What’s so great about gathers? Feel the frills with a low-down on ruffle-tastic uses. Create perfectly ruched garments with our guide to how to sew gathers – from bold ruffled sleeves through to cuffs, delicate waistlines and more. Using gathered stitches is a wonderful way to add shaping and structure to your garments. It’s ideal for adding volume to gathered skirts, easing sleeves into armscyes and cuffs and giving busts a better fit over the natural curves of the body. You can also use gathering techniques purely as decoration, such as adding ruffled trim to the hemline of aprons and dresses, or around the edge of a neckline. There’s a wide variety of ways to create gathered seams, from traditional hand-stitching to automated machine techniques and more – so read on to find out which is the best style and method for you and your project.
1. Start with the basics
When it comes to stitching gathers, working them by hand is perhaps the best place to start. It’s an age-old technique that allows you to draw your fabric together exactly how you want to get neat results. Mark out the area that you want to gather, and work two or three parallel lines of straight hand stitching across it, spacing them around 5mm apart. As you grow more confident with the technique, you can use a stab motion to pick up several tucks of fabric at a time and speed up the process. Once finished, pull the threads gently to draw the fabric up, then secure to hold your gathers in place before continuing with your project.

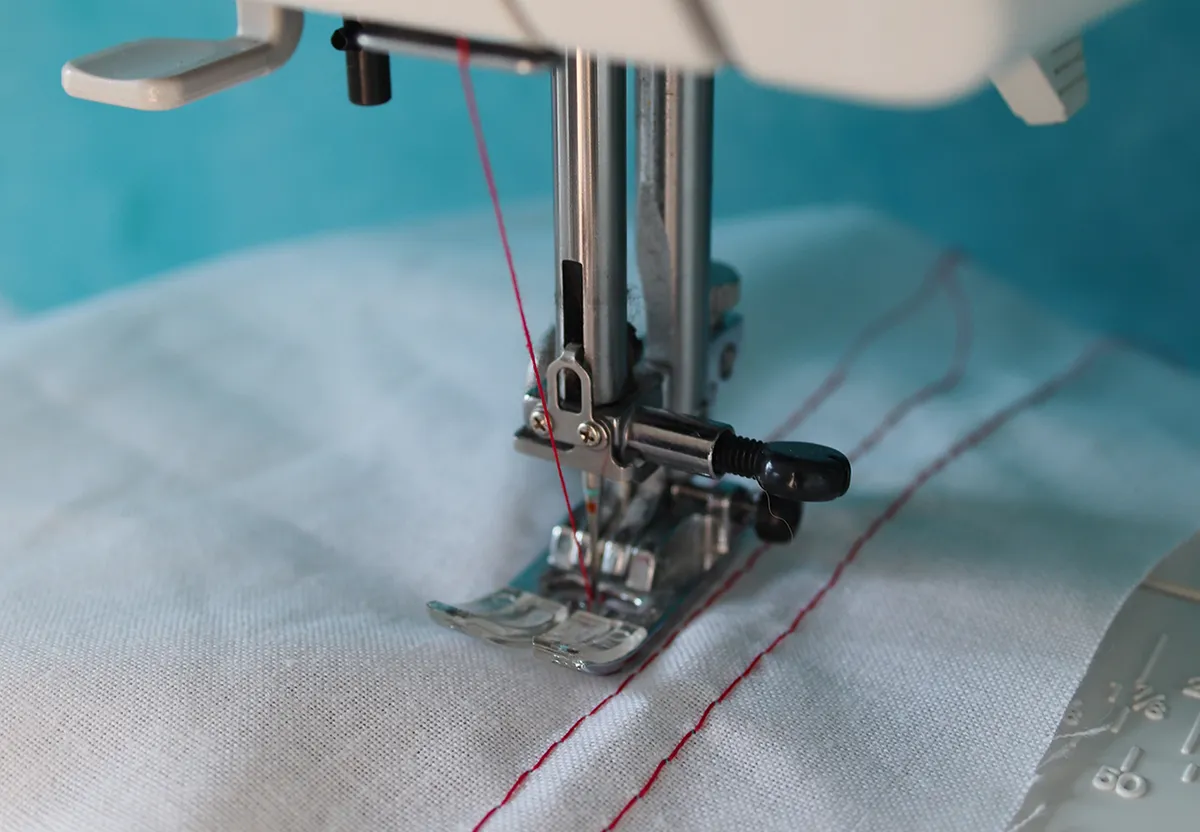
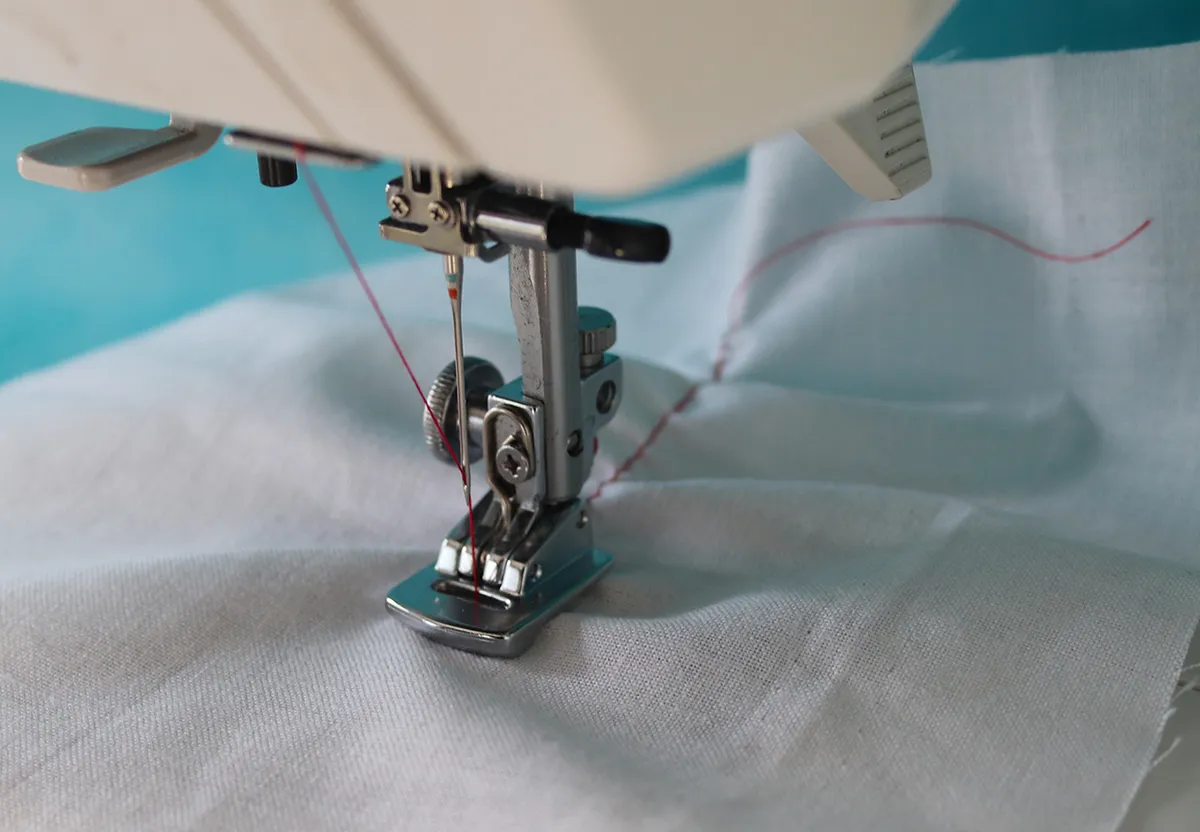
2. Move onto the machine
Once you’ve mastered the basics, speed up the process (and get more uniform results) by using your machine to work the technique. The basic premise is the same – work two or three parallel lines of straight stitch across the area you want to gather, then pull the threads to draw them up. Use a long stitch length and a low thread tension – not only does this place less pressure on the threads that will be drawn up but it makes them easier to remove later.
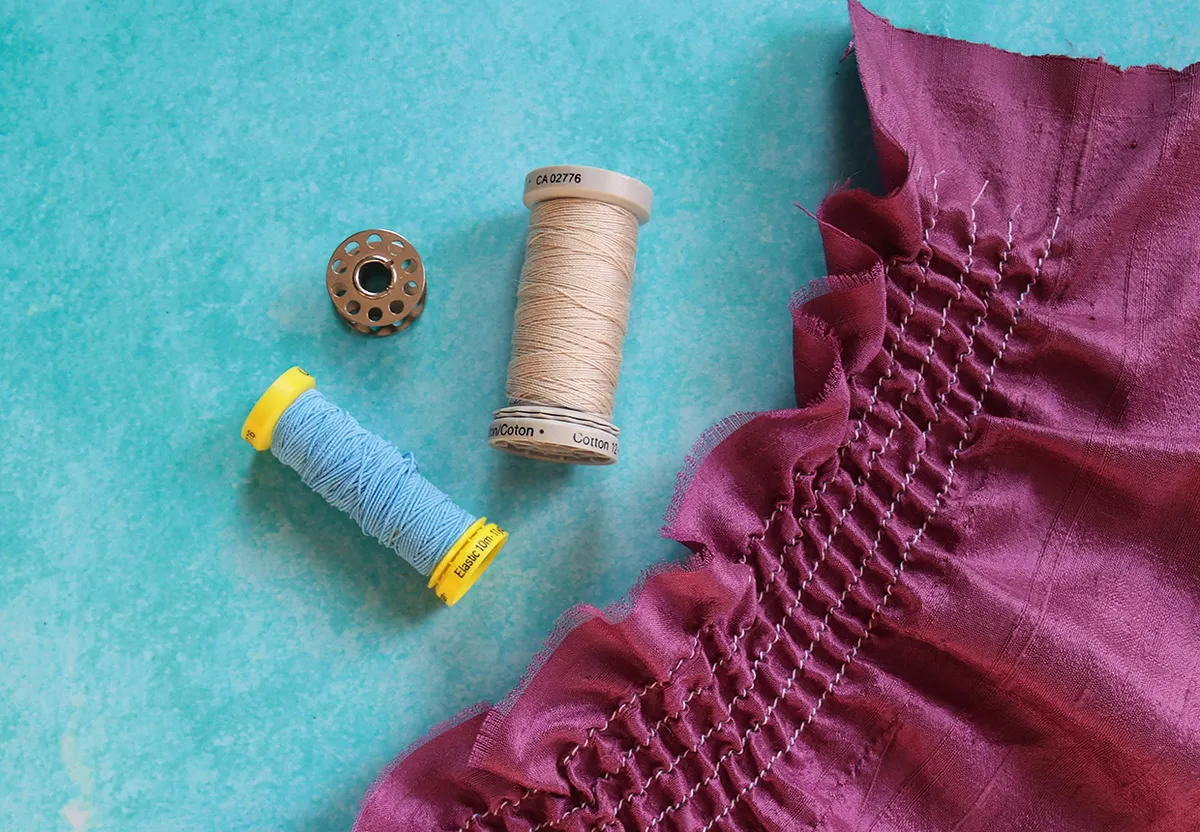
3. Choose a contrast colour
Due to gathering stitches almost always being temporary, it’s advisable to work them in a bold, contrasting colour of thread. This will make them easy to spot and distinguish from your actual stitches later on – so when it comes to removal, you won’t unpick the wrong ones.
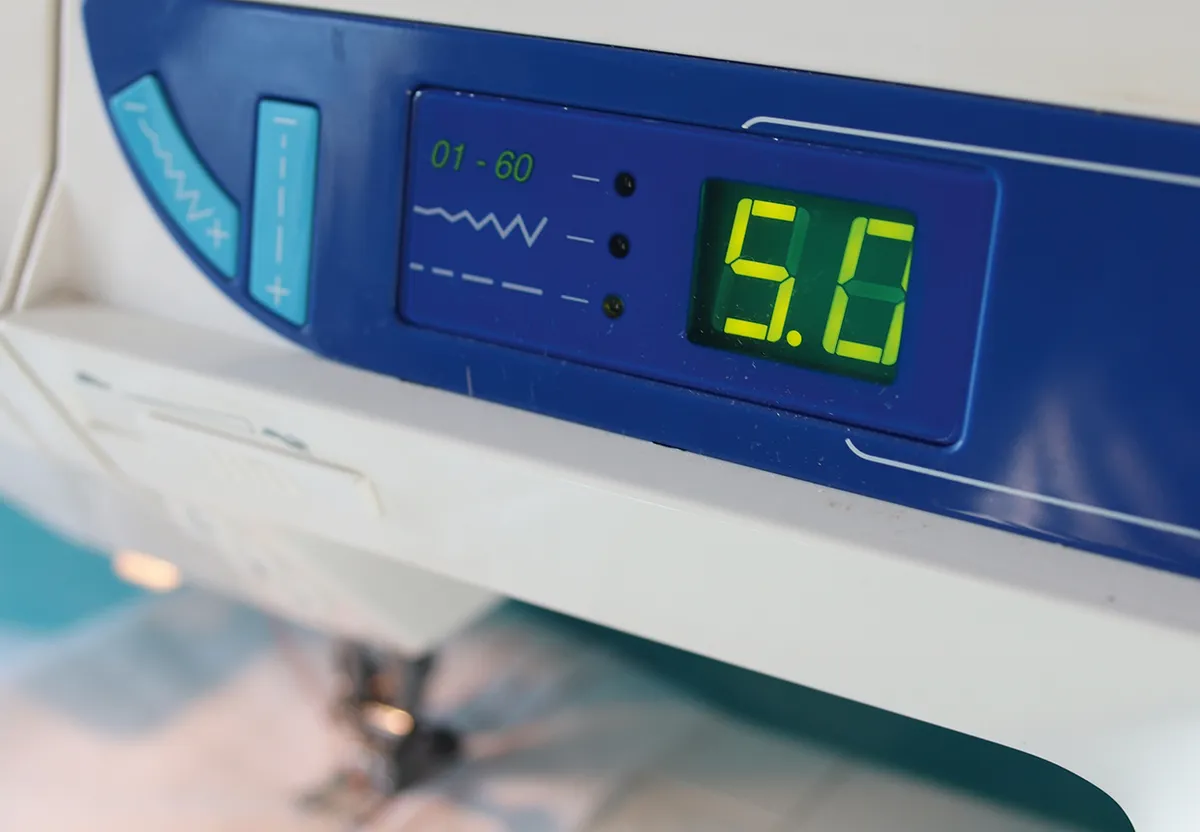
4. Use a long stitch length
It's almost always best to use a longer stitch length when working machine gathers. Set your machine to the longest stitch possible – normally 4mm or 5mm – and test a small area first. You should find that the longer length makes the process of ruffling the fabric much easier, and leads to less annoying thread breakages.
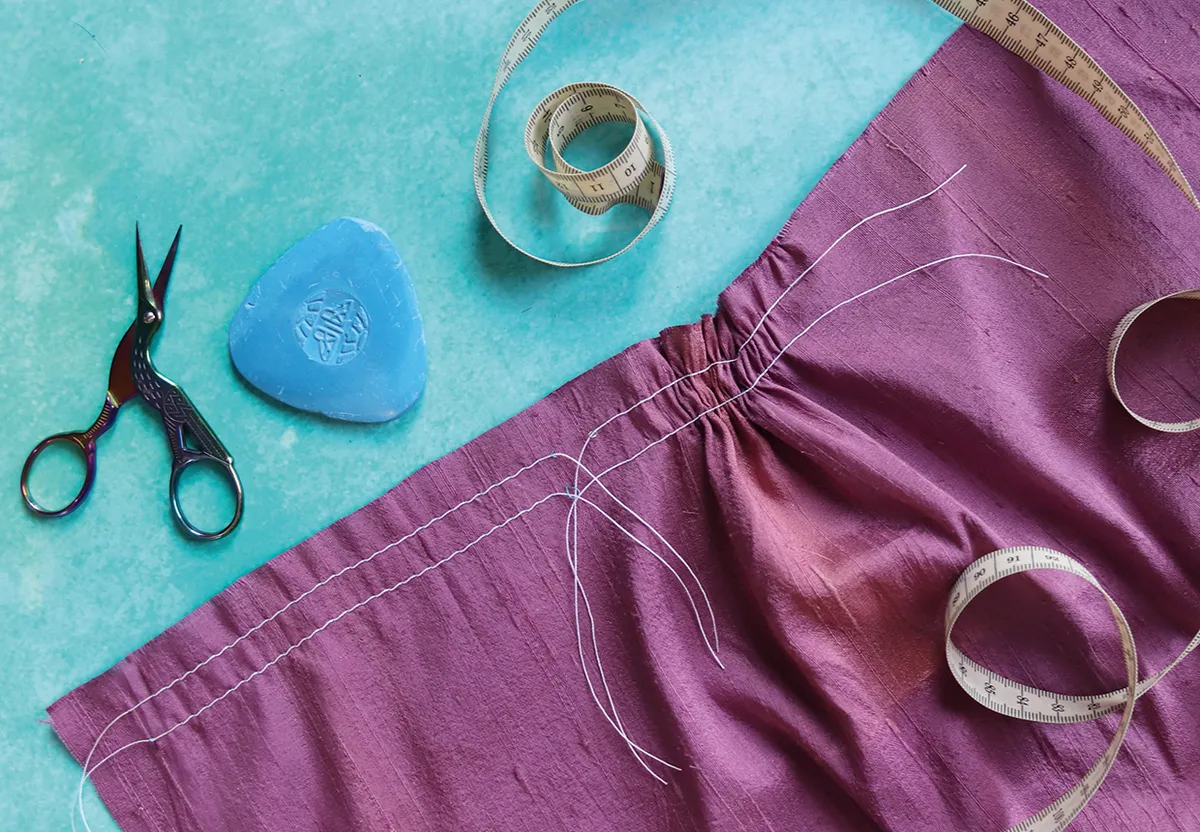
5. Work in sections
Another way to avoid the dreaded thread snap is to work your gathers in smaller sections, especially if they cover a large area. It’ll put less pressure on the threads as they are pulled and if they do break, less damage will be done. For example, if you’re working on the waistband of a skirt, split the seam into two or even four separate gathered threads – this way, if one of the threads does snap, you’ve got a much smaller area to rework and the rest should remain intact.
6. Use a Gathering foot
Another way to create neat, evenly-spaced gathers is to use a dedicated gathering foot, such as this one, from Elna. As you work, the underside of the foot uses a thick bar to gather your fabric or attach ruffles onto flat materials simultaneously. For a more dramatic effect, a ruffler foot can also be used.
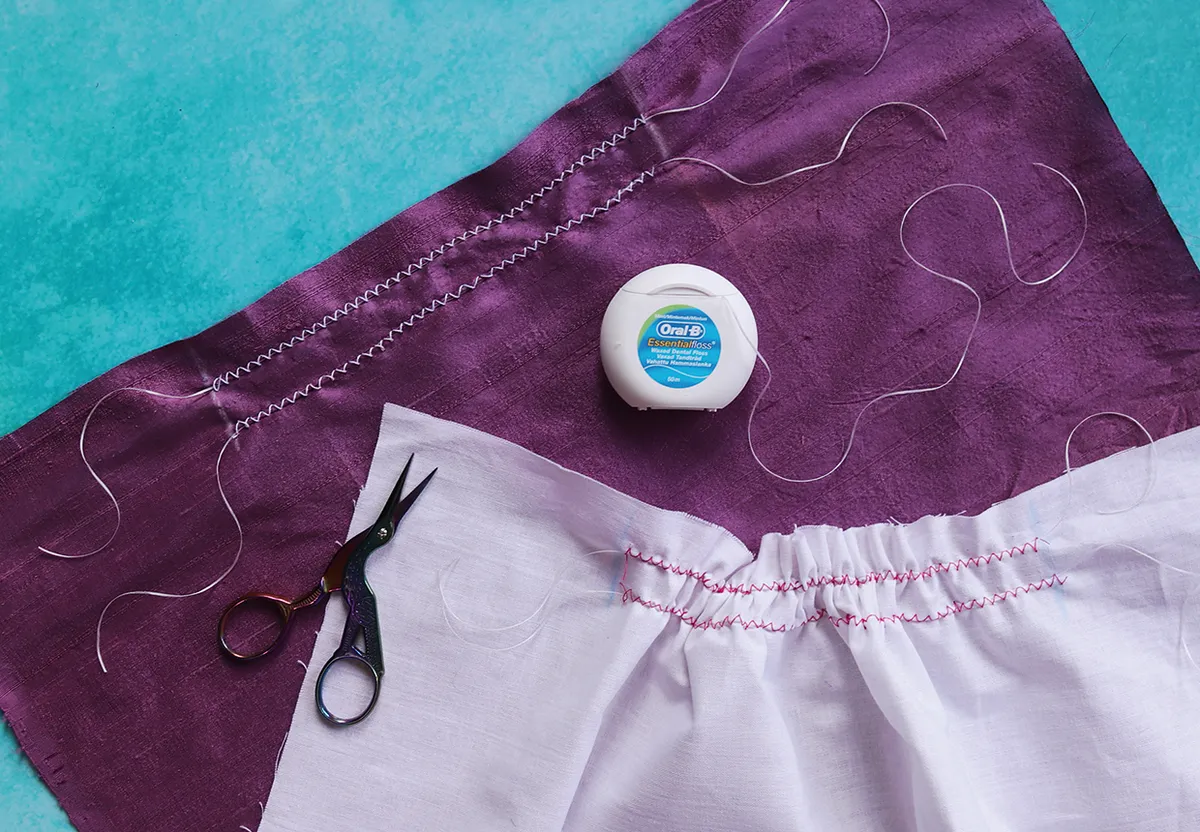
7. Don't forget to floss
It may sound bizarre but dental floss can actually be used to gather fabric effectively, too. It’s super strong, which means it’s less likely to snap when drawn up. Simply cut and lay a length of floss along the area you want to gather, then use a wide machine zigzag stitch to couch over it. Once stitched, pull the floss to gather the fabric and secure, then carry on stitching as normal and remove the floss and zigzag stitches once the seam is finished.
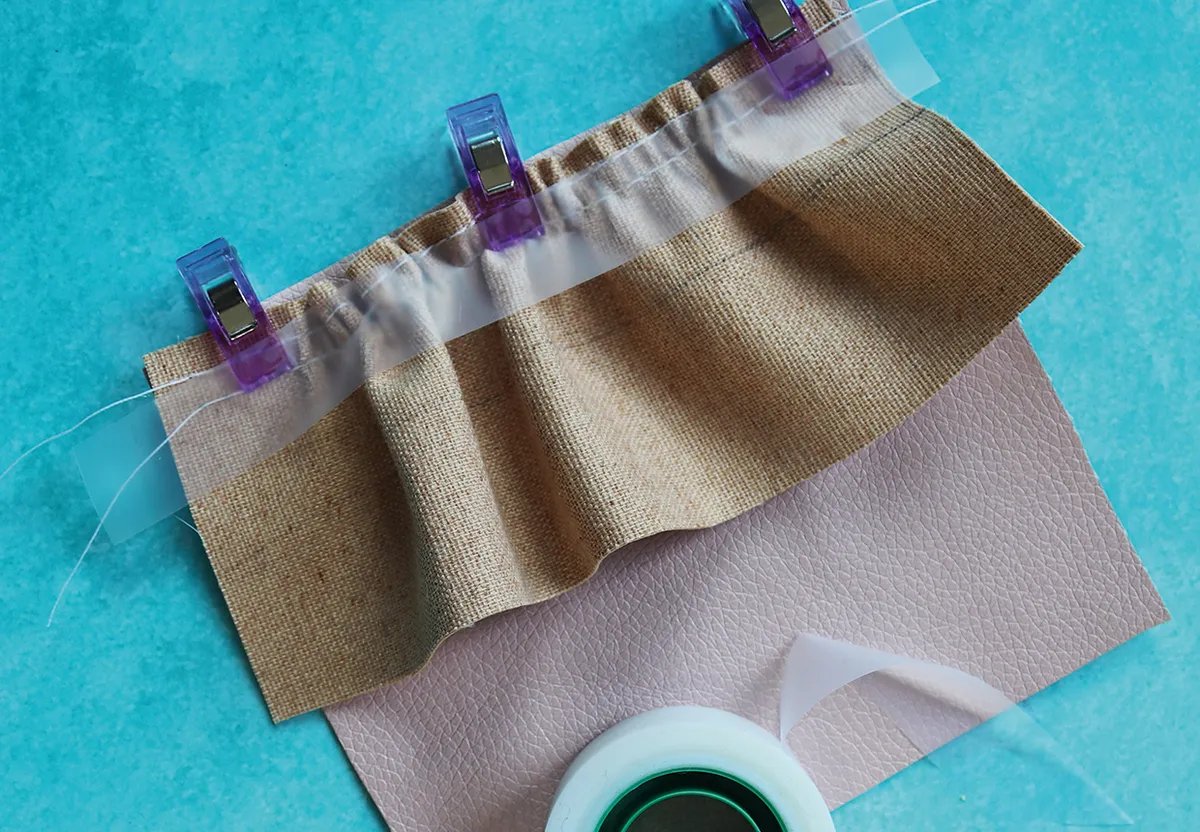
8. Use clear tape on heavy duty fabrics
As with dental floss, using clear tape to create gathers in your sewing projects may not be the most obvious solution but it can work well. Heavy-duty fabrics like vinyl, PVC and leather will show every pin and needle mark, so traditional methods of gathering simply won’t work. Instead, work two lines of gather stitches within the seam allowance, then draw the fabric up as desired, distributing the gathers evenly. Use fabric clips to hold your ruffles in place, then use clear tape on the wrong side of the fabric to hold everything in position. Stitch your seam, then remove the tape carefully.
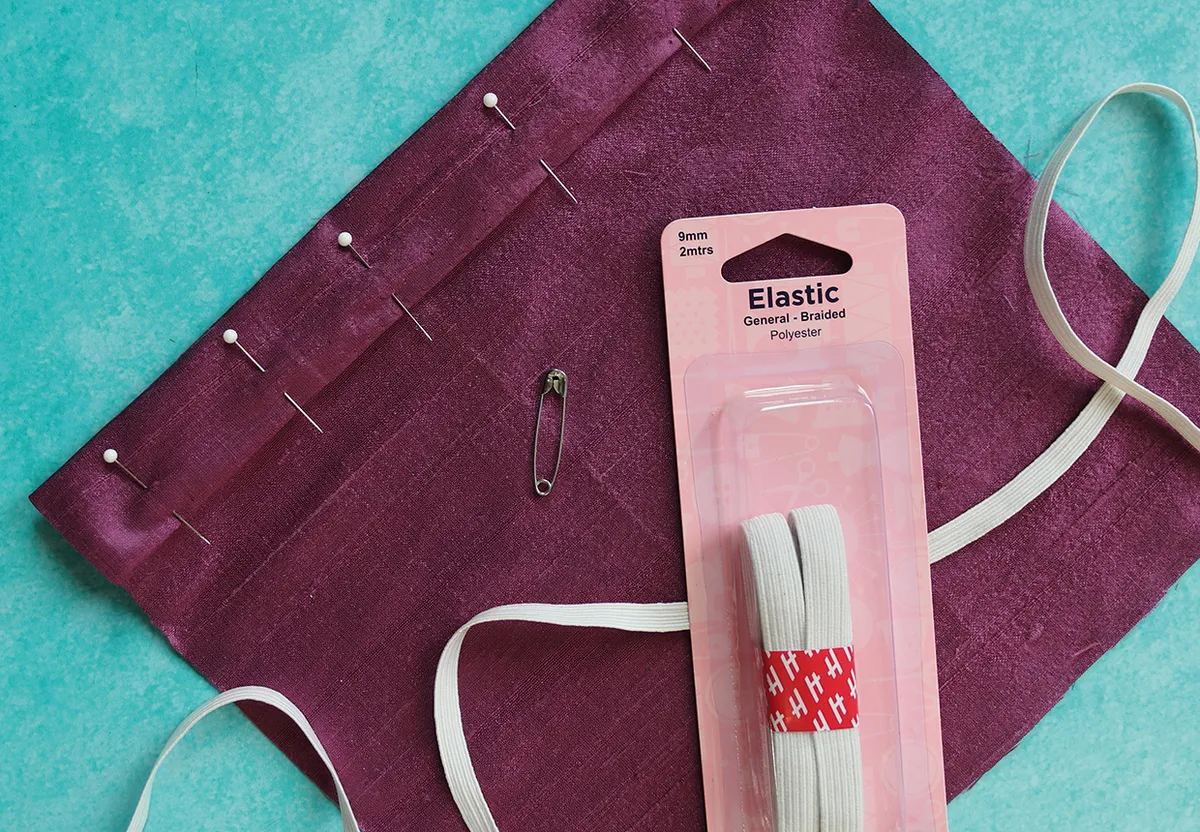
9. Use an elastic channel
Perhaps one of the easiest ways to gather a waistline, stitching a channel and then threading elastic through it, is a quick technique that will work with almost any fabric. Simply fold the edge of your fabric over to the wrong side by 5mm, then over again by the width of channel you wish to create, and top stitch to secure. Thread a length of elastic through it – using a safety pin to keep track of the end – then bring the two cut edges together and stitch to form a loop. As the elastic relaxes, the channel should naturally gather up. You can also work this technique using a fabric cord or drawstring, instead.
10. Shirring, smocking and more
Once you’ve mastered the basics, you can move onto more advanced gathering techniques such as shirring – which uses several lines of machine stitching to create gathers with elastic bobbin thread and regular upper thread – and smocking, a hand stitching technique that uses embroidery floss and a combination of short and long stitches to create bespoke gathered areas. These are not just functional but decorative too, making an art form out of this practical technique.