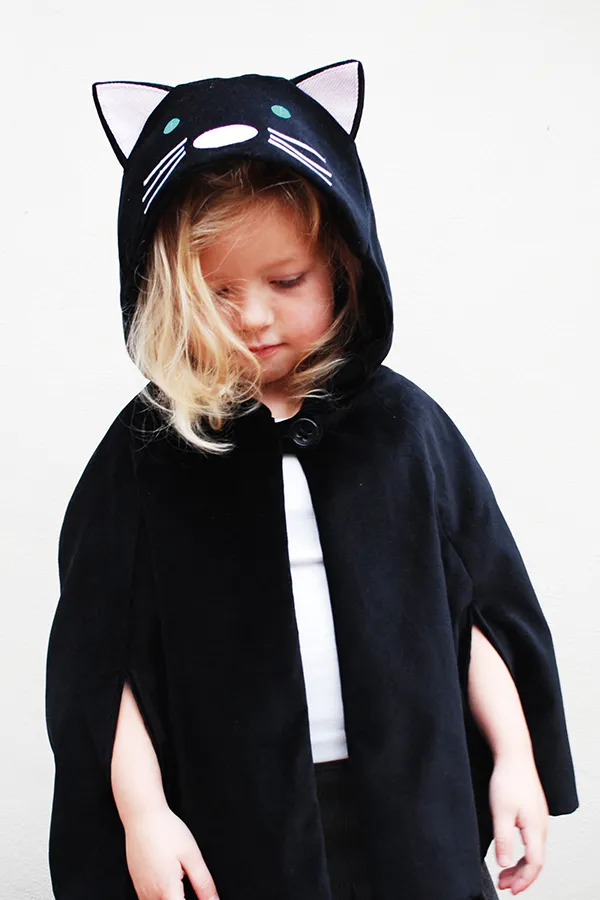
This fun cat cape is sure to become a favourite everyday dressing-up piece in your little one’s wardrobe, and also makes a great Halloween costume for school discos, trick or treating or let's pretend play.
This cat cape tutorial by Kirsty Harley is a great DIY cat costume to sew up in an evening or two. Kirsty is the founder of Wild Things Dresses – a fun-filled DIY fashion label that shows you how to sew costumes for everyday play.
How to make a cat costume: step by step
You will need
- Velvet or cord fabric, black, 1 metre (40in) (based on fabric 142cm (56in) wide)
- Lining fabric, black, 1 metre (40in) (based on fabric 142cm (56in) wide)
- Fabric scraps, for the ears and face details in pink, grey and green
- Bondaweb, 30x30cm (12x12in)
- 1 button, black, 2cm (¾in) in diameter
- Cat costume sewing patterns – download them for free below.
Download your free sewing patterns for the cat cape here
- Download the Cat Cape Hood PDF
- Download the cat's How to sew a cat costume face template PDF
- Download the Cat Cape Main Cape* PDF
*Pattern correction: there was an error with the scale of the hood pieces when we first created this free sewing pattern for issue 9 of Simply Sewing magazine. To make sure you use the correct templates:
1. use all the main cape shapes from the Cat Cape Main Cape download PDF
2. For the hood shapes, please use the patterns in the Cat Cape Hood pattern PDF.
Select your size
Kirsty’s pattern comes in three sizes. Choose the best size for your child from the list below, but we advise you use the age range as a guide – you may wish to measure your child and select the most suitable cape length, referring to the pattern and remembering that the hood pattern is also cut according to age.
- Small 1 – 3 years
- Medium 3 – 5 years
- Large 5 – 8 years
Choosing the fabric
Ideally use woven velvet or a fabric with a pile. Remember that fabrics such as velour will have a small amount of stretch, and you may need to adjust your machine stitch to a narrow zigzag to allow for this.

The purrrrrfect project
Test your sewing skills and make your little one an extra special treat with our adorable cat toy sewing pattern.
Cutting out
Step 1
Trace the pattern for the cape front, cape back, cape side and three pieces for the cape hood, following the lines for the correct size. You will need to add 1cm (3/8in) seam allowance all the way around.
Step 2
Place the fabric folded selvedge to selvedge right sides (RS) out on a flat surface.
If you’re using a fabric with a pile such as velvet or cord, it’s important to cut the pattern pieces in the same direction, with the nap or pile running downward. This will ensure there is no contrast shading when the garment is made.
Take a look at your fabric before you start, running your hand to smooth the pile in the right direction.
Step 3
Pin the pattern pieces in place following the cutting layout. Draw around the pattern pieces using tailor’s chalk, adding a 1cm (3/8in) seam allowance all the way around, making sure all grainlines run parallel to the selvedge. The back is shown placed centre back to the fold of the fabric.
Cut the pieces out. The hood face and gusset are cut once only. Repeat for the lining.
Assembling the cat face
Download, print and cut out the cat's face shape templates using our free template. From scraps of the main cape fabric, cut four ears, adding 1cm (3/8in) all around.
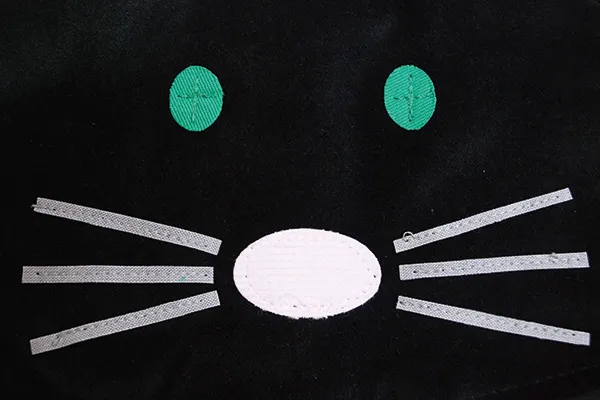
Back the fabric scraps for the inner ears, whiskers, nose and eyes by pressing Bondaweb onto the wrong side (WS).

Trace around the shapes on the paper side and cut out two inner ears from pink fabric, two eyes from green fabric, a pink nose and six grey whiskers.
Peel the shapes off the paper backing then arrange the features on the face panel referring to the photographs. Place the pink inner ears in place, on top of two of the cut outer ears.
Press these appliqué shapes into place. Finish by topstitching all pieces with matching thread to fix in place.
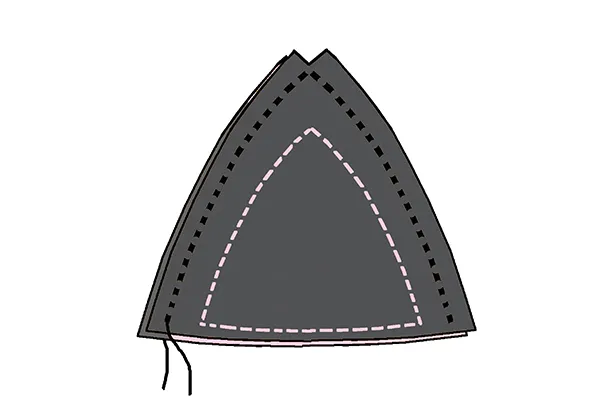
To make the ears, place the front and back RS together and sew around the curved edges using a 5mm (¼in) seam allowance. Carefully snip around the curve, then turn through and press.
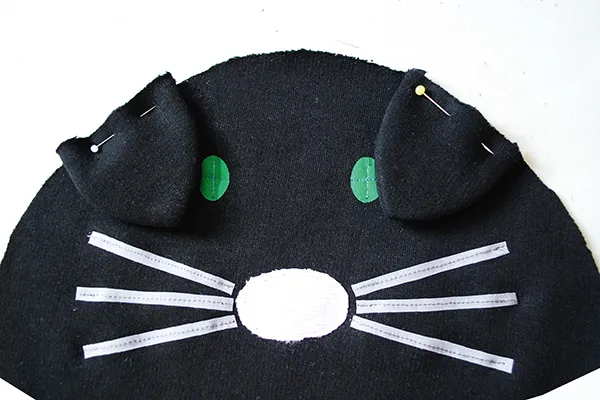
Position and sew the ears on the top edge of the face panel as marked.

Can't get enough of cats?
Learn how to do a cat face paint for Halloween
Making the hood
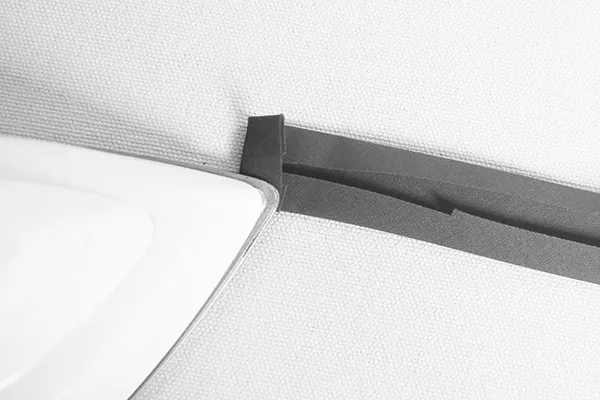
Pin and sew the left and right hood sides to either side of the gusset, with RS together and a 1cm (3/8in) seam allowance. Press the seams open.
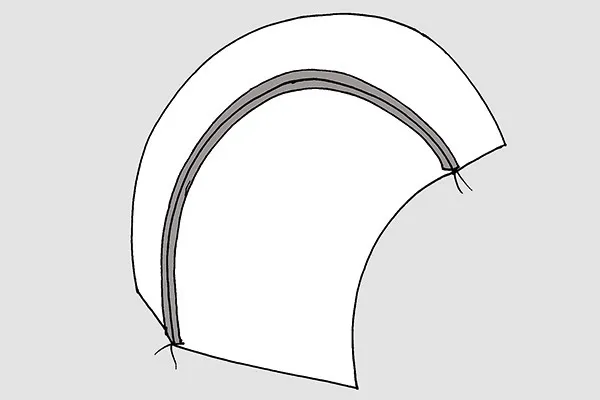
Also attach the top edge of the face to the front edges of the sides and gusset.
Repeat for the hood lining.
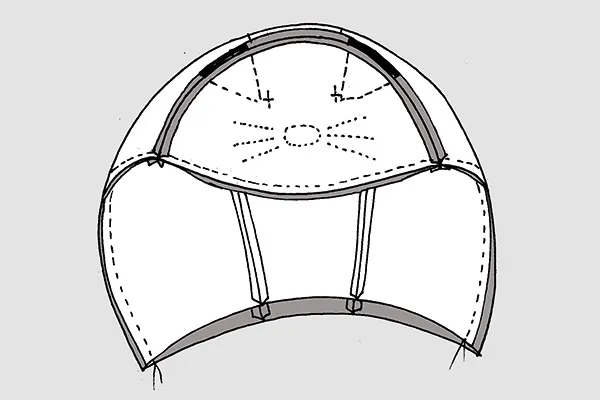
Place the main hood and lining RS together and sew all the way around the front edges. Snip into the curved edges as required and turn through.
Press carefully, rolling gently to obtain a good finish at the curved edges.
Finish by topstitching 5mm (¼in) from the edge around the front.

Creating the cape
Step 1
Make a rouleau loop from the main fabric to comfortably fit over the button you wish to use. Take a bias cut strip of fabric 8x3cm (31⁄8x1 ¼in). Fold and sew along one edge, leaving thread on the end.
Step 2
Carefully thread the loose threads at the end through a large darning needle. Feed the needle back through the inside of the channel, and carefully pull the fabric back to form the rouleau loop. You may also use narrow ribbon or cord as a fastening.
Step 3
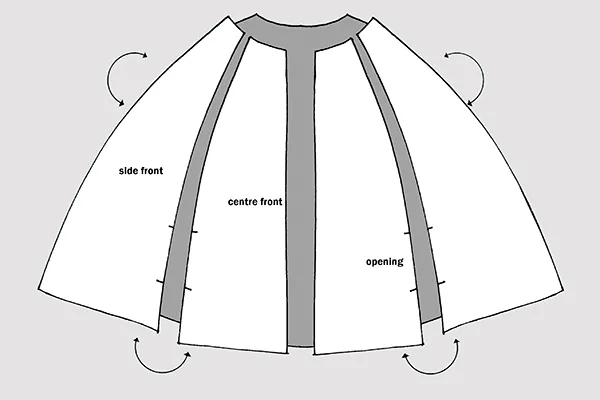
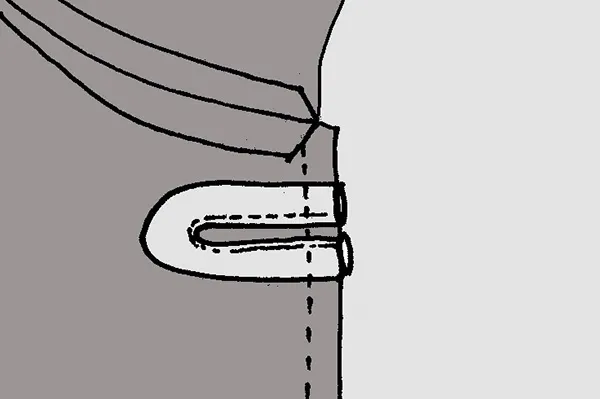
Pin then sew a cape side panel to each cape front panel, RS together, leaving an opening for the hand openings. Press the seams open.
Step 4
Pin then sew the side panels to the back panel, RS together. Press open.
Step 5
Pin then sew the hood to the neckline of the cape, RS together, adding the rouleau loop at the right, large enough to fit over your chosen button.
Assembling the lining
Step 1
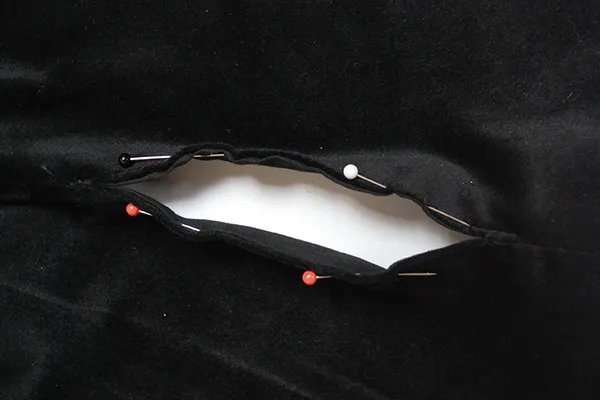
Make the cape lining in the same way as the main cape and press. Sew the assembled cape lining to the hood lining but leave an opening at the back large enough to turn the cape through later. Press.
Step 2
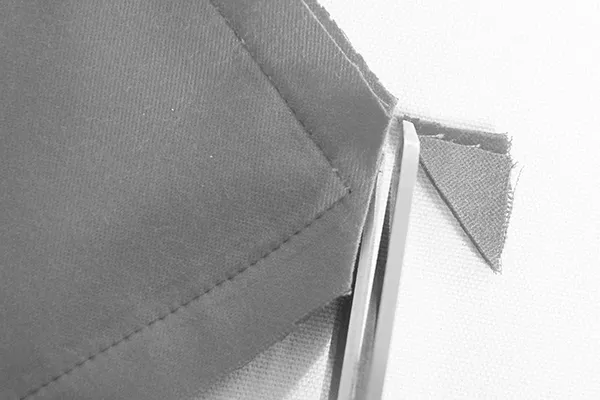
Place the main cape and lining RS together. Sew all the way around, trapping the rouleau loop between the seams. Carefully snip across the corners to give a neat finish, then pull the cape through the openings in the neck seam. Press.
Finishing the cape
Position the armhole openings in the main cape and lining WS together with the seam allowances turned under. Pin, then tack into place. Sew 5mm (¼in) all the way around each opening to hold the outer and lining together.
Neatly slip stitch the opening in the hood neck seam closed. Sew the button on in line with the loop on the other side of the cape to finish.

Quick cat makes
Keep the kitty-themed crafting going by learning how to make an easy origami cat!
Cat costumes are for life, not just for Halloween
The wonderful thing about this DIY cat costume is not only that it makes an easy-to-wear Halloween costume for little ones, but is so cute that it can also be used for imaginative play all year round – or just worn as part of their every day outfit!
Complete your little kittens outfit
Your cat costume isn't complete without that all-important tail! Check out our how to make a cat tail tutorial on Gathered.