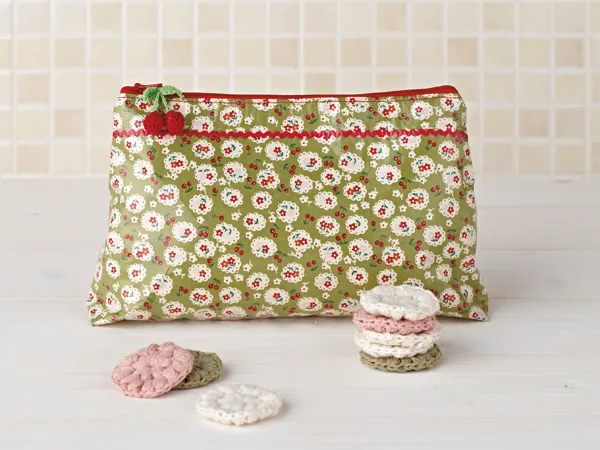
Attach the vinyl to the fabric
Step 1
Place a length of ric-rac or another decoration onto your fabric before applying the vinyl.
Step 2
Peel the paper off the vinyl and place the sticky side of the vinyl onto the right side of the fabric. Place the shiny side of the paper on top of the vinyl and iron it in place on a medium heat setting (your iron will touch the matt side of the paper.) If you have added ric-rac, use the tip of the iron to try and get into all the nooks and crannies.
Step 3
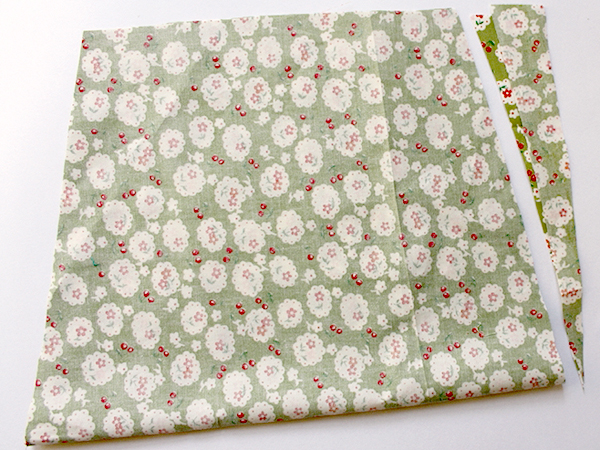
Now cut your vinyl-covered fabric to 35 x 42cm (13¾ x 16½”).
Step 4
Then fold the rectangle in half lengthways and draw a diagonal line down each side, starting 5cm (2″) in from the top at each side and ending at the bottom corner. Cut along the lines.
Sew in the zip
Step 1
With your fabric in front of you, right side facing up, place the zip along one of the short ends of your fabric, right side down.
Step 2
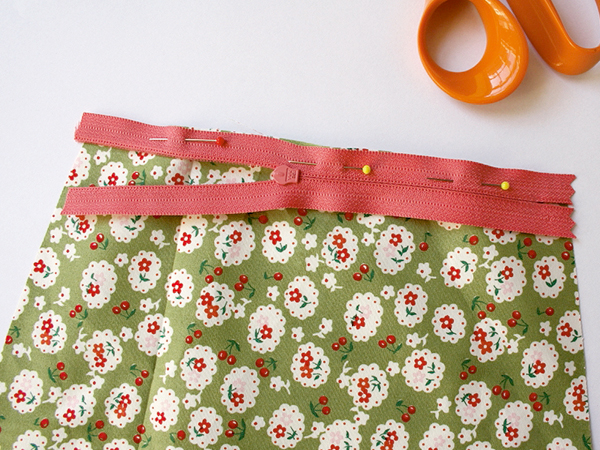
Line up the top edge of the fabric with the top edge of your zip. Half open the zipper, and pin in place. Now machine stitch with the zipper foot attachment, making sure your line of stitching is close to your zip teeth. Stop sewing just before you reach the zipper, then put your needle down/raise the presser foot, and move the zipper to behind the presser foot. Then lower the presser foot back down and keep sewing to the end.
Step 3
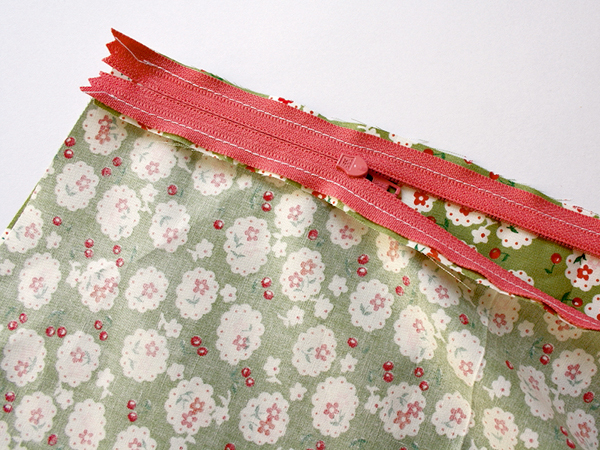
Take the other top edge of your fabric, and line it up with the other side of your zip – right sides together. Again, the edges should line up. Pin in place. Open the zipper halfway again.
Step 4
Now you can top-stitch if you like. It can be slightly more fiddly with the vinyl, as it can stick to the presser foot. If you have a detachable arm on your sewing machine, it helps if you remove it. Open your zip and make sure all layers (fabric and zip) are facing towards the fabric (not the zip), and machine stitch down the fabric, around 2mm from the seam where it meets the zip. This ensures the fabric stays away from the teeth when you’re opening and closing the zip. Repeat for the other side.
Constructing the pouch
Step 1
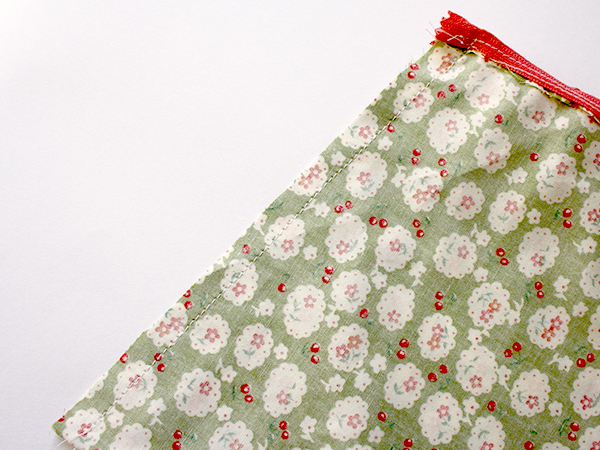
Close the zip so you have a tube. Turn it inside out (so the shiny side is on the inside) and fold it flat with the zip along the top.
Step 2
Now switch to your standard machine presser foot, and stitch down one side of your pouch, with a 1cm (3/8 “) seam allowance. Be careful around the end of the zip – those pesky metal stoppers can get in the way of your needle!
Step 3

Half open the zip, and repeat, stitching down the other side, so you make the pouch.
Step 4
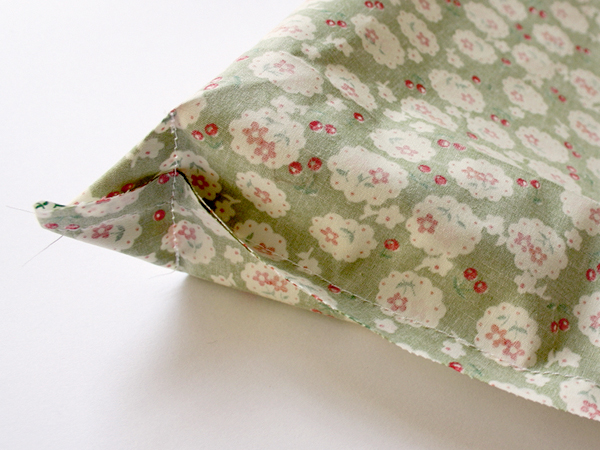
Now we’ll make the bottom gusset. Open the zip completely, and put your hand into one corner of the pouch – opening the point up to a triangle. Draw a line perpendicular to the seam, so the line measures 5cm (2″) across.
Step 5
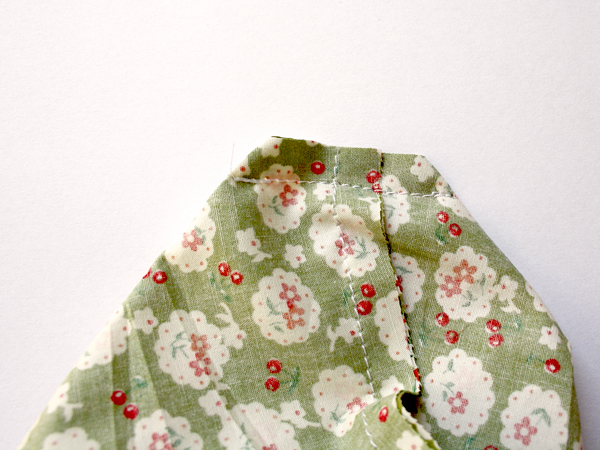
Machine along the line, securing the stitching at either end. Repeat for the other side.
Step 6
Snip off both points, about 1cm (½”) away from the stitching line.
Step 7
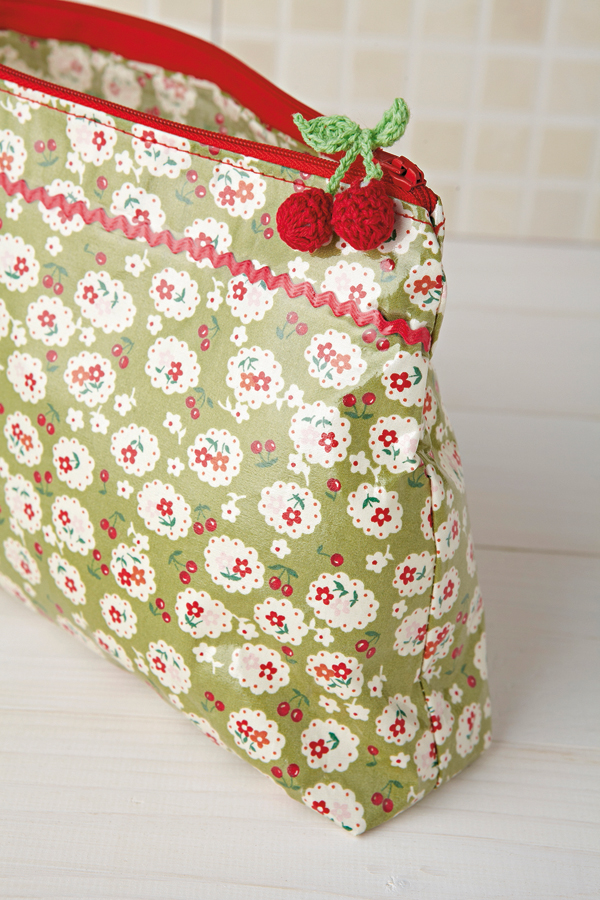
Turn your new DIY makeup bag right side out and attach any embellishments.
