How to clean a sewing machine

Keep your trusty sewing machine in good working order by giving it a routine clean. Read on for our step by guide to how to clean a sewing machine.

6 issues of Simply Sewing magazine for £14.99|Save 78%!

Published: September 1, 2019 at 11:21 am

They're our most trusty and valued piece of kit, and as we sew more and more with our chosen sewing machine, we get to know it intimately! From it's best tricks to it's not-so-happy quirks, each machine is different, but they all need regular maintenance for us to get the best results from them. So today we're looking at how to take care of your machine with a regular DIY service.

Let's face it, buying a sewing machine is an investment, so if you want it to continue to stitch as smoothly as it did when you first brought it home, keeping it clean is a really easy thing you can do to help your machine run at its best....

While we recommend taking your machine to a professional to fix any issues and give it a full service, there are things you can do at home to keep your trusty machine running like a dream, from covering it when you're not stitching, to cleaning it often to keep it free of lint. Follow our maintenance tips and step-by-step cleaning guide below to keep your machine whirring away nicely. A happy machine means happy stitching, after all...

7 things we can all do to take care of our sewing machines

Cleaning and maintaining your sewing machine is often a task many stitchers overlook – until, that is, it stops working properly and you wish you had done something earlier. The answer to this is, of course, to clean it often and get it serviced regularly. Follow our simple guide on how to look after your precious machine and keep it stitching perfectly.

1. Keep it covered

The simplest thing you can do for your machine is to keep it covered when you’re not using it. This prevents dust, lint, dirt and pet hair from getting into the tiny workings of your machine. Most machines come with a cover, or you can make your own from your favourite fabric.

2. Keep it clean

Ideally, you should clean your machine after every few sewing projects – especially if you have been sewing with fluffy fabrics. The main problem is lint – the short, fine fibres that come off fabric whilst you are working with it. This attracts dust and gets stuck in your machine so it won’t work as efficiently and causes real long-term damage, so clean it regularly.

3. Oil your machine (if it needs it)

Most machine manuals will come with very detailed instructions on how to oil your machine. Always use approved sewing machine oil and nothing else. Some machines, particularly the newer ones, are self-lubricating and do not need to be oiled at all.

4. Change your needle

A bent or blunted needle can result in skipped stitches, broken or looped threads, pulls in your fabric or damage to your machine. Change your needle after about every eight hours of sewing and always use one to suit your fabric type.

5. Winding the bobbin

Always use the bobbin your manufacturers recommend for your machine. It’s best not to wind a new thread over an existing one as this creates extra tails that can jam your machine.

If you have a low bobbin sensor then this won’t work if you have more than one thread colour on your bobbin. Also, it’s best not to use pre-wound bobbins unless recommended by your sewing machine manufacturer.

6. When to get it serviced

You should have your machine serviced once a year by a recommended sewing machine technician. They will check and adjust the tension and timing as well as cleaning areas of the machine that you can't reach and replace anything if necessary. This should keep your machine running smoothly; if you have any other problems with it, get these checked too. Your machine (and sewing) will thank you for it!

7. Troubleshooting

Most sewing machine manuals will give you troubleshooting tips, but if your machine isn’t operating properly try these three things before you take it to a technician:

  • Take the top thread out and remove the bobbin. Now re-thread the machine.
  • Replace the needle with a new one, making sure it’s the correct type for your fabric and thread and that it’s screwed in tightly.
  • Clean your machine following our guide, below.

If none of these work, then take your machine to a repair shop – don’t try to fix it yourself or suffer on in silence, letting it slow down your latest sewing project.

Read on to find out how to clean your machine…

If you're in the market for a new sewing machine, read our complete guide to the best sewing machines.
Step 1

How to clean a sewing machine step 1

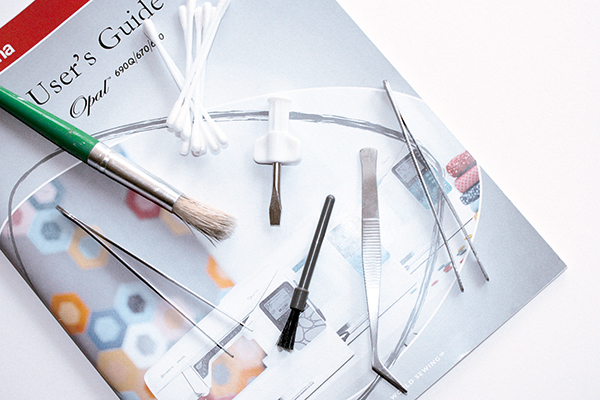
Gather your tools and materials

If you can’t find your manual or never had one, phone a sewing machine dealer who stocks your make of machine as they may be able to help, or search for your model on the internet – many manuals are often available to download.

Cleaning tools such as a small lint brush, screwdriver and oil often come with your machine. A quality, clean paint brush will also do the job. A pair of tweezers are also useful, as are a couple of clean cotton buds. Don’t blow the lint out, as your breath contains moisture which can corrode the parts.

Step 2

How to clean a sewing machine step 2

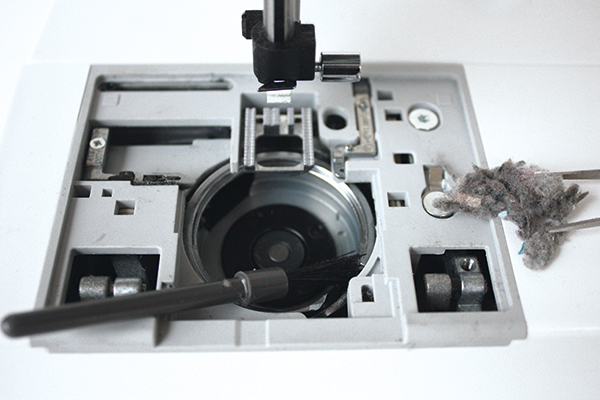
Start by cleaning the bobbin area

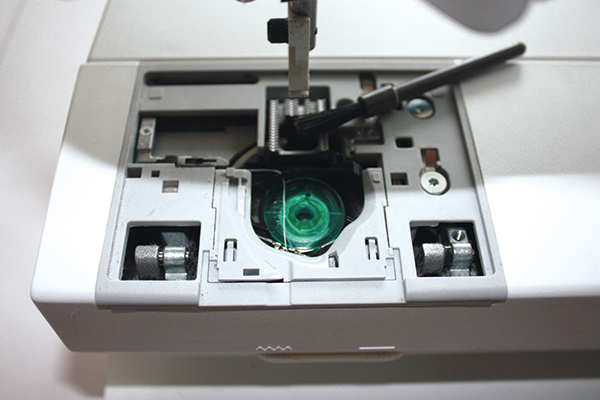
Turn off and unplug your machine for safety whilst you clean, then remove the needle and the foot. Follow your instruction manual to remove the presser foot and needle plate then lower the feed teeth if your machine has this option. Remove the screw that holds the needle plate in place or lever it off.

Clean the feed teeth with the brush and, using an old needle, remove the lint inside the feed channels. Carefully remove any balls of dust and lint with tweezers, but take care here not to push them further into the machine. Gently wipe over these areas to remove any residual dirt using a cotton bud.

Step 3

How to clean a sewing machine step 3

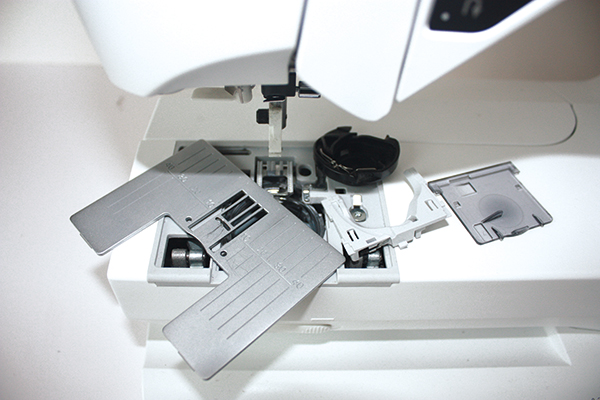
Next, you need to clean under the bobbin area

Remove the bobbin case holder but, if possible, take a quick photo of it before you do. This will help you put it back in properly when you’ve finished. Remove all the dust and lint balls with tweezers and brush the whole area, especially around the hook race – this is the metal hook that catches the thread. Move the hand wheel around slowly in order to clean all the way around. A small vacuum attachment can really help here to remove everything. You can also used canned air, but this can put moisture inside your machine and blow the lint back in so is not always the best option.

Step 4

How to clean a sewing machine step 4

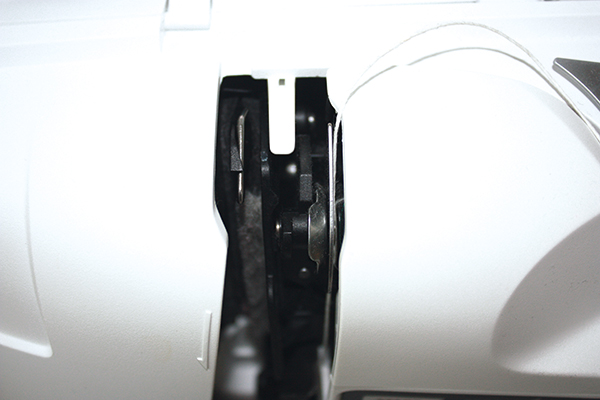
Dust, lint and pieces of broken thread often stick between the tension discs

This can cause a gap between the discs so not enough pressure is put on the thread, resulting in thread loops underneath. To clean them, raise the presser foot to disengage the discs, then run a length of thick cotton thread or dental floss back and forth through the thread channel a few times. This will remove any lint residue. Many sewing machine problems are related to the thread tension and cleaning the discs and bobbin will often solve any tension issues.

Step 5

How to clean a sewing machine step 5

You can now reassemble your machine

Look at your photo or manual to put everything back in the right place. Replace the bobbin case first, carefully lining up the case as before. If you have difficulties correctly placing the bobbin case, gently turn your hand knob back and forth, until you find the right place. Slide on your stitch plate (also called a needle or throat plate) and replace the screws. Put the presser foot back on then insert a new needle, making sure you put it in right way. The needle will have flat side and a rounded side and your manual will tell you which way this needs to face. Once the needle is inserted correctly and pushed up into the needle clamp as far as it will go, tighten up the thumb screw firmly; only use a screwdriver if your manual tells you to!

Step 6

SS013 Workshop Photo Six – 3.JPG

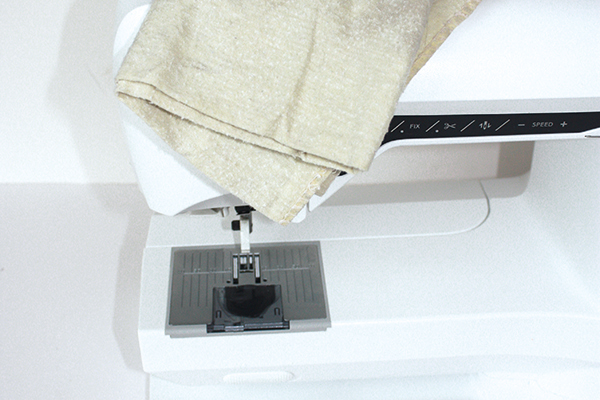
Once everything is back together, wipe down the surface of your machine.

Use a soft cloth to remove any dust, lint or threads. You can use a slightly damp cloth to wipe over the surface but make sure you squeeze your cloth out firmly and don’t get any water near the moving parts. Wipe over your machine again using a dry cloth for a final polish.

It’s a good idea to try to get into the habit of giving your machine a quick wipe over after each project so it will be ready and clean for the next time you stitch. Don’t forget to put your cover back on to keep it dust-free, too.