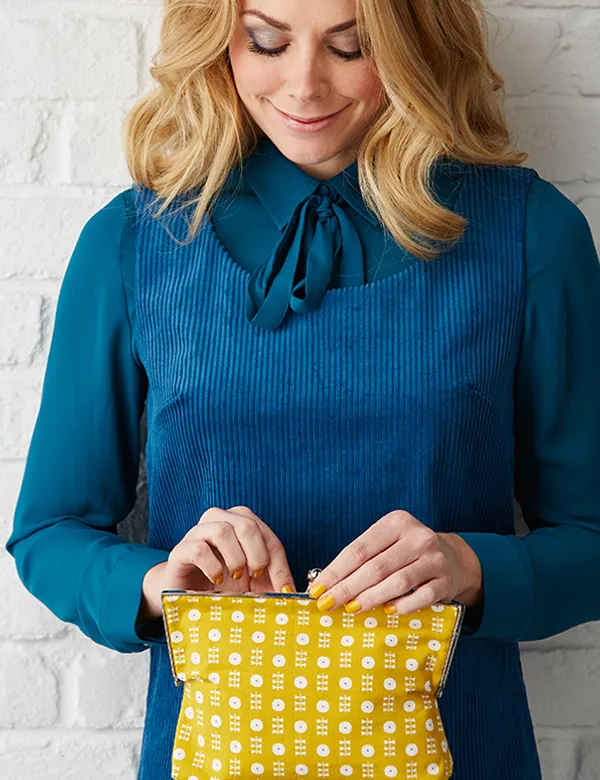
Looking for a quick project to make? How about this Fast Fat Quarter project? Sew up a snazzy purse with a snap clasp in your favourite fabric!
Snap to it! How to make an easy-sew clutch
Sew Jennie Jones’ simple and smart snap-clasp clutch to stash the essentials on your next date night.
You will need
- 1 fat quarter
- Medium-weight interfacing: 40x55cm (16x22in)
- Bag frame: 23cm (9in)
- Invisible thread
- Basic sewing kit
Notes
- Use a 1cm (3⁄8/sub>in) seam allowance.
- Download our issue 13 templates here to print out the clutch bag shape.
Designer Jennie says: “There are lots of different bag frames out there. I’ve used a sew-in type, but if you fancy a quicker project then opt for the glue-in version, which doesn’t require any hand stitching.”
Step-by-step... get sewing!
Step one: Print, trace and cut out the template from our downloadable templates PDF. Cut the fabric in half widthways for the outer and lining. Fold the outer piece in half widthways with right sides (RS) together then place the fold line of the template along the fold of the fabric and pin in place. Cut this out then repeat to cut the bag lining and two pieces of interfacing to the same shape.
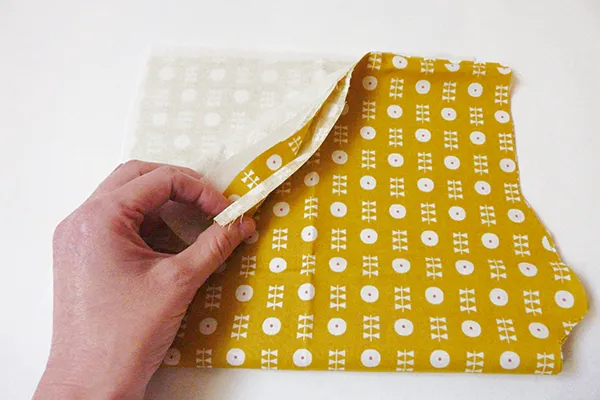
Step two: Take the outer fabric piece and pin the interfacing to the wrong side (WS) of it. Fold along the bottom edge, RS facing, and sew along the diagonal edges marked 1 on the template. Repeat with the lining piece and other interfacing piece.
Step three: With RS together, bring the side seam just sewn to join the bottom edge. Pin and then sew to create a box corner seam, marked 2 on the template. Do this on both corners and repeat on the lining piece.
Step four: Put the lining into the outer RS facing and pin along the open edges, marked 3 on the template. Sew along the three side edges, leaving a 5cm (2in) turning gap to pull the bag RS out.
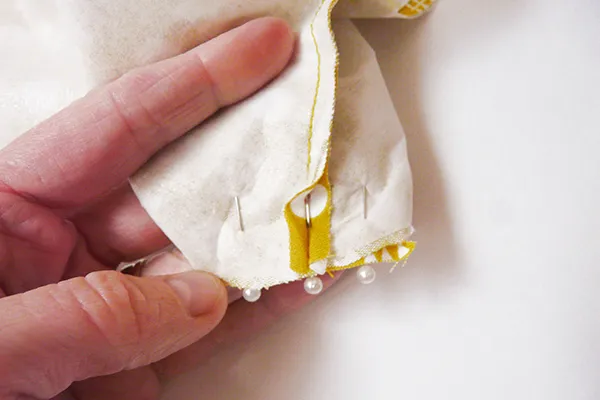
Step five: Clip the corners and turn the bag RS out. Slip stitch the turning gap closed. Press.
Step six: To keep the fabric still, roughly tack the bag to the frame.
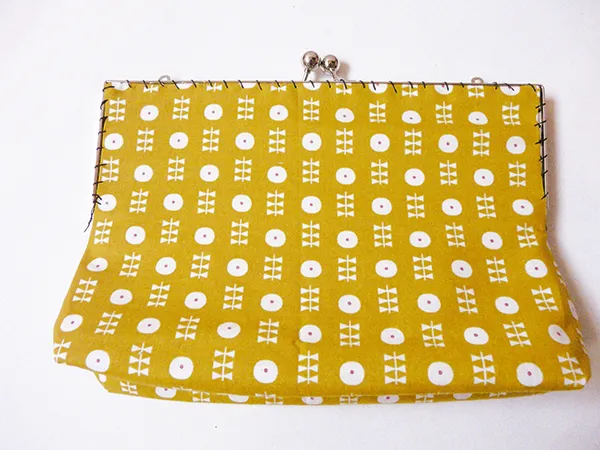
Then, using invisible thread, stitch neatly into place though the holes in the frame and into the top of the bag.
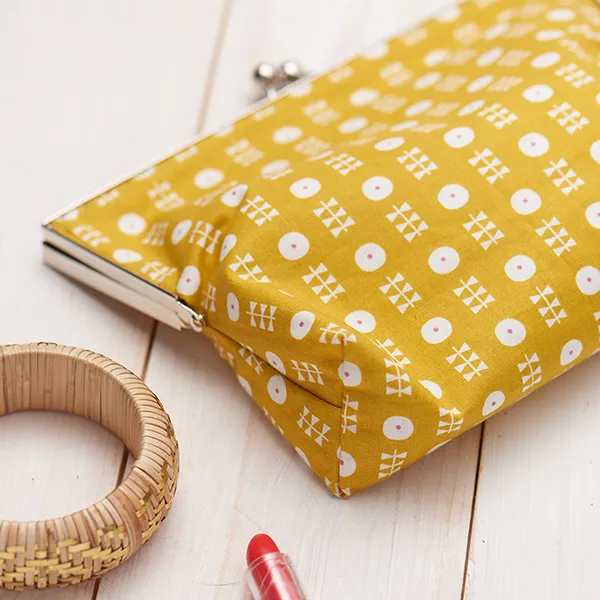
Enjoy your finished bag!