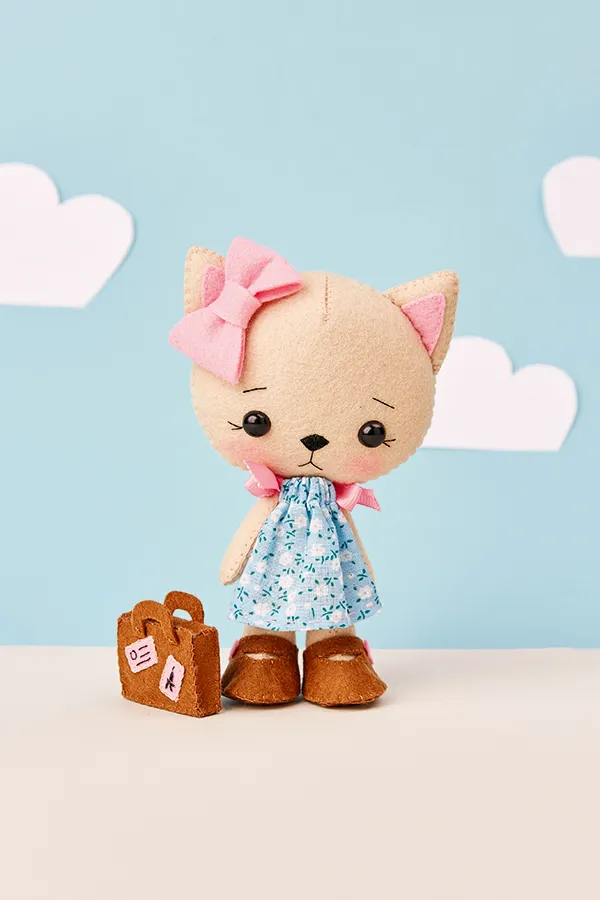
Step 1

Cut out all of the templates. Pin them to the corresponding pieces of felt and cut out as instructed (see templates for the best way to arrange your pattern pieces). Draw on the grids, dots and other markings using a disappearing ink marker.
Step 2

Use the tip of a pair of embroidery scissors to make two tiny holes for the eyes at the centre of each X on the face. Insert the safety eyes with connectors positioned at the back, ensuring you slide the connector firmly down onto each post as far as it will go.
Step 3

Embroider the eye detail using straight stitches. Fold the head in half, wrong sides (WS) together, and whip stitch the darts at the top and bottom of the head. Whip stitch the darts on the back of the head.
Step 4

Sew inner ears onto outer ear, as shown. Blanket stitch the ear pieces together, leaving an opening at the bottom. Stuff each ear and sew the gap closed. Pin ears to head and ladder stitch in place.
Step 5

Pin head front and head back WS together. Starting at the bottom, blanket stitch all the way around, leaving an opening for stuffing. Stuff firmly and sew the gap closed. Leave a tail of thread for attaching the head to the body later.
Step 6

Blanket stitch around the body, leaving an opening in the back. Stuff and sew the gap closed. Repeat for the two arms.
Step 7

Blanket stitch around the leg, leaving the foot open. Stuff to just before the foot opening. Centre the sole on the bottom of the foot, matching the toe dot with the seam on the front of the leg. Sew in place, adding more stuffing before closing.
Step 8

Pin head to neck and sew into place with ladder stitch, as shown. Go around the join several times, sewing a little lower on the neck and a little higher on the face each time.
Step 9


Now pin the arms to the sides of the body. Insert a double-threaded needle underneath one arm and bring it up through the body and out through the other arm. Bring the needle through the arm again. Go back and forth a few times and tie off. Repeat for the legs and you’ve got yourself a felt doll! Now for the clothes.
Making the felt doll clothes
Step 1

Zig zag stitch around the entire outer edge of the dress, using the smallest setting on your sewing machine. With the WS of the fabric facing you, fold the centre top edge of the dress over using the marked dots as a guide. Machine sew very close to the edge to form the casing for the ribbon.
Step 2

Pin the side seams right sides (RS) together with a 0.2mm (1/8“) seam allowance. Press seam open. Repeat to make the ribbon casing at the back of the dress, keeping the WS of the fabric facing you.
Step 3
Fold a hem along the bottom edge of the dress and stitch into place with embroidery thread. Cut the ribbon in half. Attach a small safety pin to one end and thread through the front casing of the dress. Repeat with the back.
Step 4
Slide the dress onto the doll, positioning the armholes of the dress below her arms and the seam of the dress at her back. Gather the fabric on the front and back casing and tie the ribbons into bows just above her shoulders.
Step 5

Blanket stitch around the shoe detail. Blanket stitch back edges of shoe together, then blanket stitch again around the entire top opening of the shoe. Position bow in place and stitch on at the centre. Place sole of shoe onto the bottom of the shoe top, aligning dots at toe. Blanket stitch in place.
Step 6

Embroider the travel motifs in black thread. Blanket stitch each one onto the front of the suitcase. Blanket stitch the sides of the suitcase to the back of the suitcase panel, as shown, to create an open box shape. Now attach the front panel as shown, leaving a small gap for stuffing. Stuff, then stitch the gap closed.
Step 7
Pin each handle in place. Insert needle up through the seam at the bottom of the case and out through one of the handle bases. Make a little stitch, taking the needle out through the handle directly opposite. Make another little stitch and then take the needle out diagonally through the handle opposite. Repeat for the handle bases on the other side.
Step 8

Fold bow in half length-wise. Make a few tight stitches at the centre of the WS of the bow to create a ‘pinch’. Fold bow in half width-wise. Stitch the two short ends together, then whipstitch the short edge of the bow centre on top, as shown.
Step 9

Wrap the bow centre over the front of the bow, overlap the short edges and stitch into place. Sew the bow to the doll head. Rub a pink pencil onto the doll’s cheeks and gently smudge with your finger.