Step 1

First measure your sewing machine in order to determine your fabric cuts. Measure the height, width and depth to work out the dimensions for the front/back, sides and top. Also note the position of the handle, including its width and thickness, and its distance from each of the machine’s edges.
Step 2


Based on your sewing machine’s measurements, cut your fabric, adding 2.5cm (1″) to each dimension to account for seam allowances. You’ll need the following cuts and counts:
Front/back panels: 1 shell, 2 lining, 1 heavy sew-in interfacing.
Side panels: 2 shell, 2 lining. For the chevron front shell panel, cut the following pieces:
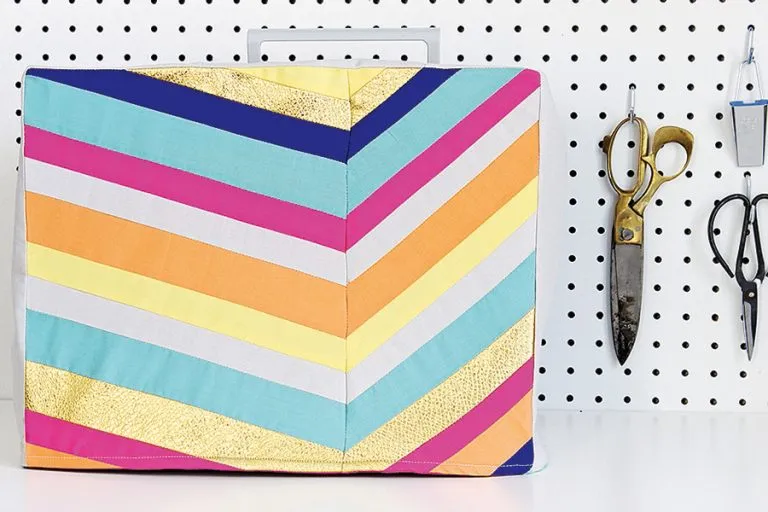
Template 1A: 3 teal, 1 peach, 1 gold.
Template 1B: 2 yellow, 1 gold, 2 navy, 2 magenta, 2 grey.
Template 2A: 3 teal, 1 peach, 1 gold.
Template 2B: 2 yellow, 1 gold, 2 navy, 2 magenta, 2 grey.
If your machine is wider than 38cm (15″), add width accordingly to the templates. If your machine is taller than 30.5cm (12″), add additional strips accordingly. The top panel comprises of four pieces – two side pieces, and two middle pieces to surround the handle opening. Use the measurements from step 1 to determine the size of each of these pieces, adding 2.5cm (1″) for seam allowances. Cut one of each piece from the shell and lining fabric.
Step 3

Right sides (RS) together, sew all the A chevron template pieces and all the B pieces together in the following order: 2A/2B: yellow, 2A/2B: gold, 2A/2B: navy, 1A/1B: teal, 2A /2B: magenta, 2A/2B: grey, 1A/1B: peach, 2A/2B: yellow, 2A/2B: grey, 1A/1B: teal, 1A/1B: gold, 2A/2B: magenta, 2A/2B: peach, 2A /2B: navy, 1A/1B: teal.
Step 4

Sew the strip of As and Bs together, ensuring that the seams from the previous step align along your new seam. Press.
Step 5

Trim the chevron panel to the same dimensions as the front/back panel.
Step 6

Create the top panel by sewing the two middle pieces to one of the side pieces, RS together. End the seam 1.5cm (½”) from the edge that will face the handle of each of the middle pieces.
Step 7

Sew the top panel’s other side piece to the middle pieces, leaving 1.5cm (½”) unsewn as per the last
step. Press the seams and unsewn middle piece, as shown.
Step 8

Sew the side panels to each end of the top panel, leaving 1.5cm (½”) on each end unsewn.
Step 9

Sew the top of the front panel to the top panel, beginning and ending the seam 1.5cm (½”) from each end. For added structure, sew in a piece of heavy interfacing along with the front panel.
Step 10

Sew the sides of the front panel to the side panels, starting 1.5cm (½”) from the top where the seam from the last step began/ended.
Step 11

Repeat steps 9 and 10 with the back panel and press the seams.
Step 12

Repeat steps 6-11 with the lining fabric. If your handle isn’t perfectly centred, be sure to sew the lining’s top panel pieces together so they’re a mirror image of the shell.
Step 13

Tuck the shell into the lining. RS together, sew together along the bottom edge, and press.
Step 14

Pull the shell through the handle opening in the lining. Tuck the lining into the shell.
Step 15

Top stitch the bottom edge.
Step 16

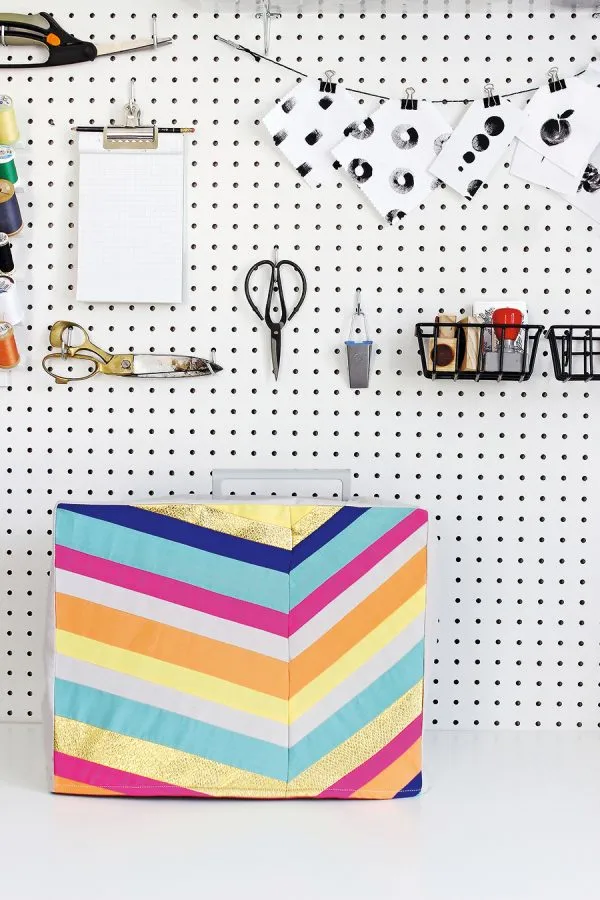
Align the shell’s handle opening and lining. Top stitch together. Pop the finished piece over the top of your sewing machine – it deserves a fancy new look after all that hard work.