
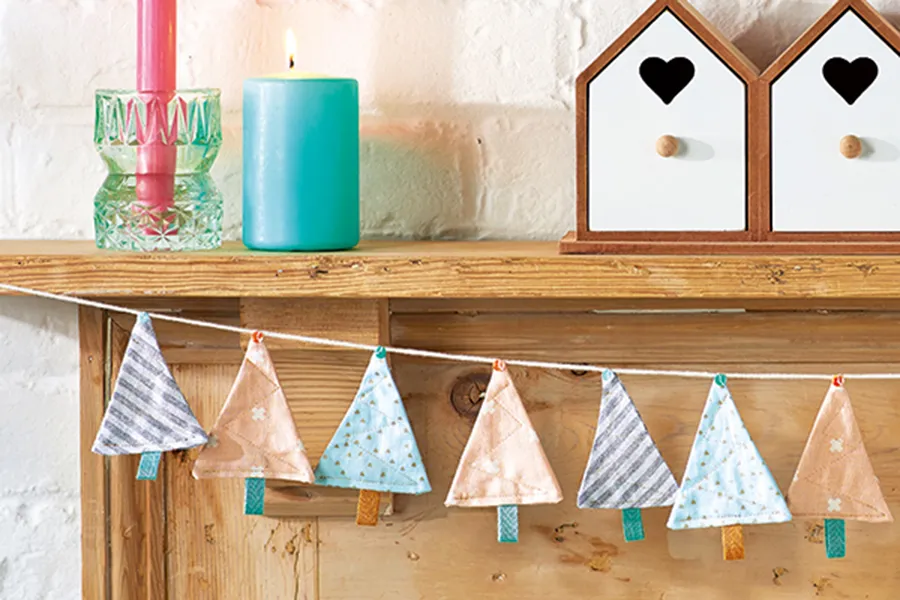
Even crafty newbies can make these simple sew Christmas decorations – Make yours tonight!
Whip up these simple Christmas decoration sewing patterns in just a few hours and use them to deck out your tree with that home-sewn special touch. You don't need to be an expert to make these easy-sew decorations – in fact you can even sew them by hand if you don't have a sewing machine!
- Make your own twinkling Christmas banner
- How to make felt animal Christmas decorations
- Easy embroidered Christmas decorations
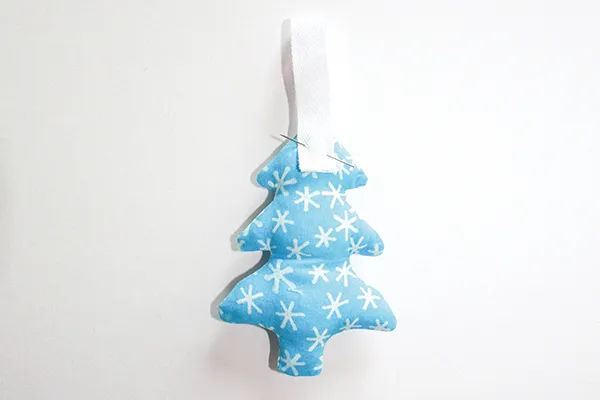
These three decorations look fantastic made in patterned festive fabrics, but classic Christmas colours would work equally as well. The process is the same for the star, tree and heart shapes, so grab your fabric and let's start stitching!
How to sew Christmas decorations
You will need
- Main fabric: 15x30cm (6x12in)
- Polyester fibrefill (toy stuffing)
- Ribbon to hang
- Matching sewing thread
- Download and print our free Christmas decorations template (PDF)
Fill the whole house with handmade decorations using our free Christmas bunting sewing pattern
How to sew Christmas decorations: step by step

Cutting out the fabric
Step one: Print out your chosen template from the pattern sheet and cut it out. You can choose from a tree, star or heart or draw your own if you prefer.
Step two: Cut the main fabric in half to make two squares, for the front and back of the decoration.
Making the shapes
Step three: Place your template centrally on the wrong side (WS) of one piece of fabric and draw round it.
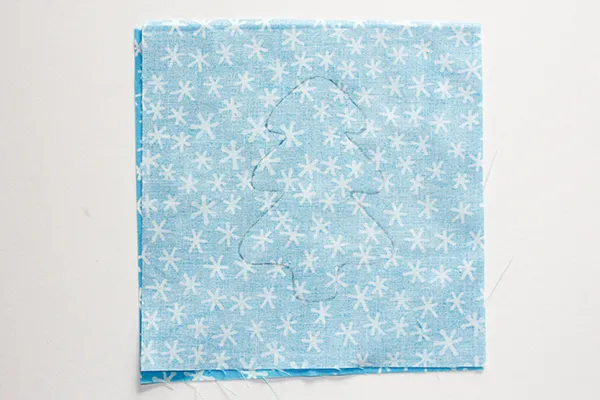
Step four: Place this piece of fabric right sides (RS) together with the other piece of fabric and pin these together.
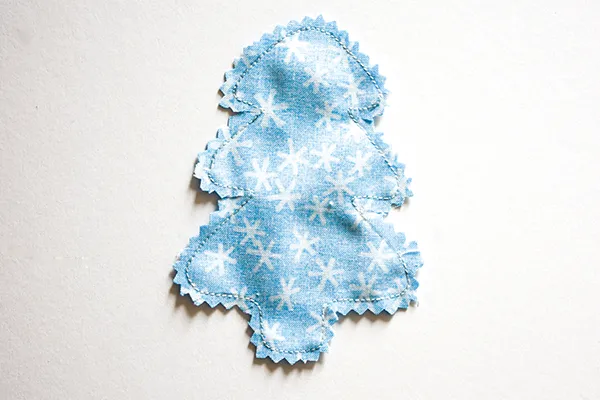
Step five: Stitch carefully along the draw lines starting and stopping along a straight edge so that you can leave a small turning gap.
Step six: Trim all round the edges using pinking shears to reduce the fabric bulk and stop it from fraying. Snip into the points and tight curves taking care not the snip the stitching.
Filling the shapes
Step seven: Turn your fabric shape RS out and turn the gap edges under, then press.
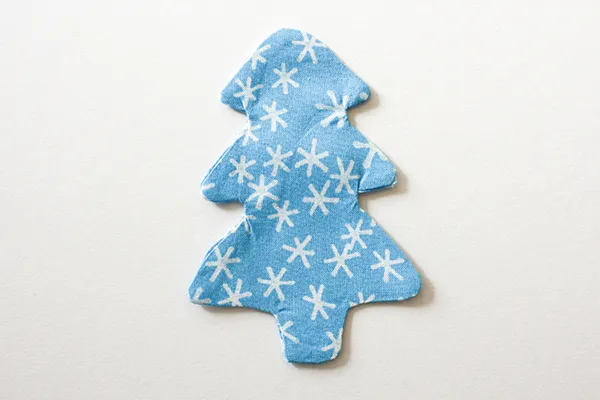
Step eight: Stuff the shape lightly using small pieces of stuffing at a time to make sure you get it into all the curves and points.
Step nine: Slip stitch the gap closed.
Adding a hanging loop
Step 10: Fold your ribbon in half then turn the short ends under and pin to the top of the back of your padded shape.
Step 11: Slip stitch the ends of the ribbon in place to complete.
Admire your finished decorations!

Get creative this Christmas
If these simple sew Christmas decorations have inspired you to make this year a hand-made Christmas, you'll find plenty more inspiration in our list of 51 easy and free Christmas sewing patterns.


