How to measure yourself

Are you new to making your own clothes or wondering where to start? We're here to help! In this post we'll talk you through the basics of how to take your own body measurements (or even better, ask a friend to lend a hand!).

6 issues of Simply Sewing magazine for £14.99|Save 78%!

Published: February 6, 2021 at 2:58 pm

If you're new to dressmaking, knowing how to measure yourself correctly is an essential skill and it will enable you to make garment that fit like a glove!

Before you begin any dressmaking project, always measure yourself before you choose which pattern size to make. The sizing can vary greatly from pattern to pattern and brand to brand, so don’t just assume you’re a particular size. It's worth taking the time at this stage before you spend time lovingly crafting a new garment. Scroll down for our essential guide to how to take your own measurements, including how to measure waist, how to measure inseam (inside leg) and how to measure bust.

So let's go! We'll talk you through how to take all of your body measurements below, then compare them to our sample size chart to practise picking which size to sew. You'll usually find a sewing pattern's size chart printed on the pattern envelope or on the instruction sheet inside.

Read on to learn how to measure yourself…

Looking for more dressmaking tips? Learn how to sew a button, how to use a sewing pattern or how to insert an invisible zip. If you're ready to start making your own clothes then check out our best sewing patterns for beginners.

Top tips for how to take your body measurements

Before you begin, make sure you read these tips to help you get the perfect fit:

  • Measure yourself in your underwear and preferably in the bra you’ll be wearing underneath your garment as this can alter the measurements slightly.
  • For accuracy, use a fabric tape measure as it’ll curve around your body.
  • You can measure on your own if you stand in front of a mirror, but for best results ask a friend to help so they can check the tape measure is sitting in the right places.
  • Make sure the tape measure sits snuggly around you but isn’t too tight.
You will need:

  • Tape measure

Step 1

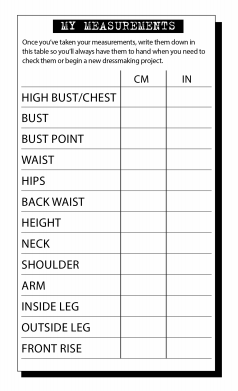
Start by downloading our free PDF to help you record your measurements. It’s a good idea to print out a batch of these so that they’re ready whenever you need them.

Download our free ‘My Body Measurements’ table to record your findings

How to take your body measurements

Step 2

Which common measurements do I need? Take the measurements below carefully and download our  My Body Measurements table to record your findings.

How to take your own body measurements

Step 3

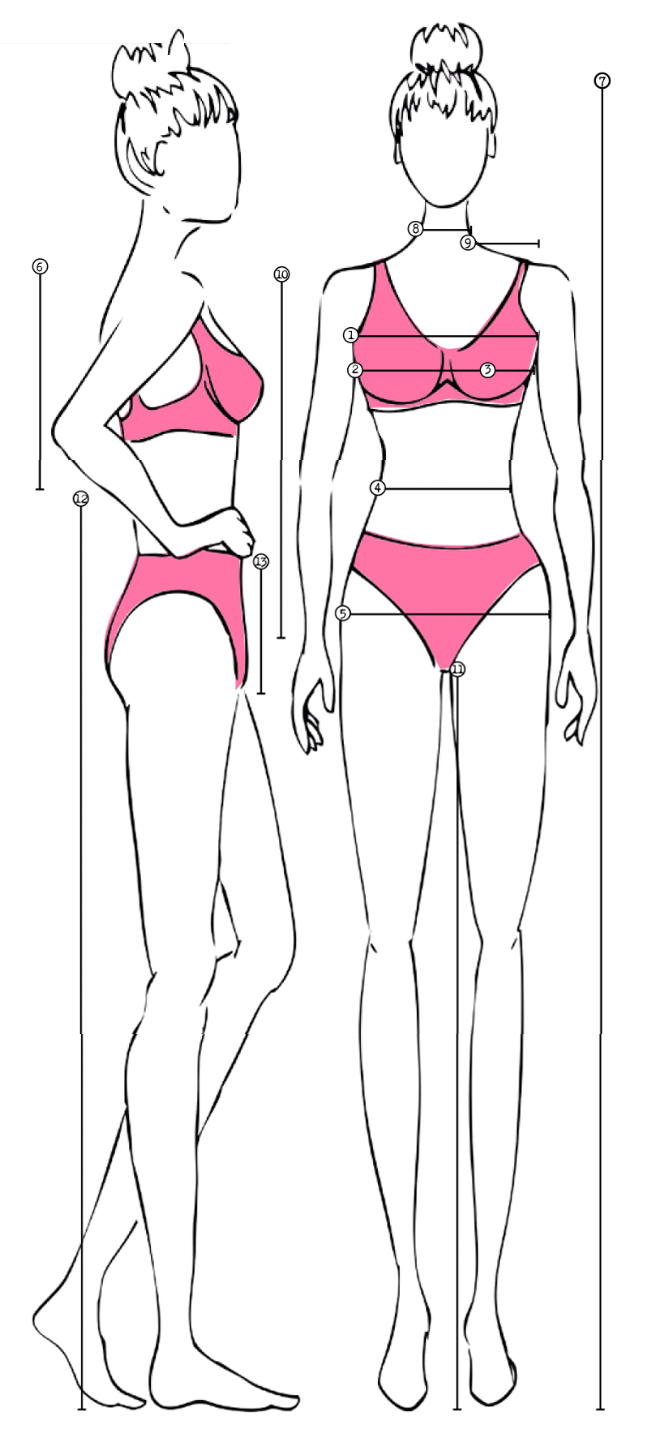
These are the measurements that you’ll need to take for each part of your body:

  1. High bust/chest: Across the back, directly under the arms and above the bust.
  2. Bust: Around the fullest part of your bust, across the centre of your nipples.
  3. Bust point: Your nipple point when wearing the bra you will be wearing with the garment.
  4. Waist: Your natural waistline, where you bend to the side.
  5. Hips: Around the fullest and widest part of your thighs and bottom.
  6. Back waist: From the top of your spine at the base of your neck to your natural waistline.
  7. Height: Stand against a wall without shoes on and measure from the top of your head to the floor.
  8. Neck: The circumference of your neck at its fullest.
  9. Shoulder: From your neck to where the shoulder seam would be on a garment.
  10. Arm: From where the shoulder seam would be to your wrist.
  11. Inside leg/inseam: From your crotch to the floor.
  12. Outside leg: From your waist to the floor.
  13. Front rise: From your crotch to your waist or wherever you want your waistband to sit.

You’ve got this. The sooner you can confidently measure up, the sooner you can grab a sewing pattern and get started on your handmade wardrobe.

How to measure yourself