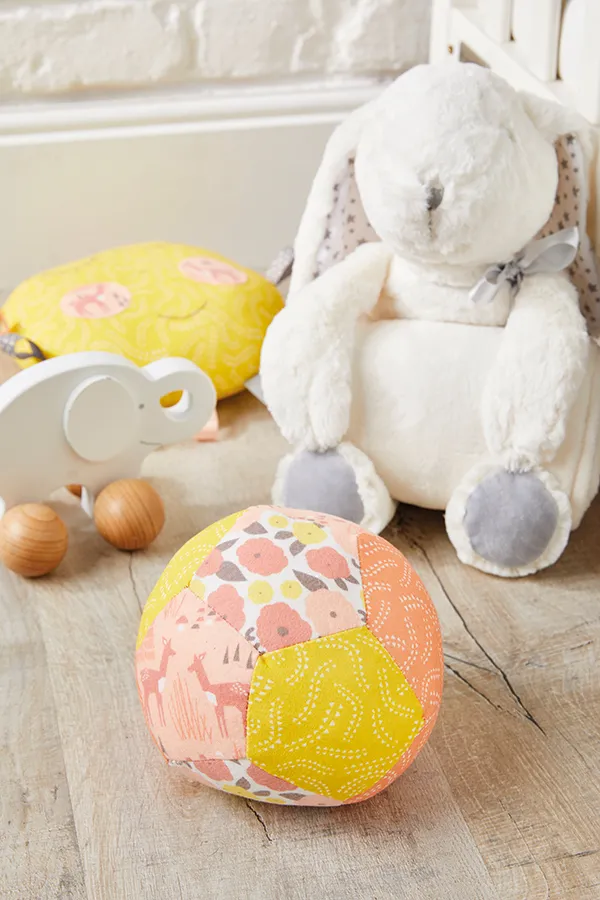
Welcome a newborn into the world with this sweet gift idea, designed by Jessica Entwistle, sewn in super-soft flannel or knit fabrics. Read on for our free tutorial...
You will need
- Four fabrics: 36x36cm (15x15in) of each, knit or flannel
- Polyester fibrefill
- Matching sewing thread
- Erasable fabric pen
- Basic sewing kit
Fabrics used
We've used fabrics from Field Day by Elizabeth Olwen for Cloud9 Fabrics.
Notes
- This project uses our patchwork ball template from our Simply Sewing Templates from issue 39
- Use a 5mm (1⁄4in) seam allowance.
Cutting out
Step one: Download our templates (you'll need the patchwork ball shape on page 11).
Step two: Cut out 12 pentagons using the template. We cut three pentagons each from four fabrics.
Piecing the pentagons
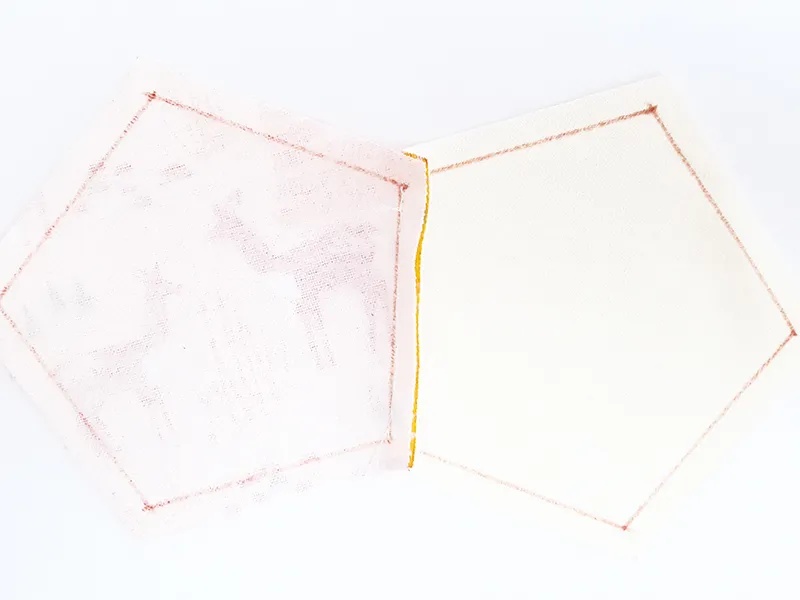
Step three: Mark on the wrong side (WS) of each pentagon the 5mm (1⁄4in) seam allowance inside the raw edges as this makes it easier to sew them together.
Step four: Decide on the pattern for your ball and lay out the pentagons accordingly.
Step five: Take two pentagons and place them right sides (RS) together.
Step six: Sew together along one of the marked lines from where the lines cross so you are starting and finishing 5mm (1⁄4in) from each end. Backstitch at either end of the seam to secure the stitching.
Step seven: Add another pentagon to the two pentagons you've just stitched to join them up and create a slightly curved trio. Make sure you don’t stitch into the previous seam but just up to it for a flat finish.
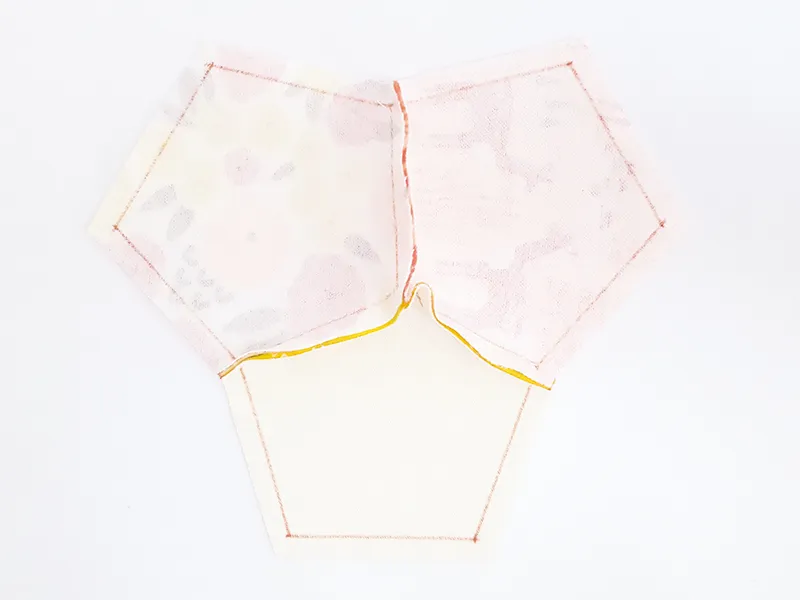
Step eight: Continue adding pentagons around the central pentagon until you have six sewn pentagons and a bowl shape.
Step nine: Repeat this with the other six pentagons to create two fabric ‘bowl’ shapes.

Assembling the ball
Step ten: Sew the two fabric 'bowls' together, making sure the seams line up and the pentagons match, to make a ball.
Step eleven: Leave one unsewn seam to use for a turning gap.
Step twelve: Turn the ball RS out through the turning gap and stuff firmly.
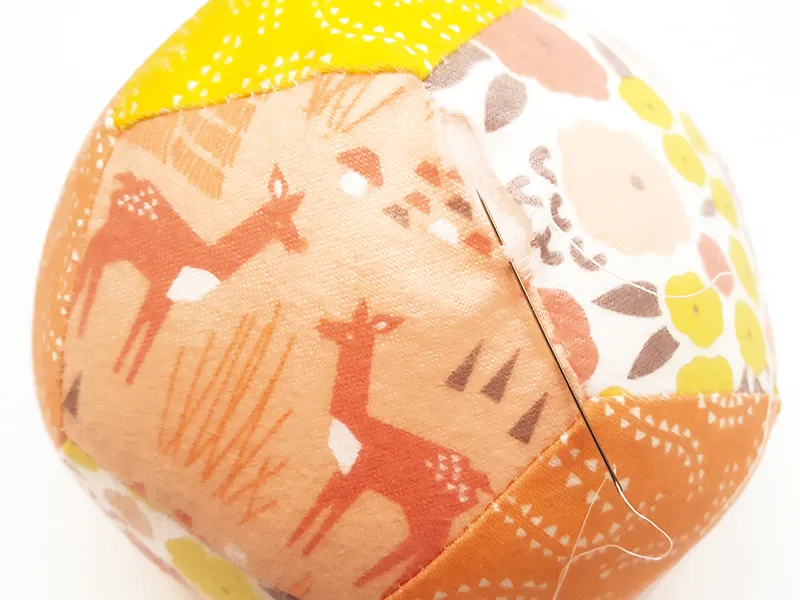
Step thirteen: Slipstitch the turning gap closed to finish. It's worth stitching this twice to make it extra secure and prevent the filling escaping.