Turn old jeans into baby bibs with Jessica Entwistle's easy DIY denim tutorial. Now before we begin, yes, we DO know that baby bibs endure quite a bit of mess and mayhem during meal times, but if you're not sure about the benefits of sewing your own bespoke bibs, why not use this project to make one-of-a-kind gifts for friends' new arrivals? You could add the baby's details to the hand-embroidered area of the design, or save them for excursions so your wee one can show off your sewing skills and thrifty styling!
This pattern can be used to make either a traditional bib or a bandana-style bib, and it can be adjusted to fit your baby or toddler – just move the placement of the Velcro. "I used Velcro because it can be adjusted as your baby grows," explains Jessica, "plus it means you can put the bibs on and take them off using one hand (which is sometimes vital!). But you could easily swap the Velcro for a couple of snap fasteners, if you prefer."
How to make baby bibs from old jeans
You will need...
- A pair of old jeans to fit the pattern (we used a UK size 14 pair)
- One fat quarter of red cotton flannel
- Cotton thread, gold to match traditional jeans stitching (we used Coats Duet col. 6690, thicker thread), and dark indigo (we used Coats Duet col. 9068, standard thread)
- Embroidery thread, Anchor 890 (gold), Anchor 47 (red)
- Velcro hook and loop tape, red, 20mm wide, 4cm long (for each bib)
- Sewing machine with size 16 needle (for thick thread and fabric)
- Pins
- Air or water-erasable pen
- White dressmaker’s pencil
- Tracing paper
- Download our free sewing templates from issue 4 for the bib shape and embroidery patterns
How to make bibs step-by-step
Step one
Cut out the bib shapes... wash and iron your jeans. Turn them inside out. Decide which bib you’d like to make, traditional or bandana style and download our free sewing templates from issue 4 of the magazine to get the bib shape template. Trace the pattern for your chosen bib onto paper and cut out. The bib shapes are symmetrical so the template pieces are just half of the final bib pattern. Place the paper template over your jeans and cut off enough of the jeans to fit the pattern – for the smaller bandana, we used the bottom part of a jean leg; for the larger bib, we used the top of a jean leg.
Fold your piece of denim in half, right sides together, and place your template on top with the ‘fold edge’ of the shape along the folded edge of the denim. Draw around the template with the water-erasable pen, transferring all markings from the template to the fabric.
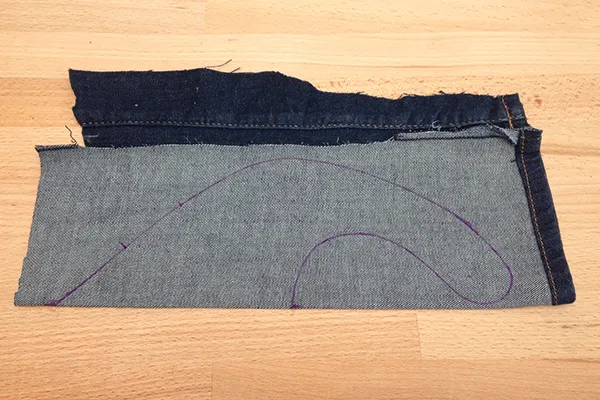
Step two Open out the folded piece of denim and flip the template over. Line up the template with the fold line on the other side of the denim and draw around it again to create your bib shape.
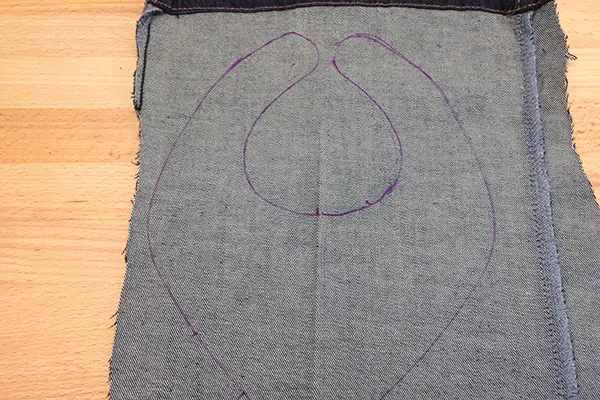
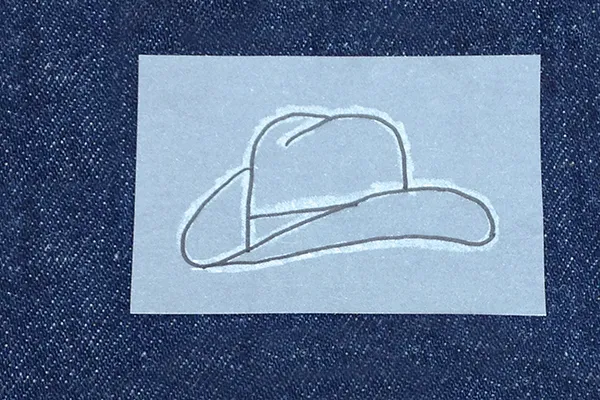
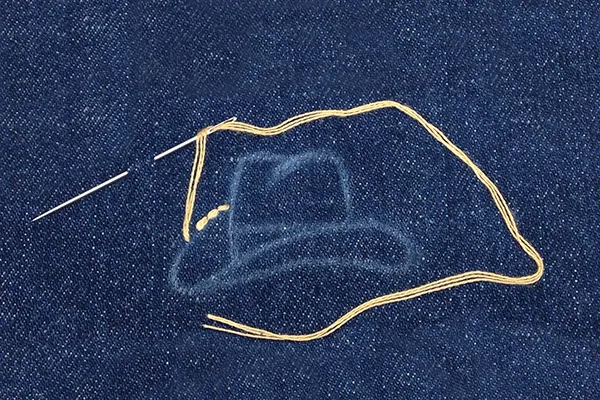
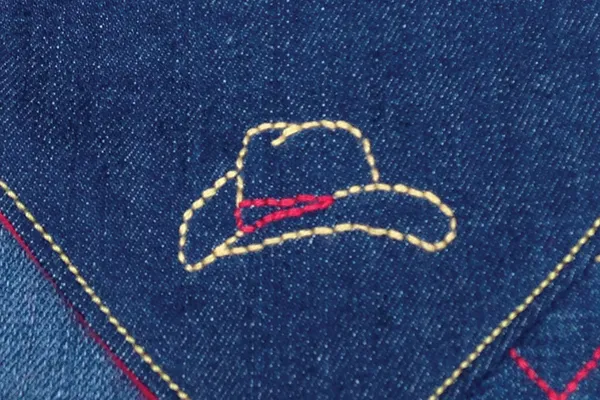
Step three Decide which embroidery design to use, the heart or the cowboy hat – download our Simply Sewing Patterns issue 4 part 1 here. Trace your chosen embroidery design onto paper and transfer it to your fabric – we did this by marking the reverse of the traced design with a white dressmaker pencil and then tracing the image with a pencil onto the denim. Position the design near the lower edge of the bib, at least 2cm from the bib outline.
Step four Embroider the image using backstitch and three strands of embroidery thread.
Step five Carefully brush off any remaining white pencil marks.
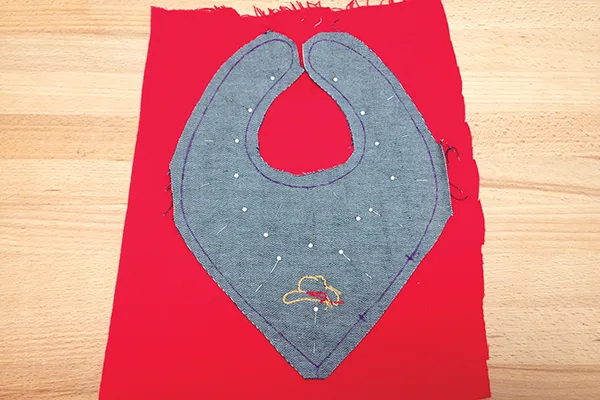
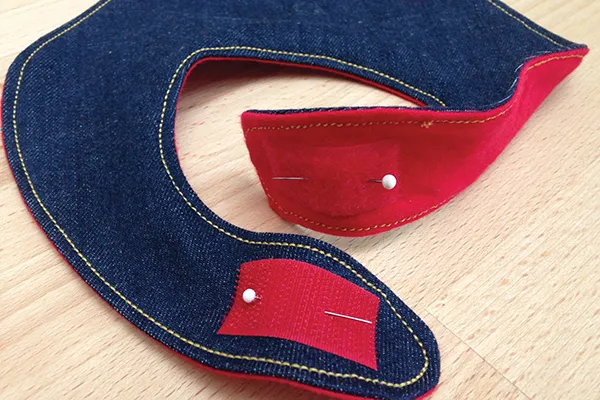
Step six Trim around your denim bib shape, approx 1.5cm from the bib outline. Place the shape right sides together with your piece of red flannel. Pin in place.
Step seven Using the dark indigo thread, sew the two sides together along the bib outline, leaving a 5cm gap in one side for turning. Trim off the excess fabric to 1cm and make small snips into the seam allowance of the neckline, making sure you don’t cut into your stitching. Cut off the seam allowance point at the bottom of the bandana-style bib.

Step eight Pull the bib through the turning gap until it’s right sides out. Press flat, tucking the excess fabric inside at the turning gap, ready to be sewn shut.

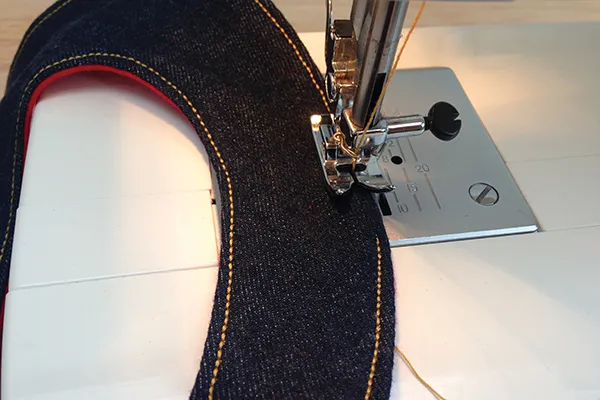
Step nine Thread your machine with the thicker gold thread and slowly topstitch around your bib, 3mm in from the edge. This will help your bib to lie flat and also close the 2in turning gap.
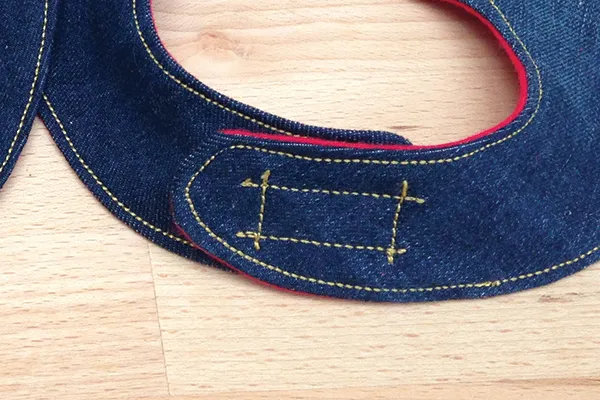
Step ten Cut a strip of Velcro approx 4cm long and pull the two halves apart. Pin the hook part (scratchy) at one end of the bib, on top of the denim fabric. Pin the loop part (fuzzy) at the other end of the bib, on top of the red flannel fabric.
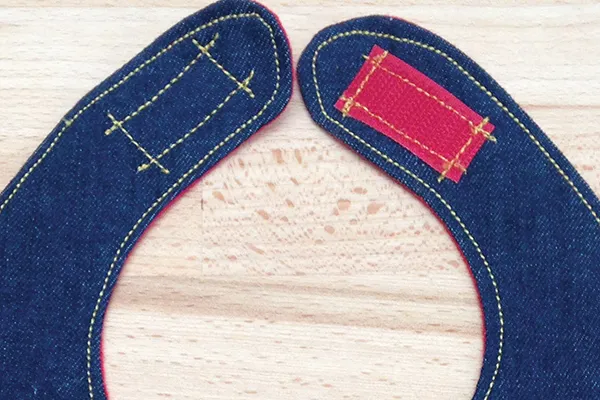
Step 11 Carefully sew the two halves in place, with four overlapping lines of stitching to form a rectangle shape.
Step 12 With the hook half, you might find it easier to tack the strip in place first and then stitch it down with your machine from the denim side. Stitch very slowly because you’re sewing through quite a few layers. You might find it easier to sew using the machine handle rather than the foot pedal. Tidy up any loose ends to finish.