Create an easy flower painting for your home

Discover how to paint watercolour flowers with Whistlefish founder Lyn Thompson. In this easy step-by-step photo tutorial, you’ll learn how to produce some beautiful blooms to display in your home.

Easy flower painting

Florals have been a signature of the Whistlefish identity for the past 26 years, our greeting cards and art are hugely inspired by the nature of Cornwall that surrounds us. We bring out new products almost every week and there’s always, always flowers – the perfect way to pick someone up when they’re feeling down, say congratulations or send birthday wishes.

It’s always a joy to sit down and paint flowers. With the large variety of species and colours available, each time you can study and produce something completely different that reflects the time of year or the mood you are feeling.

I like to paint bright blooms as it lifts me away from whatever doom and gloom may be going on in the world; it’s an escape and you’re left with a reminder of something beautiful.

There’s also so much flexibility when it comes to painting flowers. You can interpret them in your own way and you don’t have to be an expert in fine art.

Being loose with paint gives a natural look that lends itself to the subject and there is so much room to be playful with colours and strokes. No need to be precise, just get stuck in!

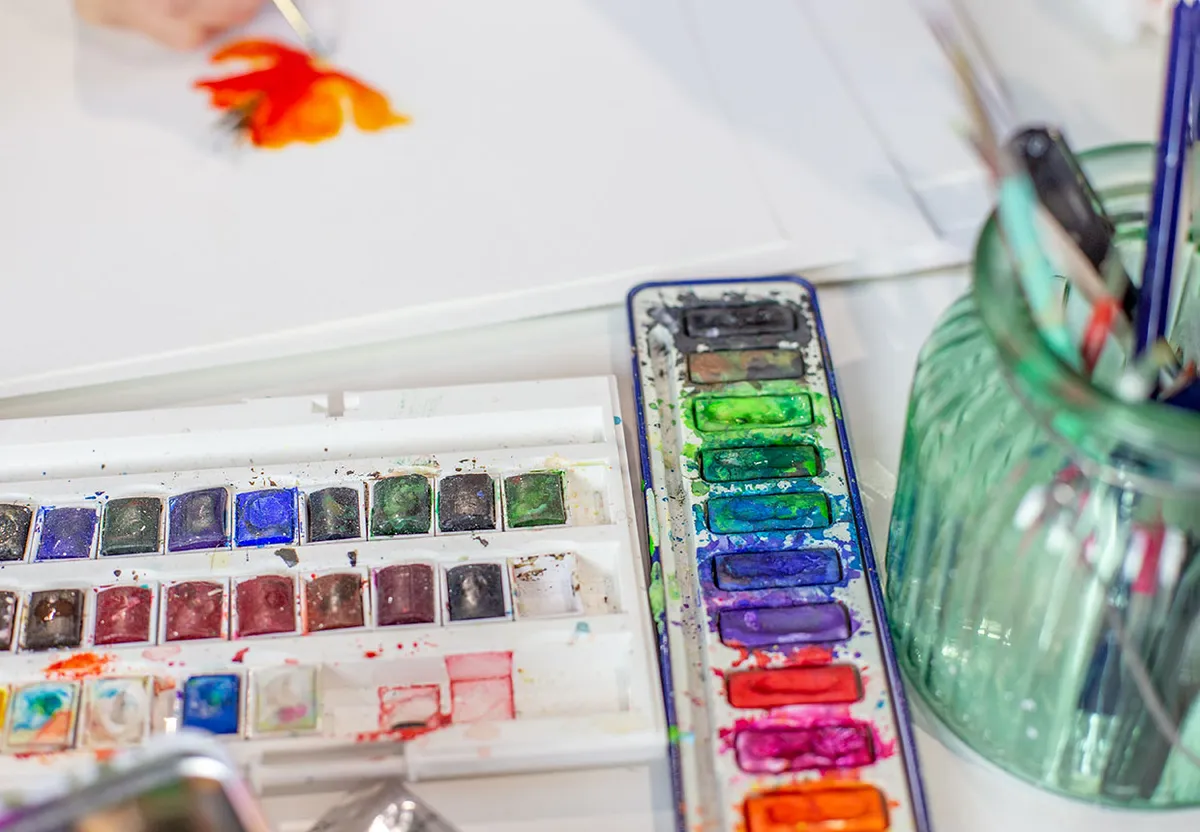
Watercolours have always been my medium of choice as they are brilliant for building layers of colour and achieving a beautiful variety of tones from soft pastels to bold brights.

Personally, I like using a combination of watercolour inks and solids; the inks are so vibrant and easy to work with and the pigmentation in the solids is excellent, great for a variety of painting methods.

It’s always best if possible to have fresh flowers in front of you so you can see the full stem and choose an angle you like most. My favourite flowers to paint are those I find in my own garden; wildflowers like poppies, roses and foxgloves (I chose poppies for this tutorial).

I always take photos on my phone so that when the flowering season has ended I can still refer back to something real.

Easy flower painting materials

Before you begin your easy flower painting, you’ll need to stock up on some supplies. Here’s what you’ll need for this project…

Watercolour inks

Watercolour inks come in vibrant colours and contain all of the colours you need to create stunning flower paintings. These inks blend well with traditional watercolour paints too. Look out for brands such as Ecoline and Daler Rowney.

Watercolour set

If you want to get into watercolour painting, it’s worth investing in a set of high-quality watercolour paints. Look for a set with pans so you can easily replace any of the colours if they run out. Good brands to buy include Winsor & Newton, Derwent and Faber Castell.

Watercolour paper

It’s important to use watercolour paper for this flower painting project. This paper is very thick and won’t bend or warp when wet. Watercolour paper absorbs the paint well and will help you to achieve a professional finish.

Whistlefish blank greetings cards

Giving someone a hand-painted card can really make their day! Make your own by using these handy blank greetings cards from Whistlefish.

Ready to have a go at painting poppies? Read on to learn how to paint a flower with Lyn’s easy guide.


Advertisement

You Will Need

  • Small, fine paint brush (Brush One)
  • Extra small, fine paint brush (Brush Two)
  • Jar of water
  • Watercolour paper or Whistlefish blank greetings card
  • Ink paints
  • Watercolour palette
  • White gouache paint
  • Kitchen roll

Total time:

Sketching the outline of the flowers

Step 1

Create light guidelines using a pencil

Sketch out the poppy with a pencil. Lightly pencil a long line as a stem and the outline of the petals.

Step 1 – sketching the flower outline

Step 2

Erase your pencil marks

Take a rubber and lightly rub out the pencil so you only see a small outline to use as a guide, this way it won’t show through when the painting is completed.

Step 2 – lightly erasing the flower outline

Step 3

Turn your page upside down

Flip the paper 180 degrees (this is an optional step as I prefer to paint upside down!) Prepare all your ink paints onto a palette or plate.

Step 3 – mixing the ink paints

Brighten the paper with vibrant ink

Step 1

Use yellow for your base

Wet ‘Brush One’ with water and use the yellow ink paint as a base for the petals. Don’t be afraid to use lots of water.

Top tip: I like these small brushes for painting flowers as they’re fine and hold moisture – great for painting petals!

Step 4 – paint the petals using yellow ink

Step 2

Add warmth with orange ink

While it’s still wet go straight over with an orange – intentionally not filling in all the areas – brushing the strokes towards you. Leave to dry for a few minutes.

Step 5 – paint over the top in orange ink

Step 3

Paint your poppy red

Add red watercolour paint to your brush and blend it in the way the petal would naturally grow; from the bottom by the stem up to the tip.

Step 6 – add a layer of red ink

Step 4

Get scrunching!

With a scrunched-up bit of kitchen roll, dab the end where the stem meets the poppy.

Step 7 – dab the ink with kitchen towel

Step 5

Let the colours run together

Change to ‘Brush Two’. Add a small amount of black for the centre or the flower. The colours will run together but don’t worry, this is the look you want to achieve. Draw small strokes to create the stamen.

Step 8 – add black for the centre of the flower

Step 6

Build up layers of vivid crimson

With the crimson red, paint over the petals; this builds up many layers.

Step 9 – build up layers of red ink

Step 7

Paint a burst of poppy seeds

Gather black watercolour on ‘Brush Two’ and hold firmly over where the stamen of the poppy would be. Use your other hand to tap the brush handle to flick the brush to get the effect of the poppy seeds exploding open.

Step 10 – add flecks of black ink

Step 8

Turn your paper around

Flip the painting back around (if you flipped it at step 3). Clean ‘Brush Two’ and pick the sap-coloured green paint for the stem.

I like to draw the stems from the bottom up then meet them in the middle because it gives me a steadier hand.

Step 11 – painting a delicate stem

Step 9

Create a cluster of bright poppies

You can add more flowers to the outside of this if you like. Draw, rub out and follow the full process again, building colours from lightest first.

Step 12 – add more flowers if you like!

Step 10

Add finishing touches to the petals

Apply pillar-box red watercolour to enhance the petals and white gouache highlights.

Step 13 – add fine details to the flower painting

Step 11

Complete the look with flecks of black

Finish off with some flicks of black paint across the stamen for an organic look.

I’ve also added some green long strokes for foliage to balance the composition at the bottom of the painting.

Step 14 – flick black flecks across the stamen

Step 12

Frame your finished flower painting

If you’ve painted onto watercolour paper, position your print in the centre of the frame and cut around with a craft knife, then insert into a Whistlefish blank frame to create your own unique artwork.

Step 12 – frame your easy flower painting
Advertisement

Making your own easy flower paintings couldn’t be simpler

Once you’ve mastered this how to paint a flower tutorial, you’ll be hooked! This is a really versatile method of painting flowers and you can try it out with so many species.

If you’re not sure what to paint next, search through our floral greetings cards for inspiration. Using our blank greetings cards you can even paint straight onto the card to create a thoughtful gift for a friend and add a message tailored just to them.

Lyn painting her watercolour flowers

I use my Whistlefish tins for pencils, pastels and tubes; I don’t throw anything away so I can see what colours I use most. And I am never seen without a trusty Whistlefish apron – every crafter’s essential!

Most importantly, be brave and get stuck in, there’s no wrong way of doing this, just keep practising and you’ll find a way that works for you. Thank you for joining me to learn how to paint watercolour flowers, please share your results with us over at instagram.com/whistlefish.

Grow your artistic skills with an easy rose painting tutorial

If you’ve enjoyed learning how to paint flowers using watercolours, the next step is to experiment with other mediums. Discover how to make your own easy rose painting with our step-by-step tutorial.