All products were chosen independently by our editorial team. This review contains affiliate links and we may receive a commission for purchases made. Please read our affiliates FAQ page to find out more.

Learn how to paint a stunning rose with our easy tutorial

Boost your artistic skills with this blooming lovely rose painting lesson! Discover how to paint a rose with our simple step-by-step guide

Try our magazines – get 6 issues from just £9.99!

Published: September 15, 2022 at 10:03 am

If you want to get into botanical art, creating a rose painting is a good place to begin. Roses come in an array of beautiful colours including vibrant pinks, deep reds and warm oranges. They’re very satisfying to paint and the finished artwork can look stunning.

It’s also a good way to practice your tonal painting skills and get to grips with the basics of colour mixing. Mastering these skills will help you to take your painting to the next level.

In this tutorial, we’ll show you how to paint a rose step by step. You’ll learn how to sketch the outline of your rose, how to build up the shading on the petals and how to add a delicate stem.

Painting from life may feel a little daunting if you haven’t tried it before, but we’re going to break the process down into easy steps for you. You can also work from a photo if you find that easier.

In this rose painting tutorial, we’ll demonstrate how to paint a rose using acrylic paints. Acrylic paints are a good choice for this project – they have rich, opaque colours and are highly blendable.

Unlike watercolours, acrylic paints are very forgiving. If you make a mistake, you can simply paint over the top and no one will ever know!

Rose painting video tutorial

Rose painting materials

Here’s what we recommend you’ll need for this rose painting project…

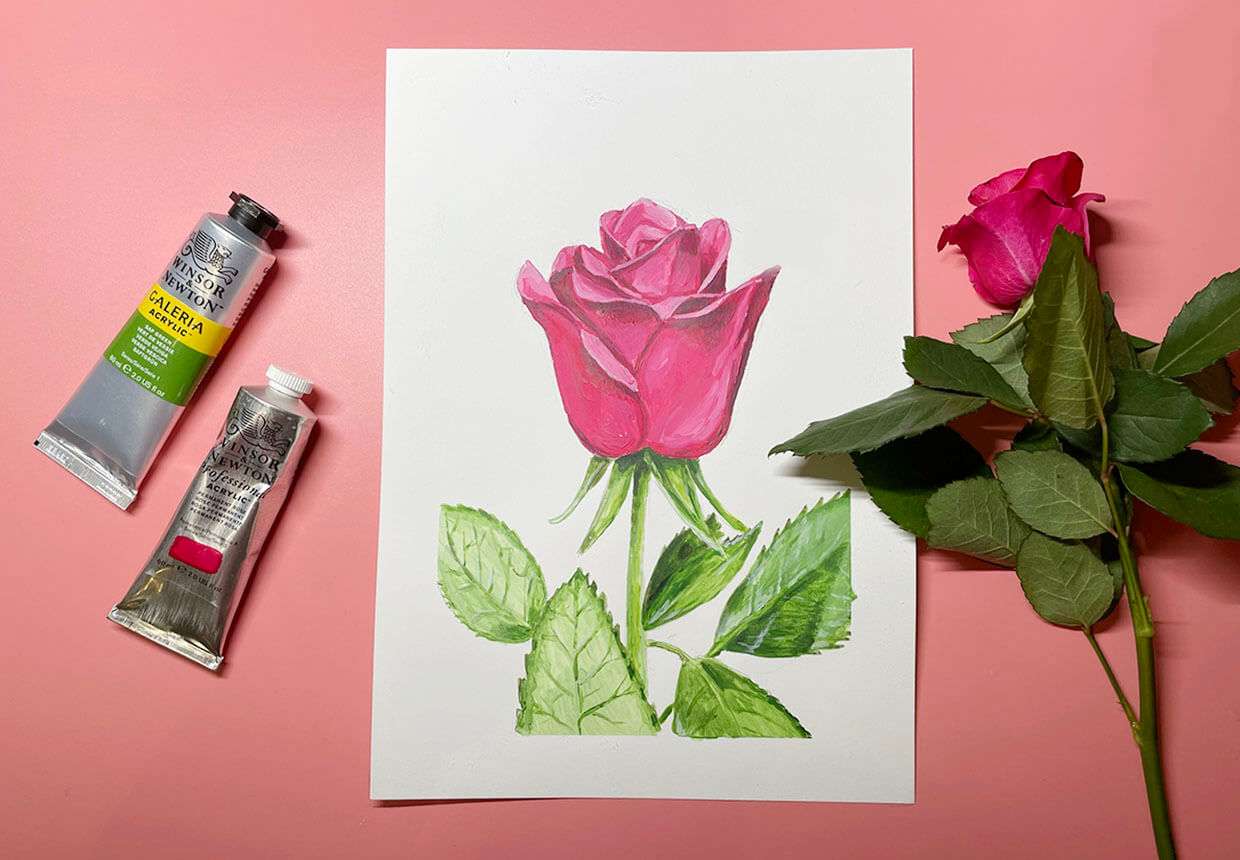
Winsor & Newton Galeria sap green paint

If you’re going to be doing a lot of botanical painting, buy a tube of sap green paint. Sap green is perfect for painting leaves, stems and foliage, as it gives a very natural-looking shade of green.

Most acrylic paint producers include sap green in their ranges, but the colours vary slightly between brands.

We like the sap green in the Winsor & Newton Galeria range – it’s highly pigmented and less expensive than many professional-standard acrylic paints. It’s good value for money because a little goes a long way.

Winsor & Newton Galeria permanent rose paint

When you picture a rose in your mind, it’s almost certainly a pink one. If you want to produce that rich pink shade then you need the right paints to hand.

In order to paint a rose in that distinctive colour, buy a tube of permanent rose for your stash.

For this project, we’re using permanent rose paint from the Winsor & Newton Galeria range. It’s a vibrant acrylic paint that blends well and is reasonably priced. Overall, it’s perfect for this rose painting project. It's a very vivid shade, so we'll be blending it with a little red paint to soften the colour.

Winsor & Newton Galeria acrylic paint set

For this rose painting project, you will need a few other colours to create shadows and highlights.

If you don’t already have an acrylic paint set, invest in one with a good selection of shades like this one from Winsor & Newton. These paints will blend well with the sap green and permanent rose Galeria paints we’ll be using to create our rose painting.

This paint set includes a great choice of bold colours that you’ll be able to use for other projects too. This is a high-quality, affordable paint set that’s ideal for beginners and art students to use in their work.

Mixed media paper

Choosing the right paper for this project is very important. If you use paper that’s too thin, it’s likely to warp when you add your paint. Look for a heavy-weight paper that’s designed for acrylic paints, such as this mixed media paper pad.

Mixed media pads are very handy to have, as you can also use them for watercolour painting, sketching and other mediums. This is a great option if you only use acrylic paints occasionally. You can buy acrylic paint paper pads, but these tend to be more expensive.

Pro Arte Polar five brush set

Pro Arte’s Polar brushes are designed for beginners and art students. While this is quite a small brush set, it includes brush shapes suitable for this rose painting tutorial.

These are synthetic brushes, so they can also be used with watercolour, oil or gouache paints. Synthetic brushes keep their shape well and will last for a long time if you take good care of them.

Make sure you wash your brushes thoroughly when you finish painting and never leave them sitting in a pot of water for a long time.

Techne – Artist & Drafting Lamp

We’re also going to be using the Techne – Artist & Drafting Lamp from The Daylight Company.

The Techne Lamp is a daylight lamp, meaning that it recreates the quality of natural light. This is really useful if you’ve started your painting outside and you want to continue painting indoors. It will help you to paint the colours more accurately.

It can be attached to your desk or easel and adjusted to suit your lighting needs. There are three brightness settings, so you can choose the right one for your current work in progress.

How to paint a rose

You will need:

  • Thick A4 paper (use a heavyweight paper such as mixed media paper)
  • Masking tape
  • Drawing pencils
  • Eraser (use a soft putty rubber if you can get one)
  • Acrylic paints (try to get tubes of permanent rose and sap green)
  • Palette (we’re using a tear-off palette, but a traditional palette or a plate would work just as well)
  • Paint brush set
  • Techne – Artist & Drafting Lamp (optional)
  • Pot of water
  • Kitchen towel (use kitchen towel to clean and wipe your brushes when you finish painting or if you want to change colours)

Preparing your workspace

Step 1

How to create crisp borders

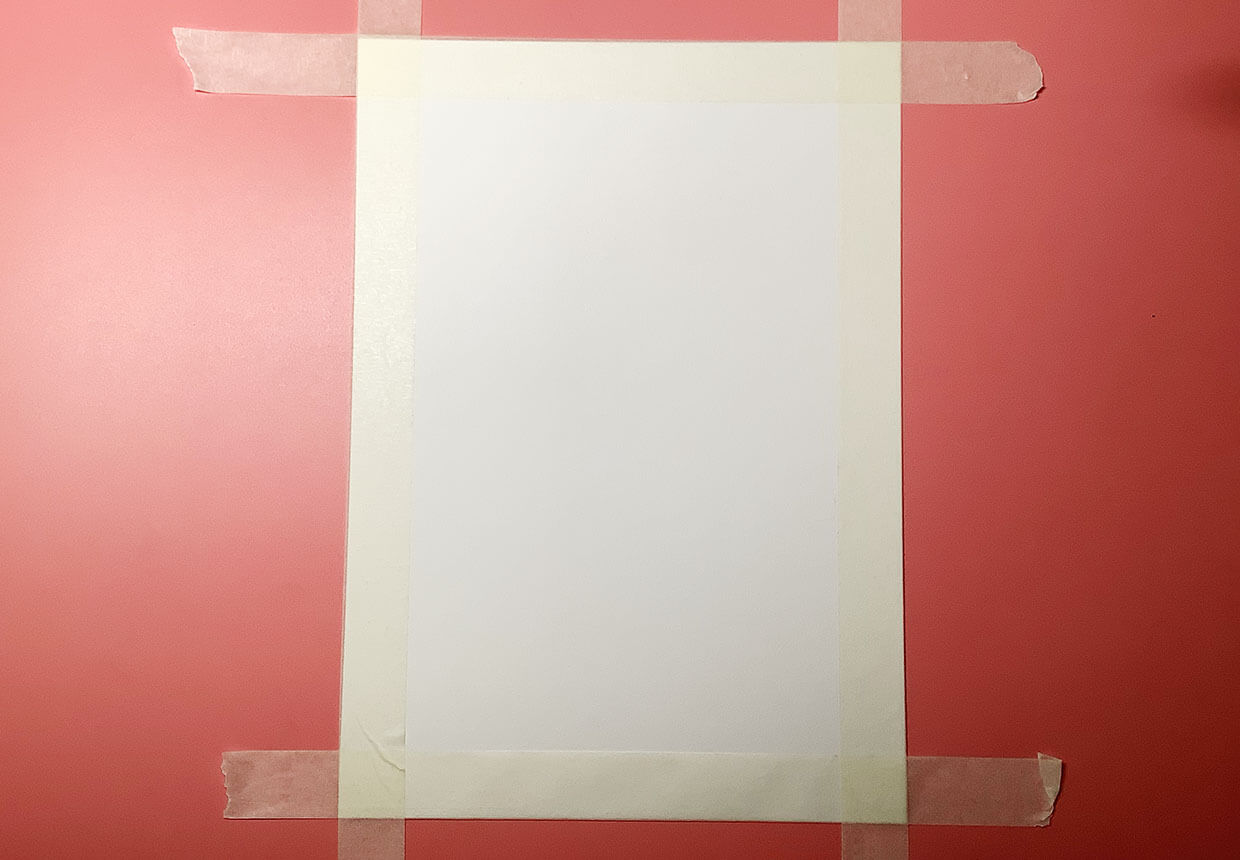
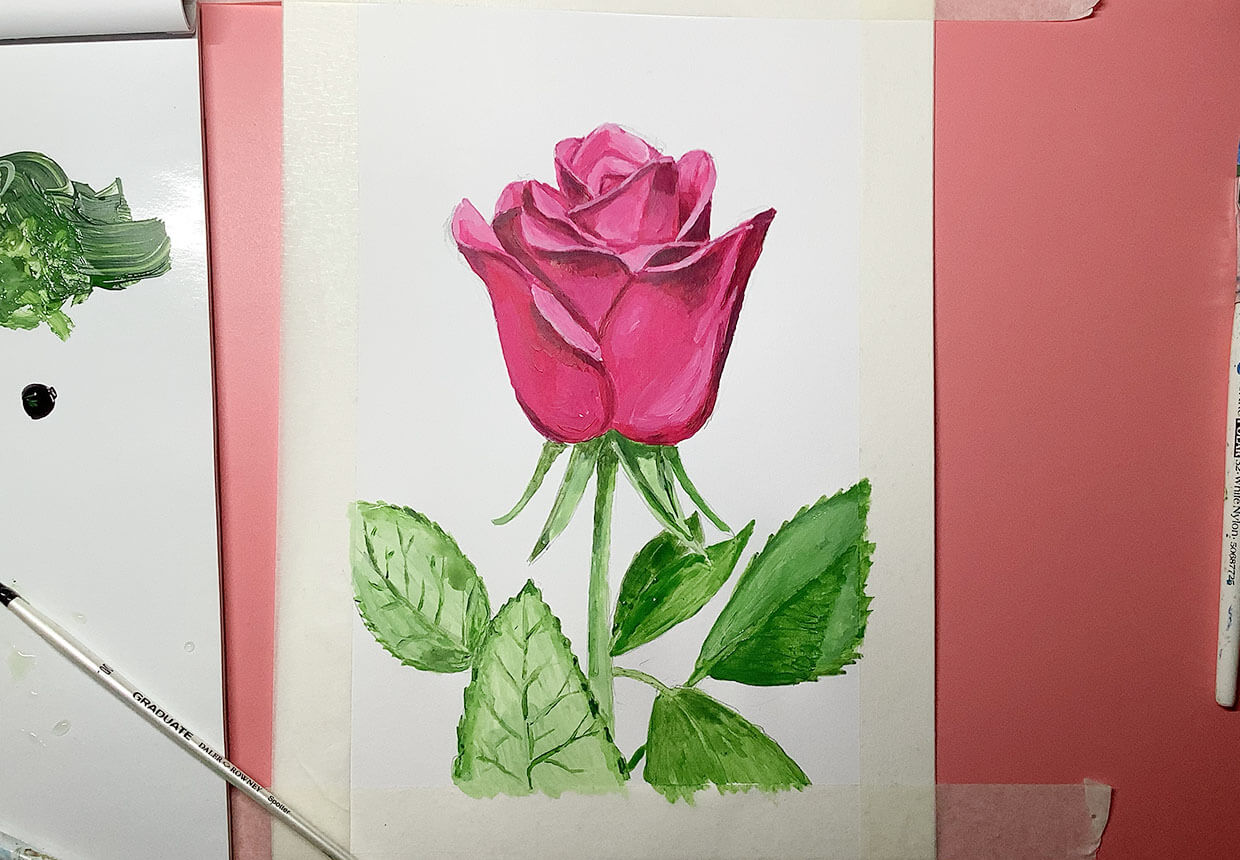
Start by taping your paper down using some artist’s masking tape. It’s a good idea to press it against your clothing before applying it to the paper to reduce the tackiness. This will stop the paper from ripping when you remove the tape.

The tape will also give you a nice clean border and stop the paper from moving around while you paint.

Step 1 – apply the masking tape

Sketching the outline of the rose

Step 1

Creating a guide for your rose painting

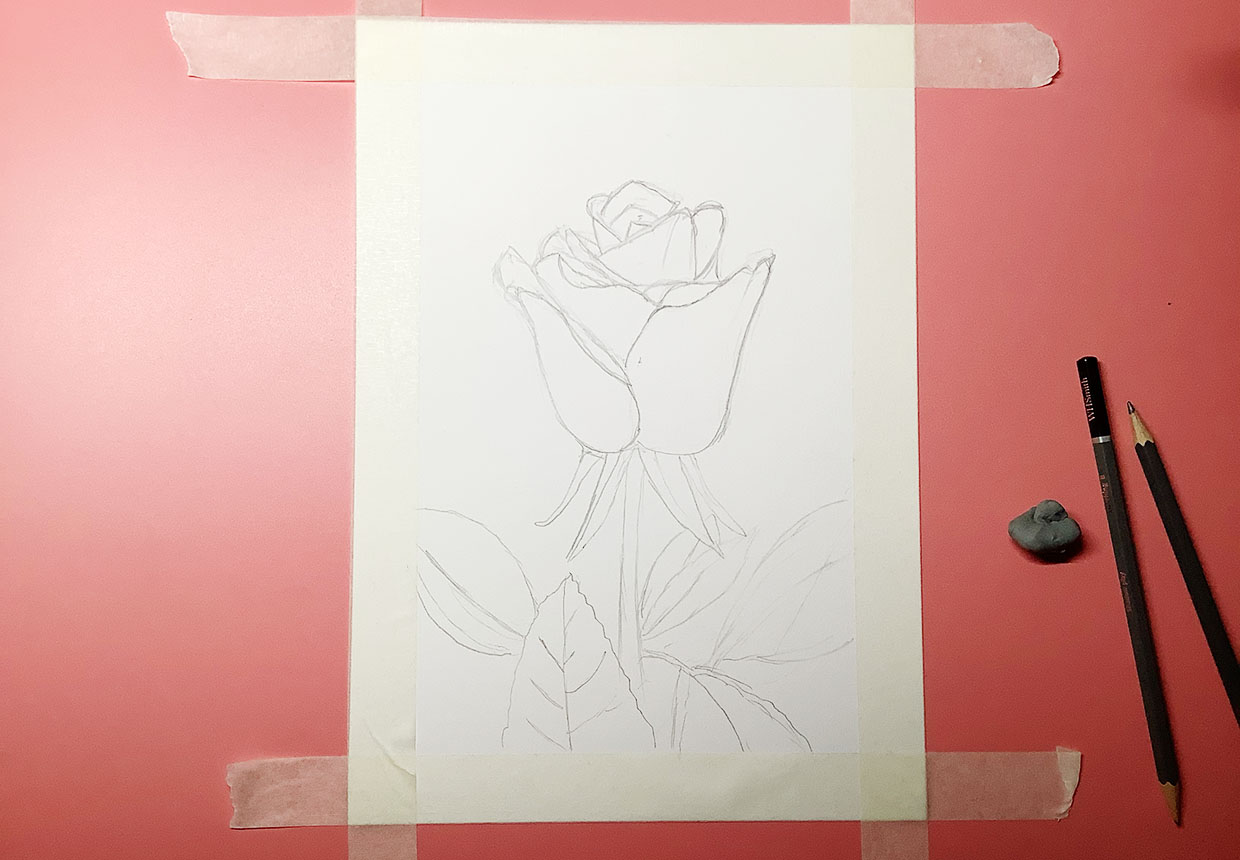
If you’re new to painting, try sketching the outline of your rose lightly onto the paper before you start painting. This will help you to get the dimensions right before you add colour.

Start by lightly marking the outer dimensions of the flower using a pencil – how tall is the flower and how wide is it?

While you’re drawing, keep looking up at the flower – get into the habit of doing this and it’ll help you to draw more accurately.

Step 2

Drawing a natural rose shape

Mark roughly where the centre of the rose is. Next, lightly sketch the outline of your flower. Look at where the outline of the rose relates to the marks you’ve already made.

For example, if there’s a dip a third of the way across the top of the flower, make a small mark to indicate where that should be before you draw the rose outline.

Step 3

Creating the beautiful petal shapes

Sketch the outline of the petals lightly. Keep glancing up at your flower as you draw to check that you’re drawing them in the right place.

If you’re struggling to draw the intricate petals, draw the rose in a more upright position so you’re not seeing as much of the centre of the flower.

Don’t worry if your drawing isn’t completely accurate – you can always correct the shape when you paint over the lines.

Step 2 – drawing the rose outline

Bringing your flower to life with colours

Step 1

Get to grips with colour mixing

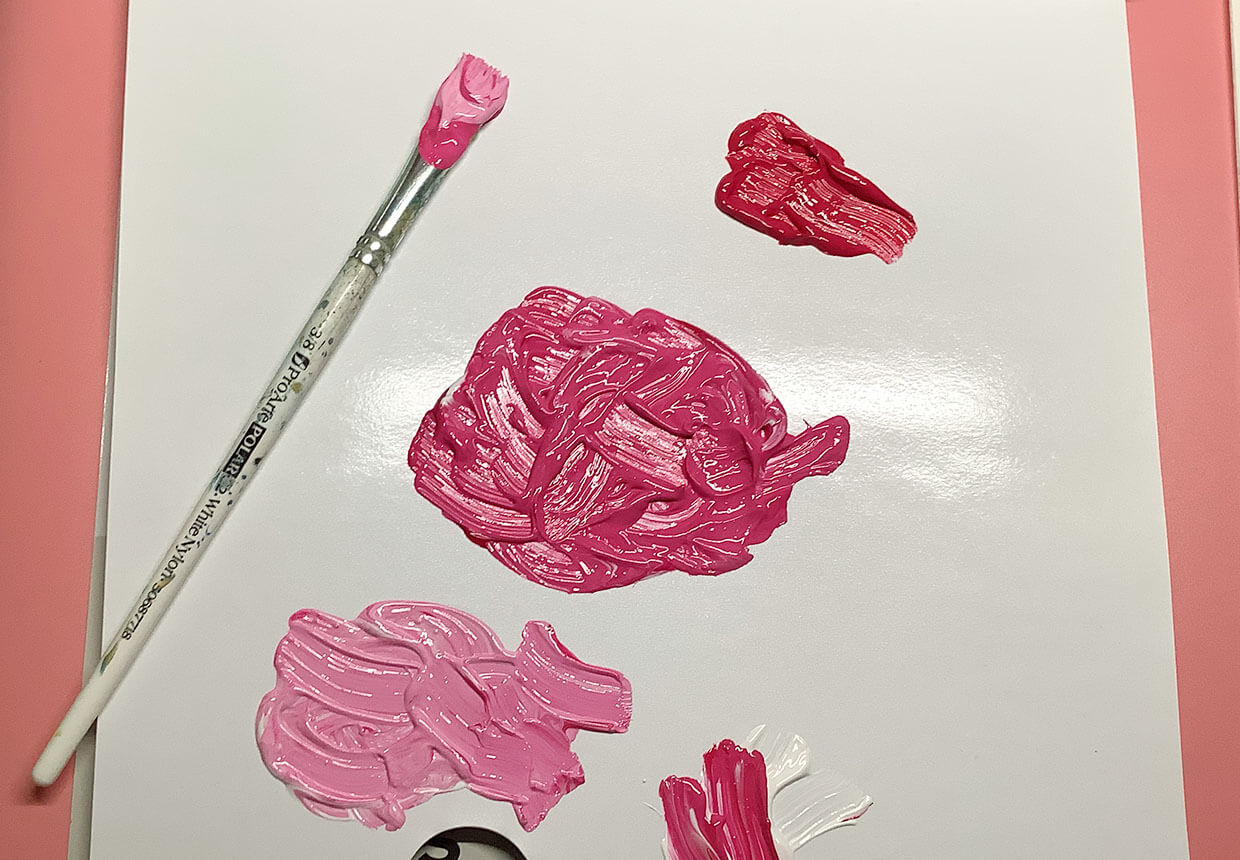
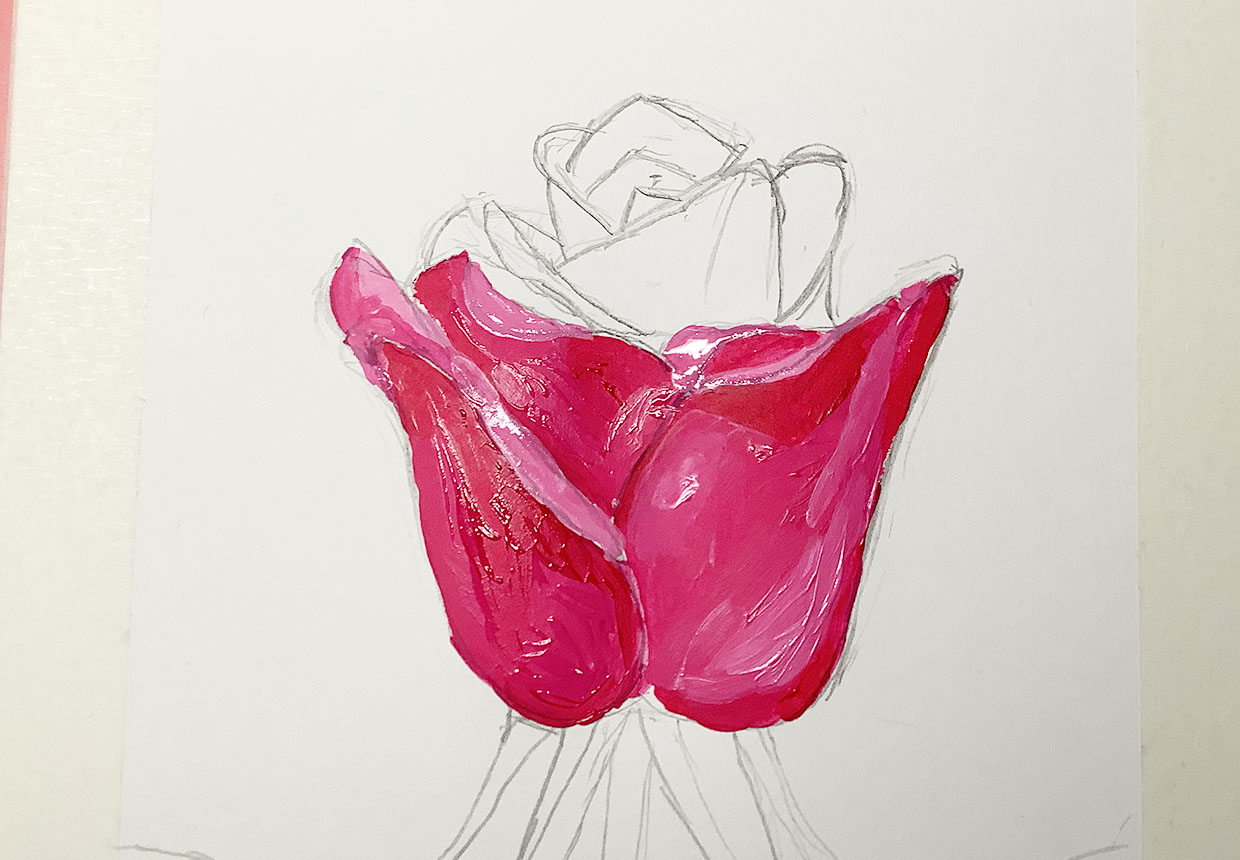
Next, we’re going to mix the colours. To make sure you get the colours right, start by mixing three tones for your petals. Begin with your middle tone, then mix a lighter tone and a darker one.

You can lighten your paint by adding white, but there are a couple of different ways you can darken your paint. The easiest way is to add black and keep adding it until you’ve achieved the colour you want. Use dark brown or blue instead of black for a softer look.

Alternatively, add the colour that’s on the opposite side of a colour wheel, which is called the complementary colour. For example, if you want to darken red or pink, mix in some green paint. You can look at a colour wheel to check this if you’re unsure.

Step 3 – mixing the rose paint colours

Step 2

Blending paints at speed

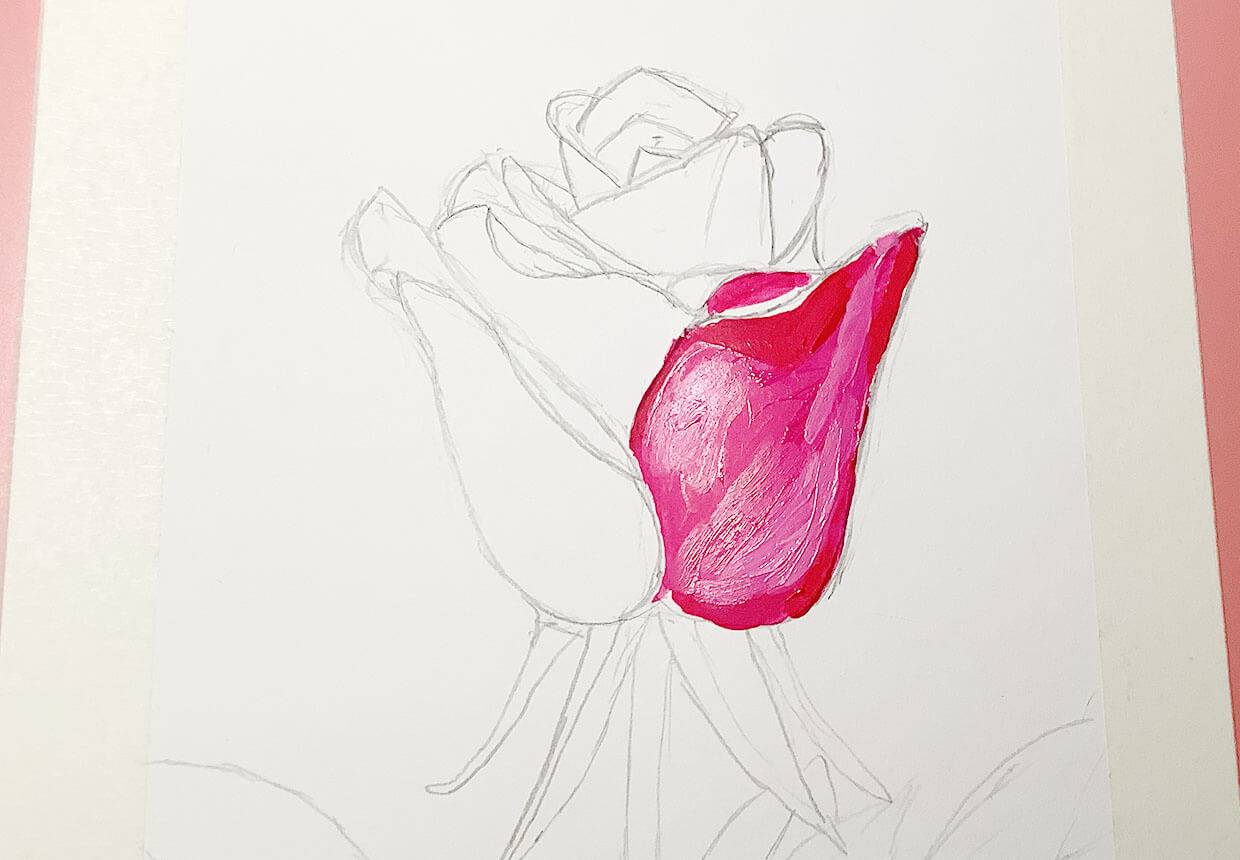
Now take a brush and begin to add your darkest tone. It’s a good idea to work quickly as acrylic paints are fast-drying. Look closely at your rose to see where the shadows are while you’re doing this.

Step 3

Darkening the petals to create a blended effect

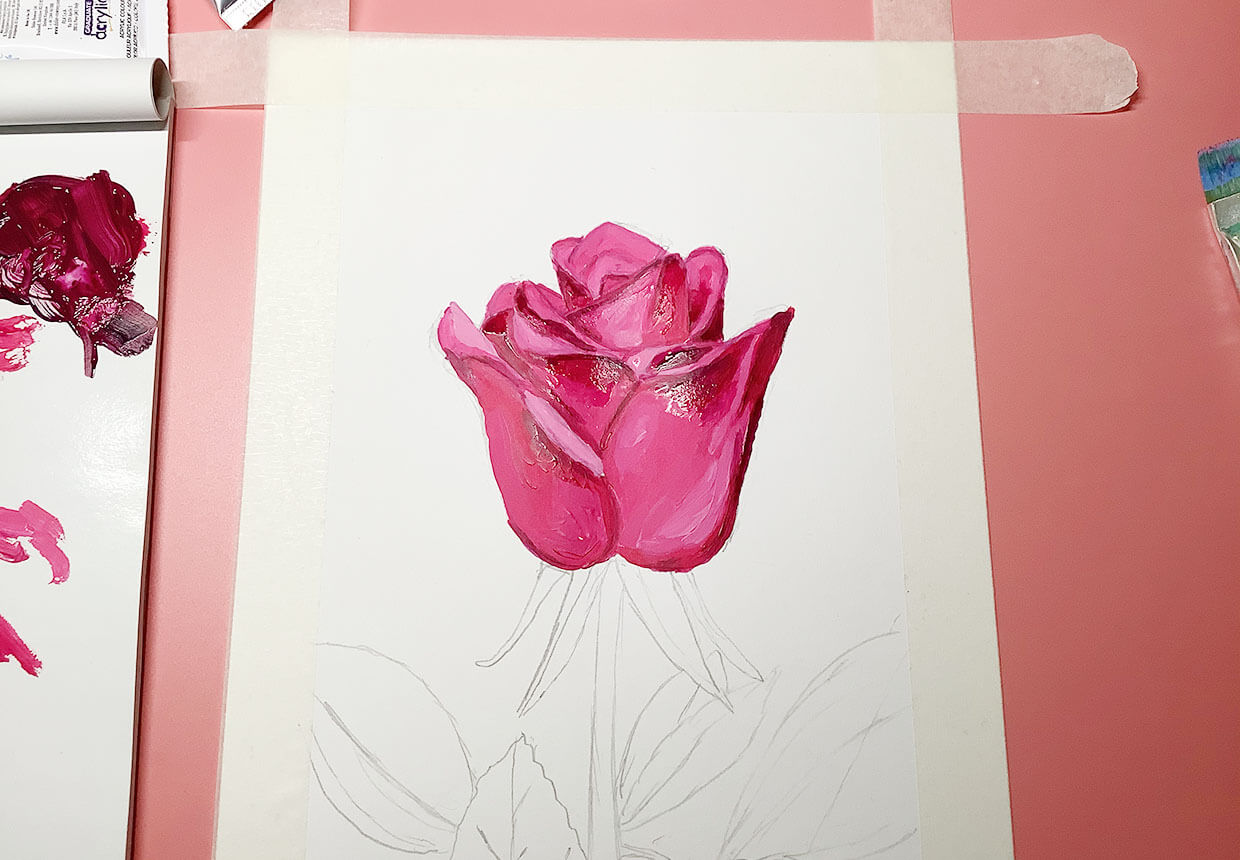
Move on to the lighter middle tones. Blend it into the shadows at the base of each petal and draw the darker paint into the mid-tones using your brush.

If the dark areas are still wet, you should be able to create a smooth gradient. Wetting the brush can also help if the paint has already started to dry. Apply more fresh paint if your first layer is too dry.

Step 4 – painting at speed

Step 4

Illuminate your rose with bright highlights

Take your lighter paint and begin to add highlights at the top of the petals, blending into your middle tone. If the middle tone has dried out a little, add fresh paint from your palette to help you blend the colours more evenly.

We recommend switching to a finer brush when you’re working on the tips of the petals to help you get a cleaner edge.

Step 5 – adding highlights

Bring depth to your painting with highlights and shadows

Step 1

Making the shadows deeper

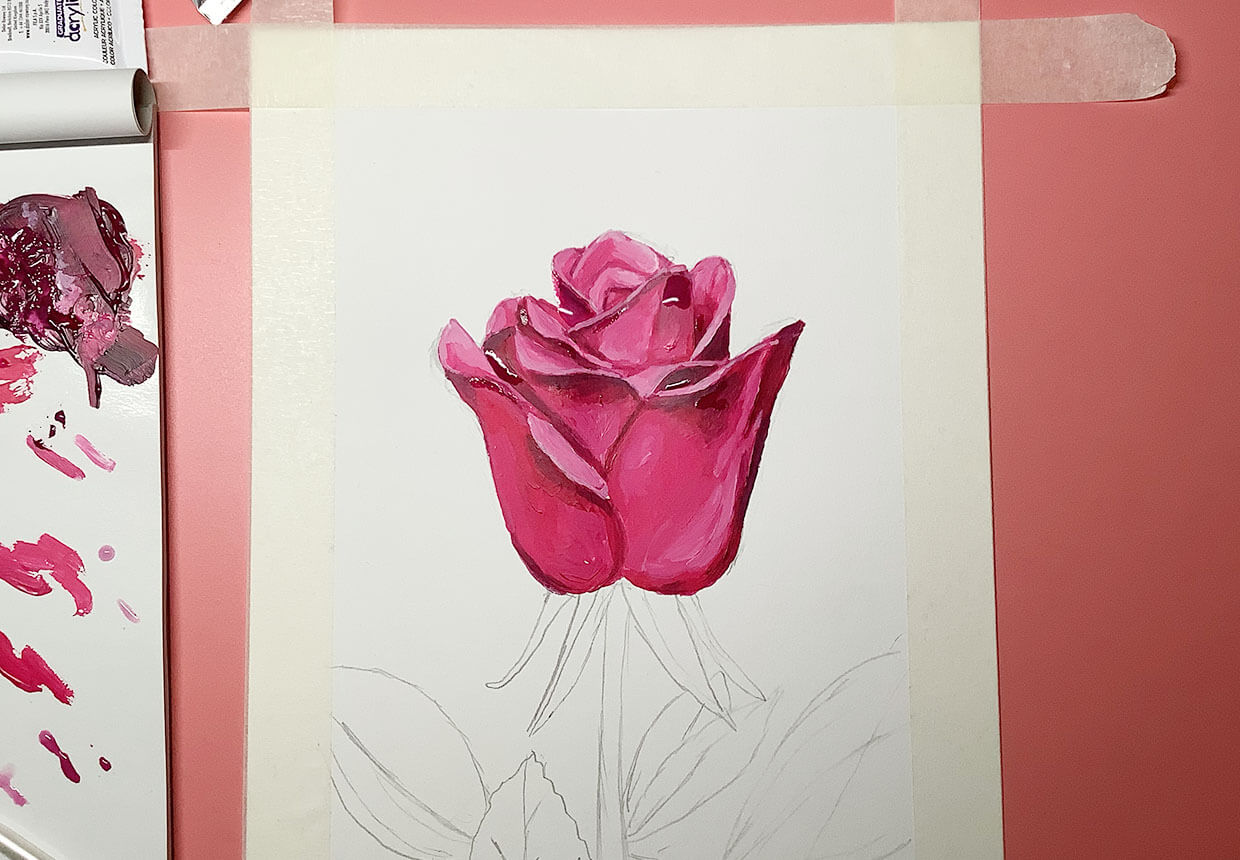
If you closely look at your rose, you’ll notice that there are some areas between the petals that are even darker.

Take your darkest petal shade and mix it with a different colour (such as black) to make it even darker. Use a fine brush to add these little shadows to your painting.

Step 6 - painting darker shadows


Step 2

Lift your painting with the brightest highlights

Now for the highlights! Take your lightest petal shade and make it lighter with a little white paint. Use a fine brush to add highlights along the very edge of the petals.

If you want it to look as though your rose is catching the sun’s rays, you could also mix a little yellow into the paint to add warmth to your painting.

To prevent smudging, try painting the individual petals separately to get a smooth gradient.

This is a good time to go over your rose and tidy up any areas that look messy or inaccurate.

Step 7 – adding the brightest highlights

Painting a natural-looking stem and leaves

Step 1

Creating an elegant stem

If you like, you can paint more roses surrounding your original rose or you can add leaves and a stem.

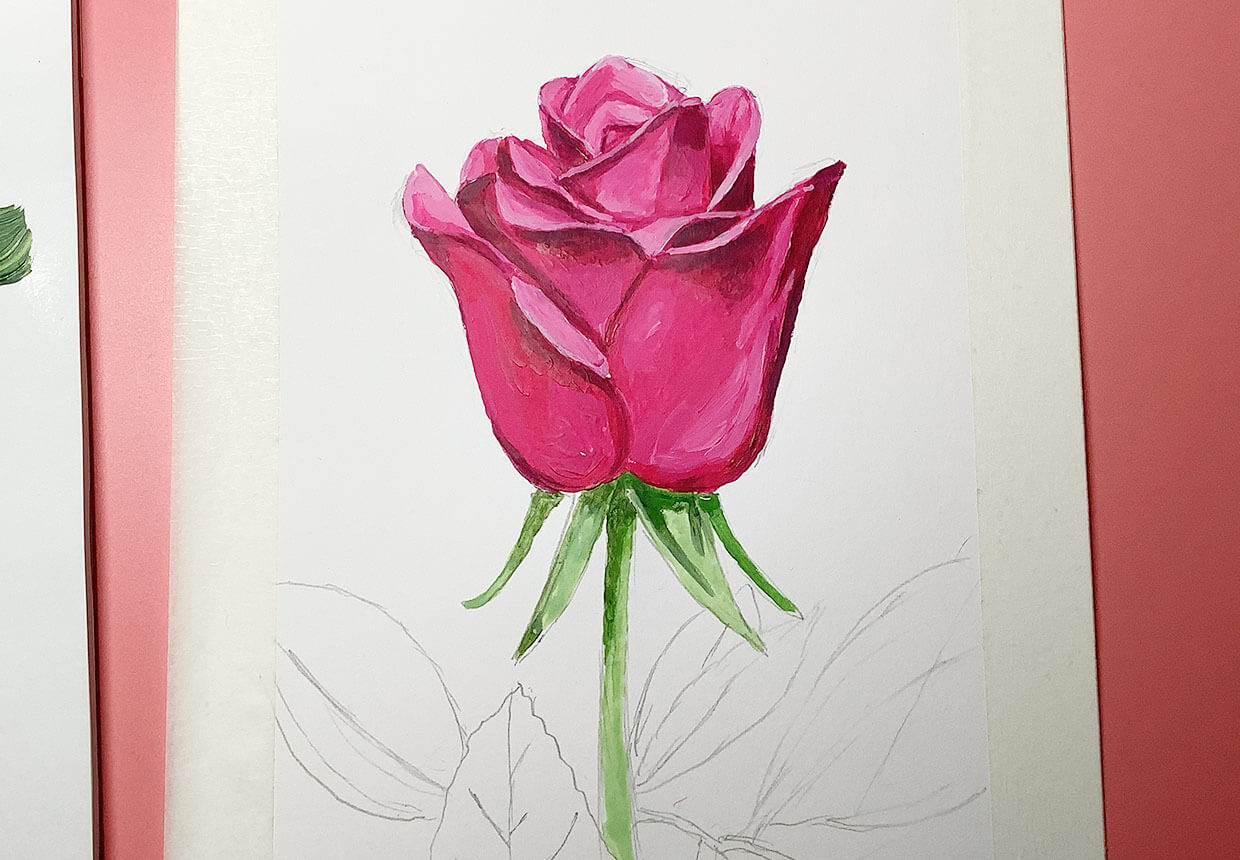
For the stem, you’ll need to mix three tones of green. Start by adding the mid tones, then move on to the shadows and the highlights. Use a fine brush to keep the stem looking even. You can add a few thorns along the stem if you wish.

If you didn’t draw a stem at the beginning, you can lightly sketch the outline using one of your lighter green tones and a fine brush. Curve the stem slightly for a more natural look.

Step 8 - painting the stem

Step 2

How to add a realistic leaf

You can add a leaf if you like. Sketch the outline using one of your green tones, then fill it in using the same colours you mixed for the stem.

Use a fine brush to add little points along the edge of the leaf, along with any additional highlights or shadows. You can also use the fine brush to add little veins along the leaves.

Step 9 – adding realistic leaves

Step 3

Lift your rose painting with a bold background (optional)

If you want to add a pop of colour to your finished painting, try painting a coloured background. If the edges of your painting are a little messy, this gives you the chance to tidy them up.

Use a fine brush to go around the edges of your rose. Then use a flatter brush to fill in the rest of your background. Use alternating vertical and horizontal brush strokes to make the background smooth and even.

Step 4

Revealing your finished masterpiece

Once the paint has dried, it’s time for the most satisfying part of the project: peeling away the tape to reveal your finished painting!

Make sure you remove the tape from the paper by pulling it sideways at an angle – this will stop the paper tearing.

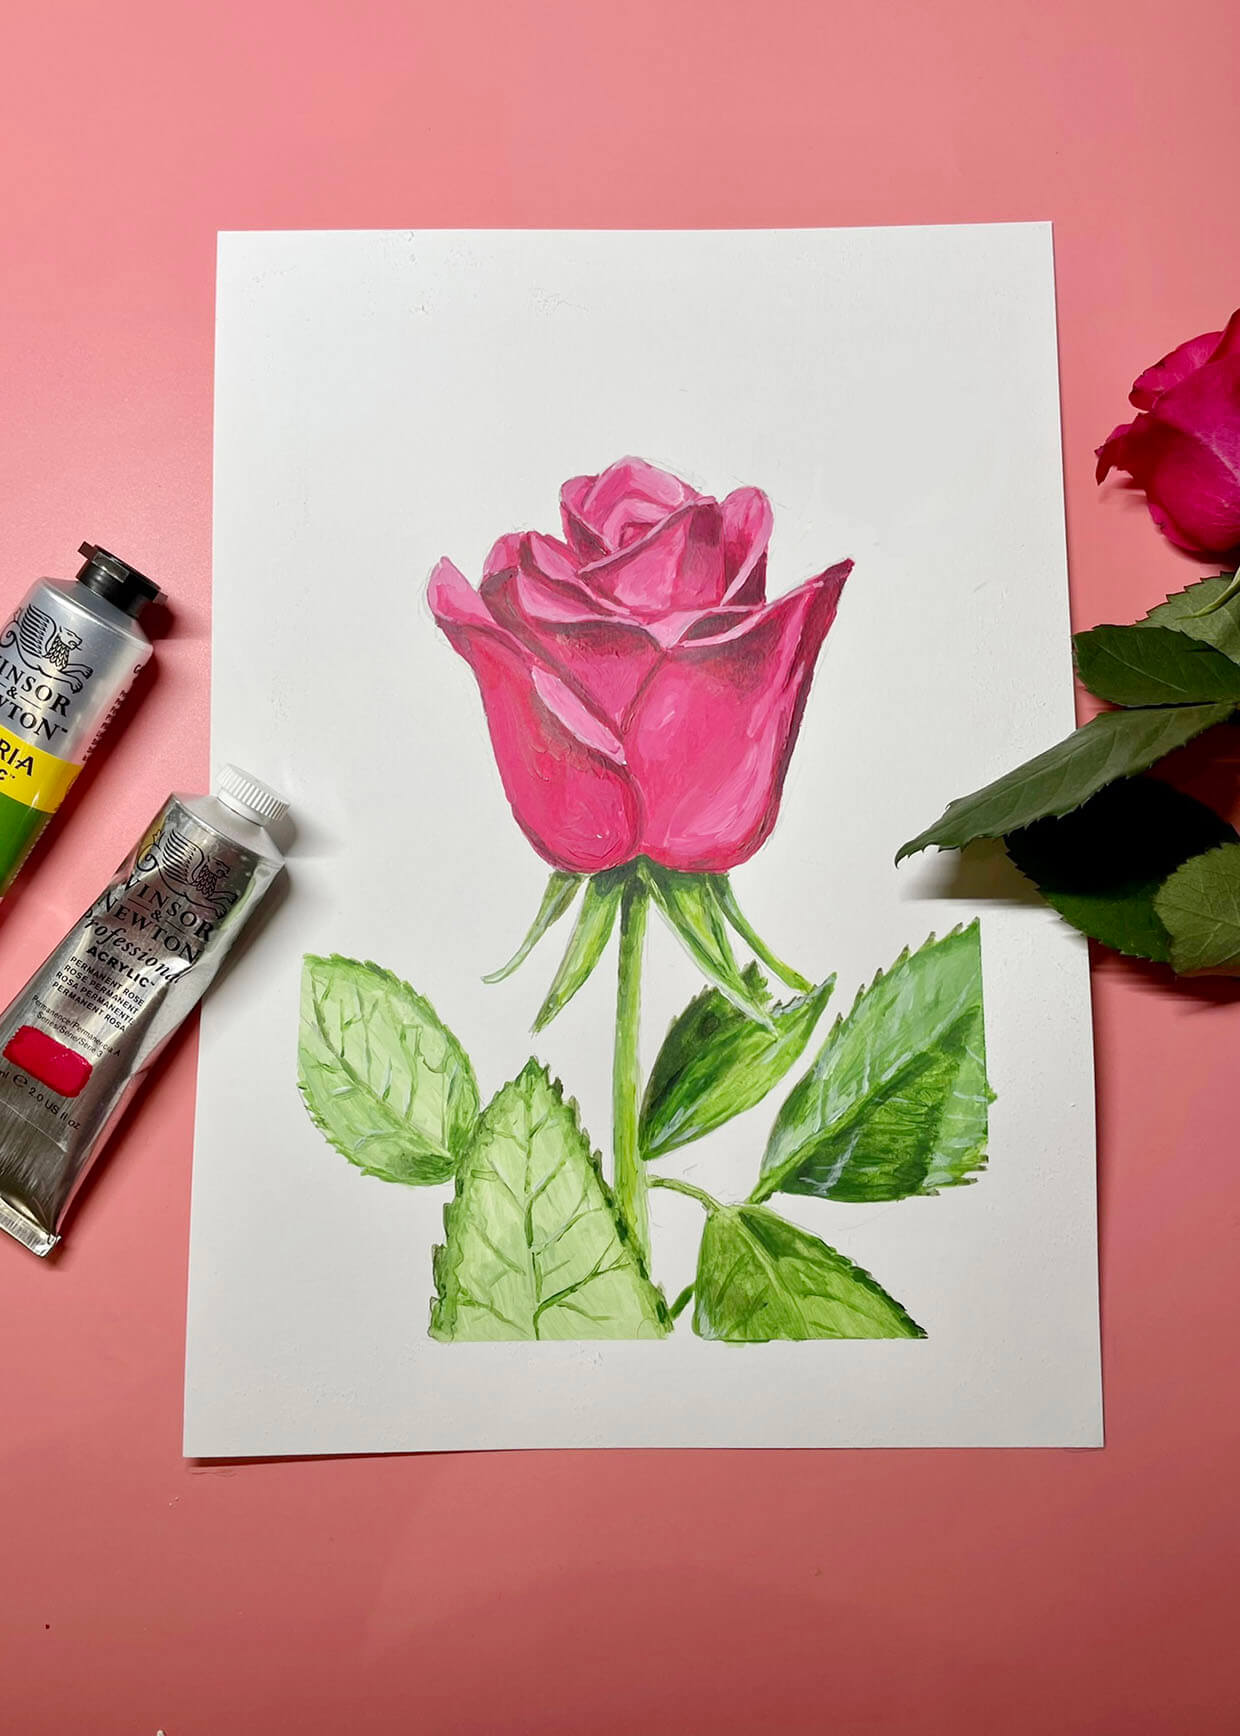
How to paint a rose

How to make your rose paintings even more stunning

You should now be able to produce your own stunning rose paintings with ease. Once you’ve learned the basic skills, you can start to experiment and develop your own unique painting style.

In this easy rose painting tutorial, you’ve discovered how to sketch a rough outline, how to blend paints to get smooth gradients and explored basic colour mixing techniques.

You’ve learned how to use shadows to create a sense of depth and how to add luminous highlights to bring your painting to life.

If you want to take your rose paintings to the next level, it’s a good idea to go back to basics and practice your drawing skills. When you look more closely at a rose, you begin to notice fresh details which you can bring into your work.

Improving your drawing technique will make you a better painter!

Create your own stunning rose drawings with Gathered

Now you’ve mastered painting a rose, why not learn how to draw a rose?

Our step-by-step rose drawing tutorial includes a video workshop to help you sketch your own beautiful blooms.

How to paint a rose