For many of us, the desire to draw and paint the landscape arises from the pleasure and memories of our outdoor experiences, and the challenge in capturing them on canvas or paper. As a professional landscape painter, my passion for the subject comes from the connection that I feel with the landscape and the process of painting it allows me to communicate and share my experience of it with those that view and purchase my work.
Watercolor landscape painting is so much more than making nice pictures of the countryside – it’s an opportunity to share the sense and atmosphere of a place at a moment in time.
Occasionally complemented with pen and ink, I use watercolour for all my work. It is a subtle and delicate medium and its ability to create passages of softly blended colours is perfect for the cool northern light that we experience in the UK for most of the year. Even on a grey winter’s day there is a wonderful spectrum of hues to be found in a leaden grey sky or in the apparent tedium of a brown hedgerow. Keen observation and the endless colour opportunities that are available on a skilful watercolour painter’s palette allows the seemingly dull to become dynamic.
Unlike other media, the equipment needed to paint in watercolour is simple and easy to use and that allows me to make an immediate response to the landscape around me, particularly on location, helping me to capture fleeting moments of light or outrun the incoming storm! In the studio, watercolour’s quick drying time enables me to complete paintings quickly, ready for the galleries that represent me or the clients from whom I receive commissions.
For the beginner a good quality set of materials can be assembled without the need for great expense, making watercolour easily accessible to many. As you become familiar with the way that watercolour behaves – and misbehaves – you will find yourself engaged with a captivating activity that challenges and rewards in equal measure. Of course, the medium works well for a variety of different subject genres, but I can’t help thinking that it was somehow designed for landscape painting!
Looking for more painting inspiration? Check out our watercolor painting ideas, learn how to paint a watercolor portrait or how to paint a watercolor galaxy.
What is watercolour?
Before you get started with watercolour, let me introduce you to its most important characteristics. Firstly - and this is where it differs to all other media – it is transparent. As you dilute the paint with water it allows you see the brightness of the white paper shining through which gives a good watercolour painting its sense of freshness and luminosity. Because you can see what is underneath, it also becomes very difficult to hide your mistakes! For this reason, despite its simplicity, watercolour is perhaps the hardest medium to master.
Secondly, watercolour is unpredictable. We know that water will flow where it wants to and often there is little we can do about that. A skilful watercolourist understands this and becomes adept at persuading the paint to comply with their ideas and brushstrokes.
Finally, watercolour dries lighter than how it appears when you apply it to the paper. In some cases, this can be up to 40% lighter depending on the colour.
If you would like to see what these attributes mean in practice, then watch my What is Watercolour video on YouTube, which is aimed at those with no prior experience of the medium.
Watercolor landscape painting materials
I have used Daler Rowney products since I started painting and have always found them to be excellent quality and sensibly priced. For beginners, the Aquafine collection of paints and brushes is a good place to start and The Langton range of paper is ideal. To paint along with me you will need the following equipment:
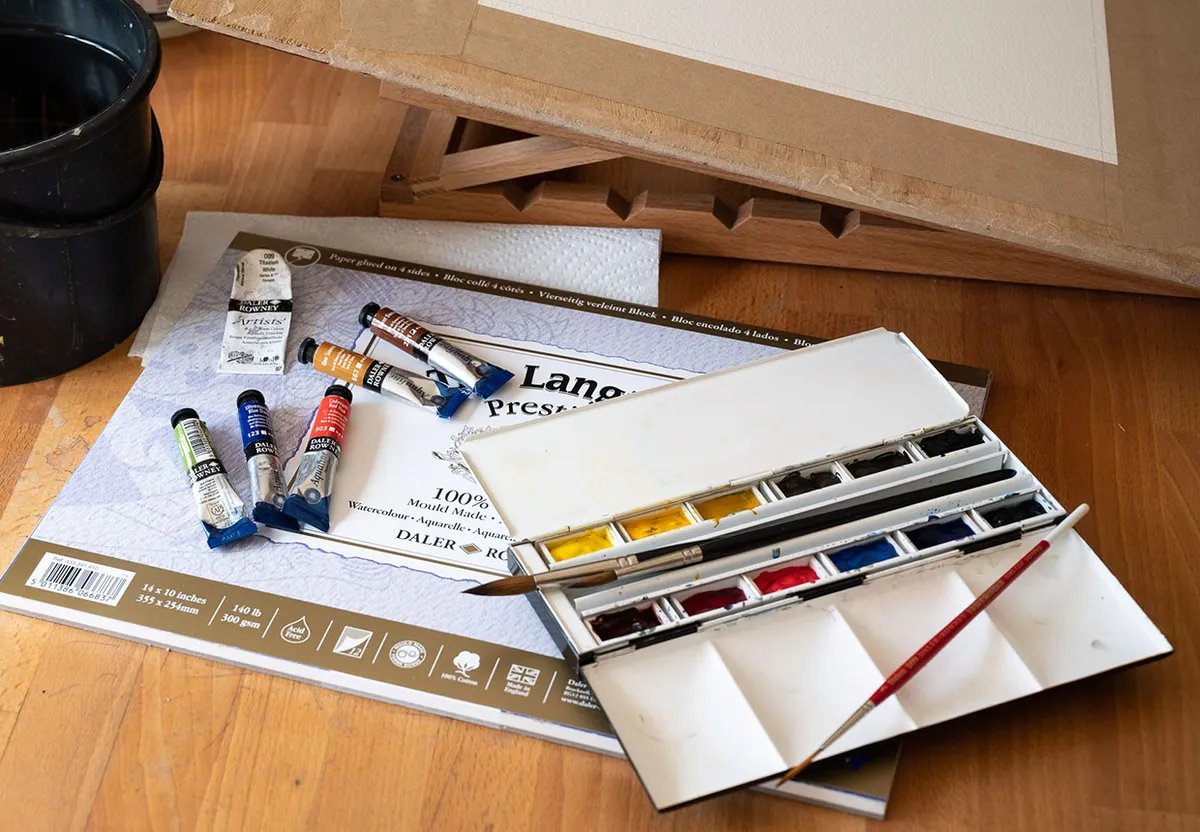
I have used Daler Rowney products since I started painting and have always found them to be excellent quality and sensibly priced. For beginners, the Aquafine collection of paints and brushes is a good place to start and The Langton range of paper is ideal. To paint along with me you will need the following equipment:
Paint
Either tubes or pans, but you may find the amount of paint on your brush easier to control by starting off with pans. I have used a limited palette of colours for this painting, as I do for all my work, and I will show you how to mix those to achieve the colours we need.
- Blue - French Ultramarine or Ultramarine (B)
- Red – Cadmium Red or Rose Madder (R)
- Yellow – Raw Sienna (Y)
- Brown – Burnt Sienna (S)
- Green – Hooker’s Green (G)
- Titanium White (W)
Brushes
Round brushes – sizes 10 and 6 1 inch hake/flat brush Rigger or liner brush.
Paper
Cold Press or Rough surface 140lb (300gsm) paper, A4 size (or approx. 30cm x 21cm). To help you achieve some texture with your brushstrokes I normally suggest Rough for most landscapes.
If your paper is a loose sheet, then you will need to fix it to a board with some tape. I would recommend using a block (sheets that are gummed together on all sides) as this reduces the paper’s capacity to buckle when wet.
Studio equipment
- Mixing palette, if you don’t have one already to hold your paints (white ceramic plates work perfectly well for this.)
- Filled water pot
- Paper towel or something to help you regulate the amount of water on your brush
- Support for your board or block – they should be tilted at a shallow angle towards you
- Piece of spare/scrap paper to test you colour mixes
My YouTube video ‘Watercolour Equipment – An Introduction for Beginners’ will give you more help if you’re unsure what is best to buy:
How to paint a watercolor landscape
For this easy landscape painting exercise, I’m going to show you the techniques and stages needed to paint a simple landscape. Poole Harbour in Dorset is one of my favourite landscapes to paint and features regularly in the work that I sell through my gallery in Swanage – The Mulberry Tree Gallery. It’s hard to beat this view from the shore across to Brownsea Island in the distance, with the Purbeck Hills beyond. Painting this scene will introduce you to the following techniques:
- Colour mixing using your three primaries (red, yellow and blue) – an essential discipline for successful landscape painting.
- Painting a flat wash
- Painting a variegated wash
- Suggesting texture with broken washes
- Controlled and dynamic brushstrokes
I have broken the painting down into a process of manageable stages for you to follow for this watercolor landscape tutorial. Of course, it isn’t possible to give you a detailed description of every brushstroke and indeed it wouldn’t be helpful to do so.
Before you start painting, take some time to read through all the stages and look closely at the finished painting so that you are familiar with how the exercise will develop. One of my top tips for watercolour success is to have a clear vision of where each painting is heading and how to get there as it’s easy to lose sight of this as you move through the various stages.
As you start to paint, try not to simply copy every single mark that I have made – watercolour is best handled with a degree of freedom, and you’ll find that your work will become too tight if you are concerned with replicating every brushstroke that I have made.
For my colour mixes, I have used the notation next to each colour mentioned above and the order represents the most prominent colour first – e.g. (B + Y) is a mix of blue (Ultramarine) with a lesser amount yellow (Raw Sienna) mixed, to create a soft green colour.
Are you ready? Read on to learn how to create your own watercolor landscape painting.