
Cyanotype printing is a fun and creative craft that makers of all ages will enjoy.
Through the magic of science, you can create incredible artworks with this alternative photography technique, with plenty of opportunities to experiment and get creative.
Everything you need to know about cyanotype printing
Read on to learn everything about cyanotype printing, or if you’re looking for a specific piece of information you can use these handy links to go directly to each section.
- What is a cyanotype
- How does cyanotype printing work
- Are cyanotype chemicals toxic
- What do you need to make a cyanotype
- Where to buy cyanotype paper and where to buy cyanotype chemicals
- The best cyanotype kits to buy online
- How to make a cyanotype
- How to make a cyanotype on fabric
- Can cyanotypes be different colours
- How to turn an image into a cyanotype
- Cyanotype ideas to try experimenting with
- How long does a cyanotype last
- How to dispose of cyanotype chemicals?
What is a cyanotype
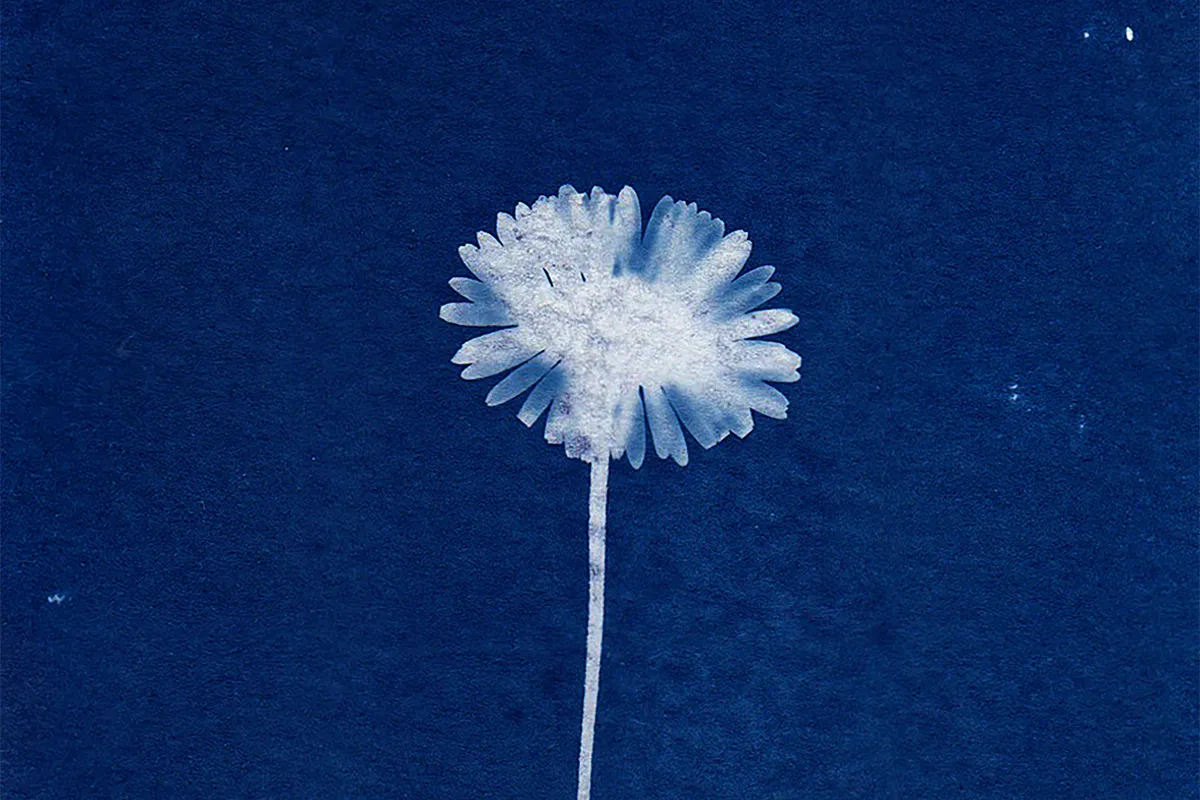
A cyanotype is a monochrome print or image made by placing objects on a pre-prepared light-sensitive surface.
As cyanotypes are created without a camera, the prints or images they create are correctly called ‘photograms’. The very name ‘cyanotype’ is derived from the Ancient Greek words for ‘dark blue’ and ‘mark/impression/type’.
The vast majority of cyanotype printing creates a negative photographic image on a dark blue surface – the light-sensitive surface is exposed to the sun to ‘develop’, capturing the shadow of the objects placed on the surface, creating a stencil-style image.
This precursor to modern photography was discovered in 1842 by Sir John Hershel, and was quickly adopted and experimented with by various artists.
This photoreactive process was also used in the early period of reprography, most notably for blueprints. As cyanotypes create a negative image once exposed and fixed, the original technical drawing would be reproduced as white lines on a blue background – hence how they got the name of blueprints.
While advancements in photography and printing mean blueprints are no longer made in this way, this alternative photographic process is still used and practised by artists to this day.
The term ‘cyanotype’ refers to an image made via this specific process and cyanotypes can be made on a range of surfaces and mediums.
Most prints are made on thick paper, however cyanotypes can also be made on fabric, wood, glass and many other materials.
How does cyanotype printing work
You can buy prepared cyanotype paper or cyanotype kits where you prepare the light-sensitive solution yourself. Whichever way you choose and whatever medium you use, the process works in the same way.
To start, you place your objects (which will be the subject for your cyanotype) on top of your light-sensitive paper or other medium. You then expose this to sunlight.
The amount of time that you leave your surface exposed to the sun for determines how strongly the image will be transferred to your cyanotype, so exposure times can vary – roughly 5 minutes or less on a sunny day to 20 minutes or more on a dull day.
However, different effects can be achieved with different timings – in theory, the longer you leave it the stronger the print.
Once your image has been exposed, wash the solution off your paper in cold running water for a few minutes which will ‘fix’ your image.
As you do this, you will see the image reverse to give you your negative cyanotype – where the parts fully exposed to the sun turn blue and parts hidden under your subjects stay white (or clear, depending on the colour of your paper/surface). You then blot as much water off as possible and leave your print somewhere safe to dry.
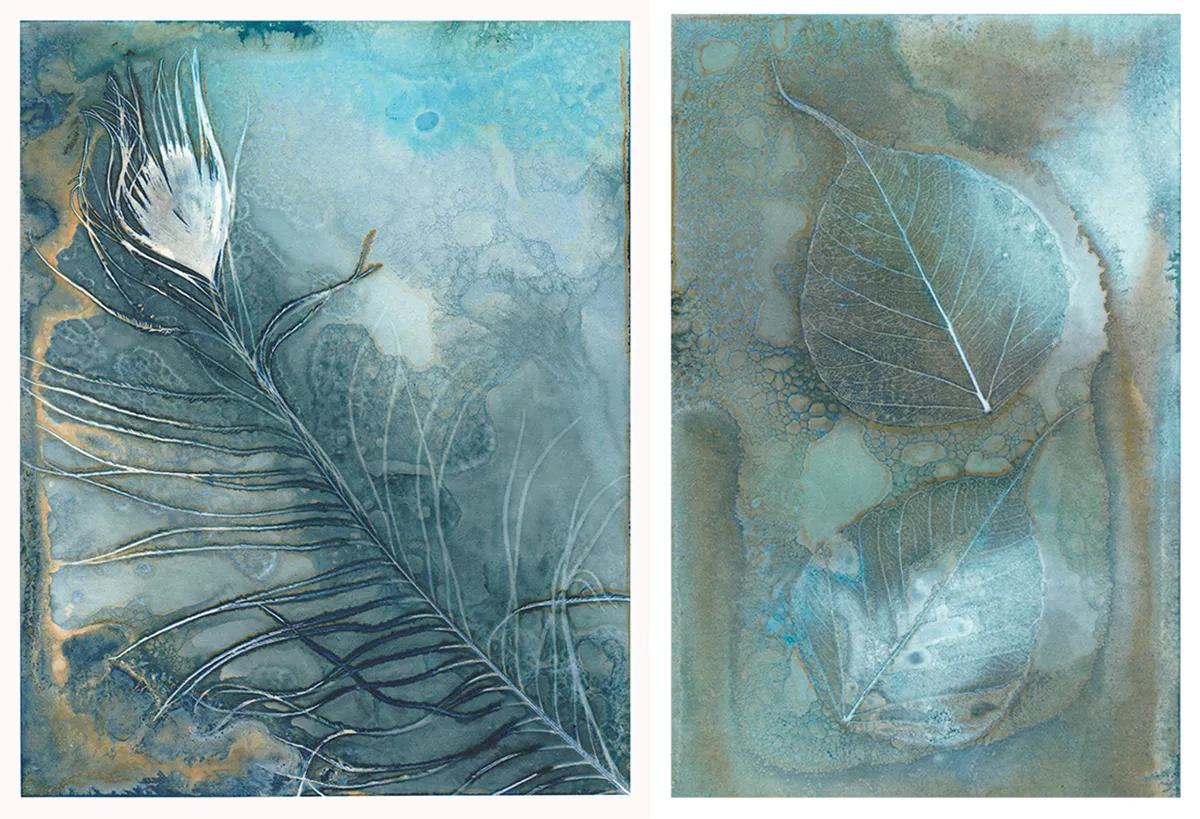
Much in the same way that exposure times can alter your final print, so can the transparency of the object used.
The translucent qualities of items such as flower petals or feathers can be captured and create ghostly images if given adequate exposure, or alternatively semi-clear items such as bubble wrap or clingfilm can also be used to create interesting textural effects.
The science behind cyanotypes
It all stems from the light-sensitive qualities of iron compounds. Ferric ammonium citrate (or more commonly ferric ammonium oxalate) and potassium ferricyanide are combined, and then coated onto a surface and allowed to dry in a dark place.
When exposed to the sun, the ultraviolet rays react with the ferric ammonium citrate or oxalate, which leads to a reduction in the iron compounds, which then react with the ferricyanide to create the deep blue pigment known as Prussian Blue.
As the light sensitive solution is exposed to the sun, you will see the exposed parts first change from a yellow tone to a green/turquoise colour, gradually changing to a lighter silvery grey/green shade.
However, when you ‘develop’ or fix the image by washing with water, you wash away the water-soluble iron compounds leaving only the Prussian Blue pigment in the exposed areas – reversing light and dark to give you your negative image.
Are cyanotype chemicals toxic
As a general rule, cyanotype printing is perfectly safe and as long as you follow guidelines and use common sense there is no reason to fear (and pre-prepared cyanotype paper is completely safe to use).
The main hazard from handling the individual chemicals is that they could potentially irritate the skin or eyes, so you should always wear gloves when handling solution and wash your hands/skin thoroughly before and after.
If any of the solution or chemicals come into contact with eyes, rinse thoroughly and seek medical advice.
While cyanotype photography is a great craft to try with kids, you should still ensure that the wet solution is prepared by adults and chemicals are kept out of reach of children (or buy a prepared kit for them to use).
One of the larger risks is not toxicity, but staining! The final solution can heavily stain, and you may not even realise you’ve stained a surface or piece of clothing until you get it wet. For this reason it’s wise to wear gloves to protect your skin, an apron to protect your clothes and protect any work surfaces with newspaper first.
If you intend on getting experimental with your cyanotypes and incorporating other ingredients or trying ‘wet cyanotype’ printing (which we’ll cover later), then you do need to be careful with your ingredients.
Adding extra substances can interfere with the chemical reaction, which could potentially lead to fumes being created. Whenever adding anything other than the supplied ingredients, always do your research first and work in a well-ventilated area just to be safe.
What do you need to make a cyanotype
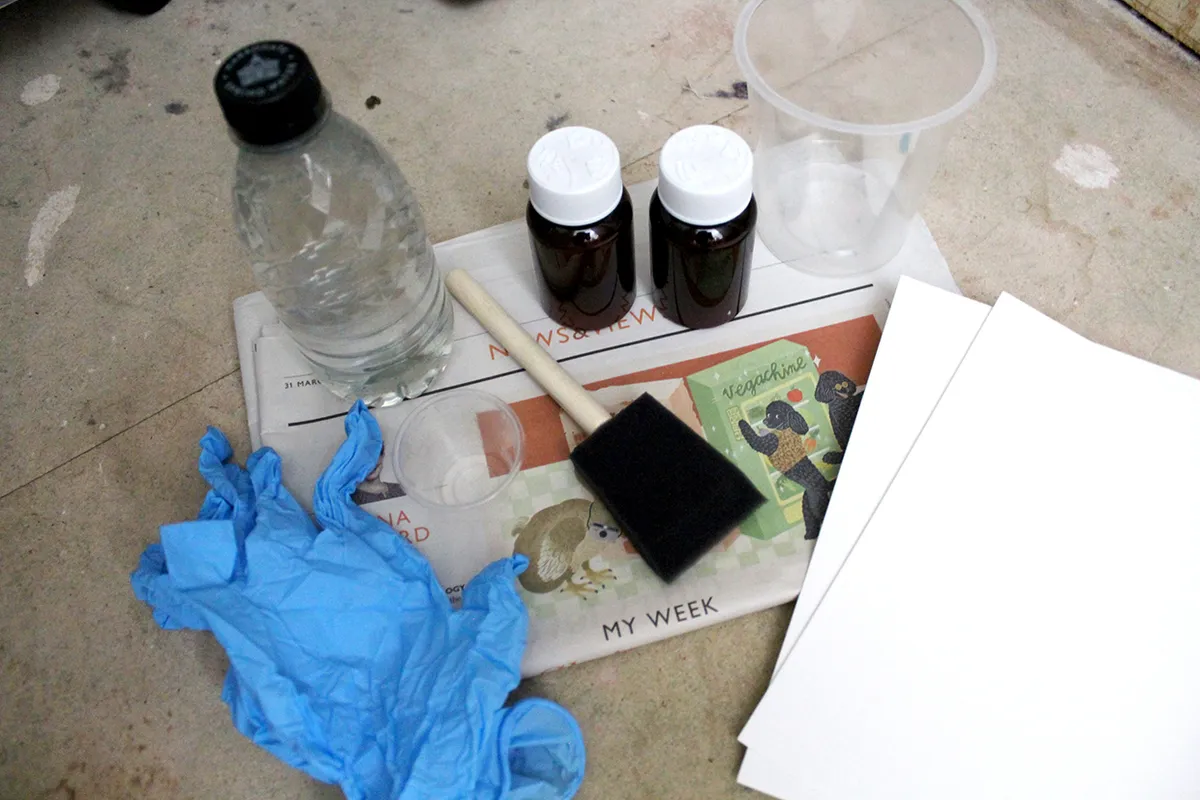
As well as your prepared cyanotype paper or chemical solution (which we'll cover next), there are various extra items that you’ll need to create your cyanotype prints:
Subject items for your cyanotype print
This may seem obvious, but taking time to think about and collect your subject items before starting to prepare your prints is one of the most important steps of cyanotype photography.
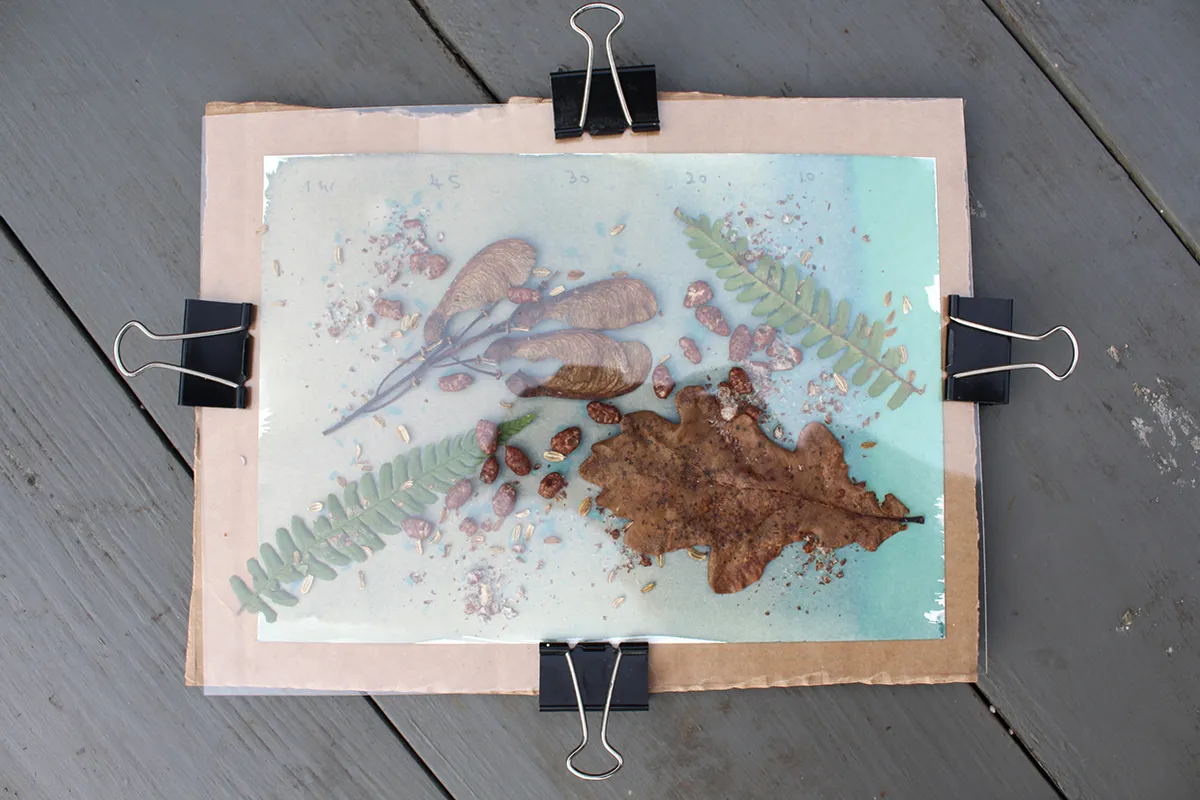
Cyanotype printing starts the moment you expose the surface to the sun, so it’s wise to have all of your subject items prepared and ready to hand. It’s even worth planning out the composition of your print beforehand on a plain piece of paper, so you can quickly move the items onto your cyanotype surface once you’re ready.
A sheet of glass or perspex/acrylic sheet
Many cyanotype kits include a picture frame or sheet of clear acrylic or perspex. However, this isn’t for framing your prints! By laying a piece of glass over your subject items, they will be pressed closer to the surface while still being exposed to the same amount of light, producing cleaner and more detailed cyanotype images.
It’s not always necessary or even possible to use a piece of glass with some items, and in fact sometimes you might enjoy the ghostly effect that can happen with edges that are not flat with the surface. It’s particularly useful for items such as leaves or flowers that will have natural curls that would prevent them from lying flat on your paper.
If you’re preparing and applying your cyanotype solution yourself, you will also need the following:
A sponge brush
Regardless of whether you’re applying your cyanotype solution to paper or fabric, you need to ensure you get an even coat. You could use a regular paintbrush, but using a foam sponge brush means you can get a nice smooth application without any brush strokes.

A measuring cup/mixing pot
When preparing you cyanotype solution, you will need to measure the amount of water that you add to your dry chemicals. You will then need to measure a small quantity of each chemical solution, and then mix them together in a mixing pot (ensure it's big enough to fit your sponge brush into)
Paper or other surface medium
Once you’ve obtained your solution and brush, you then need to sort out your medium.
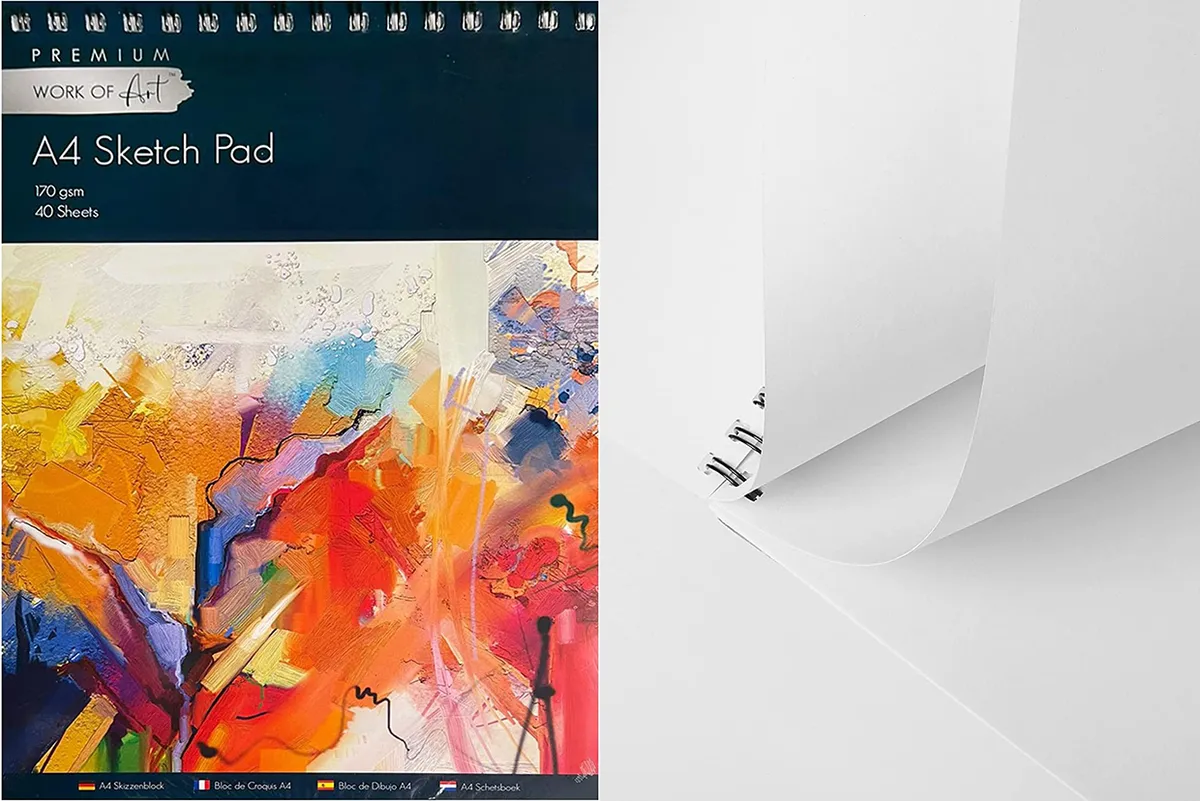
When choosing paper for cyanotype printing, you need to bear in mind that you will be getting the paper wet twice – once when you coat it in solution, and again when you wash it off in water. For this reason, you need to use paper that is relatively thick and won’t break apart when wet, so aim to use paper that is a minimum of 100GSM or above – the thicker the better.
Cartridge paper is the most widely used paper type for cyanotypes, watercolour paper also works well and other types of paper can be used to create different results. Whatever type you use, you want to use acid-free paper so that it doesn’t interfere with the chemical reaction.
If you want to print on fabric, this is best done on 100% unbleached cotton (often called calico). We have seen cyanotypes made on 100% silk fabrics too with interesting results, however fabrics that have already been dyed/treated or that are blends of fibres could create reactions that might affect or corrupt your cyanotype images.
Rubber gloves and an apron
We mentioned earlier cyanotype solutions can easily stain skin, clothes and clothes. Even if you are really careful when applying your solution, it’s still easy to splash some onto your clothes when you’re running your print under cold water when you develop/fix it.
Wearing some thin rubber gloves will give you more dexterity than household kitchen gloves and a general-purpose apron will help to protect your clothes. Remember that it’s possible that you might not even notice that you’ve got cyanotype solution on your clothes until you next wash them and the solution develops.
Newspaper for protecting surfaces
As well as protecting your skin and clothes, it’s also important to be aware that cyanotype solutions can easily be absorbed and stain surfaces too. You should make sure that your work area is adequately protected with a few layers of newspaper.
It’s also wise to put protection underneath the paper or fabric that you are printing onto too. Depending on how thick or thin your medium is, there is a potential for the solution to soak through and stain the surface below, particularly so with fabric.
You may find it easiest to place a sheet of cardboard below your medium, which will not only protect your surface but will also make it easier to pick up and move your medium when exposing it to the sun.
A towel, paper towels or hair dryer
Once you’ve exposed your cyanotype print to the sun for an adequate amount of time, you need to wash it under running cold water to develop your print. This then needs to be allowed to dry.
It is helpful to have a towel or some paper towels to dab/blot off any excess water. Your print will dry best if it can be hung (for example, on a washing line) to ensure that it dries evenly and doesn’t stick to the surface below.
You can use a hair dryer on a cool/medium setting to speed up the drying process, although you do need to be careful that you don’t damage your print. If you have the hair dryer on a hot setting it could potentially warp your paper or you could blow water droplets around which could affect or stain your print.
Reuse and recycle
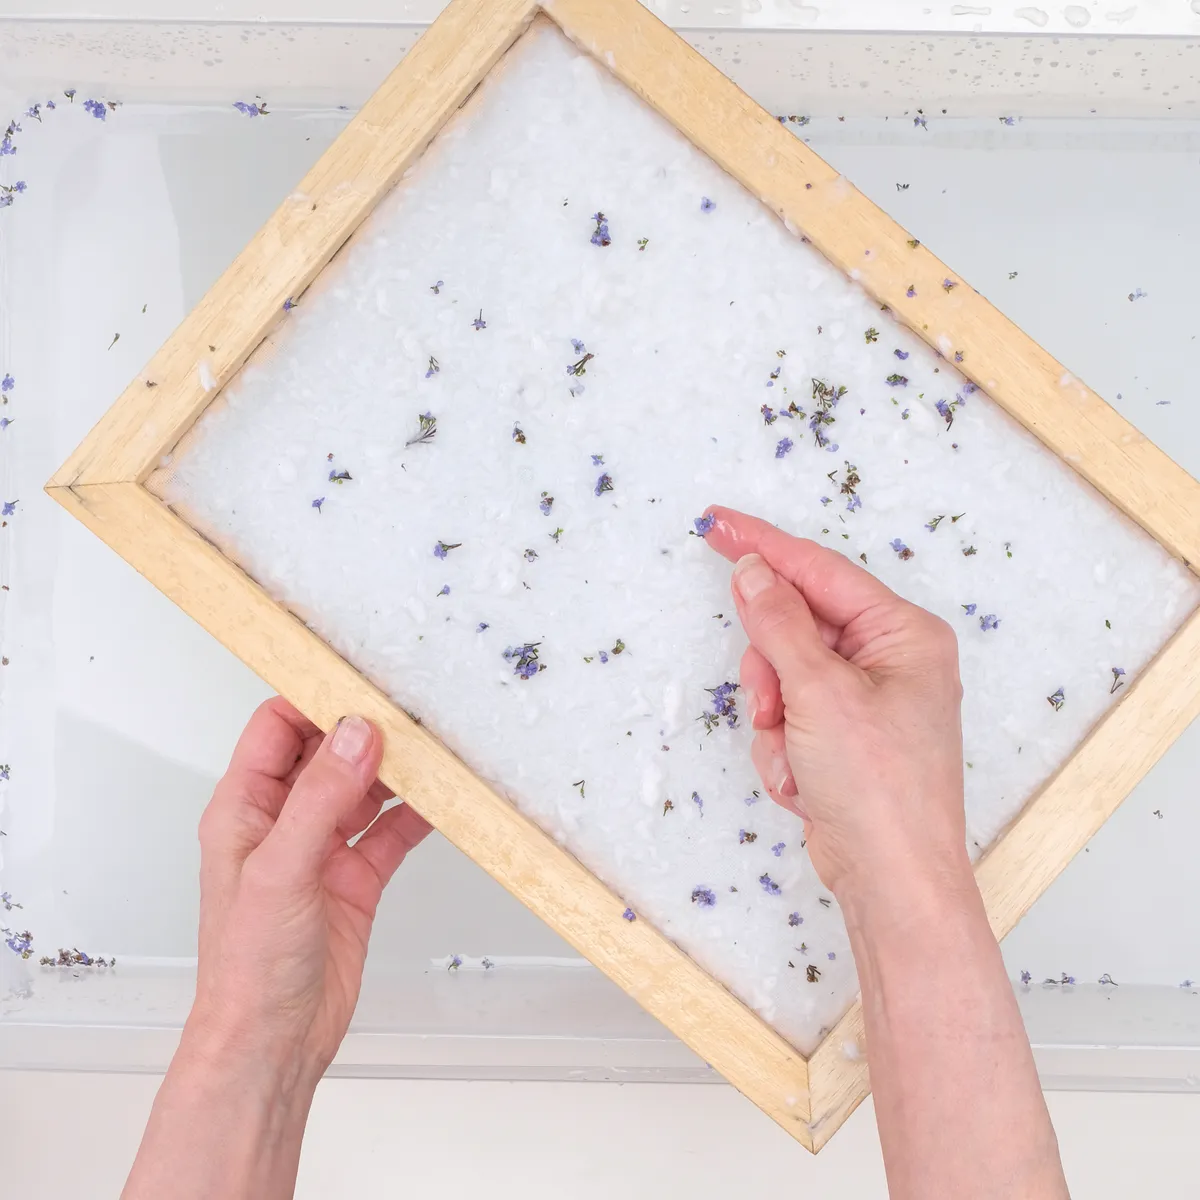
Fancy getting creative with every single step of your print process? Take things one step further and make your own medium by learning how to make paper.
Where to buy cyanotype paper and where to buy cyanotype chemicals

Cyanotype paper is by far the simplest and easiest way of giving this fun craft a try. You can find a wide range of prepared cyanotype paper in various sizes from plenty of suppliers online.
This may be in the form of products from retailers such as Amazon, or from independent suppliers on sites like Etsy. It’s worth having a good shop around and considering what you’ll be using your papers for, as the price, size and quantity of papers can vary dramatically.
When it comes to buying the individual chemicals, the options are a bit more limited. The vast majority of cyanotype chemical products available from larger online retailers are produced by Jacquard.
These are normally in the form of dry chemicals in prepared bottles that you add a certain amount of water to. You can buy Jacquard cyanotype chemicals from Amazon or Cass Arts.
You can also find some independent producers selling cyanotype chemicals on Etsy, although these are often sold as refills for cyanotype kits, which are a great option when trying cyanotype printing for the first time.
The best cyanotype kits to buy online
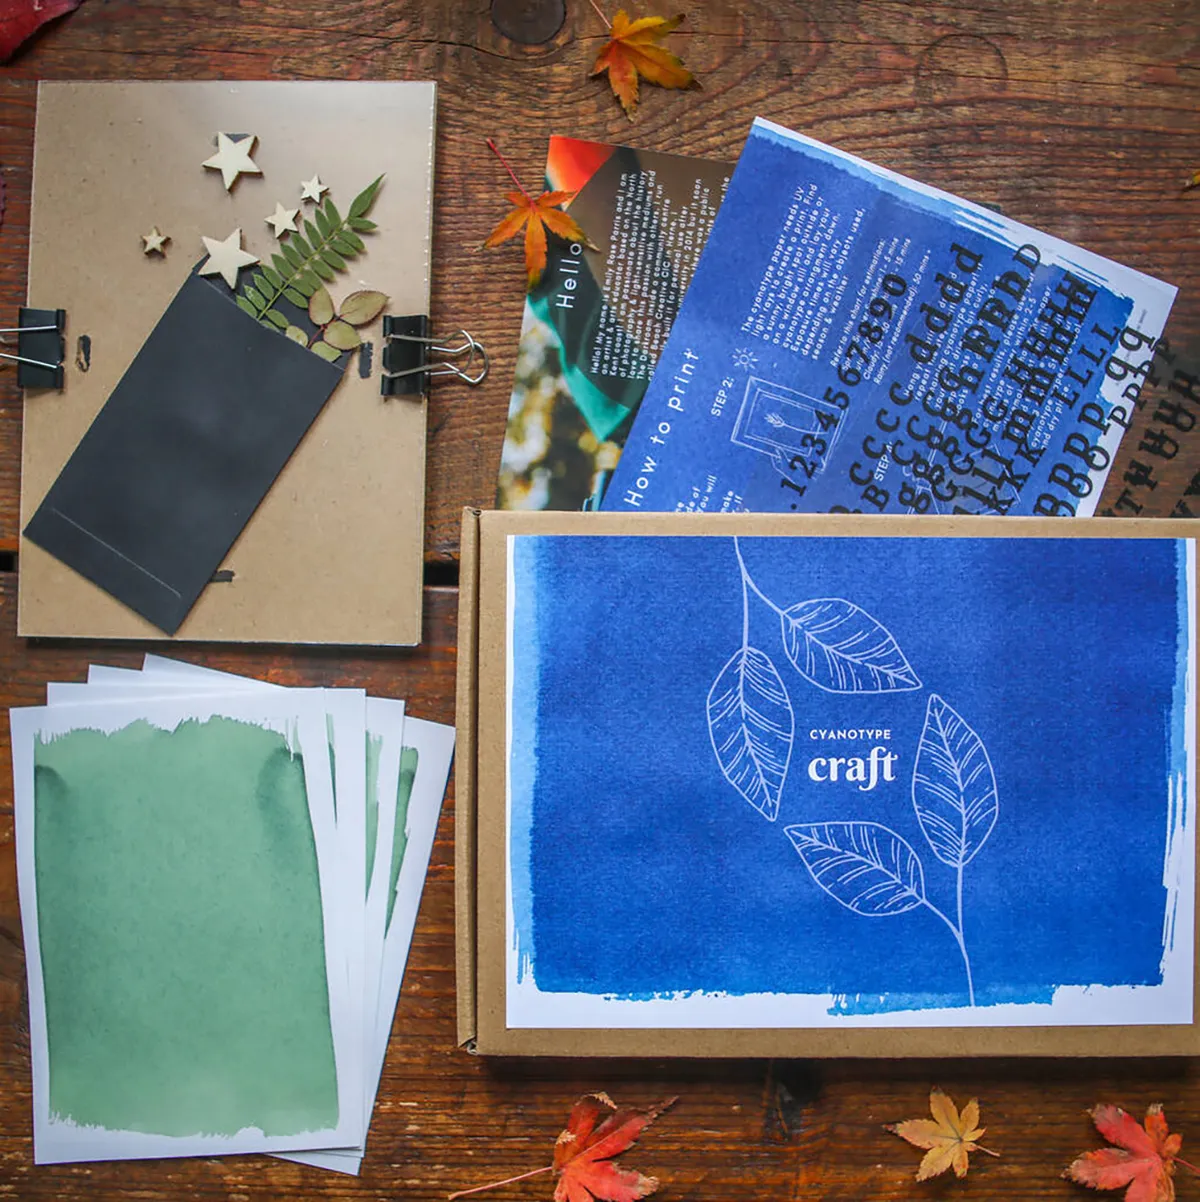
Whether you fancy trying cyanotype printing as a fun crafty activity to do with your kids, or want to get artistic and try experimenting yourself, starting out with a cyanotype kit is a great option for beginners.
You can get a variety of kits online, from simple packs of prepared papers to full kits that even come with elements you can use in your prints.
The kits that include chemicals to apply yourself are worth investing in, as they come with all those little extras that not everyone will have hanging around at home, such as a sponge brush or a black light-proof bag to store your papers.
Once you’ve tried a kit once, you can often get refill packs from the same suppliers with just the chemicals.
Check out our pick of the best cyanotype kits available to buy online.
How to make a cyanotype
We’ll now show you how to make a cyanotype from start to finish. If you are using a prepared cyanotype medium you can skip the preparation steps below and get straight to making.
Preparing your cyanotype surface
Step 1 – Prepare your solution
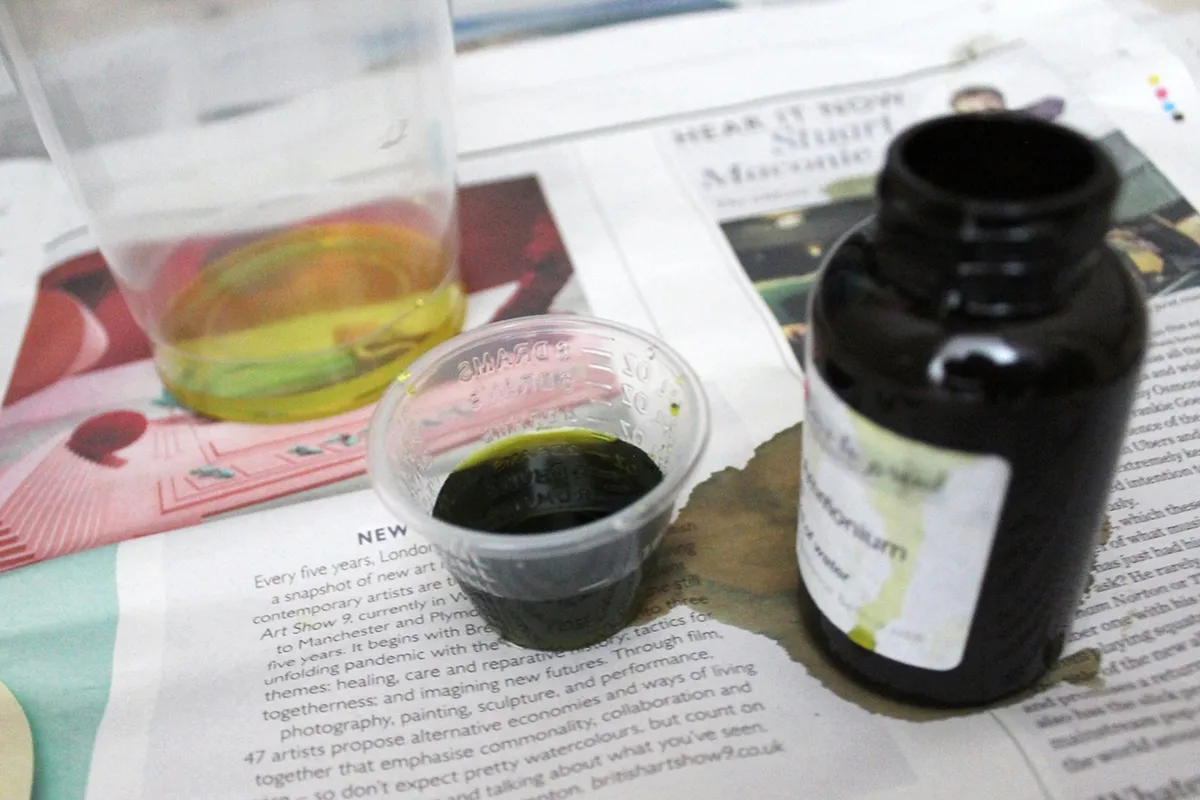
Start off by preparing your cyanotype solution according to the manufacturer's instructions – this may vary slightly with different products.
Generally this process involves adding water to two separate powdered chemicals (normally supplied in separate bottles), mixing well, before combining a small amount of the two solutions together. Alternatively, the two chemicals may come as a liquid form where the water has already been added.
If you live in an area with particularly hard water, you may want to use bottled water when preparing your cyanotype solutions as it tends to be more alkaline than regular tap water, which could potentially interfere with the chemical reaction.
Keep your solutions out of direct sunlight. If stored correctly your separate solutions should keep for approximately 6 months, if not longer.
Step 2 – Coat your surface
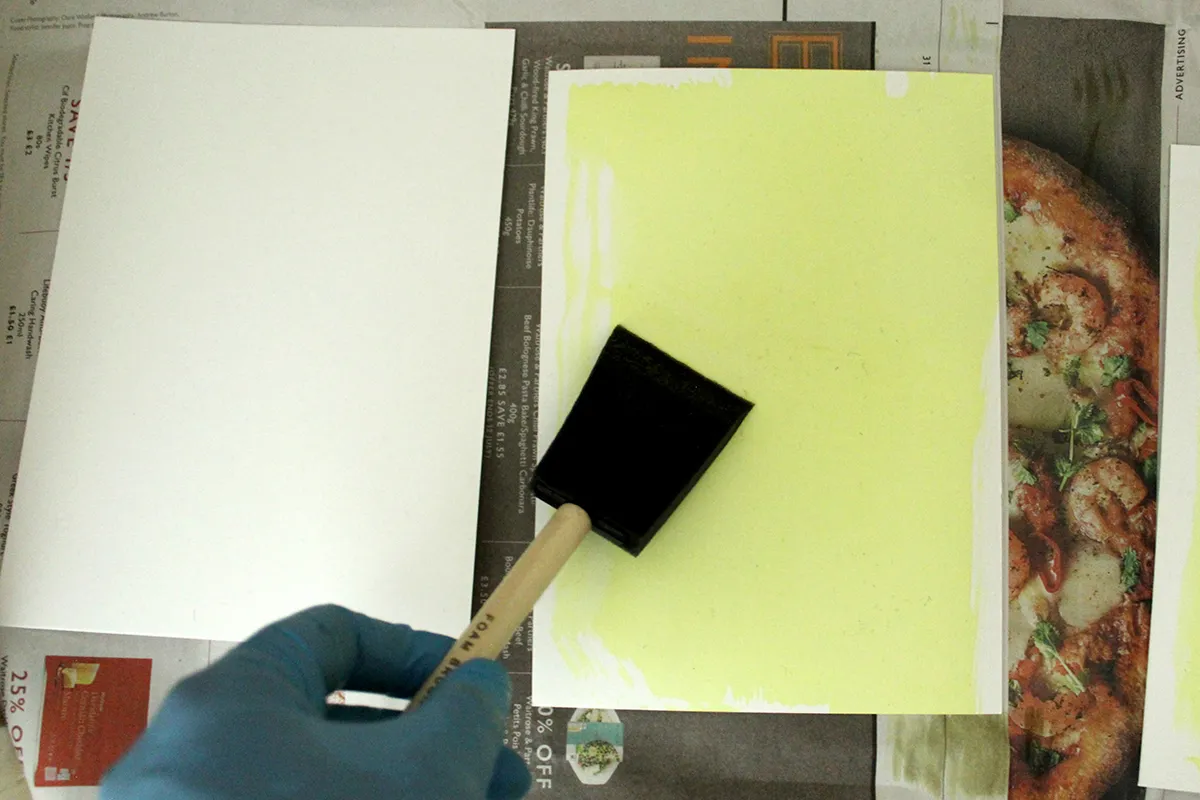
You will need to do the following steps in an area with subdued light, for example, a room with curtains or blinds drawn to block out any sunlight.
While it is the ultraviolet rays from sunlight that trigger the chemical reaction, fluorescent lights can affect the solution too, so aim to keep your room as dim as possible while still being able to see what you’re doing.
Be sure to place adequate protection in the form of newspaper or cardboard underneath and around the surface you want to coat to prevent any possible spills or seepage through your medium.
Wearing gloves, smoothly paint your mixed solution onto your chosen medium. Try to achieve an even coverage. Remember that a little goes a long way, so be sparing with your application.
Step 3 – Allow to dry
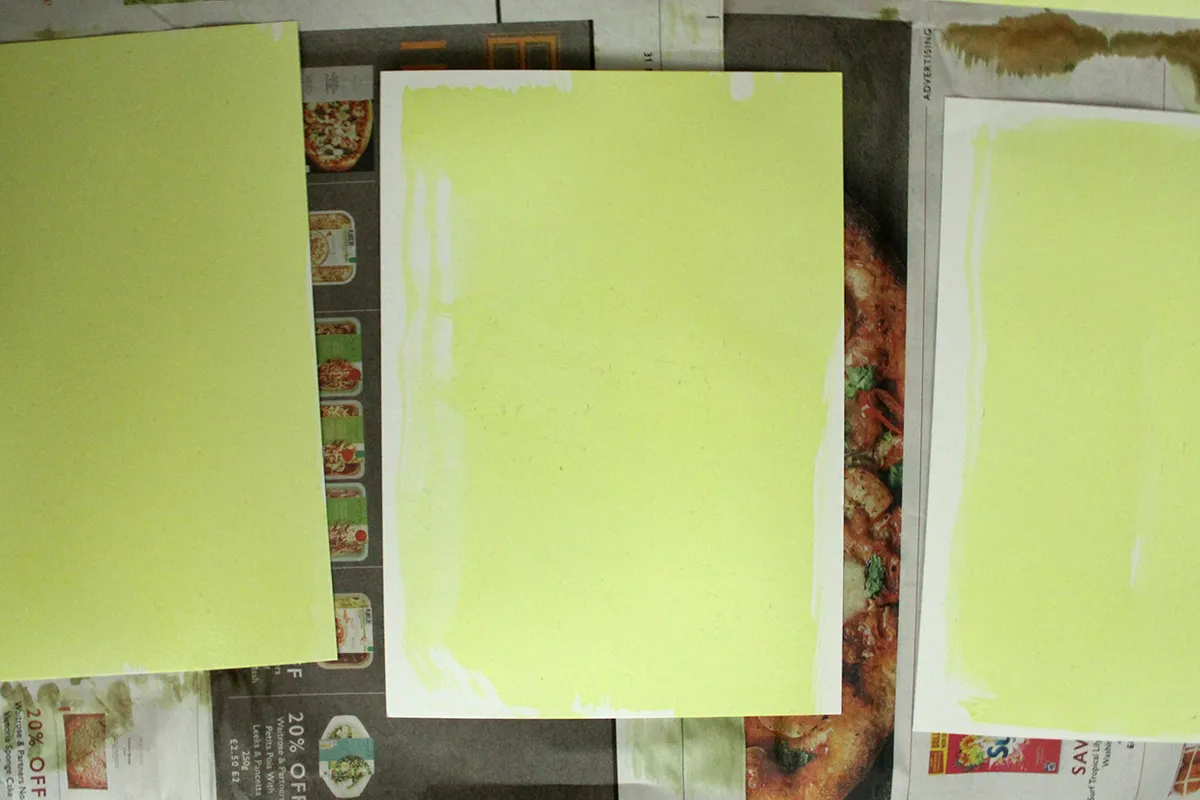
Now you need to let your cyanotype solution dry on your chosen medium. For best results, leave it to dry for at least 24 hours – you may wish to store it in a dark cupboard so that it’s out of the way.
If you are preparing cyanotype paper or fabric to use at a later date, once dry, store your medium in a light-proof black bag.
Making your cyanotype
Step 1 – Prepare your work area
Before getting your cyanotype medium out of its dark drying place (or packaging), it’s a good idea to take the time to prepare your work area.
Make sure you have a clear surface to work on, as well as ensuring you have clear and easy access to a sink or bath for when you need to wash your print.
Step 2 – Plan your cyanotype image
Gather together the items that you plan on using to create your cyanotype image. You could provisionally lay out your items on a piece of paper first to plan out your composition.
Make sure that you place your items within easy reach.
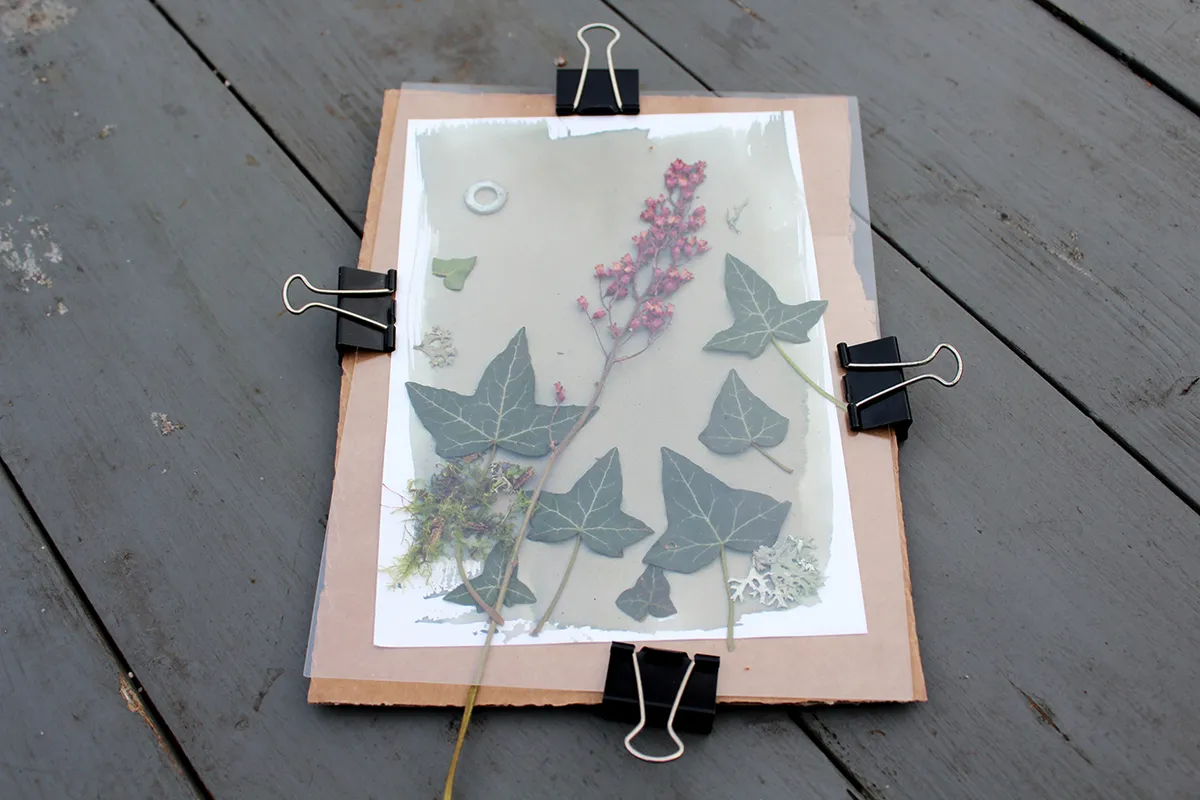
Step 3 – Arrange your objects on your cyanotype surface
Now take out your cyanotype medium and place your objects onto the surface. You want to do this quickly but calmly.
Depending on your setup, you can place your medium in direct sunlight and quickly place your objects on it, or prepare it first in a dimly lit room and then carefully transfer it to a sunlit area.
As cyanotype exposures take minutes (or hours) rather than seconds you don’t need to rush – equally you don’t want to unnecessarily expose the paper. You can make adjustments at the start, but try to do this quickly – once you start exposing your items and surface to the sun any movements can potentially create blurry or underexposed images.
When you're happy with your arrangement, lay a piece of glass on top of your items – this will help to both keep them in place as well as helping to flatten certain items for a clearer image transfer.
Step 4 – Expose your cyanotype to the sun
It’s now time to expose your image. Advice on exposure times varies and can depend on your desired effect. As a general rule, on a bright sunny day it will be exposed after approx 2-5 minutes, whereas on a cloudy day it could take more like 10-20 minutes.
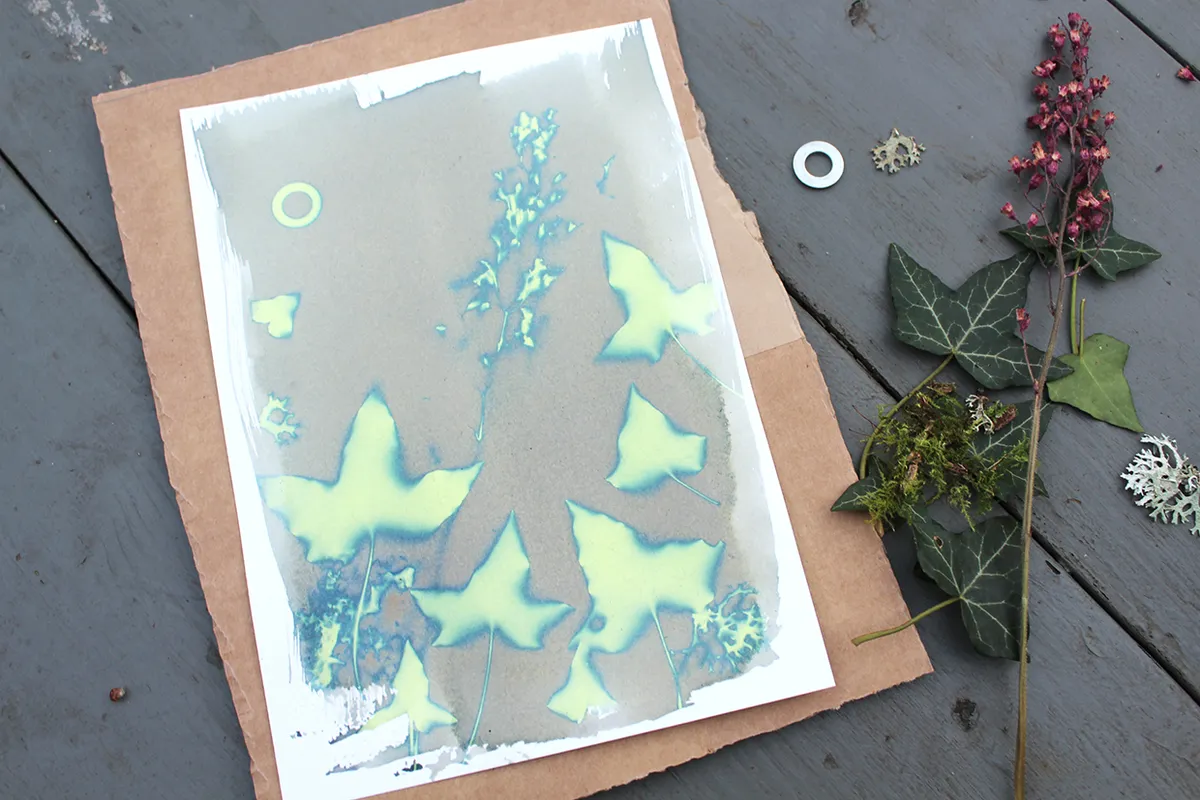
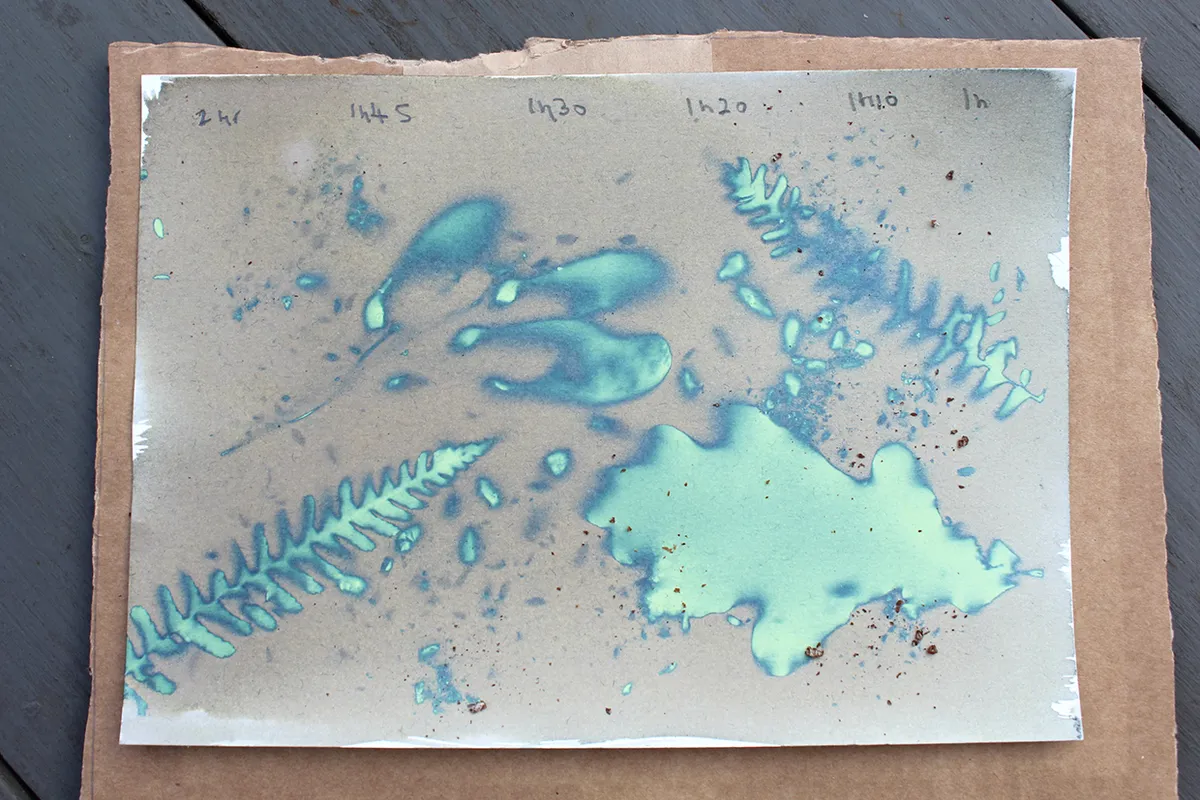
You will see the uncovered sections of the cyanotype solution quickly start to change from yellow to a green/turquoise colour, then as it is exposed to the sun it will gradually turn to a paler silvery grey/green colour. The longer you expose your paper, the darker the final blue will be. This can also affect the midtones too and clarity of your prints too.
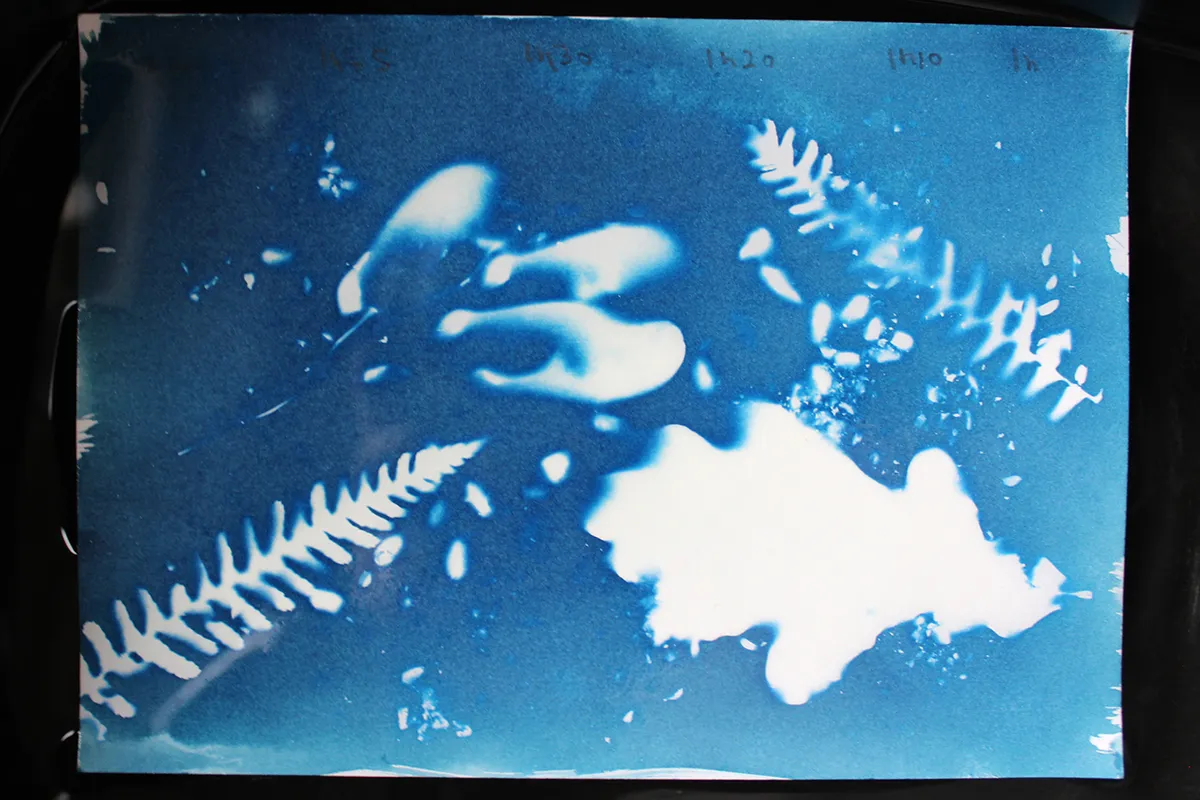
It’s hard to give a finite answer on exposure times as there are multiple contributing factors. We recommend making some test strips first. Cut a piece of cyanotype medium into strips and using similar objects on each, expose them for different lengths of times. Note the time on each strip and then complete the next two steps. This should give you a good idea of how long to expose your cyanotype for your desired result.
Step 5 – Remove objects and wash in cold running water
Once you feel your cyanotype has been adequately exposed, quickly remove your items, then place your medium under cold flowing water.
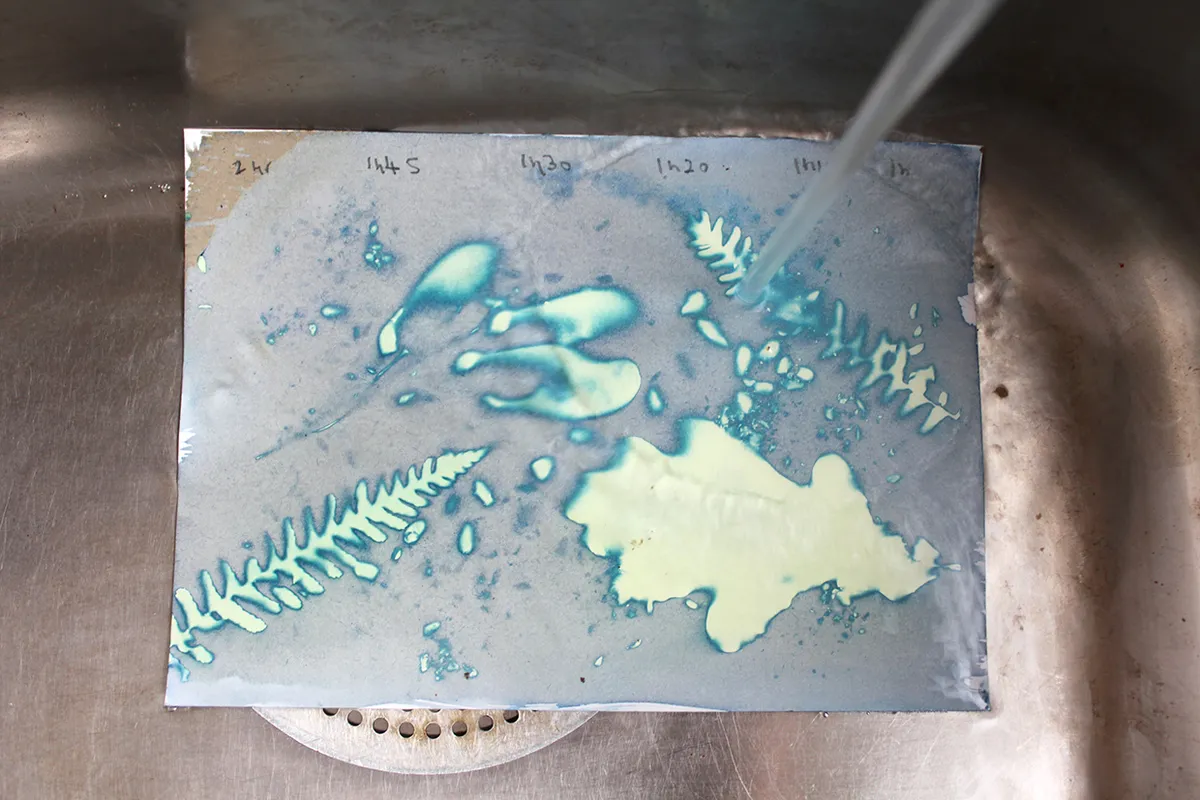
You can do this with small prints in a large tray/tub and by agitating/splashing the water, or alternatively under a tap in a sink. You might find this easier to do in a shower or bath if you are making large prints or fabrics.
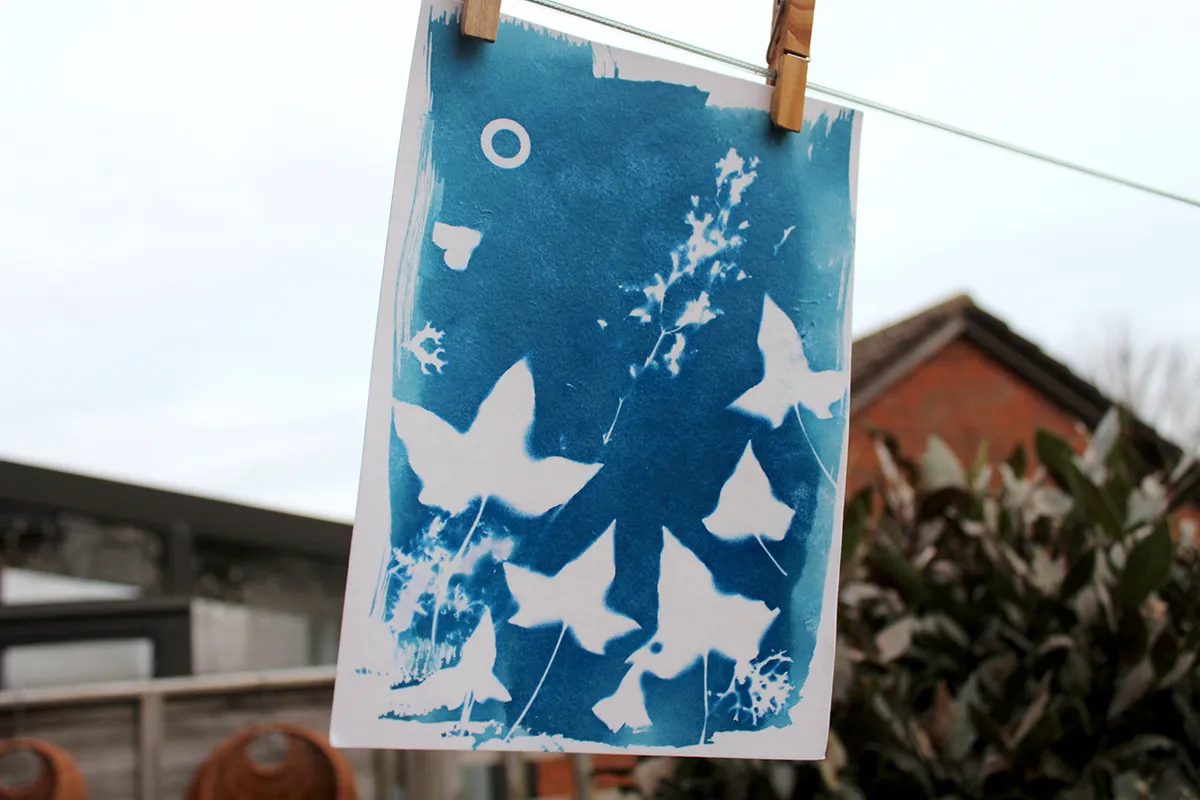
You want to wash off all the chemicals and as this happens you will see the dark blue tone develop. Wash for approximately 5 minutes or until the water runs clear.
Step 6 – Allow to dry.
Remove your print from the washing area and gently shake off any water. You can choose to speed up the drying process by gently blotting off excess water with a towel or paper towels.
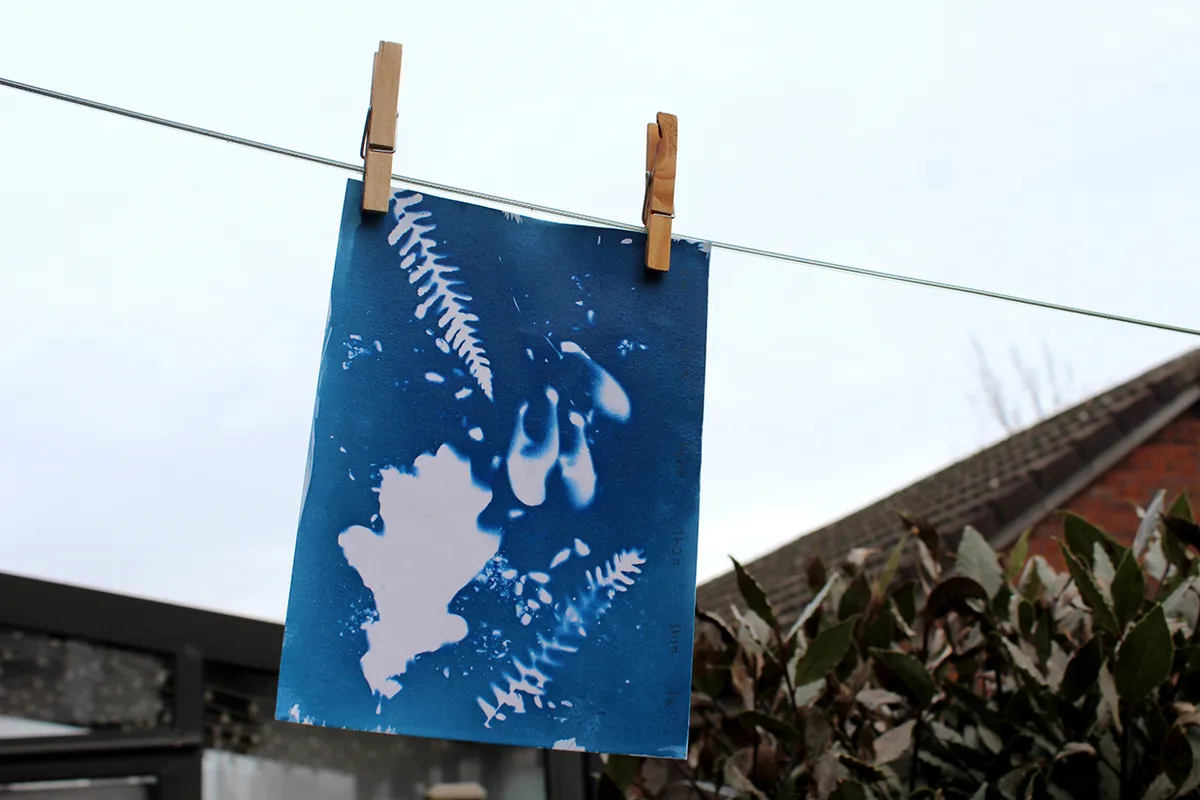
Use pegs to hang your print to completely dry in a shaded area.
Once dry your cyanotype print is fully developed and fixed. You can now admire and display your print with pride!
How to make a cyanotype on fabric
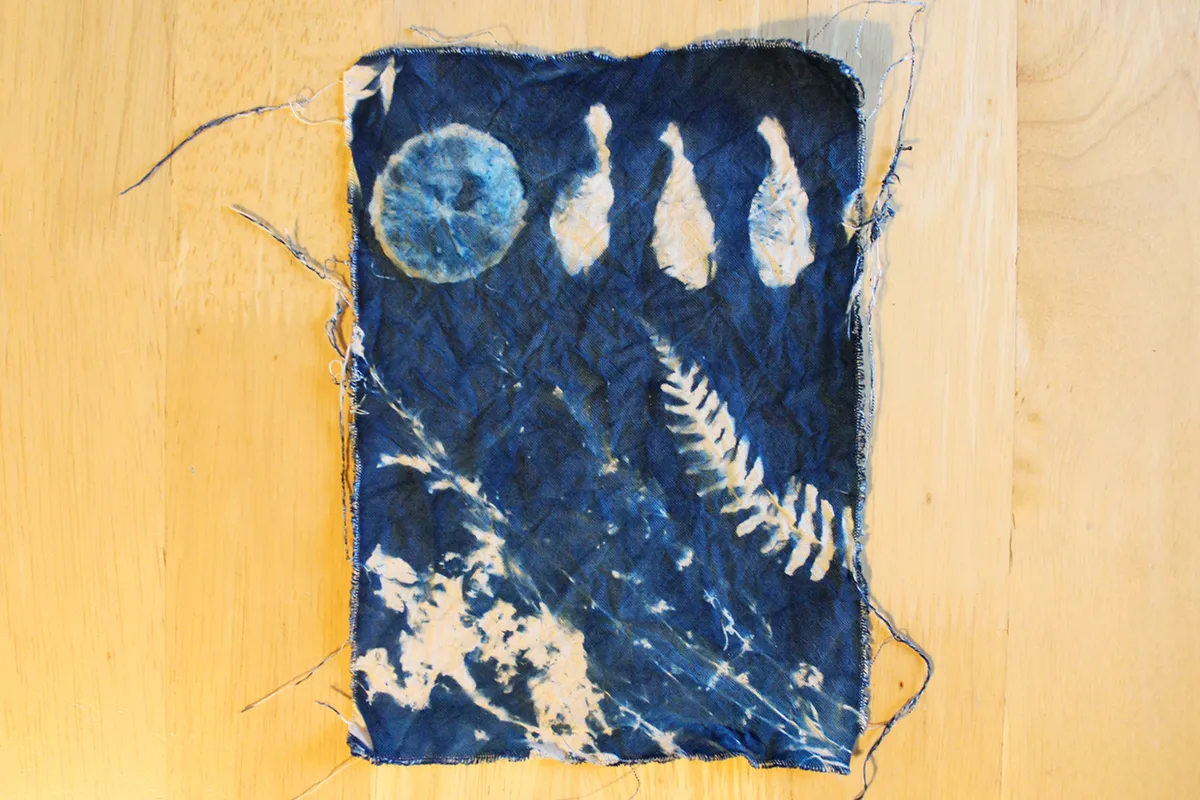
Now that you know how to make a cyanotype on paper, why not try experimenting with making your prints on fabric too. Creating your own fabrics can add a whole extra level of detail (and satisfaction) to your handmade sewing projects.
It works in much the same way as printing on paper, but there are a few extra things to keep in mind when working with fabric.
Check out our How to make cyanotype fabric tutorial for more details.
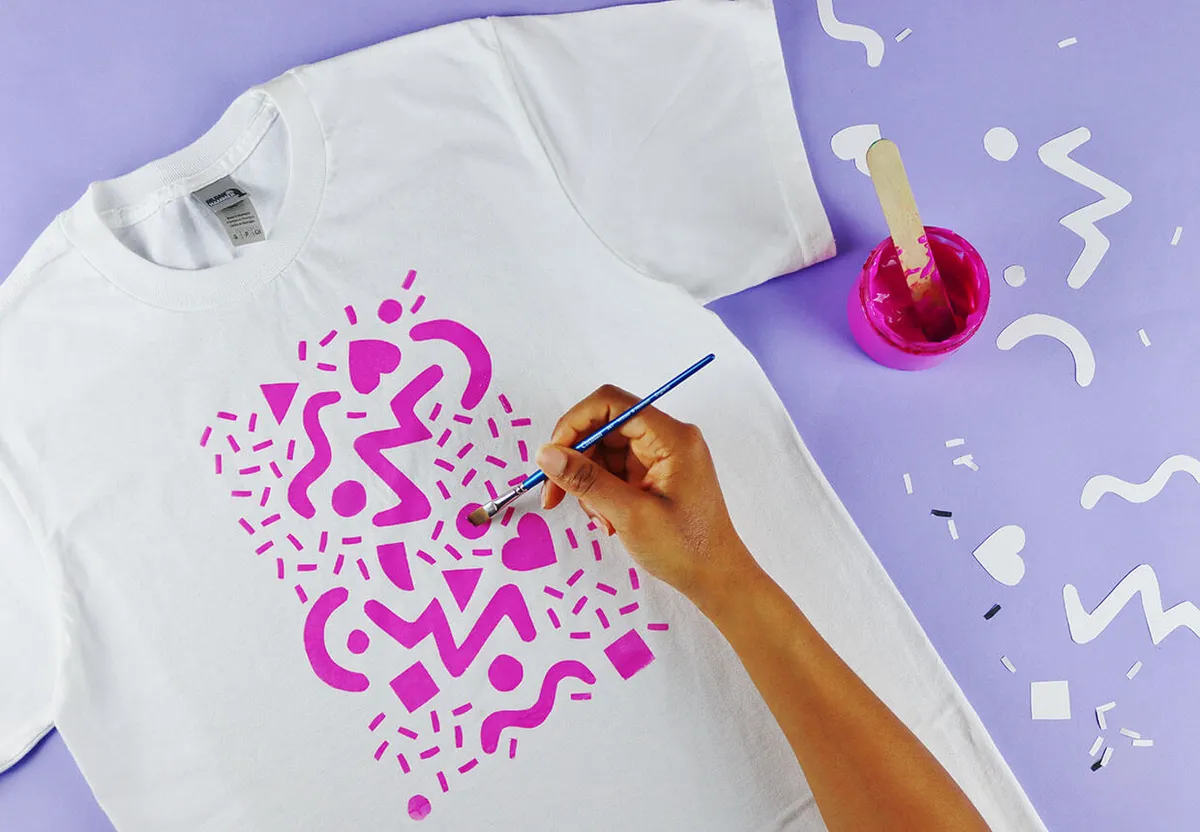
Make your own fabric designs
If you want to print on fabric so that you can make your own clothes, check out our DIY t-shirt printing tutorial – It’s easier than you think.
Can cyanotypes be different colours
True cyanotypes, by the very nature of their name, are almost always that lovely shade of Prussian blue – and this is normally what most people hope to achieve.
However, there are ways of altering the shade of blue, or introducing different colours. This can be done in a variety of ways, although we would recommend that you thoroughly research any of these methods before trying to ensure you fully understand any risks involved.
Wet cyanotypes
You can alter the cyanotype process to get different results by using the wet cyanotype process. This is where you lightly remoisten your prepared paper or surface with a spray mister (or work directly into the wet chemical solution if you’re applying it yourself). You are then able to try one of the following wet techniques to affect and corrupt the chemical reaction.
Bleaching can be used to lighten the Prussian Blue effect, and this can be done using ammonia, borax, or even household bleach. However, this method can degrade or damage your paper or surface, and you have to be very careful with reactions and to wash your surface as soon as the desired effect is achieved. This is not a technique we would advise for beginners to try without fully researching first.
Colours can also be made more intense and different effects can be achieved by adding mild acidic liquids such as vinegar or lemon juice. They will strengthen the blue effect and can also be used to create interesting effects. Hydrogen peroxide can also be used to speed up the development process, however this can potentially damage your print so we wouldn’t advise it.
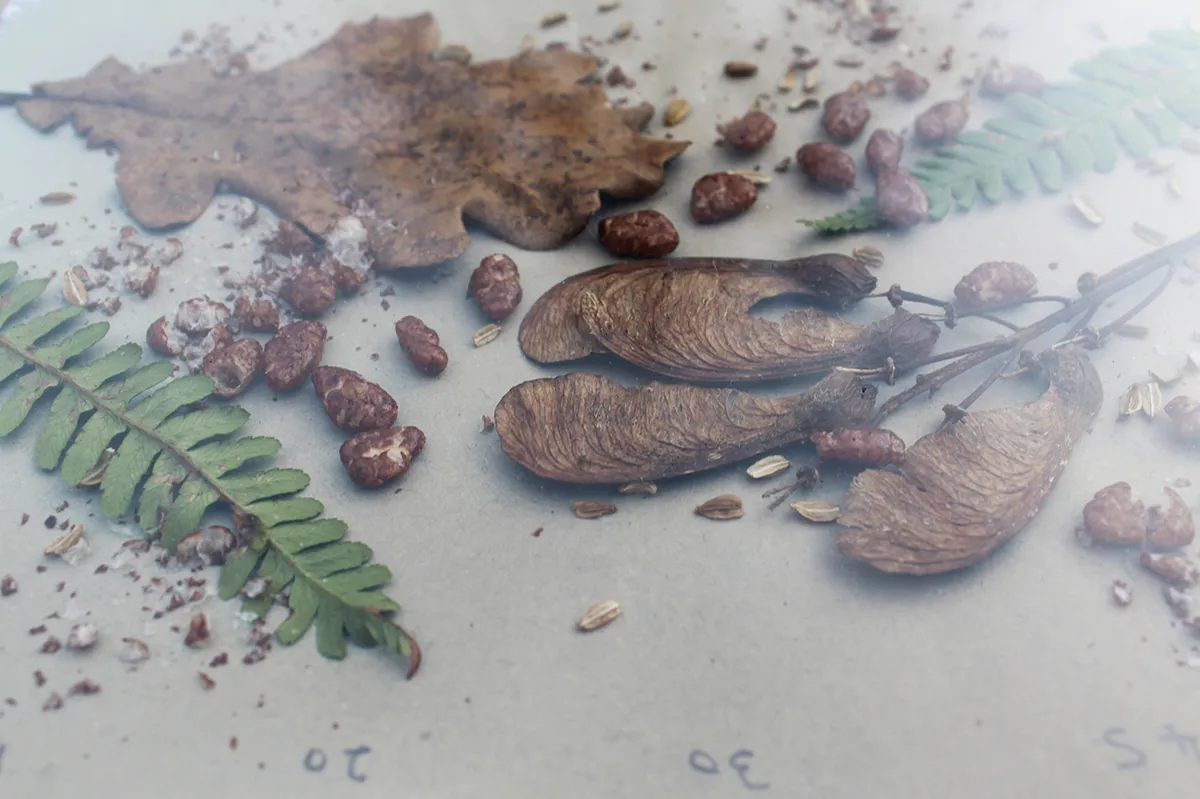
People will also try incorporating soap bubbles and items such as salt, paprika, turmeric or coffee grounds to add interesting effects and reactions to their piece. Wet cyanotypes enable you to explore a whole extra level of cyanotype effects, but they can also require longer developing times (some sources advise hours).
Please take the utmost care if you are experimenting with any of these techniques and research your ingredients so that you’re aware of how they might react with the chemicals.
Toning your cyanotype
When creating a traditional blue cyanotype, you can choose to alter your print by toning – either during the wet cyanotype process or after your final print has been fixed and dried. Adding ingredients such as wine, coffee or tea can stain or ‘colourise’ your print, changing both the colour of the iron oxide in your cyanotype as well as the white parts too.
Similarly, you can also try making cyanotype prints on materials that aren’t white, such as coloured or fluorescent paper. This not only means that your traditionally white sections will be colourised, but also that the blue will be darker or with a slightly different hue depending on the background colour.
Using speciality chemicals
While there’s no easy way to change the blue of your cyanotype yourself, there is a company that creates light-sensitive dyes in different colours that can be used in the same way. Jacquard Solarfast dyes can be used on both paper and fabric, and come in a range of colours.
If you fancy giving them a try, we’d recommend their Jacquard Solarfast Starter set. It comes with everything you need and the solutions to make violet, orange and blue prints. Also included is three sheets or Solarfast film, a transparent sheet that you can print inverted images onto to act as negatives so that you can print proper photographs.
How to turn an image into a cyanotype
As well as making photograms from placing items on light sensitive paper, some people like to create their own custom designs or use photographic negatives in their cyanotypes.
You can do this via film negatives, or by digitally inverting a black and white image and printing on some printable acetate sheets to make your own negative.
Cyanotype ideas to try experimenting with
Once you’ve got your supplies and know what to do, it’s time to get creative!
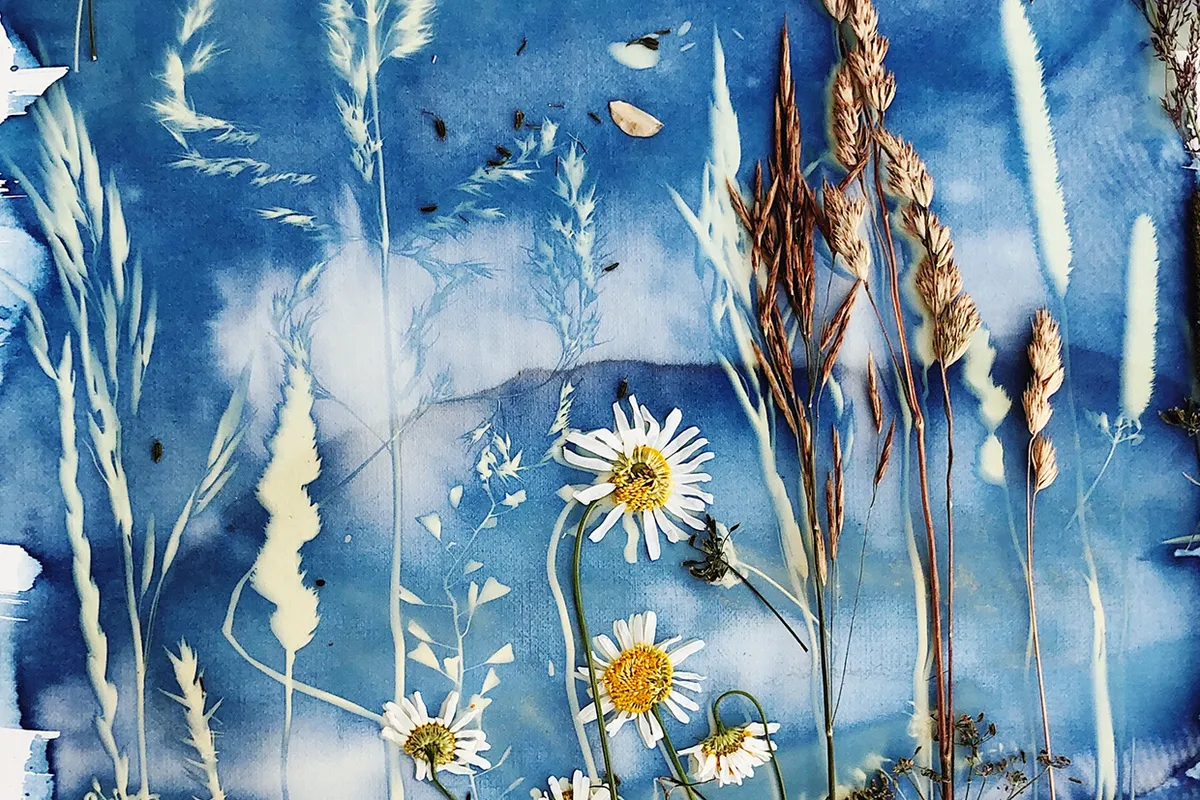
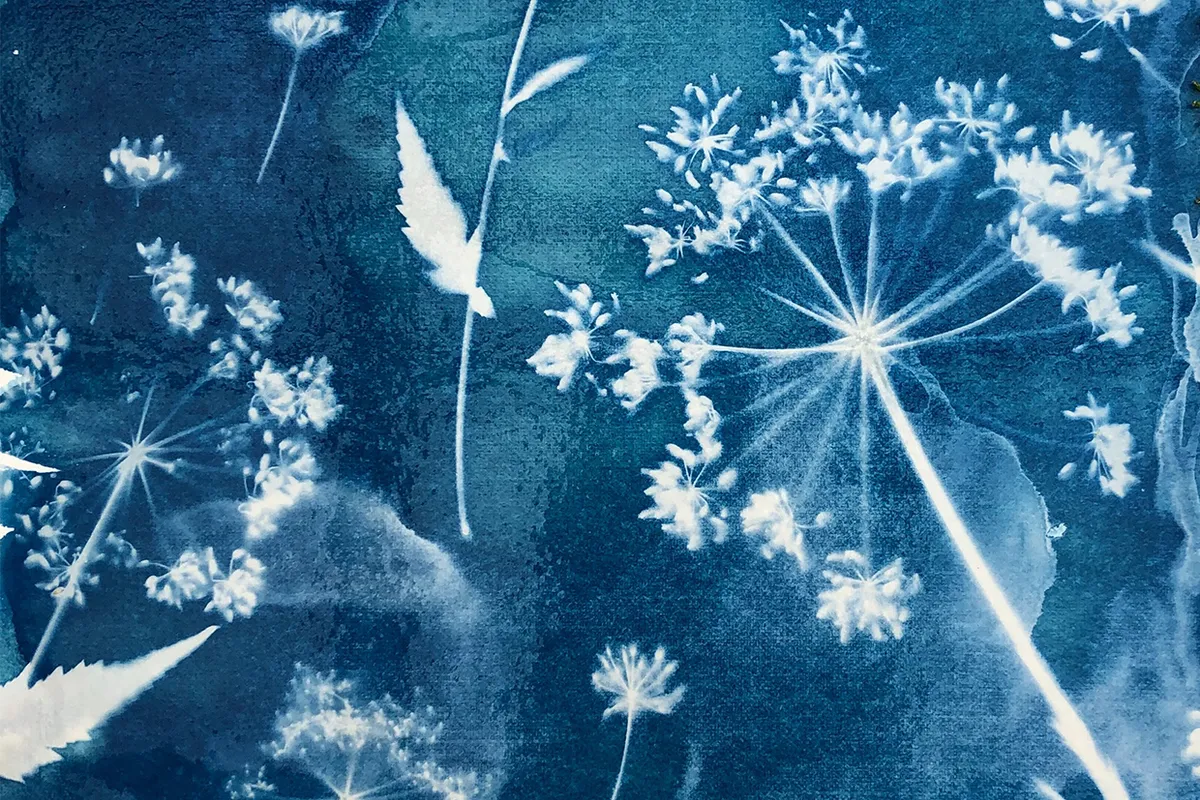
Leaves and plant life are very popular subjects for cyanotype printing (people have been making cyanotypes of natural elements since its invention). There’s loads of scope for creativity with cyanotypes though, and part of the fun of this alternative photography technique is experimenting and not knowing exactly how your final print will look.
You can also get creative with how you apply your light sensitive cyanotype solution onto your paper or fabric too. We’ve seen some lovely examples where the solution is painted on in custom shapes or designs before being exposed.
Looking for some inspiration before starting on your own cyanotypes? Then check out our list of cyanotype ideas to try.
How long does a cyanotype last
Cyanotypes are permanent and in most cases will last a lifetime. However, there are certain factors that can lead to your prints fading. Cyanotype prints can go yellow if exposed to alkaline conditions, so it’s better to store prints in a plastic or polyester sleeve or file rather than a paper file or cardboard box. Yellowing can also occur with cyanotype fabrics too, so you should always wash these in cold water using non-phosphate detergents.
If your prints do fade, it is possible to regenerate them. Sometimes just moistening them again is enough to help to bring the print back to life – if not then soaking in hydrogen peroxide or vinegar can help to restore a prints vitality (although success of this is not always guaranteed).
How to dispose of cyanotype chemicals?
Fortunately the chemicals used in cyanotype have a very low toxicity, especially after they have been through the development process. Official advice will differ depending on your country or even local district, so we would recommend seeking advice from your local water board first if you are concerned.
In theory, cyanotype chemicals are safe to wash down the drain provided they are diluted with plenty of water – after all, when you wash your prints you’ll probably be doing this in a sink or bathtub anyway. By the time that the chemicals enter the sewerage system and get to a water treatment plant they will be so minute and diluted that they shouldn't pose any risk.
However, advice on this can vary so it’s worth looking into properly. You can normally dispose of all sorts of different chemicals at your local recycling or waste disposal centres.
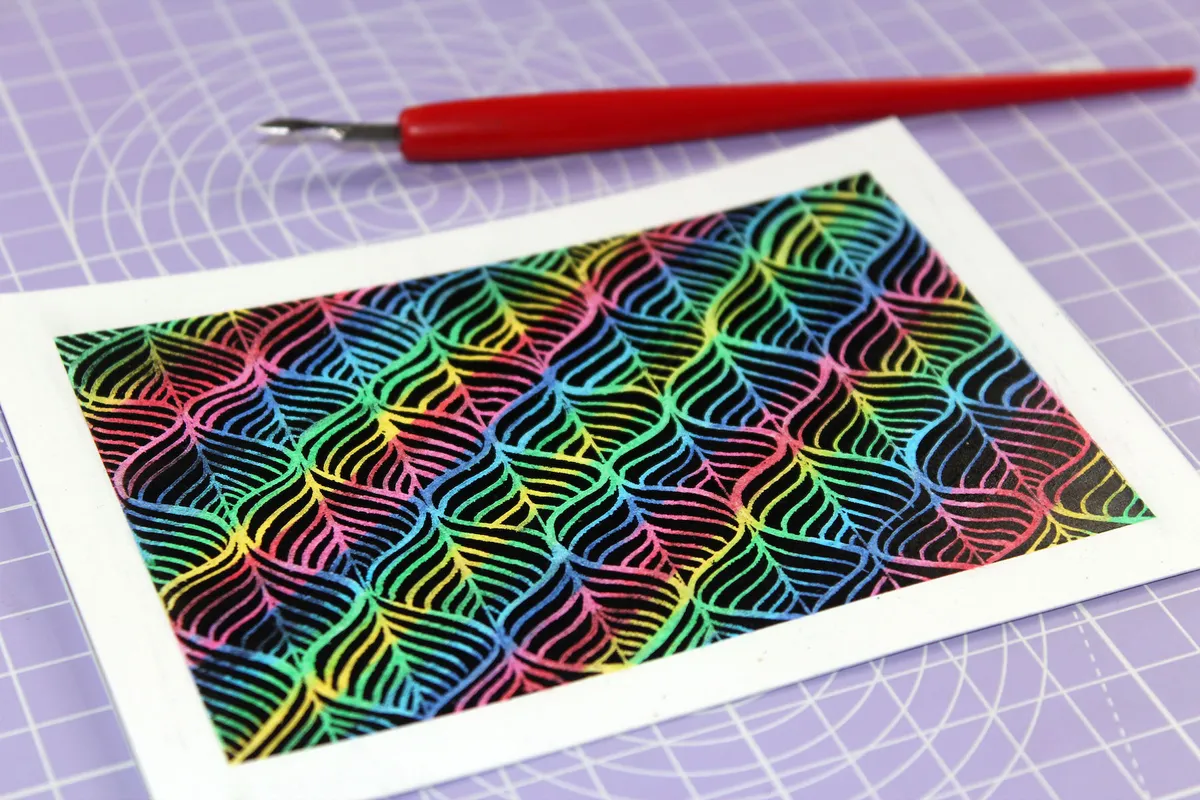
Get creative with colours
Fancy more fun and experimental ways of getting creative? Try learning sgraffito - a fun and colourful craft full of unexpected results. Find everything you need to know in our beginners guide to sgraffito.
Perfect your cyanotype printing with plenty of practice
Now that you know all about cyanotype photography you’re probably raring to get going with your first print. Remember, practice makes perfect.
There are a lot of elements within cyanotype printing that are quite variable (development times being a big one), so your first print is unlikely to come out exactly how you imagine it.
Don’t lose heart though, the more you experiment, the more you’ll understand this fun technique.
Try another beautiful blue dye technique
If you can’t get enough of beautiful blues, you should try the Japanese art of Shibori, a wonderful tie-dye technique that creates fabulous patterned fabrics. Learn how to make a shibori tie dye scarf with Gathered.


