All products were chosen independently by our editorial team. This review contains affiliate links and we may receive a commission for purchases made. Please read our affiliates FAQ page to find out more.

How to do peg loom weaving

Stephanie Fradette’s chunky peg loom weaving tutorial will teach you how to make this gorgeous cushion design!

Try 6 issues of your choice of craft magazine from just £9.99

Published: April 26, 2021 at 8:19 am

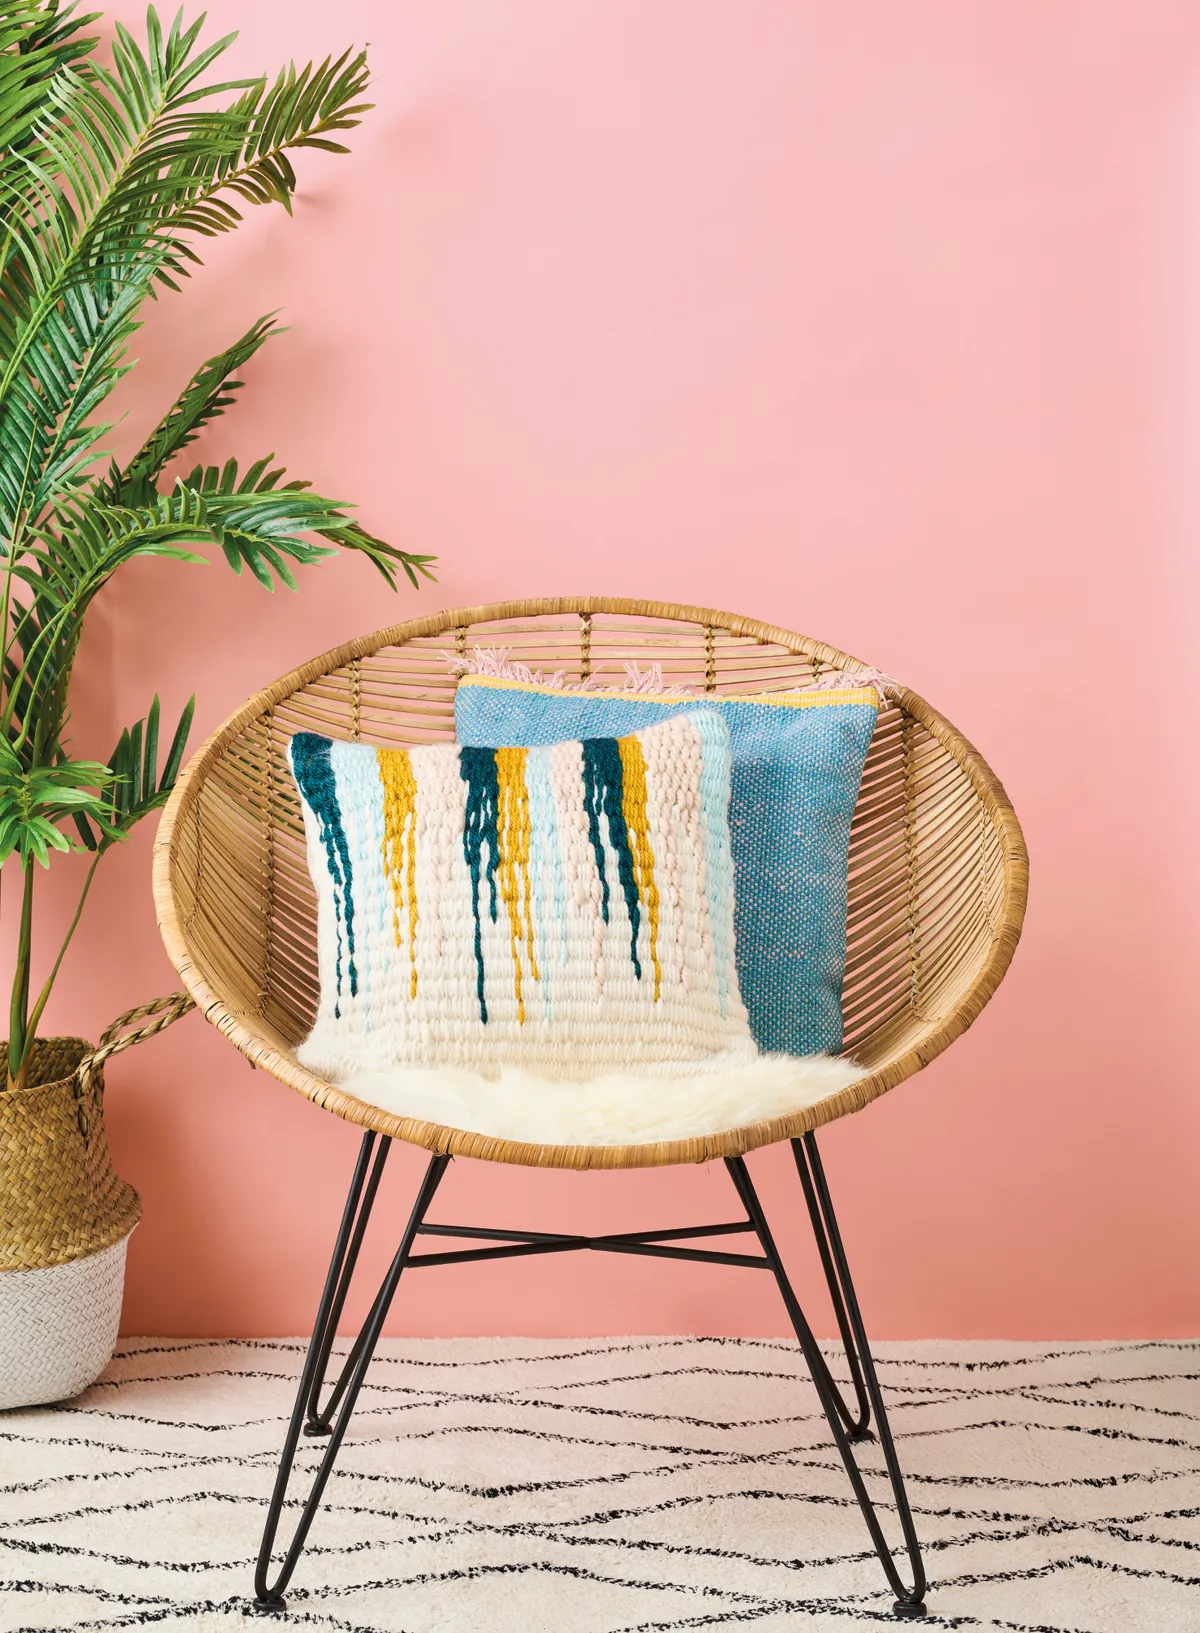
It’s no secret that super chunky yarn is a total winner when it comes to handmade cushions, but this is the first time we’ve clapped eyes on paint-drip look textiles. How’s it done? The frameless and satisfyingly hands-on peg loom weaving technique, which allows you to create fibre art in a freer way. And a cushion’s the best form for fully embracing the chunky yarn squishiness and showing off your handiwork.

Head to our library of macrame knots to find a tutorial for the lark’s head knot. As you weave, keep the tension even and loose enough that the woven section can easily glide down the warp. This way the weave won’t get caught in the knots as you’re pushing the project down.

This project was created by Stephanie for Mollie Makes magazine – for more easy-make craft projects and creative inspiration, subscribe to Mollie or click here to find out more.

Materials

50cm (19¾") wide peg loom

Debbie Bliss Roma (70% wool/30% alpaca, 80m/87yd per 100g). two balls in Cream (53001) (YarnA)

Lion Brand Hometown USA (100% acrylic, 74m/81yd per 142g), one ball each in:

  • Louisville Julep (117) (Yarn B)
  • Montpelier Peacock (175) (Yarn E)

Knit Craft Hug It Out (100% acrylic, 58m/63yd per 200g), one ball in Shell (HH04) (Yarn C)

King Cole Big Value Super Chunky (100% acrylic, 81m/90yd per 100g), one ball in Mustard (3121) (Yarn D)

Cotton string

Two 45 x 35cm (17¾ x 13¾") pieces of backing fabric

Tapestry needle

Sewing needle

Matching sewing thread

43 x 43cm(17 x 17") cushion pad

Adhesive putty or clamps

How to do peg loom weaving

You will need:

  • Wide peg loom
  • Yarn
  • Backing fabric
  • Needles
  • Cushion pads
  • Clamps

Step 1

tapestry weaving Step_1

Start by placing 24 of the 8mm pegs in the 1cm (3/8") wide slots of the peg loom. Thread each peg hole with a 15cm (6") length of cotton string and tie the ends in a knot. This allows the loom to accommodate a thick yarn warp.

Step 2

tapestry weaving Step_2

To create the warp, cut 24 160cm (63") lengths of Yarn A, fold them in half and attach to each loop string using a lark’s head knot. Secure the loom to a table using adhesive putty or clamps.

Step 3

tapestry weaving Step_3

Attach the end of Yarn A to the rightmost peg with an overhand knot. Start weaving from right to left by passing the yarn in and out of alternating pegs. At the end, turn around and weave back, from left to right, in the opposite pattern of the previous row. Weave approximately 3cm (11⁄4") in this way, leaving the end of Yarn A on the rightmost peg.

Step 4

tapestry weaving Step_4

Join Yarn B on the leftmost peg with an overhand knot and start weaving, alternating from the previous row and stopping roughly 10 pegs in. Using Yarn A, start weaving from the rightmost peg towards the middle until you meet Yarn B, and both yarns are at the front of the loom in between the same two pegs.

Step 5

tapestry weaving Step_5

Cross the two yarns over where they meet in between the pegs, as shown, and continue the weaving pattern back in the opposite direction on both sides. Continue this technique for approximately 5cm (2"), following the main image as a guide and crossing both yarns randomly for each row at different points to create a hatching effect.

Step 6

tapestry weaving Step_6

Cut Yarn B and tie an overhand knot on the leftmost peg, keeping Yarn A on the right of the loom. Do not cut Yarn A.

Step 7

tapestry weaving Step_7

At this point you’ll have woven approximately 8cm (31/8") onto the pegs. Bring the woven section down the pegs and along the warp. To do this, remove one peg at a time and guide the woven section along the peg, past the knot. Replace the peg in its original peg hole. Repeat with each peg until the woven section is off the pegs and secured onto the warp.


Step 8

tapestry weaving Step_8

Secure Yarn C on the leftmost peg of the loom. Referring to the main image as a guide, continue to weave, alternating Yarns B-E in sections of 3-6cm (11⁄4-23/8") using the hatching effect in Steps 3-6, always keeping Yarn A on the right of the panel. Finish by weaving approximately 3cm (11⁄4") of Yarn A across the length of loom. You’ve completed your first peg loom weaving project! Now to finish it off.

Step 9

tapestry weaving Step_9

Once you’ve woven 45cm (173⁄4") in total, slide the panel down the warp until the warp ends are of equal length on both sides. Using a tapestry needle, sew any loose weft ends in to secure.

Step 10

tapestry weaving Step_10

Cut each warp thread close to the knot. Tie them together in groups of three at both ends of the panel, using an overhand knot.

Step 11

tapestry weaving step_11

Take one piece of backing fabric and fold one of the 45cm (173⁄4") edges to the wrong side twice by 1cm (3/8"), then pin. Repeat with the second piece. Sew in place, close to the folded edge.

Step 12

tapestry weaving Step_12

Place the woven panel and the two backing fabric pieces with right side (RS) together, aligning the edges. Ensure the two hemmed fabric edges overlap in the centre, creating a 45cm (173⁄4") square. Pin in place and sew with a 1cm (3/8") seam allowance. Turn RS out, then insert the cushion pad.

We hope you’ve enjoyed learning Stephanie’s peg loom weaving technique! For more fab weaving projects check out our weaving bookmarks tutorial or for a more basic project head to our how to weave and DIY loom tutorial