How to make a rag rug – everything you need to know

Learn how to make a rag rug with hessian with this tutorial from Elspeth Jackson from Ragged Life! This is a great technique for stash busting as well as a quick and easy way to brighten up a room.

6 issues of Simply Sewing magazine for £14.99|Save 78%!

Published: April 26, 2021 at 8:00 am

Rag rugging is a fabulously thrifty craft whereby old clothing and fabric scraps are cut up and woven through a hessian backing to create beautiful rugs and textile pieces for the home. It was incredibly popular during Victorian times when lower-income families embraced rag rugging as a way to make the most out of everything they had. They took the clothing that was no longer fit for purpose and worked their magic to make wonderful rugs for the cold, stone floors.

True to the roots of the craft, rag rugging still hinges around using up what you have lying around. You don’t need to pop to your local haberdashery to find fabric, but rather your wardrobe or offcuts box. It’s the ideal craft project for sewists and fabric hoarders as it uses up leftover scraps that might be too small to do anything significant with but are just too pretty to throw away. Not only is rag rugging great for decluttering, but it’s also an extremely forgiving craft, which makes it the perfect detox from pattern-cutting and precision. With rag rugging, you can truly let loose and have fun.

We're going to teach you how to make a rag rug and all about rag rugging so you can become a master. If you're looking for more crafty goodness then make sure you check out our free daily patterns too!
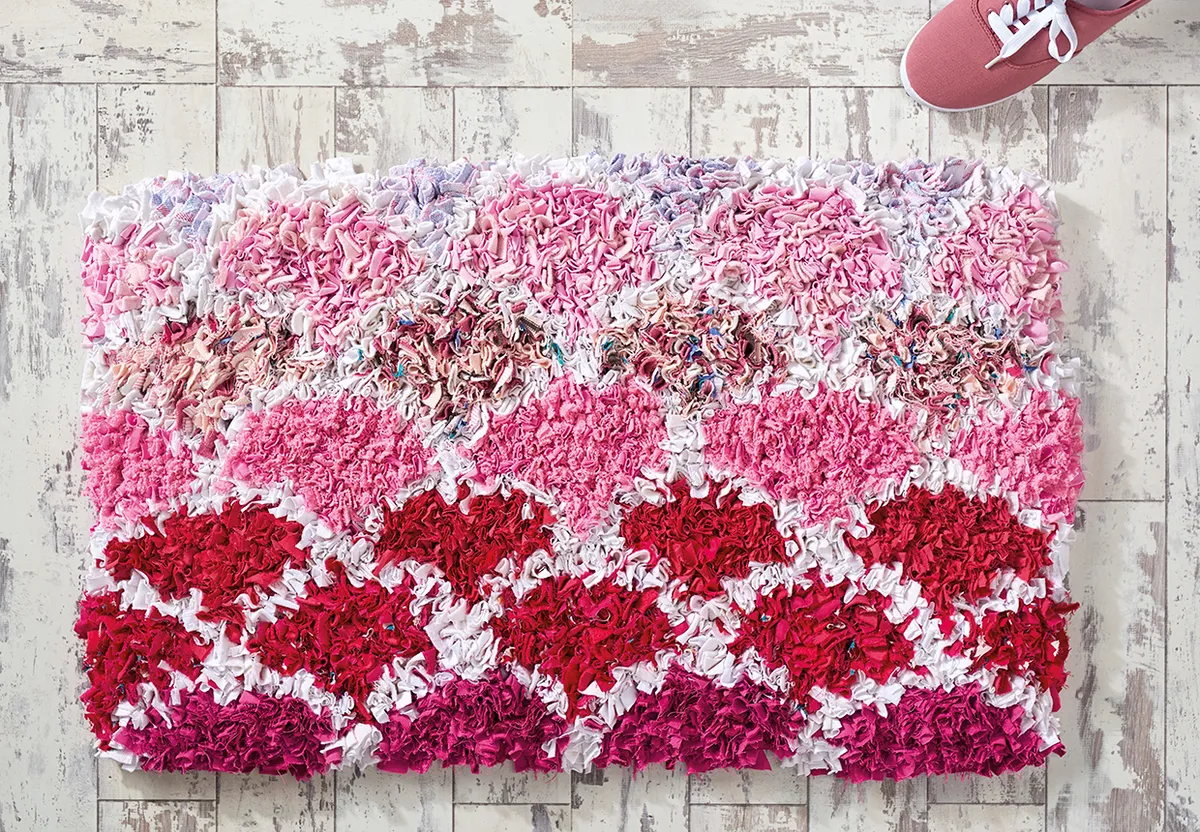
How to make a rag rug - a complete guide

Shaggy Rag Rugging

There are several different techniques for rag rugging, but for this tutorial, we’re using the ‘shaggy’ style of rag rugging, which is perfect for beginners. This is the more traditional, textured form of rag rugging. It’s ideal for making rugs, wreaths, cushions and more, creating super-soft pieces that you just want to sink your hands and feet into. You can use any type of fabric with this technique but generally, we recommend that beginners start off with thinner, softer fabrics such as jersey and cotton.

Generally, with the shaggy rag rug technique, less is more in terms of design. Shapes can be distorted when the rags flop over so you’re best focusing on colours as opposed to designs. Stripes and checks look great, for example. Another piece of advice before you get started is that it’s best investing in the correct equipment. Choose the correct weave of hessian (10 holes per inch) to ensure that your rags stay in securely, and use rag rug scissors, as this will save you time by allowing you to cut through multiple layers of fabric to create your rag rugging strips. Right now for the tutorial! Here's how to make a rag rug.

Rag Rug Making –How to make a rag rug, Step by Step

If you fancy buying a kit to help you on your rag rugging journey then check out our rug making kits for beginners round up.

You will need:

  • Fabric (you can use any fabric you like but non-fraying material works best for this project) (Approximately 4 T-shirts of white fabric and approx two large garments of pink fabric for each row of shell)
  • Scissors (rag rug scissors or very sharp fabric scissors)
  • Rag rug gauge (optional)
  • Thread (to match your fabrics)

Rag rug method

Step 1

First, gather the tools you’ll need. From the top of the hessian, weave the pointed end of the rag rug spring tool down into a hole in the hessian and up through a hole two holes away. You should now have two strands of the hessian on top of the lever of the tool.

Rag Rugging Techniques

Step 2

Squeeze the wooden handle and spring handle together to raise the lever at the end of the tool. Place the short end of the rag between the lever and the barrel and release the spring lever to clench the rag.

Rag Rugging Techniques

Step 3

Holding the hessian still with one hand, pull the spring tool back through the hessian –  it may help to wiggle it a bit. You will now find that half of the rag is on one side of the strands of hessian and half is on the other. That’s your first piece of rag rugging.

Rag Rugging Technique

Step 4

Leaving approximately two or three holes between each rag and the next, repeat these steps to continue the method. It’s generally easier to rag rug in rows with the weave of the hessian, but you can rag rug diagonally or by following the line of a pattern wherever it takes you across the hessian.

How to make a rag rug

Step 5

You can tell if you’re rag rugging too far apart because patches of the hessian will be visible from the front, and you can tell when you are rag rugging too close together because the hessian will begin to cave in and eventually the rug will curl.

Preparing the hessian

Step 1

Cut the hessian as in line with the weave as possible to the size given.

Step 2

Fold all the edges of the hessian over by 1cm (38in) then 1cm (38in) again to the wrong side (WS) to enclose the frayed edge. Pin in place.

How to make a rag rug with hessian

Step 3

Hand or machine stitch this hem into place. Be careful when sewing the corners of the rug, as the multiple layers of hessian can break your needle.

Drawing the shell design

Step 1

Download and print the free shell template (on page 7 of our PDF) then cut it out.

Step 2

Place the hessian right side (RS) up then place the template in the bottom right corner of the rug so that the base of the semi-circle aligns with a long edge of the rug.

Step 3

Draw around the curved line of the template in marker pen to create the first shell.

How to make a rag rug with hessian

Step 4

Place the template next to the first drawn shell so that the corners meet and then draw around it to create the second shell.

Step 5

Repeat this process along the bottom length of the rug.

Step 6

To mark out the second row of shells, align the corners of the semi-circle template with the tops of the two marked out shells from the first row. Draw along the curved line of the template to join the two shells together.

Rag rug making

Step 7

Continue this process until you reach the top of the rug. Don’t worry if your shells aren’t exact; they’ll become distorted by the rag rugging so any mishaps will be nicely disguised.

How to make a rag rug with hessian

Rag rugging the strips

Step 1

Cut the white fabric into 7x1.5cm (2¾x58in) strips. You can do this quicker using a rag rug gauge. Once your fabric is prepared, use the shaggy rag rug technique to rag rug two rows along all the drawn lines of shells. Don’t worry if it looks a little dishevelled at this stage.

Rag Rugging Techniques

Step 2

Once you’ve completed all the white rag rugging, starting at the bottom of the rug, fill in each row of shells in shaggy rag rugging. We used a darker shade of pink at the bottom of the rug and graduated to lighter pinks at the top.

Rug Ragging Techniques

Step 3

You can mix some patterned fabrics into the rug to add another dimension.

Step 4

Once the rug is fully rag rugged, trim approximately 5mm (¼in) off the top of the rug to make the design look clearer.

We hope you’ve enjoyed learning how to make a rag rug! For more free projects check out our craft ideas for kids which will help your little ones creativity fly. Or for more soothing craft tutorials, how about our guides to how to make wax melts or how to make bath bombs?

Bringing rag rugging up to date

Nowadays, rag rug making remains largely unchanged, as we still only use a few basic tools, hessian and fabric. The main difference is in the designs, colours and fabrics that are used. Textile artists, like me, Elspeth Jackson from Ragged Life (www.raggedlife.com), are bringing it into the 21st Century with contemporary designs that fit everywhere from cottages to modern flats. Rag ruggers are pushing the boundaries of what can be made using just a few old garments and are giving this old, traditional craft a new lease of life.