Make your own macrame necklace

Macramé just got wearable, with Sally Wilson’s knotted statement macrame necklace.

Try 6 issues of your choice of craft magazine from just £9.99

Published: April 13, 2021 at 7:29 am

Liberating a skein of yarn from your stash, transforming it and taking it out on the town on the same night has never been easier – colourful cotton rope and some knotty know-how is literally all you’ll need to perfect a flower-look statement necklace. It proves beyond all reasonable doubt that there’s so much more to this craft than plant hangers and wall décor. Macramé, we salute you.

This project was created by Sally for Mollie Makes magazine – for more easy-make craft projects and creative inspiration, subscribe to Mollie or click here to find out more.

Looking for more macrame inspiration? Take a look at our free macrame patterns for lots of amazing projects to make.

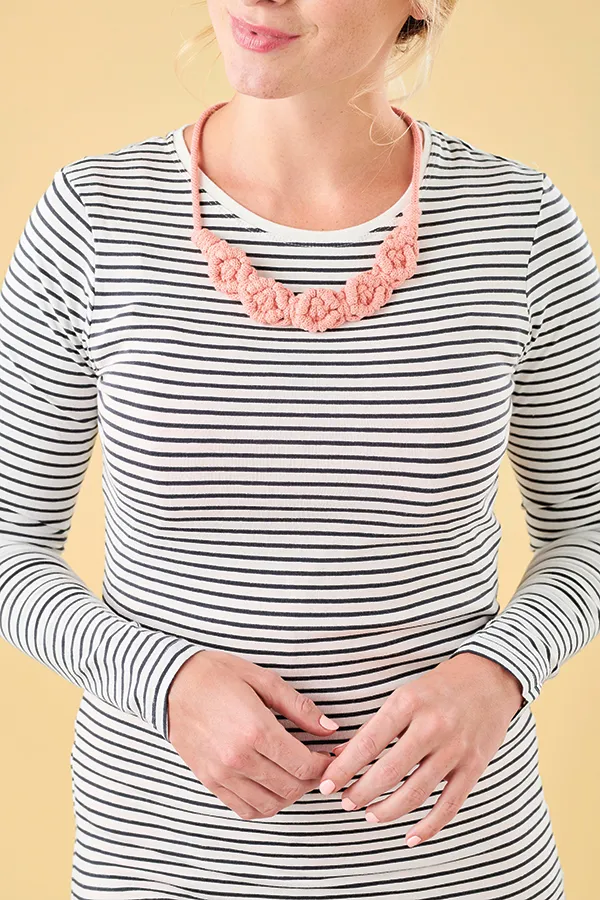
Make your own macrame jewellery

Check out our library of macrame knots to familiarise yourself with the different knotting techniques before starting.

To make this macrame necklace you will need

  • Bobbiny Rope, 100% cotton, 50m/55yd per 250g skein, 0.5cm (1⁄4") diameter, one roll in Peach (ours was from www.needlemaker.uk)

Step 1

Macrame jewelry Step_1

Cut five 10cm (4") lengths of rope, a 16cm (63/8") length of rope, and a 3cm (11⁄4") length. With the longer length, measure 3.5cm (13/8") down from the top – this is where you’ll attach the other cords. To do this, hold all the ropes, except the 3cm (11⁄4") length, in a bundle together. Use the short length to make a U-shape, and start wrapping it back around itself and over the bundle, as shown.


Step 2

Macrame jewelry Step_2

Wrap the rope around the bundle neatly four times, so each wrap is placed parallel under the last. Thread the remaining end through the loop at the bottom and pull the top loose end up as far as you can, until the loop slides up underneath the column of wrapped cord. This is called a wrap knot. Trim the top and bottom ends.


Step 3

Macrame jewelry Step_3

Use the two outside cords to make a square knot, sandwiching all of the middle cords. Take the first cord from the left over the middle ones and under the very last one. Next, take this cord over to the left, under the central ones and over the first. Pull the knot

Step 4

Macrame jewelry Step_4

Take the last cord over to the left, over the middle cords and under the first. Bring the first over to the right under the central ones and over the last, then pull again to tighten. This is a square knot.

Step 5

Macrame jewelry Step_5

Lay all the cords flat. Starting with the two middle cords of the bundle, separate these into left and right cords and lay them diagonally across the other cords in either direction. The clove hitch knot uses these pieces as the working cords that the other strands wrap and knot around.

Step 6

Macrame jewelry Step_6

To make the clove hitch knots, keep the left-hand working cord taut. Loop the one to the left around it, repeat, then repeat this step with the far left strand, so each cord makes two loops side by side. Repeat on the right side to create a chevron pattern, as shown.

Step 7

Macrame jewelry Step_7

Next, lay all the six cords out flat. The outside cords will not be used. Make a square knot with just the four middle cords.

Step 8

Macrame jewelry Step_8

Use the outside cords as working cords, and again, make clove hitch knots either side under the central square knot to finish off the diamond shape.

Step 9

Macrame jewelry Step_9

Make a square knot again with the outside cords, sandwiching all of the central cords together.

Step 10

Macrame jewelry Step_10

Repeat the process of creating clove hitch knots to make the diamond pattern around the square knots. Create five complete diamonds and tie a wrap knot around the bundle of cords.

Step 11

Macrame jewelry Step_11

Cut off all the loose ends except one long cord – this can be cut to the same length as the one on the other side, to fasten.

Step 12

Macrame jewelry Step_12

Secure both ends with a simple knot and coax the necklace into a curved shape to finish.

We hope you enjoyed making Sally’s project. Share a picture of your macrame jewellery with us on Instagram using #molliemakers, and don’t forget to subscribe to Mollie Makes to get creative inspiration delivered to your door every month!