DIY wooden candle holder centerpiece

Capture the imaginations of customers who like to entertain with this stunning wooden candle holder centerpiece made from an old plank of wood!

Try our magazines – get 6 issues from just £9.99!

Published: November 15, 2021 at 6:19 am

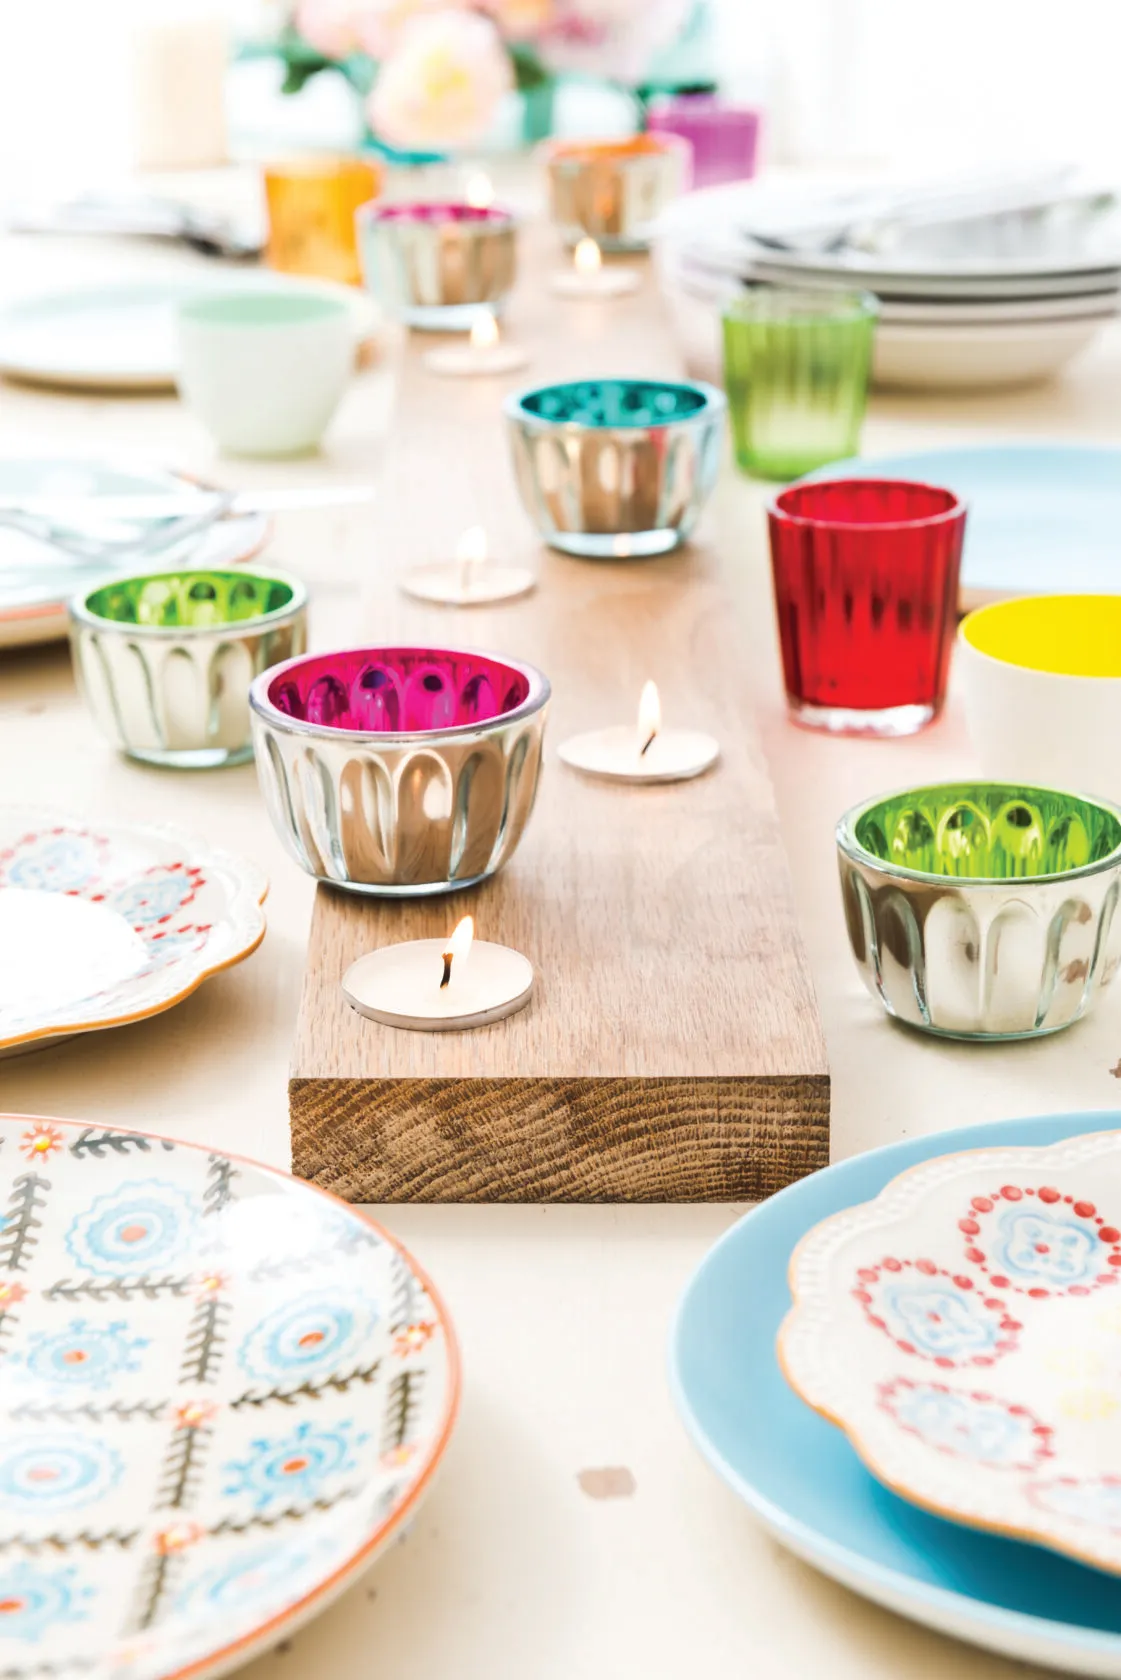
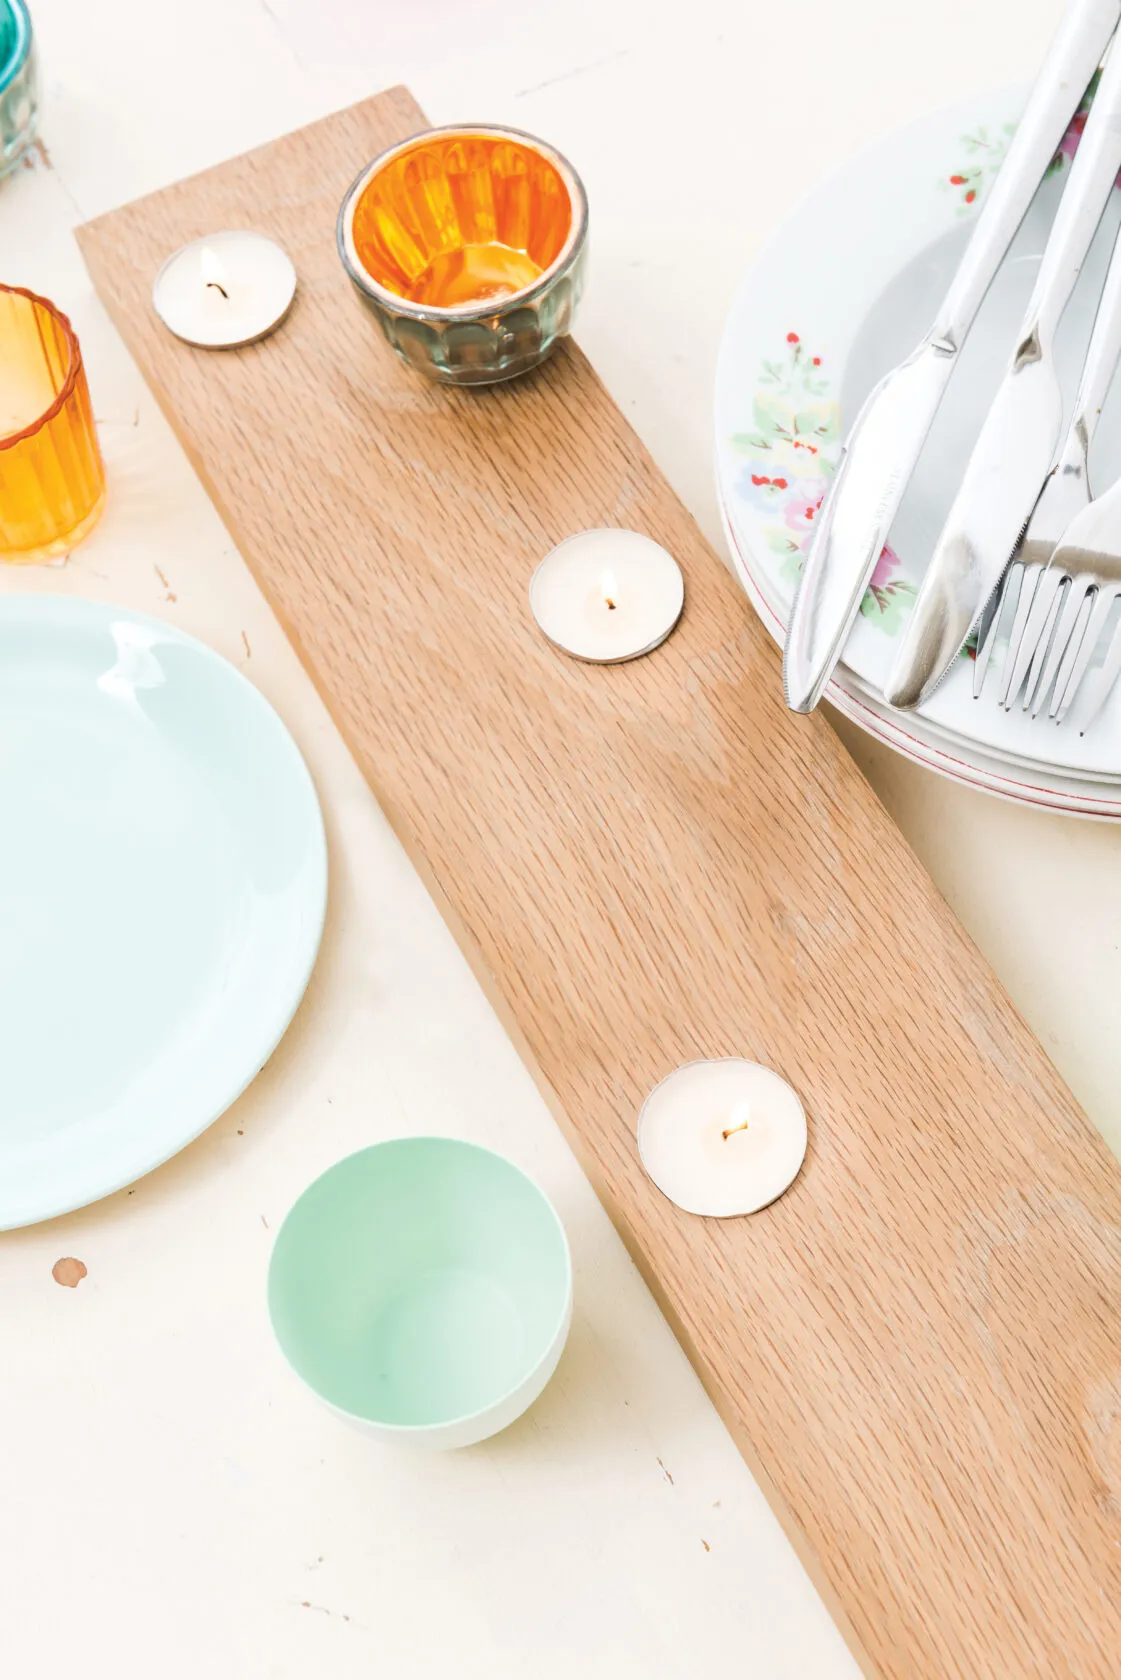
Set the scene for family parties, wedding feasts or romantic meals at home with this beautiful wooden candle holder centerpiece. If you can create homewares that evoke emotions then you're on to a sales winner, so dress it with flowers, votives or colourful glassware so customers can really visualise it at their celebration. Our wooden candle holder centerpiece is easy to make and can be customised to any table measurements by varying the length of the wood. You can make your wooden candle holder centerpiece by using offcuts or by cutting up old furniture to really reap the profits. Simple, low-cost and easily adaptable – we think this wooden candle holder centerpiece may just be your next best-seller! Be sure to play around with darker beeswax or wood stains to create different finishes for your range.

We have plenty of other upcycling projects for more inspiration here on Gathered, including these stunning vintage bookmarks or how about making your own DIY birdhouse? We love this thanksgiving doormat! Are you looking for gift ideas for men? Check out our round-up of the best Airfix kits and wood carving tools, perfect to keep them occupied during rainy days. We love seeing what you make, so don’t forget to share your upcycling or craft projects with us on Instagram, Facebook or Twitter, too!

You will need:

  • Straight piece of wood
  • Fine sandpaper
  • 38mm hole cutter
  • 35mm Forsner drill bit
  • Chisel
  • Hammer
  • Tealights
  • Pencil
  • Natural beeswax and cloth

How to make a wooden candle holder centerpiece

Step 1

Tidy up your piece of wood by sawing the ends straight and sanding down any rough areas. Keep in mind whether you want a rustic look or a neat finish to decide how much you should neaten it.

Step 2

Arrange tealights along the length of one side of the piece of wood. Add more tealights down the opposite side, positioned opposite the gaps created by the first tealights, so you get a jaunty effect. You can easily do this by eye, but, if you like to be precise, then measure the distance between each tealight. Draw around each tealight to make light pencil circles.

Step 3

Double-check that the 38mm hole cutter fits your tealights (it fits standard size tealights), then line up the edges with the pencil circles on the wood and cut down into the wood for 2cm (½in). Use the 35mm Forsner drill bit to make a hole in the centre of the circle you have just marked – make the hole just 2cm (½in) deep. You may find this requires a little elbow grease.

Step 4

Use a chisel and hammer to knock out any extra bits of wood that are blocking the hole you’ve just created. Check your tealights fit the hole and adjust the size of the hole if they’re too tight.

Step 5

Give the piece of wood a good rub with fine-grained sandpaper to remove any debris and pencil marks. Wash away the dust with a damp cloth.

Step 6

Rub two coats of clear beeswax onto the plank to protect the wood and highlight the natural grains. Then pop the tealights into the holes, to finish.

Wooden candle holder centerpiece


We hope you’ve enjoyed this easy project on how to make a wooden candle holder centerpiece. If you’re looking for more candle projects, why not browse the best candle making kits, or learn how to make a candle.