That’s how to crochet a granny square! Once you’ve mastered the basics of how to make granny squares, you can effectively just repeat the same process and keep expanding from row 4 to make your granny square as big as you want!
Some people find that occasionally your granny square can start twisting slightly – but as we mentioned earlier, a simple way to fix this is to turn your work at the end of each round.
A note about starting granny squares
You may find that other granny square patterns start slightly differently. There are pro’s and con’s to each different method, but we find that the way shown in this tutorial is best for changing colour regularly and avoids having to slip stitch long stitches to reach specific positions.
P.S. If you want your finished granny squares to look super professional, you can finish them off by learning how to do the invisible crochet join.
If you’re new to crochet and are struggling to get your squares looking perfect, check out our crochet troubleshooting tips for some handy advice
How to crochet a square

Even if you’ve only learnt some very basic crochet stitches, then you have the capability of making a crochet square.
Working rows of simple stitches until the height matches the width is the simplest form of how to crochet a square.
To make a simple crochet square, just make chains to your desired width (remember to add one extra for your turning chain), double crochet in the second chain from your hook and in each chain across, then just continue working rows of double crochet stitches until your square reaches the same height as your width.
In fact, making a crochet square in this way is often done before starting larger patterns in the form of a tension square, which is where you create a simple square to ensure that your tension and yarn choice match that of the pattern designers.
You can find out more about this in our how to check your tension guide.

When it comes to making simple squares in rows, it’s unfortunately not just a simple case of working the same amount of rows as the amount of stitches that set your width.
Factors such as the thickness of your yarn, the size of your hook, how loose of tightly you crochet and which stitches you use can all make a difference to the height and width of your work. For example, if you made a square with treble crochet stitches it is going to require less rows than if you made it with double crochet stitches.
This is shown in the example above, where although the width of this square is made up of 27 double crochet stitches, it requires a height of 30 rows to achieve the perfect 15 x 15cm square.
Solid granny square pattern

Although working squares in rows is often used for checking tension, when crochet squares are used as motifs within patterns they are more commonly constructed by using crochet in the round. The reason for this is that when you crochet in the round, your square increases in size equally on all sides.
Most crochet squares that are constructed in the round usually get categorised as a type of granny square.
While you can make a solid granny square with treble crochet stitches, you’ll still get those holes in the corners. If you’re after a completely solid granny square pattern, here’s how to crochet a square in the round using simple double crochet stitches.
Simple double crochet solid granny square pattern

Round 1 Ch2, 8dc into second ch from hook,
ss to beg dc. [8 sts]
Round 2 Ch1, (dc in next st, ch2, dc in next st) 4 times, ss to beg dc. [8 sts, 4 ch-2 sps]
Round 3 Ss into next ch-2 sp, ch1, *(dc, ch2, dc), dc in each st to next ch-2sp; rep from * 4 times, ss into first dc to join.
Repeat Round 3 to desired size.
Fasten off and weave in ends.
This solid granny square pattern illustrates how squares made in the round work. Because you work two double crochet stitches into each corner, each side grows by two additional stitches with every round.
Some people find that their squares can sometimes start to twist or slant in one direction, which is often due to tension or the way people work.
If this becomes a problem for you, then a pro tip is to take the unconventional step of turning your work for each round (although you will need to essentially reverse the pattern for rows worked in the other direction).
Your crochet edges may naturally be a bit wobbly and not perfectly straight, but this can easily be rectified with blocking. Find out more about how to block crochet and get your squares looking nice and neat.
Granny square makes
Once you’ve mastered how to crochet a square, there’s a whole world of new and exciting patterns available to you. Have a browse of these 40+ granny square projects and get inspired!
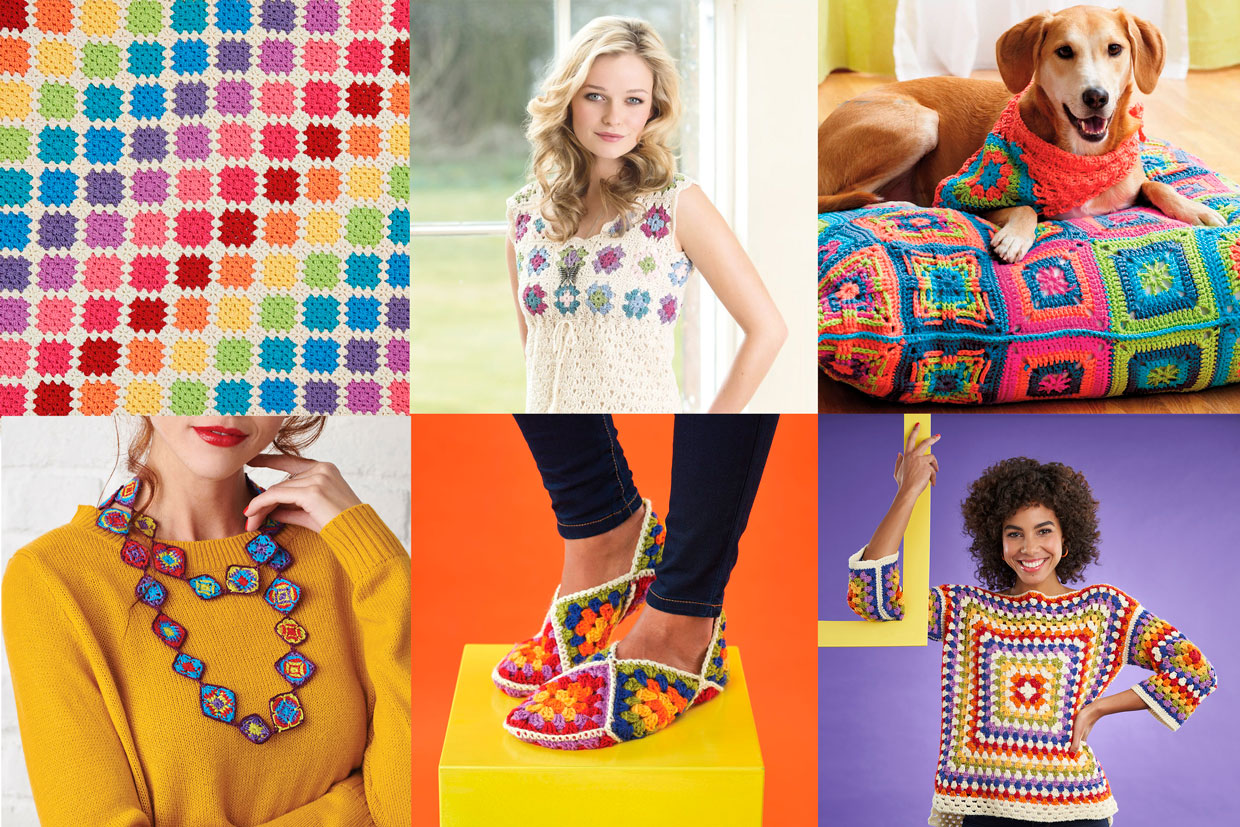
Why are granny squares so popular?
One of the main reasons that people love granny squares so much is because they’re quick and easy motifs that you can make in one go, and that quickly build up to be joined into a larger project.
There’s also a huge range of variations of granny squares, so whether you enjoy trying new stitches or love experimenting with different colours, there’s a square to suit every crocheter!
Make a range of different granny squares
Now that you know the basics of how to make a granny square, there’s a huge range of other types of granny square patterns that you can try! Check out the free granny square patterns here on Gathered.