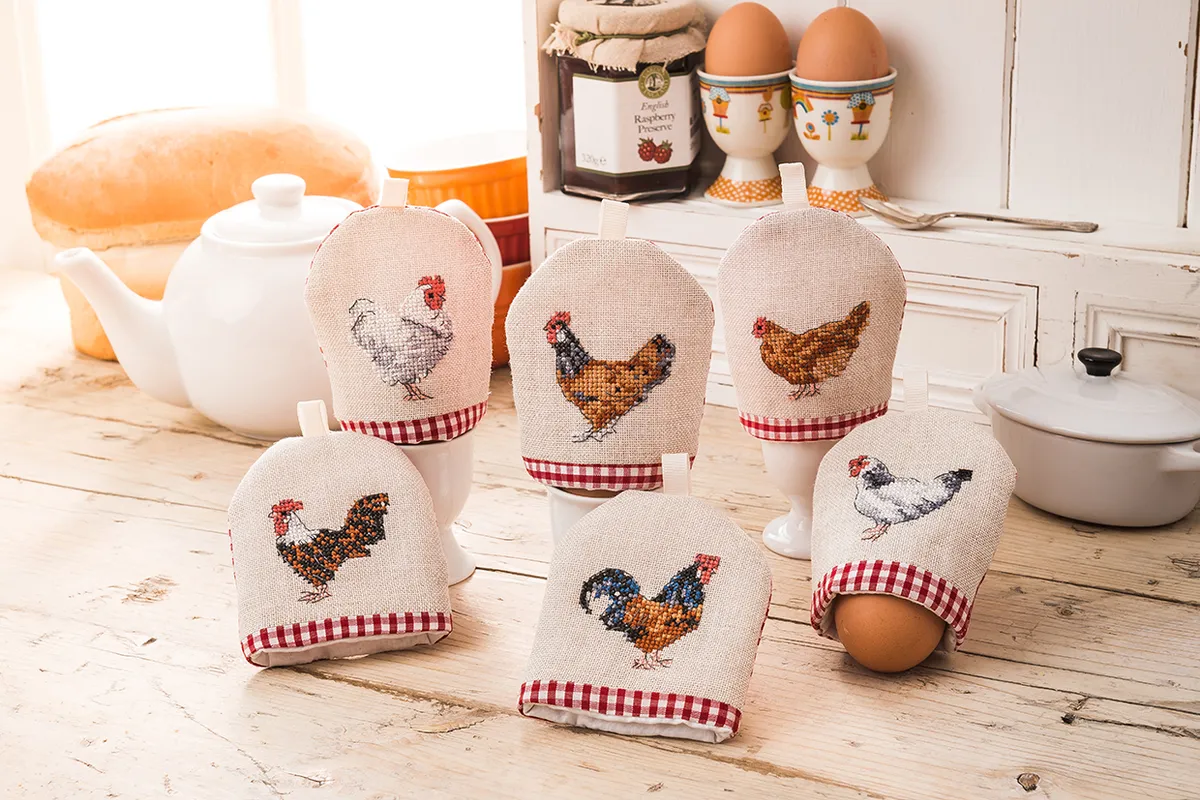
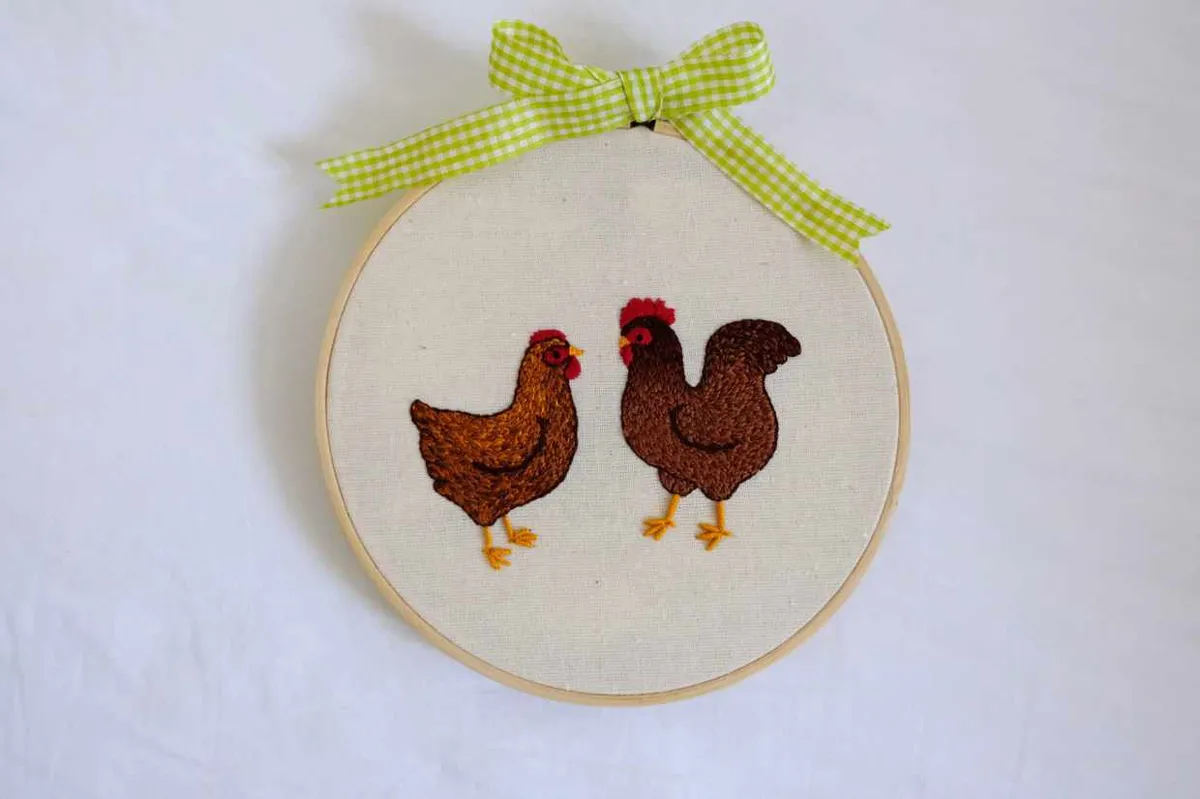
Whether you live in the country, or simply dream of doing so, nothing sums up country life like a clutch of chickens pottering around the garden, scratching in the earth and making their low clucking sounds.
So, what could be more fitting for a country-style breakfast than toast soldiers and a deliciously runny boiled egg, kept warm with one of these winsome chicken cross stitch pattern adorning a sweet egg cosy. Once you’ve stitched your chicken cross stitch pattern, which looks so lifelike thanks to Jenny’s realistic shading, follow the easy making-up instructions to transform your chicken cross stitch patterns into mini cosies. If you need any advice on working the basics of cross stitch, click for our cross stitch for beginners article. We always knew breakfast was the best meal of the day!
These brilliant chicken cross stitch patterns were originally published in Cross Stitch Crazy issue 214 as a set of six sweet designs. As that issue is no longer available for purchase, the designer of the chicken cross stitch patterns, Jenny Barton, has kindly said we can offer these two chicken cross stitch patterns from the set as free cross stitch patterns for our gather makers. if you'd like to buy the full set of six chicken cross stitch patterns, these are available for purchase on Jenny's online chart store.
Download the chicken cross stitch patterns
Click to download the chicken cross stitch patterns. The download is an A4 PDF with two ceros stitch patterns, an accompanying key and the template you need to make the chicken cross stitch patters into egg cosies.
How to make the chicken cross stitch patterns into egg cosies
Step 1
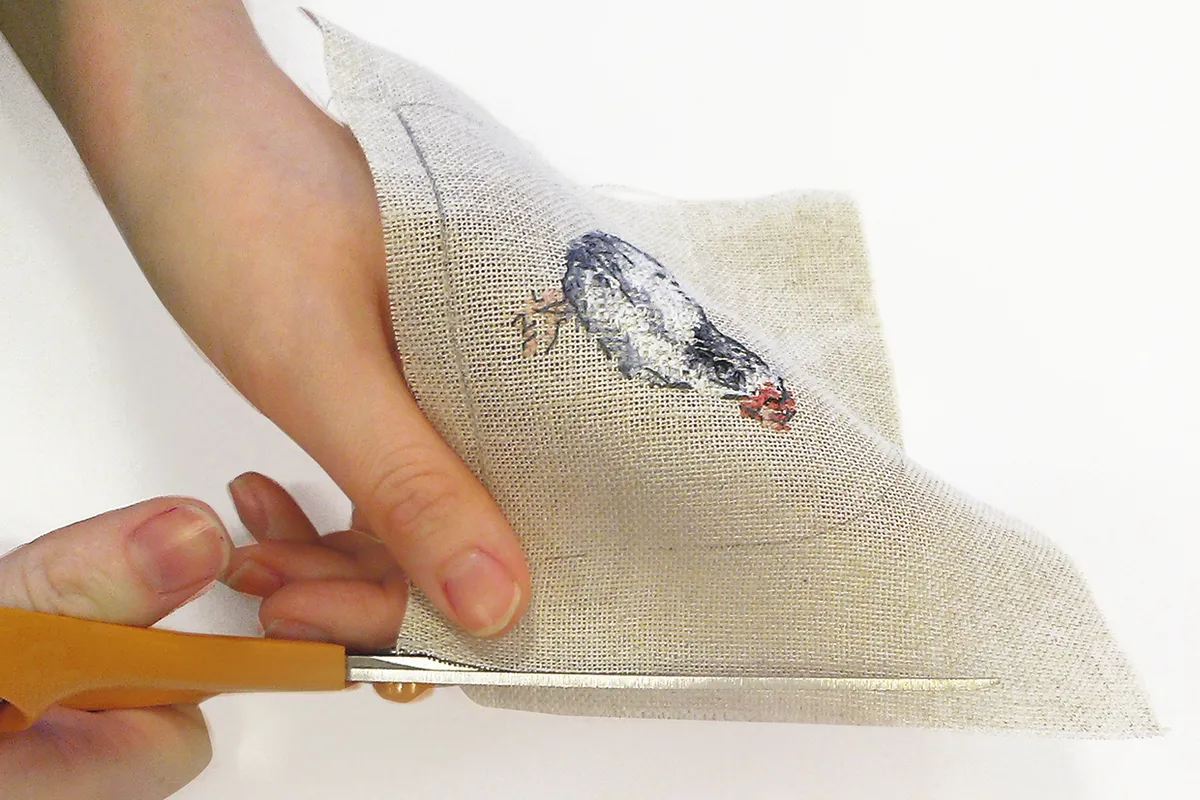
Place the template over the reverse of your chicken cross stitch, draw around it, then trim your fabric leaving a 1cm (½in) seam allowance. Cut a 3x9cm (1¼x3½in) piece from the backing fabric and pin to your chicken cross stitch with right sides facing and bottom raw edges aligned.
Step 2
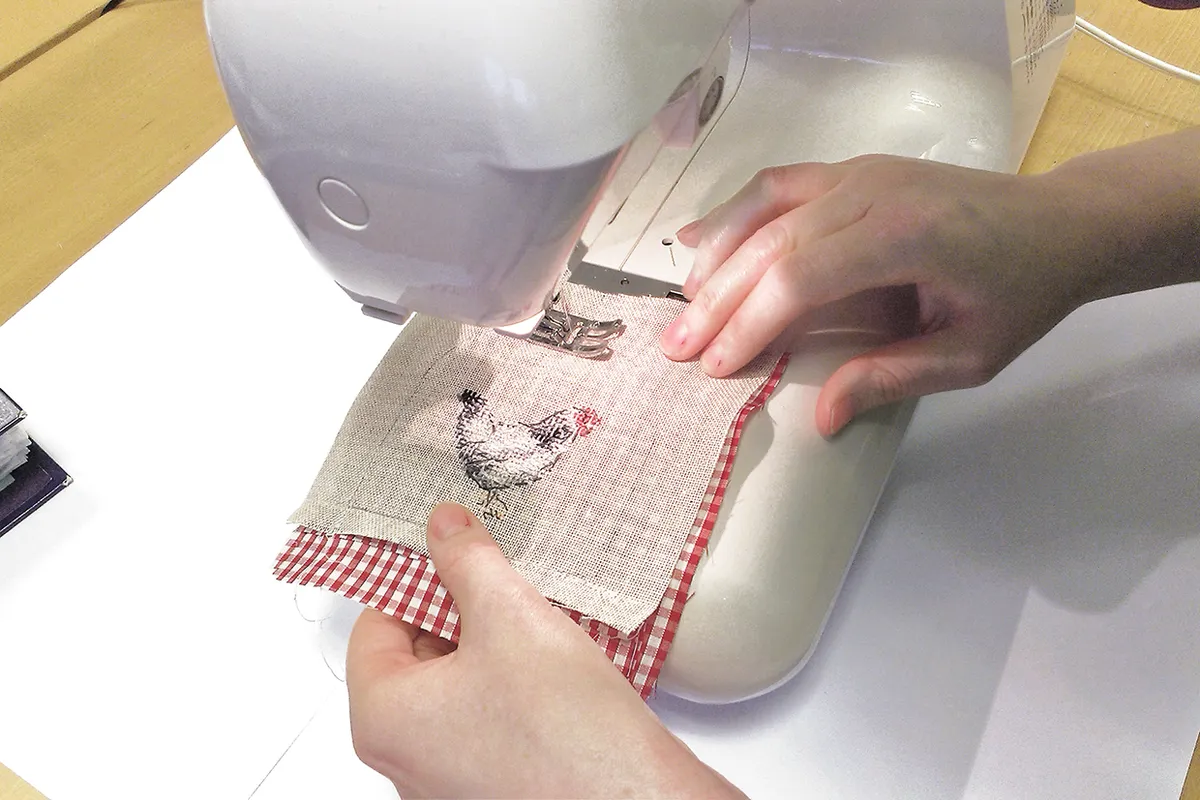
Sew the rectangle and chicken cross stitch together along the bottom line of the template. Cut another piece of backing fabric the same size as your chicken cross stitch and sew together with right sides facing, leaving the bottom open, and attaching a loop of ribbon at the top.
Step 3
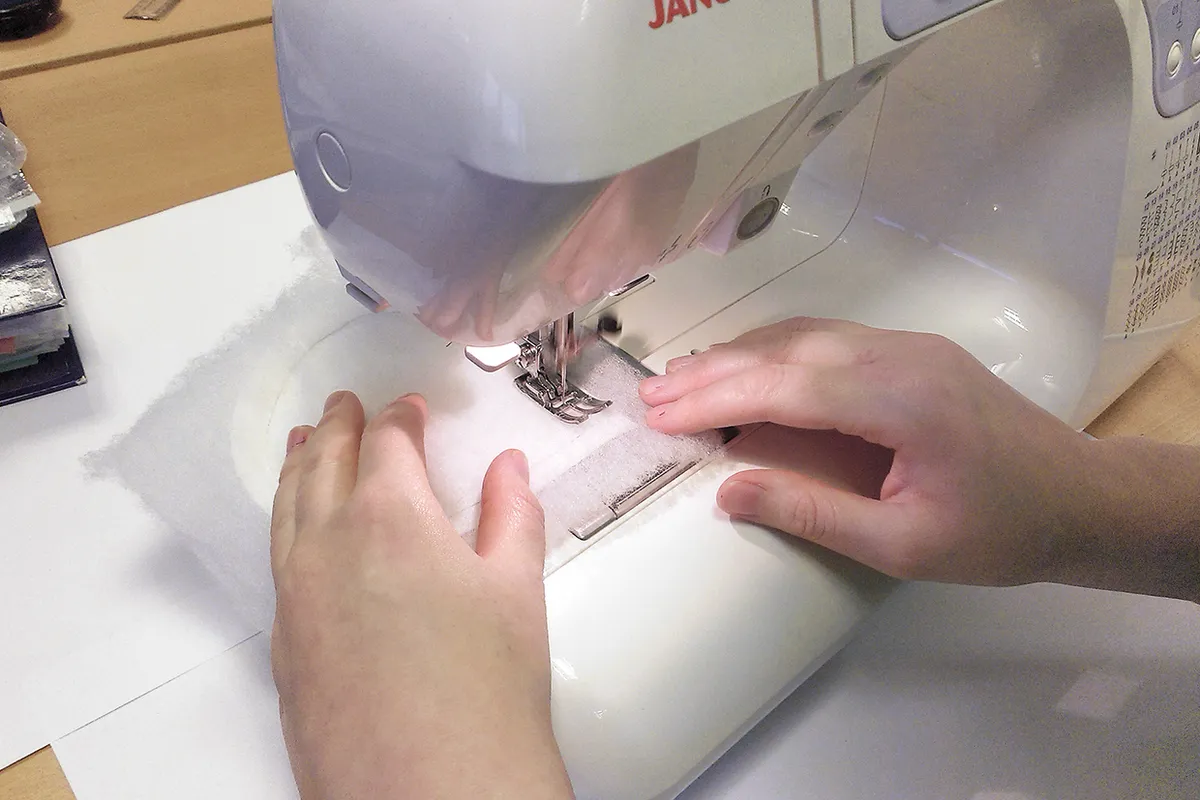
Using the template and leaving a 1cm (½in) seam allowance, cut two pieces of wadding and two of the lining. Sandwich both lining pieces between the wadding pieces with right sides facing and sew together, leaving the bottom open.
Step 4
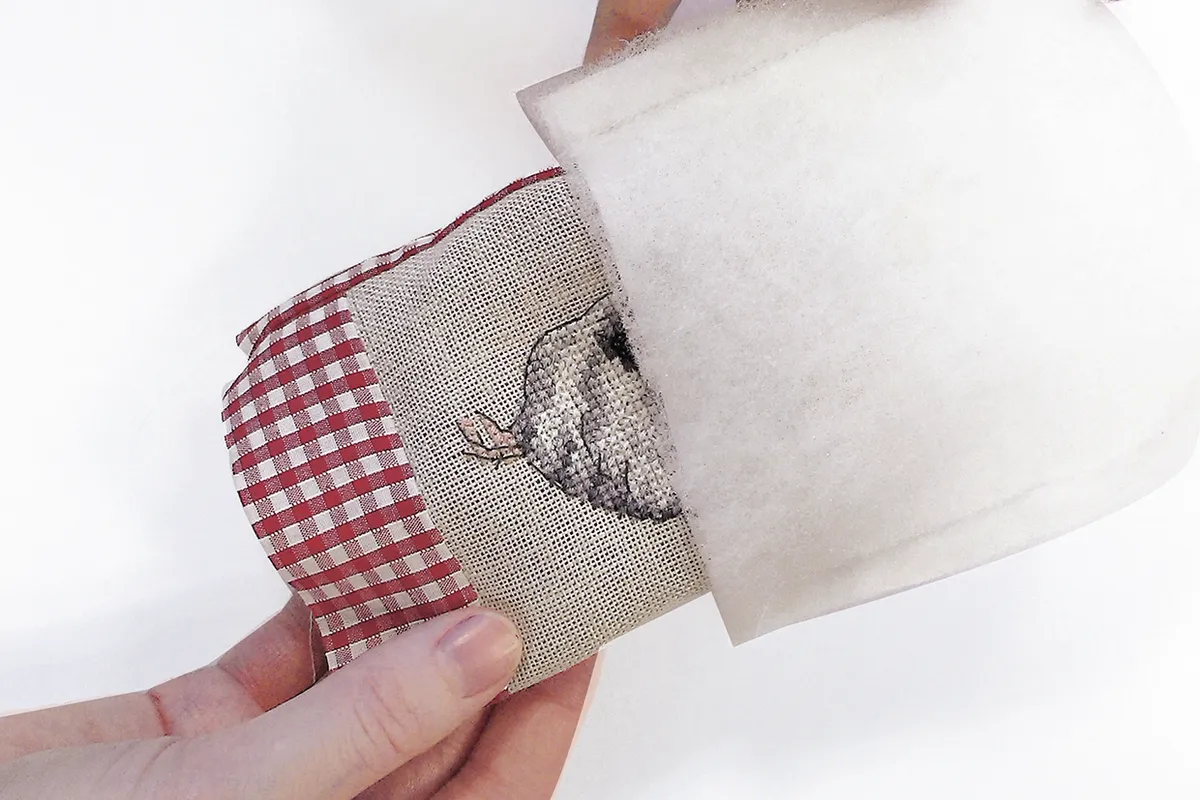
Trim any excess fabric from your sewn egg cosy then turn through to the right side. Place inside your sewn wadding and lining, making sure it’s positioned in the middle of all four layers, so between the two pieces of lining fabric.
Step 5
Pin the wadding to your egg cosy along the bottom edge, then machine-stitch all the layers together around the outside edge of the wadding, leaving the bottom open and a 2.5cm (1in) gap for turning through. Trim off any excess backing fabric from the bottom.
Step 6

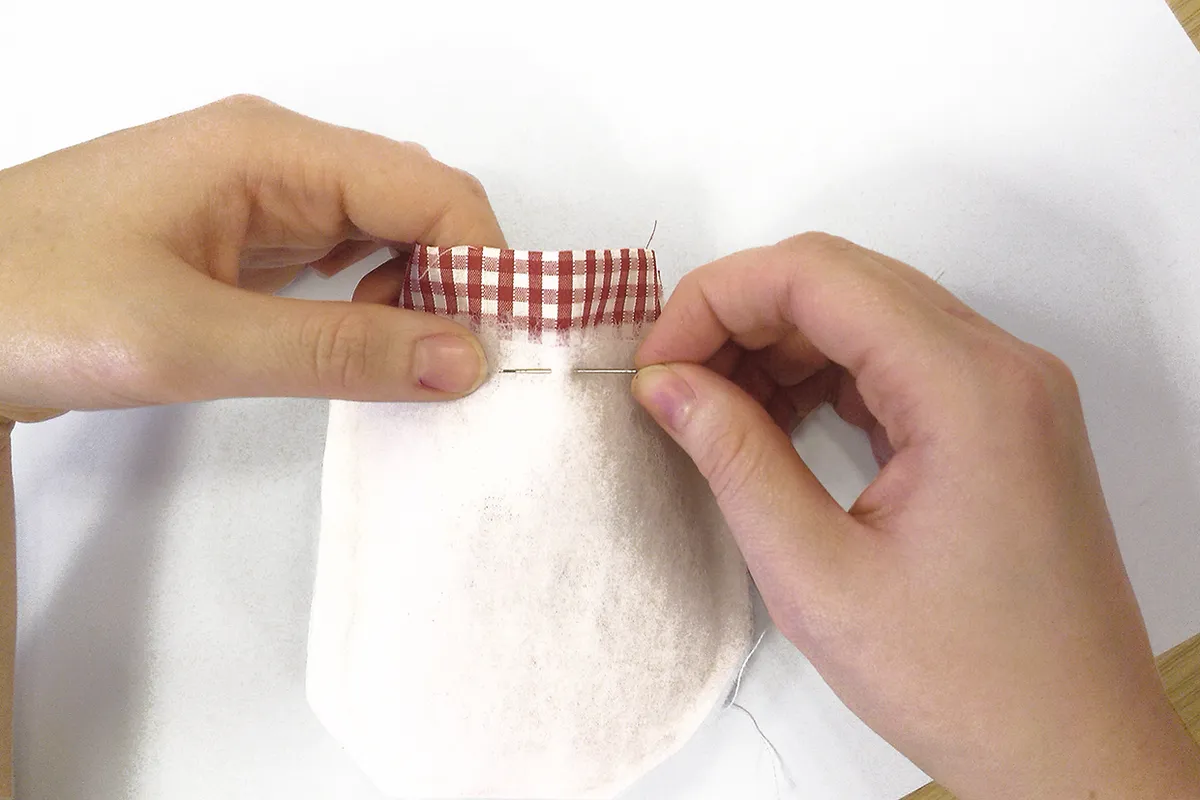
Using the gap you’ve left, turn your egg cosy through to the right side. Push out the lining so that it sits evenly and comfortably inside your egg cosy, then neatly slip-stitch the gap closed, and press with a warm iron to finish.
More chickens to stitch
looking for other chicken to go with your chicken cross stitch patterns? Click to find our chicken embroidery designs.