Follow our step-by-step guide below to make your own sew-on patch using your finished cross stitching. Then, give your favourite accessory or clothing a stitchy update! Or surprise a friend with a patch made just for them.
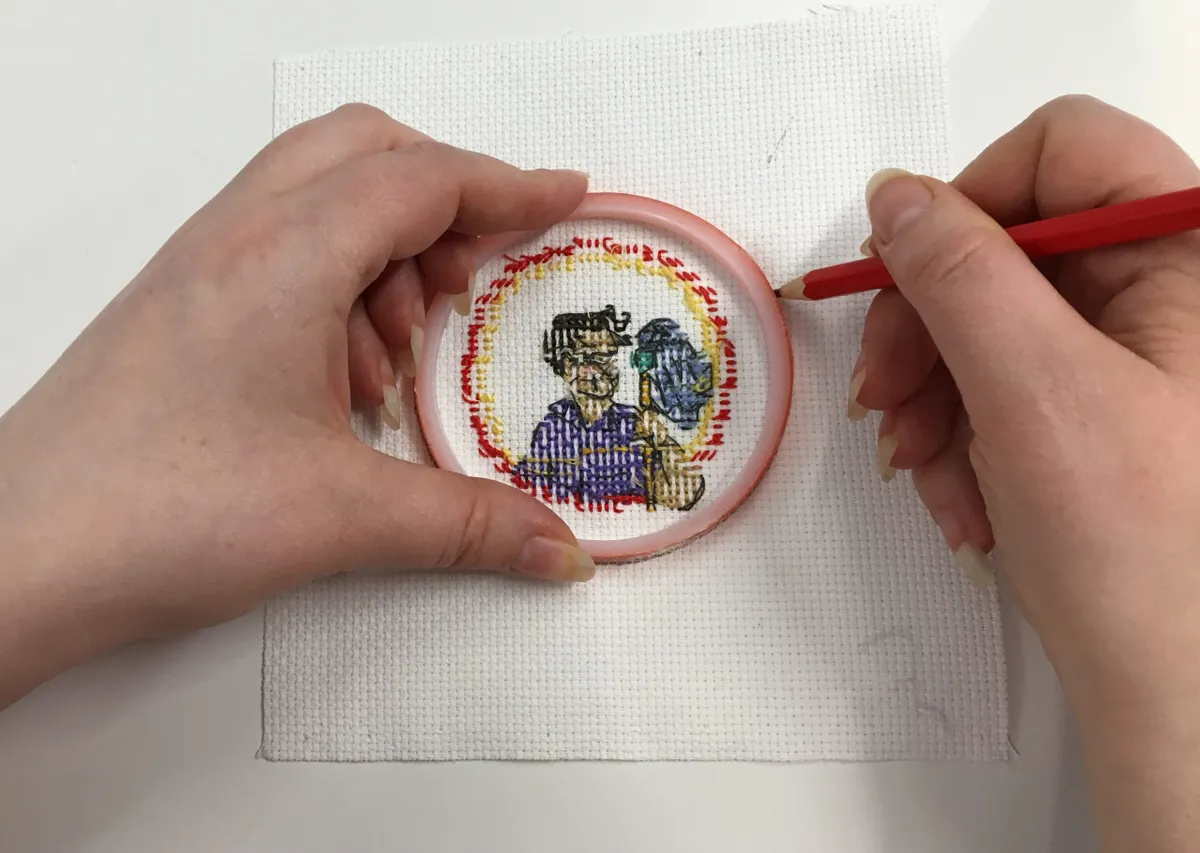
Step 1
Mark your desired shape onto the back of your stitched piece. We’ve made ours circular but you can do any shape you want as long as you leave a 0.5cm border of fabric around your stitching.
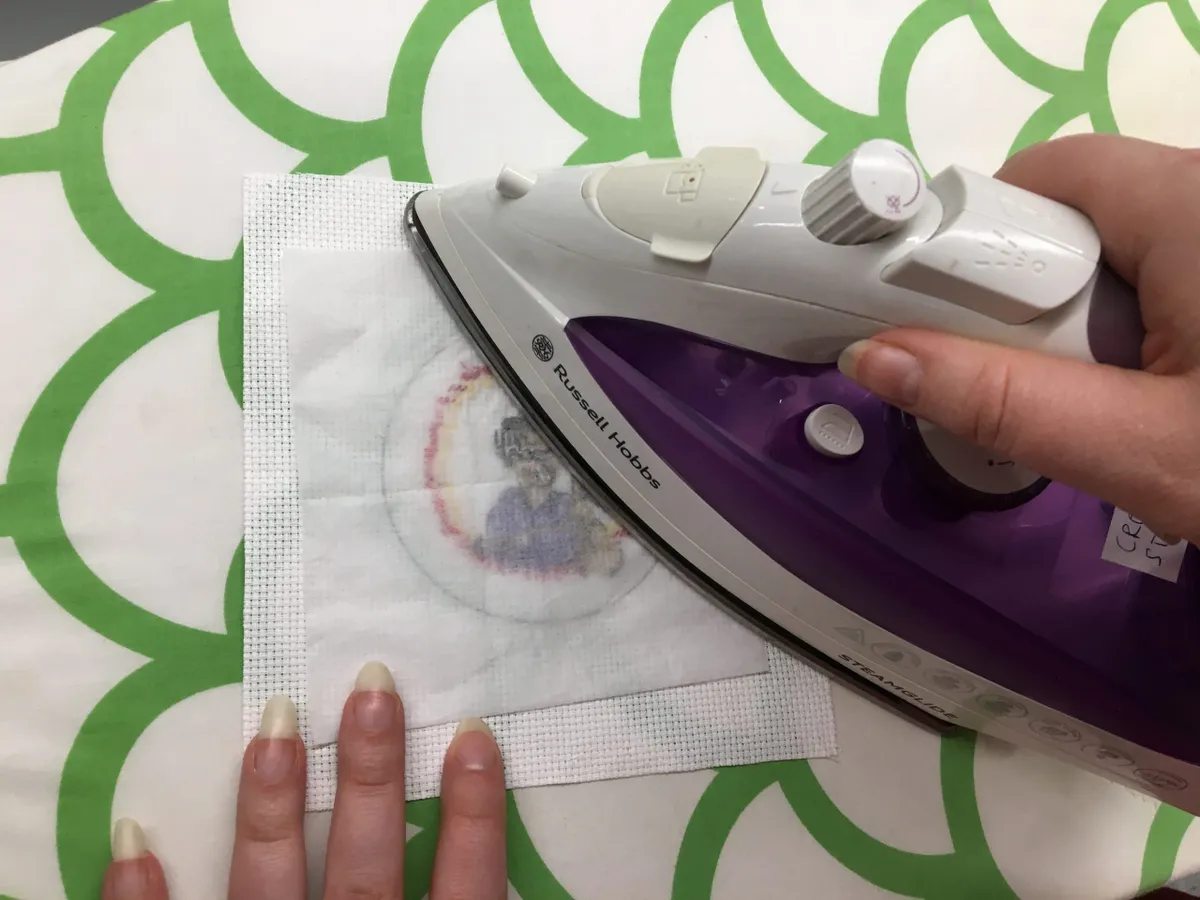
Step 2
Back your stitching with medium-weight iron-on interfacing following the instructions on the packet. This will protect the back of your stitching and gives stability to the finished patch.
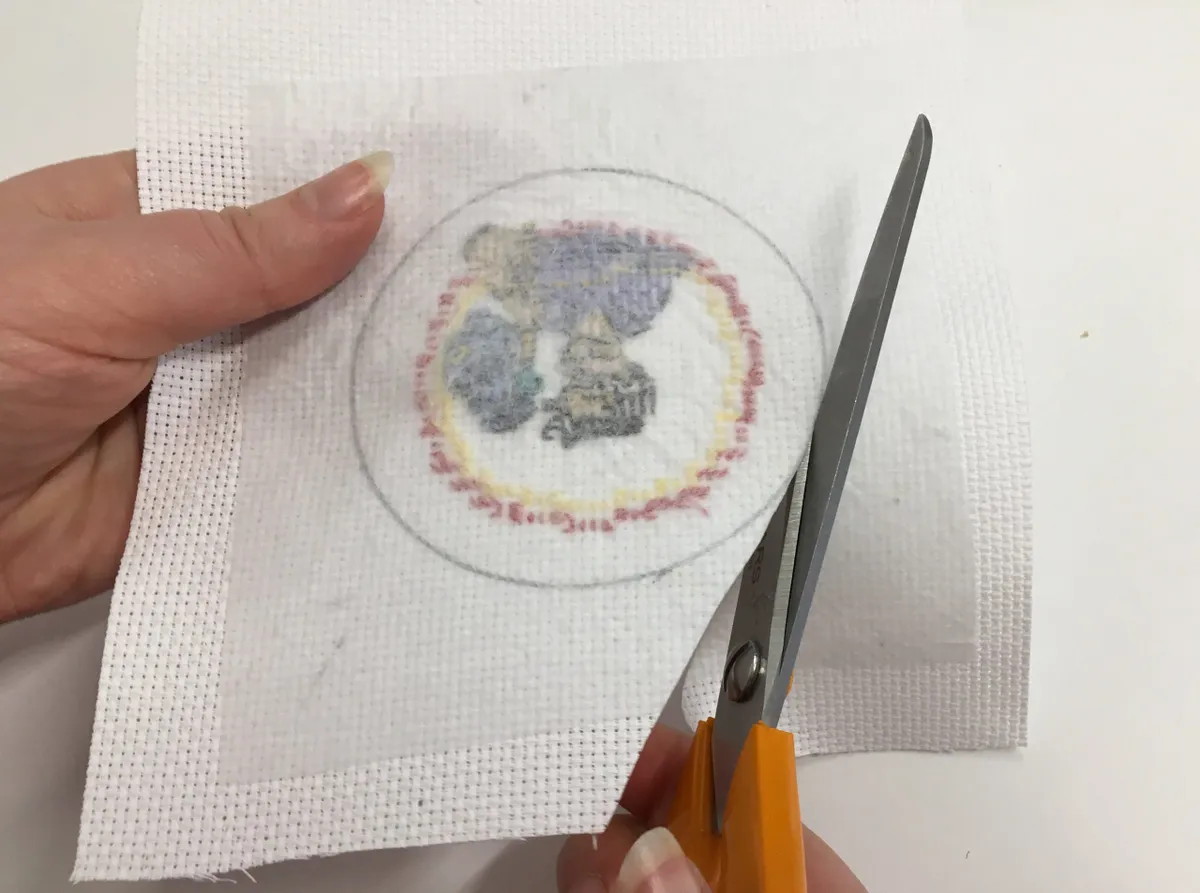
Step 3
Cut out, along your marked line – the more smooth you can make this line the better. If you are making a patch with a more complex shape, make sure your corners are nicely rounded.
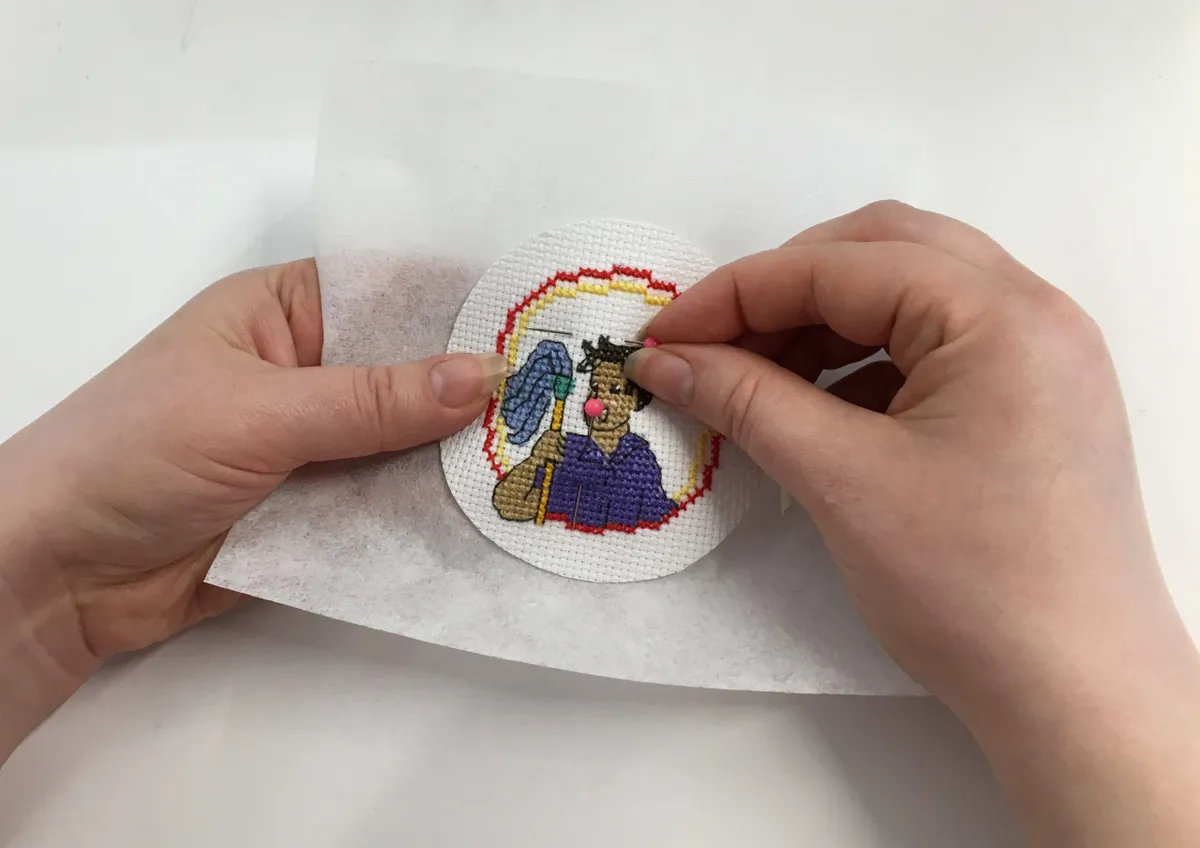
Step 4
Pin your stitched piece onto a generously sized piece of tear-away cotton stabilizer (this will help you manoeuvre your stitched piece as you feed it through your sewing machine to achieve a smooth outline).
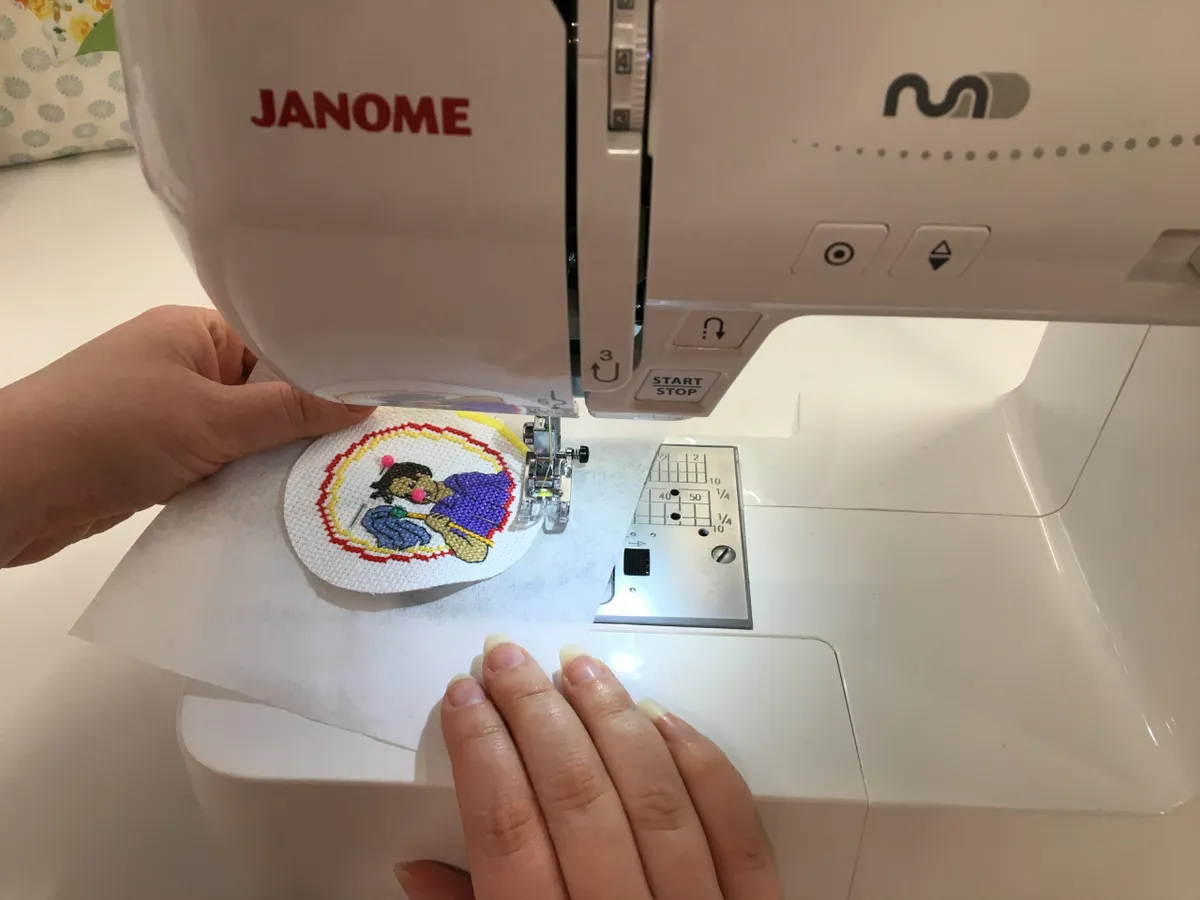
Step 5
Set your machine to zig-zag stitch setting with a stitch height of 5 and stitch width of 0.2. Sew around the outer edge, coating the raw edge of your stitched piece and creating a sewn border around your design.
Step 6
Finish by removing the tear-away cotton stabilizer from around the edge. Your patch is now ready to stitch onto a bag, apron or anything you want to adorn with a stitched motif.