
Every issue of Love Embroidery magazine has a beautiful blend of embroidery inspiration, designs and how to guides for modern stitchers. We're doubly happy to be welcoming them to the Gathered family, so you'll be able to keep up with all their latest news here in our Love Embroidery section.
The Love Embroidery team are offering some free machine embroidery patterns for you to enjoy. We have a whole host of different machine embroidery pattern digital file formats for these free machine embroidery designs, so chances are we have the digital file you need for your own digital embroidery machine!
Free machine embroidery designs: mushrooms
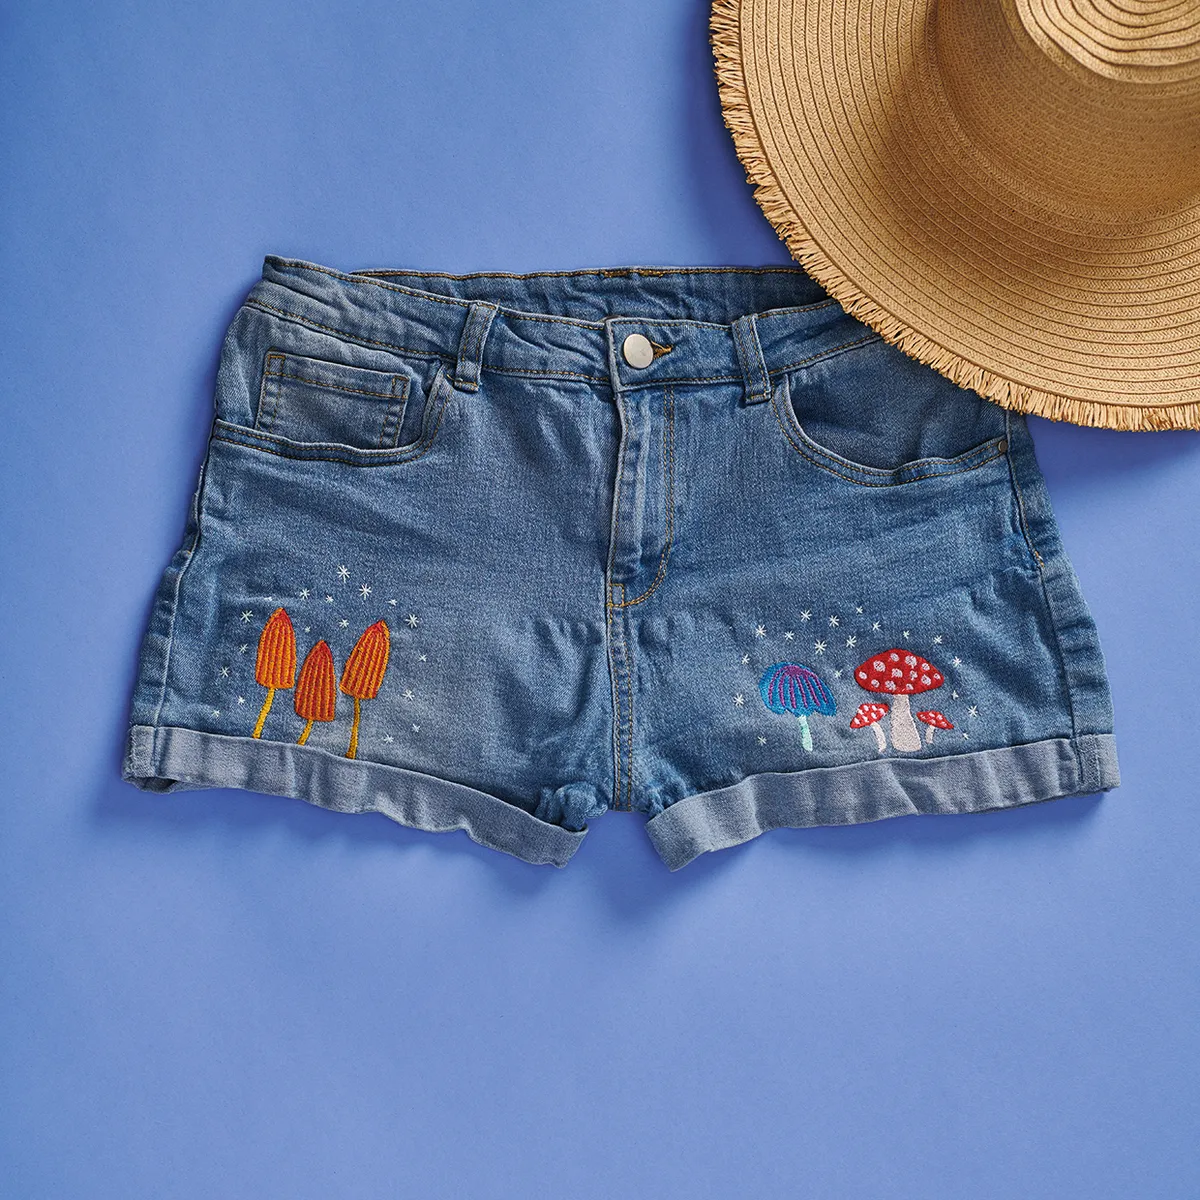
These free machine embroidery designs of mushrooms have been used to decorate a brilliant pair of jeans shorts! They featured in Love Embroidery magazine issue 14, created by one of their talented designers, Sophie Tarrant.
For the mushroom free machine embroidery designs, we have PES files to share, which work with Brother, Babylock and Deco embroidery machines.
Download our free machine embroidery designs for mushrooms
Simply click on the link below and download the file for the free machine embroidery designs
Mushroom free machine embroidery design PES files
Free machine embroidery designs: lace earrings
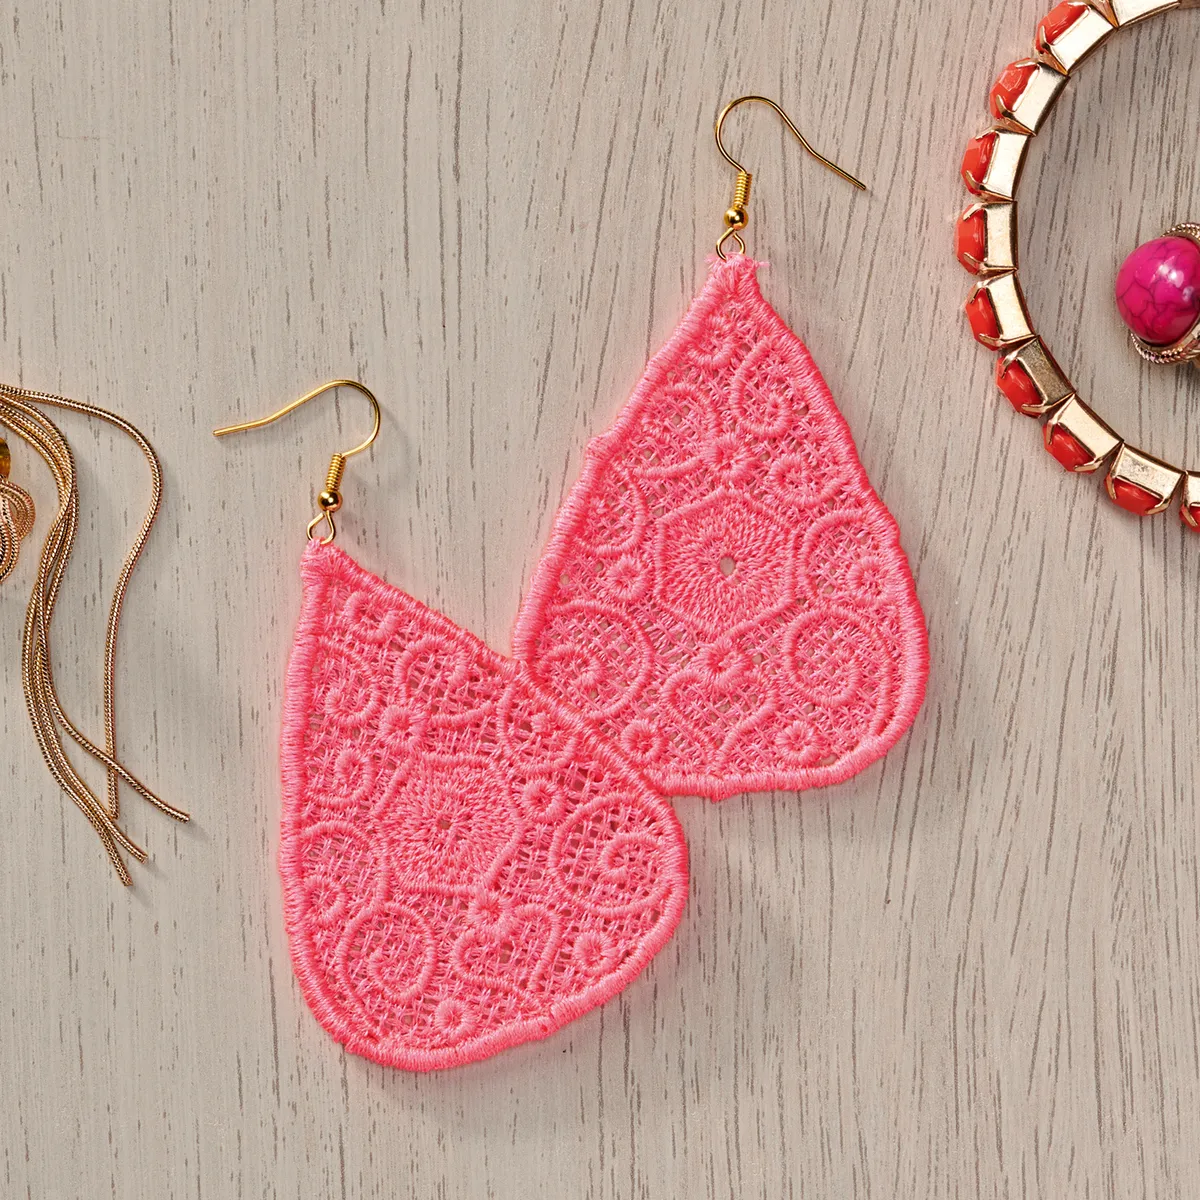
These free machine embroidery designs of lace earrings have been stitched on water-soluble stabiliser so you can wash the fabric away once you've finished stitching and hey presto, you have a pair of gorgeous earrings! They featured in Love Embroidery magazine issue 15, created by one of their talented designers, Sophie Tarrant.
For the lace earrings free machine embroidery designs, we have PES files to share, which work with Brother, Babylock and Deco embroidery machines.
Download our free machine embroidery designs for lace earrings
Simply click on the link below and download the file for the free machine embroidery designs
Lace earrings free machine embroidery design PES files
Getting started with the free machine embroidery patterns
It’s important to always choose the right hoop when machine embroidering. There are a wide variety of shapes and sizes available.Larger hoops such as the one used in this project are better for bigger designs.
Before you begin, it’s essential that you appropriately stabilise your fabric, to support and strengthen it during the stitching process. There are three main types of stabiliser used in machine embroidery:
Cut-away, which is usually used on stretchy fabrics and will remain in place indefinitely; any excess is cut away.
Tear-away, which is usually used on woven fabrics such as cotton and will be torn away after the design is worked.
Wash-away, which is used when all traces of it need to be removed from the project, such as when using a sheer fabric, or when thicker fabrics with a deep pile will need extra support from the front of the work as well as the back while you are working.
It’s best to practise a new design on a scrap of fabric before committing it to your final project to be sure that the thread colours you’ve chosen will work well and that the design is the correct size.
More machine embroidery designs
Want to find more machine embroidery designs to stitch? We have more free machine embroidery designs for you right here on gathered! If you want to try machine embroidery, but don't have an embroidery machine, try our free motion embroidery project to craft a tropical leaf pouch. Or if you are keen to try out machine embroidery design files, but don't yet have an embroidery machine, take a look out our best embroidery machines article.
Want to try a different craft? Click to browse our selection of free modern cross stitch patterns and find the one for you.
