Step 1

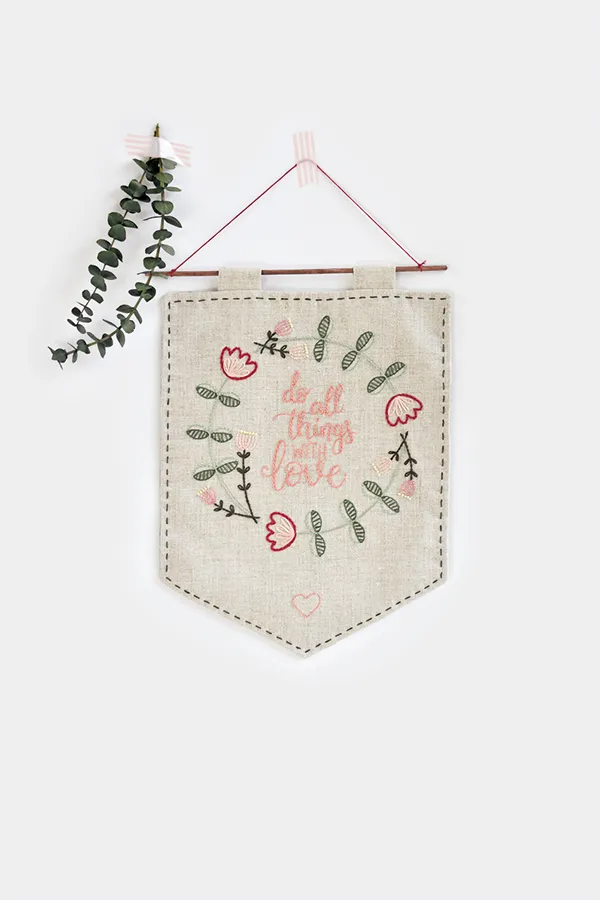
Using the template, mark the pattern on the linen with the marker and place the fabric in the hoop. Using red embroidery thread and chain stitch, embroider the outside of the large flowers. Stitch the details with detached chain stitch and light peach thread.
Step 2

Embroider the stems using stem stitch and light green thread for the long stems, and brown thread for the shorter stems. Add small leaves onto the shorter stems using lazy daisy stitch and brown thread. Work the large leaves using backstitch in light green thread at the top, and dark green thread at the bottom. Use straight stitch in dark green thread for the lines on the lower half of the leaves.
Step 3

For the small flowers, use backstitch for the lines and French knots for the dots. Use pink thread for the flowers on the outside of the wreath, light peach for the flowers on the inside of the wreath, and light yellow for all the dots.
Step 4

For the lettering, use backstitch in peach thread for the single lines, and a single row of chain stitch for the double lines. Work the heart using backstitch and peach thread. Your Valentines embroidery design is complete, now to make it into a banner!
Step 5

Remove any visible fabric marker and press the linen from the back. Using the rotary cutter and cutting mat, cut a 24 x 30cm (9½ x 117/8“) rectangle, making sure the embroidery is centred. Mark the two long edges 6.5cm (25/8“) up from the bottom, and mark the bottom edge at the centre. Form a banner shape by trimming from the two side markings, down to the centre point. Cut a piece of the cotton fabric to the same size.
Step 6

To create hanging tabs, cut two 5 x 8cm (2 x 31/8“) rectangles from the linen. Fold in half along the length, then sew the short ends together to create a tube. Press the seams open and turn right side (RS) out. Press each tube so the seam is centred, then fold in half with the seam inside the fold.
Step 7

Pin the front and back of the banner with RS together, then pin the tabs along the top edge, aligning the raw edges, and positioning them 5cm (2″) in from either long edge.
Step 8

Sew around the outside of the banner, leaving a 5cm (2″) opening for turning. Trim the corners to reduce any bulk.
Step 9

Turn the banner RS out and neatly push out the corners. Roll the seams open with your fingers, then iron the banner from the back to avoid pressing the embroidery on the front. Sew the gap closed using ladder stitch.
Step 10

Use brown embroidery thread and running stitch to stitch around the edges of the banner.
Step 11

Thin down a small amount of brown acrylic paint with a few drops of water, then paint the dowel with one or two coats of paint. Some of the wood should still show through.
Step 12

Slide the dowel through the tabs on the banner, then tie a 38cm (15″) length of embroidery thread to either end of the dowel to finish. Valentines embroidery design complete!