How to make needle felted animals
Learn how to make a needle felted cat, dog and bunny rabbit by following our easy step-by-step needle felted animal tutorial!

Published:
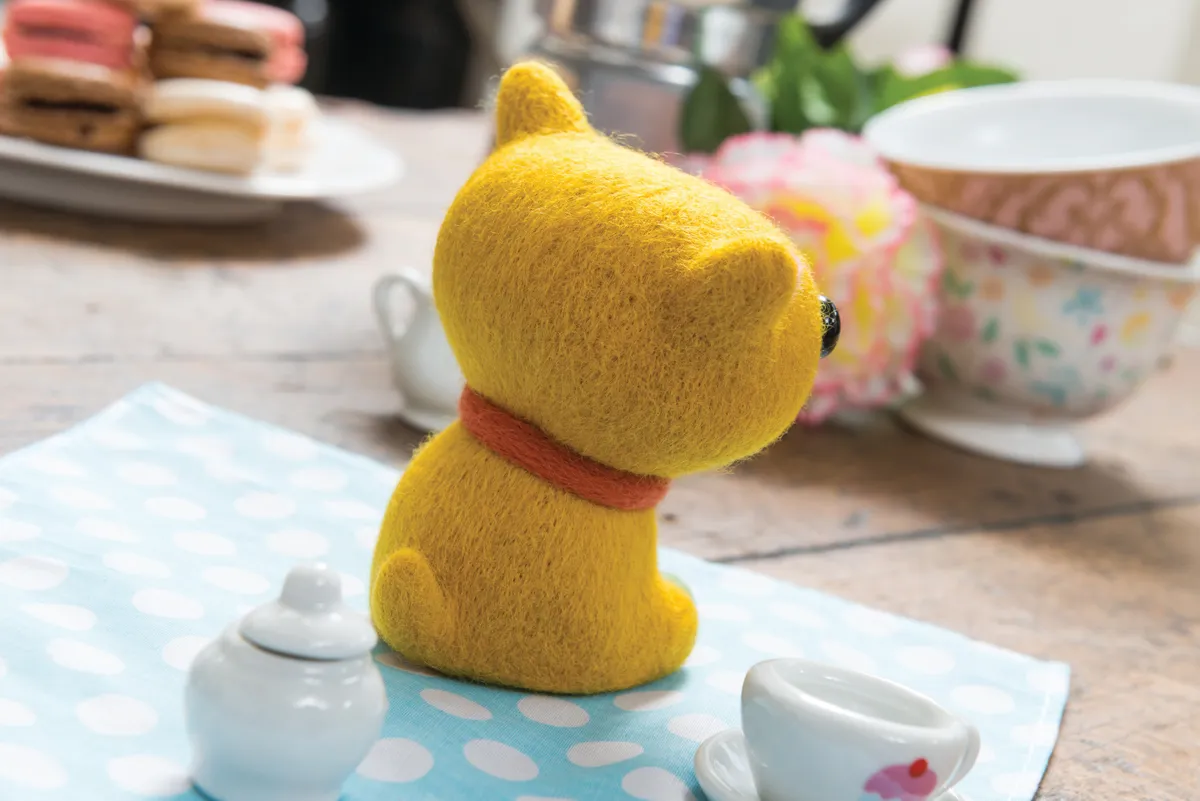
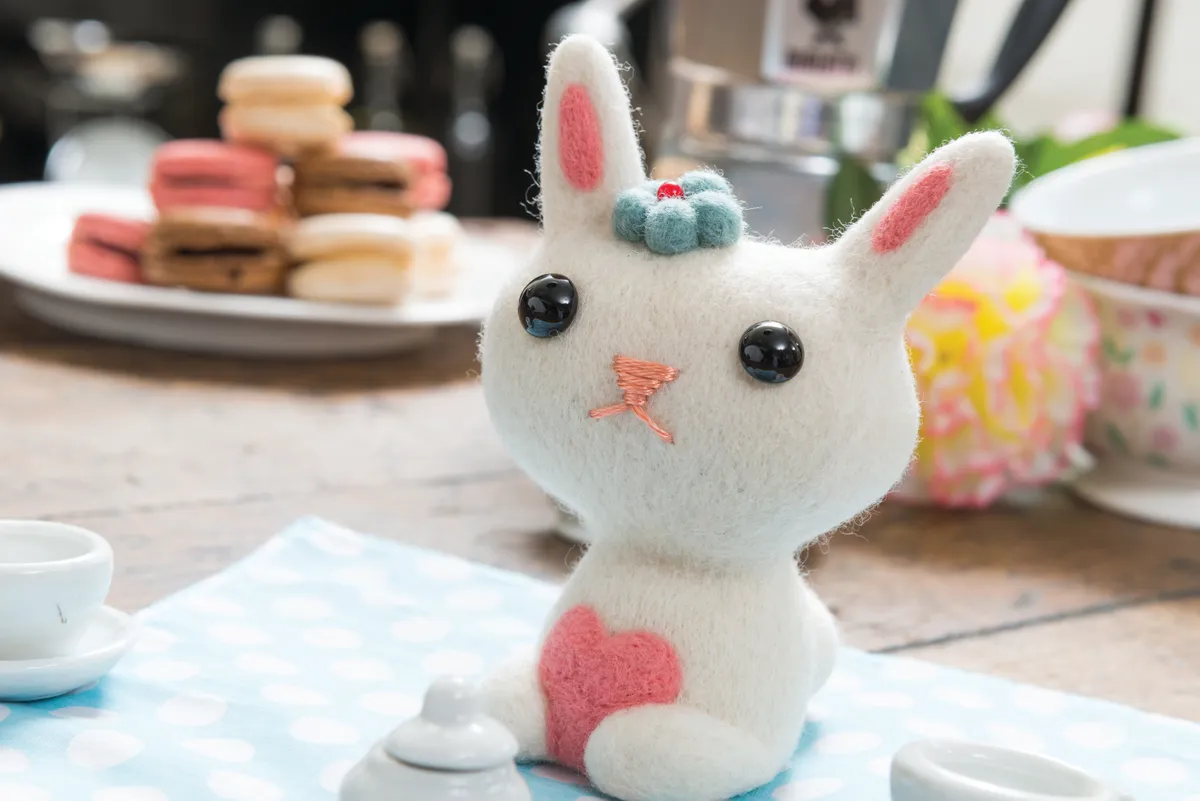
Are you looking for beautiful, free needle felting patterns? In this article, we have three stunning needle felted animals for you to make today! Designed by Gretel Parker, there is a needle felted cat, needle felted dog and needle felted rabbit – which is your favourite?
This trio of characters is fun to create and if you’re thinking of selling your makes, needle felted animals have a profitable price point. We think these adorable needle felted animals could mark the beginning of a life-long romance with needle felting and craft selling.
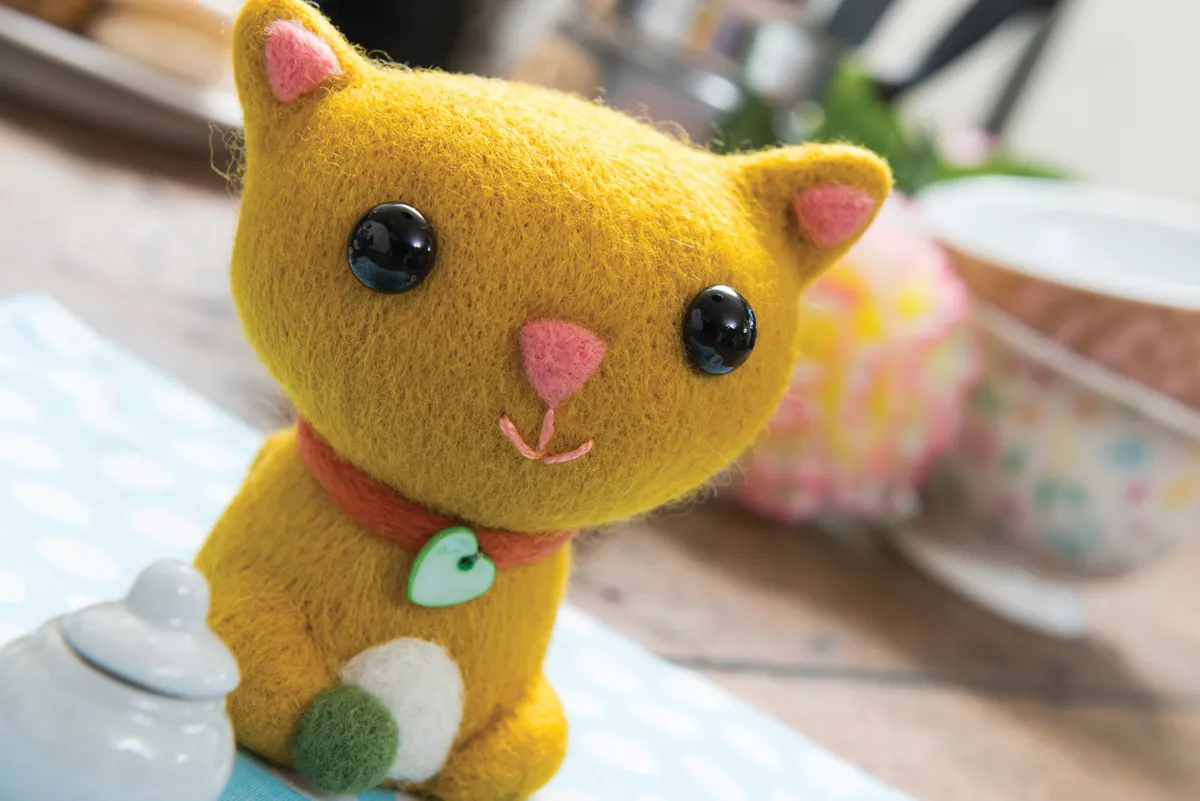
Just look at that adorable face!

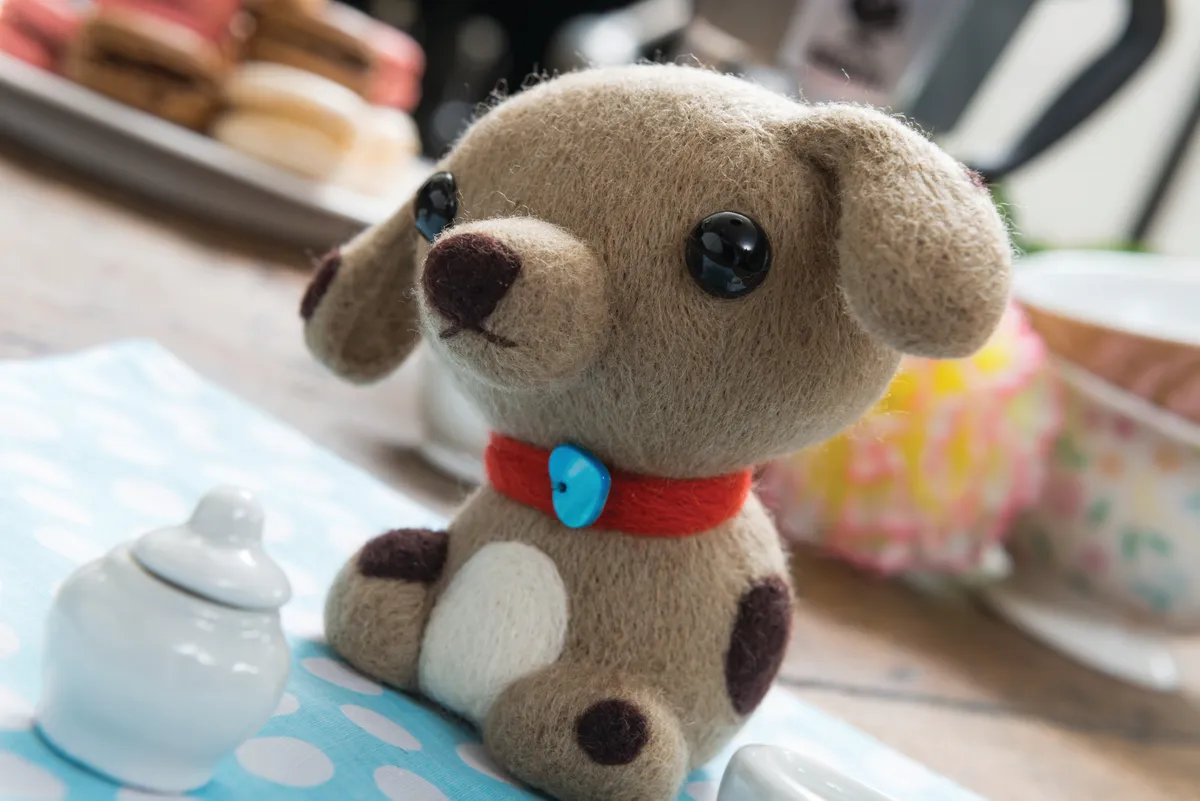
Despite these needle felted animals being rated ‘medium’ in skill level, the beautiful, fluid nature of this craft means the designs you create can be tailored to suit your own style, giving you the freedom to make whatever you choose into a gift that will be treasured forever.

If you fancy checking out our beginner’s project, check out our Beginner’s Guide to Needle Felting – also created by needle felting superstar, Gretel Parker.
Remember, these needle felted animals are not designed as toys or meant for young children. Always ensure your work is well-made and any loose parts are securely attached.
Check out Gretel’s website, for more goodies including Zoom workshops, books and lots of adorable felted animals to buy. Why not follow Gretel Parker on Instagram for more needle felting inspiration, and be sure to look out for her new book, Decorative Needlefelting Projects – 20 Seasonal Projects for the Home, published by White Owl Books as part of their new craft range, which is out later this year. We can’t wait to see all the glorious projects it has to offer!
If you’ve made these needle felted animals, why not share a picture with us on Facebook or post them on Instagram, we love to see what you make!

To make these needle felted animals you will need:
- 30g merino wool roving in white and pink (for bunny); fawn, dark brown and white (for puppy) and ginger and white (for the kitten)
- Small amounts of extra roving in all colours for adding spots, stripes and accessories
- Small amounts of pink wool
- 2 x 1cm (1⁄4in) looped black glass toy eyes
- Strong black cotton thread
- Pink embroidery thread
- Felting sponge or brush mat
- Felting needle holder
- Size 40 or 42 felting needles (spiral or triangular)
- Long sewing needle
- Sewing awl or pointy scissors
- 1cm shell heart buttons
Measurements
- 9 x 7cm (31⁄2 x 23⁄4″) not including bunny ears

How to make a needle felted cat, dog and bunny rabbit
Total time:
Step 1
How to make the head
Take a 70cm (271⁄2in) length of wool in your chosen body colour. Muddle it into a loose ball, teasing the fibres apart. Begin working the wool with two or three needles, turning as you work, to ensure roundness.

Step 2
Continue working to shape a wide, oval head about the size of a large satsuma, approximately 7cm (23⁄4in) wide and 5cm (2in) high. When the texture is firm but still has some ‘give’ in it, then add the ears.

Step 3
If you’re making the puppy, add a round muzzle to the head, before adding the ears. To make it, use a pinch of wool and needle it directly onto the face using one needle.

Step 4
How to make the ears
For each pet, use two equal-sized tufts of wool. Shape them loosely on the felting mat using one needle, then join to the body.
For the bunny ears, double over two lengths of wool to create ears that are 3-4cm (11⁄4in) tall. Add a scrap of pink wool to each inner ear.

Step 5
To make the kitten’s ears, take a small pinch of wool and shape it to make two little cones about 1cm (1⁄4in) in height. Use one needle to add a tiny wisp of pink wool to the inside of each cone, for the inner ears.

Step 6
To make the puppy’s ears, take a pinch of wool and work it into two teardrop shapes measuring about 5cm (2in) long. Work the ears onto the top of the head positioned at the sides, so that they hang loose.

Step 7
How to make the body
Take a length of wool roving measuring 25-30cm (101⁄2in). Tease into a loose ball and shape it using two or three needles. Make a small, flat-bottomed hump, like a little hill. It should be 4-5cm (11⁄2-2in) tall and roughly 5cm (2in) across the circular base.

Step 8
To create the flat base, use your thumb and forefinger to hold the wool in a loose circle as you work and carefully needle until it holds the shape. You can use one needle for fine-tuning the edge. When the body is shaped and quite firm, add the paws.

Step 9
How to make the paws
Use two equal-sized pinches of wool for each pet. Double over and shape them loosely on a felting mat using one needle, before joining them to the body. Use the photograph below as a guide for positioning the paws onto the body.

Step 10
How to make the tails
Tails are easy! Just use a small tuft of wool for each tail – a little more for the bobble tail on the bunny. Use one needle to shape and attach the tail to the body.

Step 11
Joining the head to the body
Use a spare needle to hold the two body parts together while you work. Take several short lengths of wool, 10-15cm (4-6in) long, and work them onto the neck area to fix the head to the body. The wool should lie vertically, across the neck join, from head to toe.

Step 12
Continue this process all the way around until the head is firmly attached to the body. Needle in the ends of the loose fibres, wrapping them around the rest of the body.

Step 13
If you want your character to have a winsome tilted head, then simply hold the head at an angle while you work.

Step 14
Body markings
Use wisps of wool and one needle to add the body markings. The puppy and kitten both have white tummies that are made using a fat tuft of wool.

Step 15
Make the bunny’s tummy patch by shaping a heart from pink wool roving and working it onto the tummy using one needle.

Step 16
How to make the eyes, mouths and noses
Drill eye sockets using an awl. Use two lengths of black thread to sew in the eyes. Sew in the first eye by threading the two loose ends onto a long needle, insert into the eye position and take the thread through to the back of the head, pulling the eye into the felt. Repeat with the second eye, bringing the threads out at the same point.

Step 17
Tie all the threads together with a good, tight knot, making sure that the eyes are sitting tightly in their final positions. Rethread the needle and then bring the ends of the threads out of the body, away from the knot.

Step 18
Use a scrap of wool to make the wool noses, using one needle to needlefelt
the nose in position on the face. Use pink embroidery thread to sew on the mouth with two straight stitches.

Step 19
Or, you can add super-cute noses and mouths using pink embroidery thread and a few simple stitches.

Step 20
How to make the extras
To make the flower, shape a little pinch of wool into a ball on your felting mat, then sew a small bead to the centre. Needle it into position, then finish off the shaping.

Step 21
To make the kitten’s ball, loosely sculpt a ball on your felting mat, before needling it onto the body and finishing off the shaping.

Step 22
Use a skinny strip of wool about 20cm (8in) long to add a smart collar to your pet; wrap it around the neck a couple of times and fix it on using one needle. Sew on a sweetheart tag to finish it off.

Step 23
To get a smooth look to your characters, carefully go over the surface of your pet using one needle to even out any bumps and crevices. This takes a little time, but it is well worth it for a professional finish.

