Step 1

To make your baby album – let’s start by making the main structure. Cut two 135 x 170mm pieces and one 150 x 170mm piece of aqua card. Score and fold both smaller pieces 15mm from one long edge.
Score and fold the bigger piece 15mm from both long edges. The 15mm folds will form the spines of the album. Add tape to the folds on the 150 x 170mm panel and attach to the spines the other pieces at each side to create the album cover.
Step 2

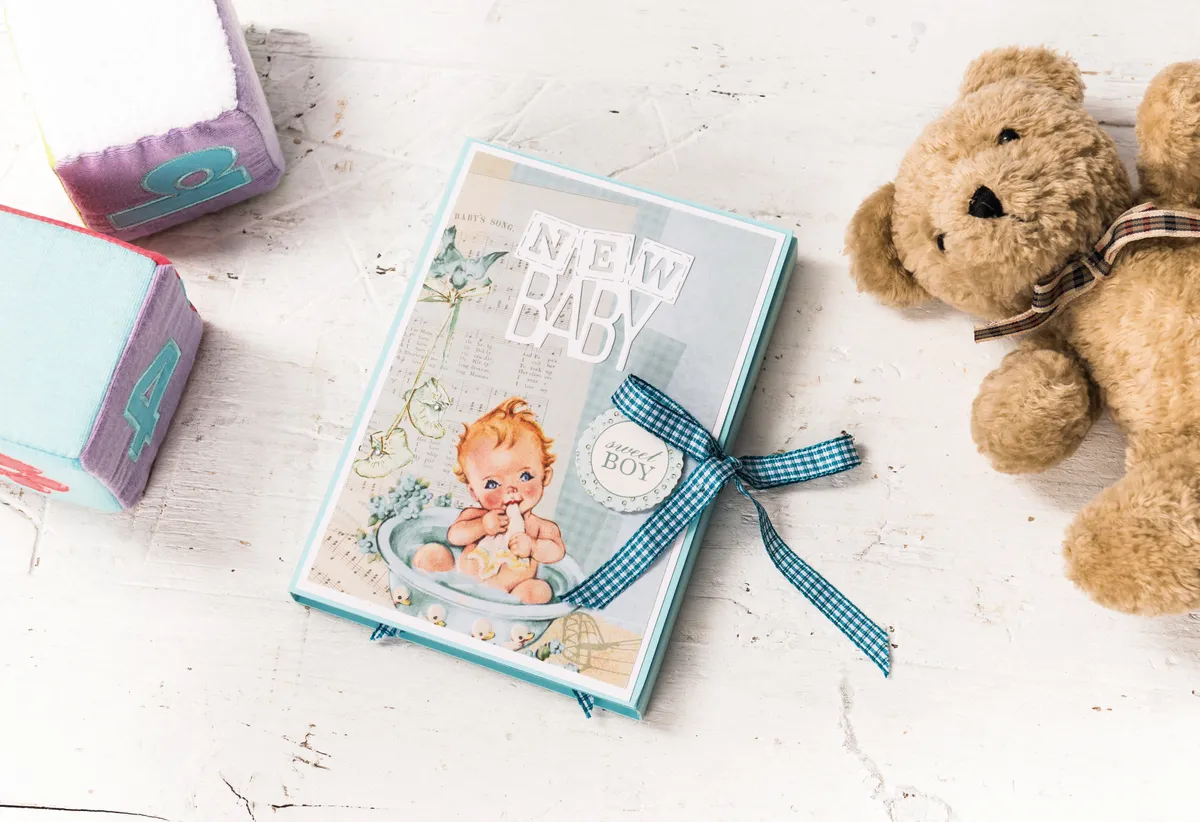
Cut two 110 x 160mm pieces of patterned paper, we’ve gone for paper featuring a baby and a plane! Layer onto two 115 x 166mm pieces of white card. Attach a 240mm length of gingham ribbon centrally to the right edge of the front cover and attach the baby paper.Fold the album so that the 150 x 170mm panel becomes the back. Attach ribbon centrally to the left edge of the back panel and attach the plane paper over top.
Step 3

Die-cut a ‘New baby’ sentiment from some white card and attach it centrally to the front of the album. You could also use ephemera if you don’t have a New Baby die set. Now decorate your baby album as it is so far!We’ve attached a ‘Sweet boy’ collectable to the centre-right using sticky fixers and added gems to the baby boots. We then glued two aeroplanes to the back and added a ‘Dream Big’ sentiment centrally to the top of the panel using sticky fixers.
Once you’re happy with the design, turn your album over and open it to the inside.
Step 4
 Score two pieces of 145 x 95mm white card 15mm from one long edge and both short edges. Trim diagonally where the fold lines cross, then fold the scored sections under.Glue patterned paper onto the front of each pocket.Punch a semi-circle from the centre of the top edge. Attach one pocket to the top centre panel of the album, glue some ephemera (we’ve gone for an ABC collectable) to the front and place the ‘Birth Record’ inside. If you’re making this baby album for a gift – why not include a picture of the mother-to-be instead?
Step 5
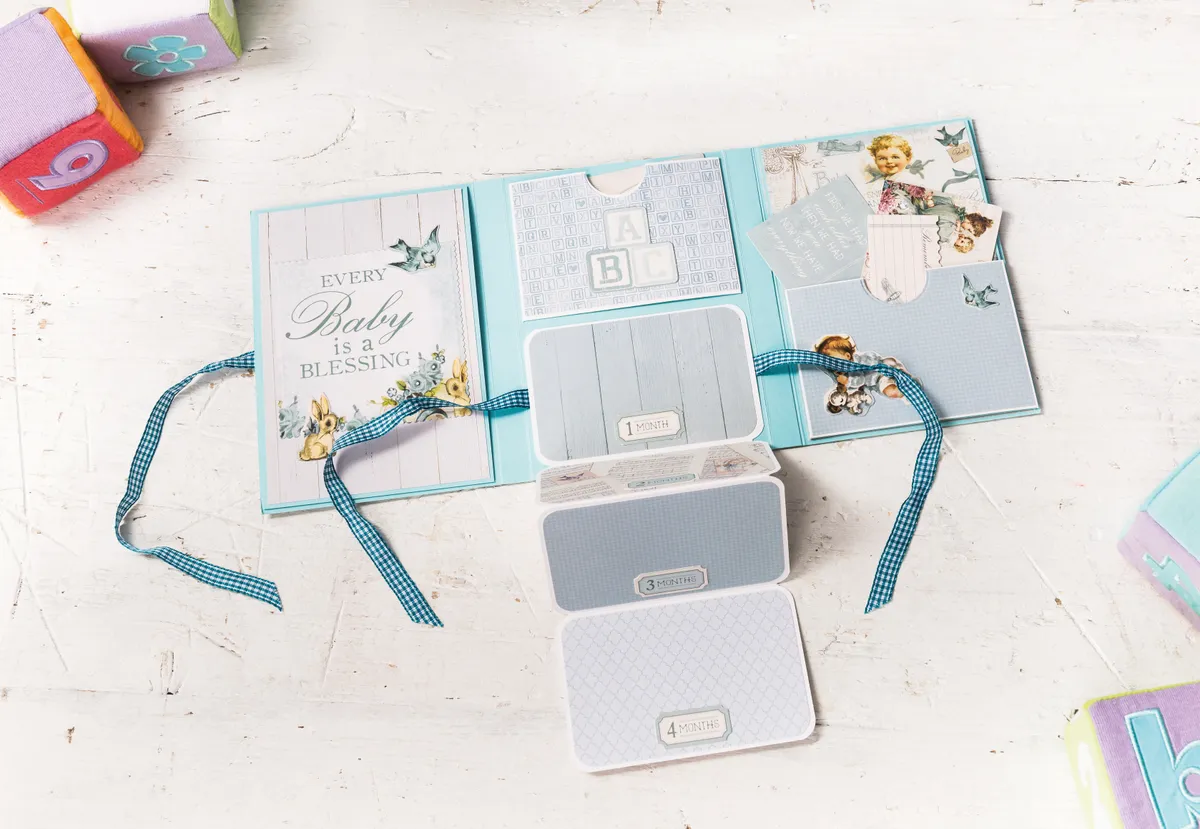
 Score 115 x 298mm of white card into four equal sections along the length. Mountain and valley fold, and round the corners. Attach five 110 x 70mm pieces of patterned paper with rounded corners to each section and the front.Add two 240mm lengths of ribbon to the back, and attach to the bottom centre of the album. Embellish with more ephemera, then tie closed.
Step 6
 Score and fold two 180 x 115mm pieces of aqua card 15mm from the short edge. Attach by the tabs inside left and right of the album. Cover with patterned paper and add pocket from step four to the panel on the right.Place some postcards and a ‘remember’ note inside. Embellish with more ephemera. Attach a 115 x 165mm piece of patterned paper under the panel, covering the tab at the top. Add a feature piece of ephemera – we’ve opted for a pram!
Step 7
 Attach a piece of patterned paper to the top of the inside left flap. Cut a sentiment – we’ve gone for ‘Every baby is a blessing’, and attach it to the panel with double-sided tape.Stick some adhesive gems to the flowers. Add a few more pieces of ephemera where you feel appropriate. Attach a 115 x 165mm piece of patterned paper under the flap, and glue another image to the top left (we’ve gone for ‘It’s a boy’) and the ‘Notes’ banner to the bottom right.
Step 8
 Attach a 110 x 165mm piece of patterned paper to the back right panel. Cut a sentiment – we’ve chosen a ‘Be little and dream big’ sentiment and attach it to the centre with double-sided tape.Glue another sentiment to the top right – we’ve gone for ‘Tiny and Sweet’ and a piece of ephemera to the bottom left. Add some adhesive gems then fold album closed and tie together to finish.