How to make an explosion card

You’ll be bursting with excitement over these fab special explosion cards, which are so easy to make! Check out our handy video and tutorial below to find all the instructions you'll need.

Try 6 issues of any craft magazine from just £9.99

Published: February 23, 2020 at 1:35 pm

Explosion cards can look really impressive. Adding a three-dimensional element to your cards always adds interest and the pop-up surprises inside of these cards are sure to wow! The folded inserts for these explosion cards are based on a series of clever folds that are origami-inspired. Follow the steps below to craft your own explosion card, and then once once you’ve mastered that, give the slightly more complex folding a try.

Once you’ve made the basic structure of these cards, there are lots of possibilities in decorating your cards, as there are so many surfaces to work with. Because of the way these cards ‘explode’ open, they make perfect birthday cards or are great for any kind of celebration or surprise! Keeping the outside of these cards fairly simple will increase the impact of the fun surprise inside!

Check out our video below to see how to make an explosion card

Shopping List:

  • Patterned papers
  • Sentiment stamps
  • Coloured card,
  • Foam pads
  • Sequins,
  • Baker's twine
  • Ink pad
  • Ribbon
  • Bone folder

Step 1

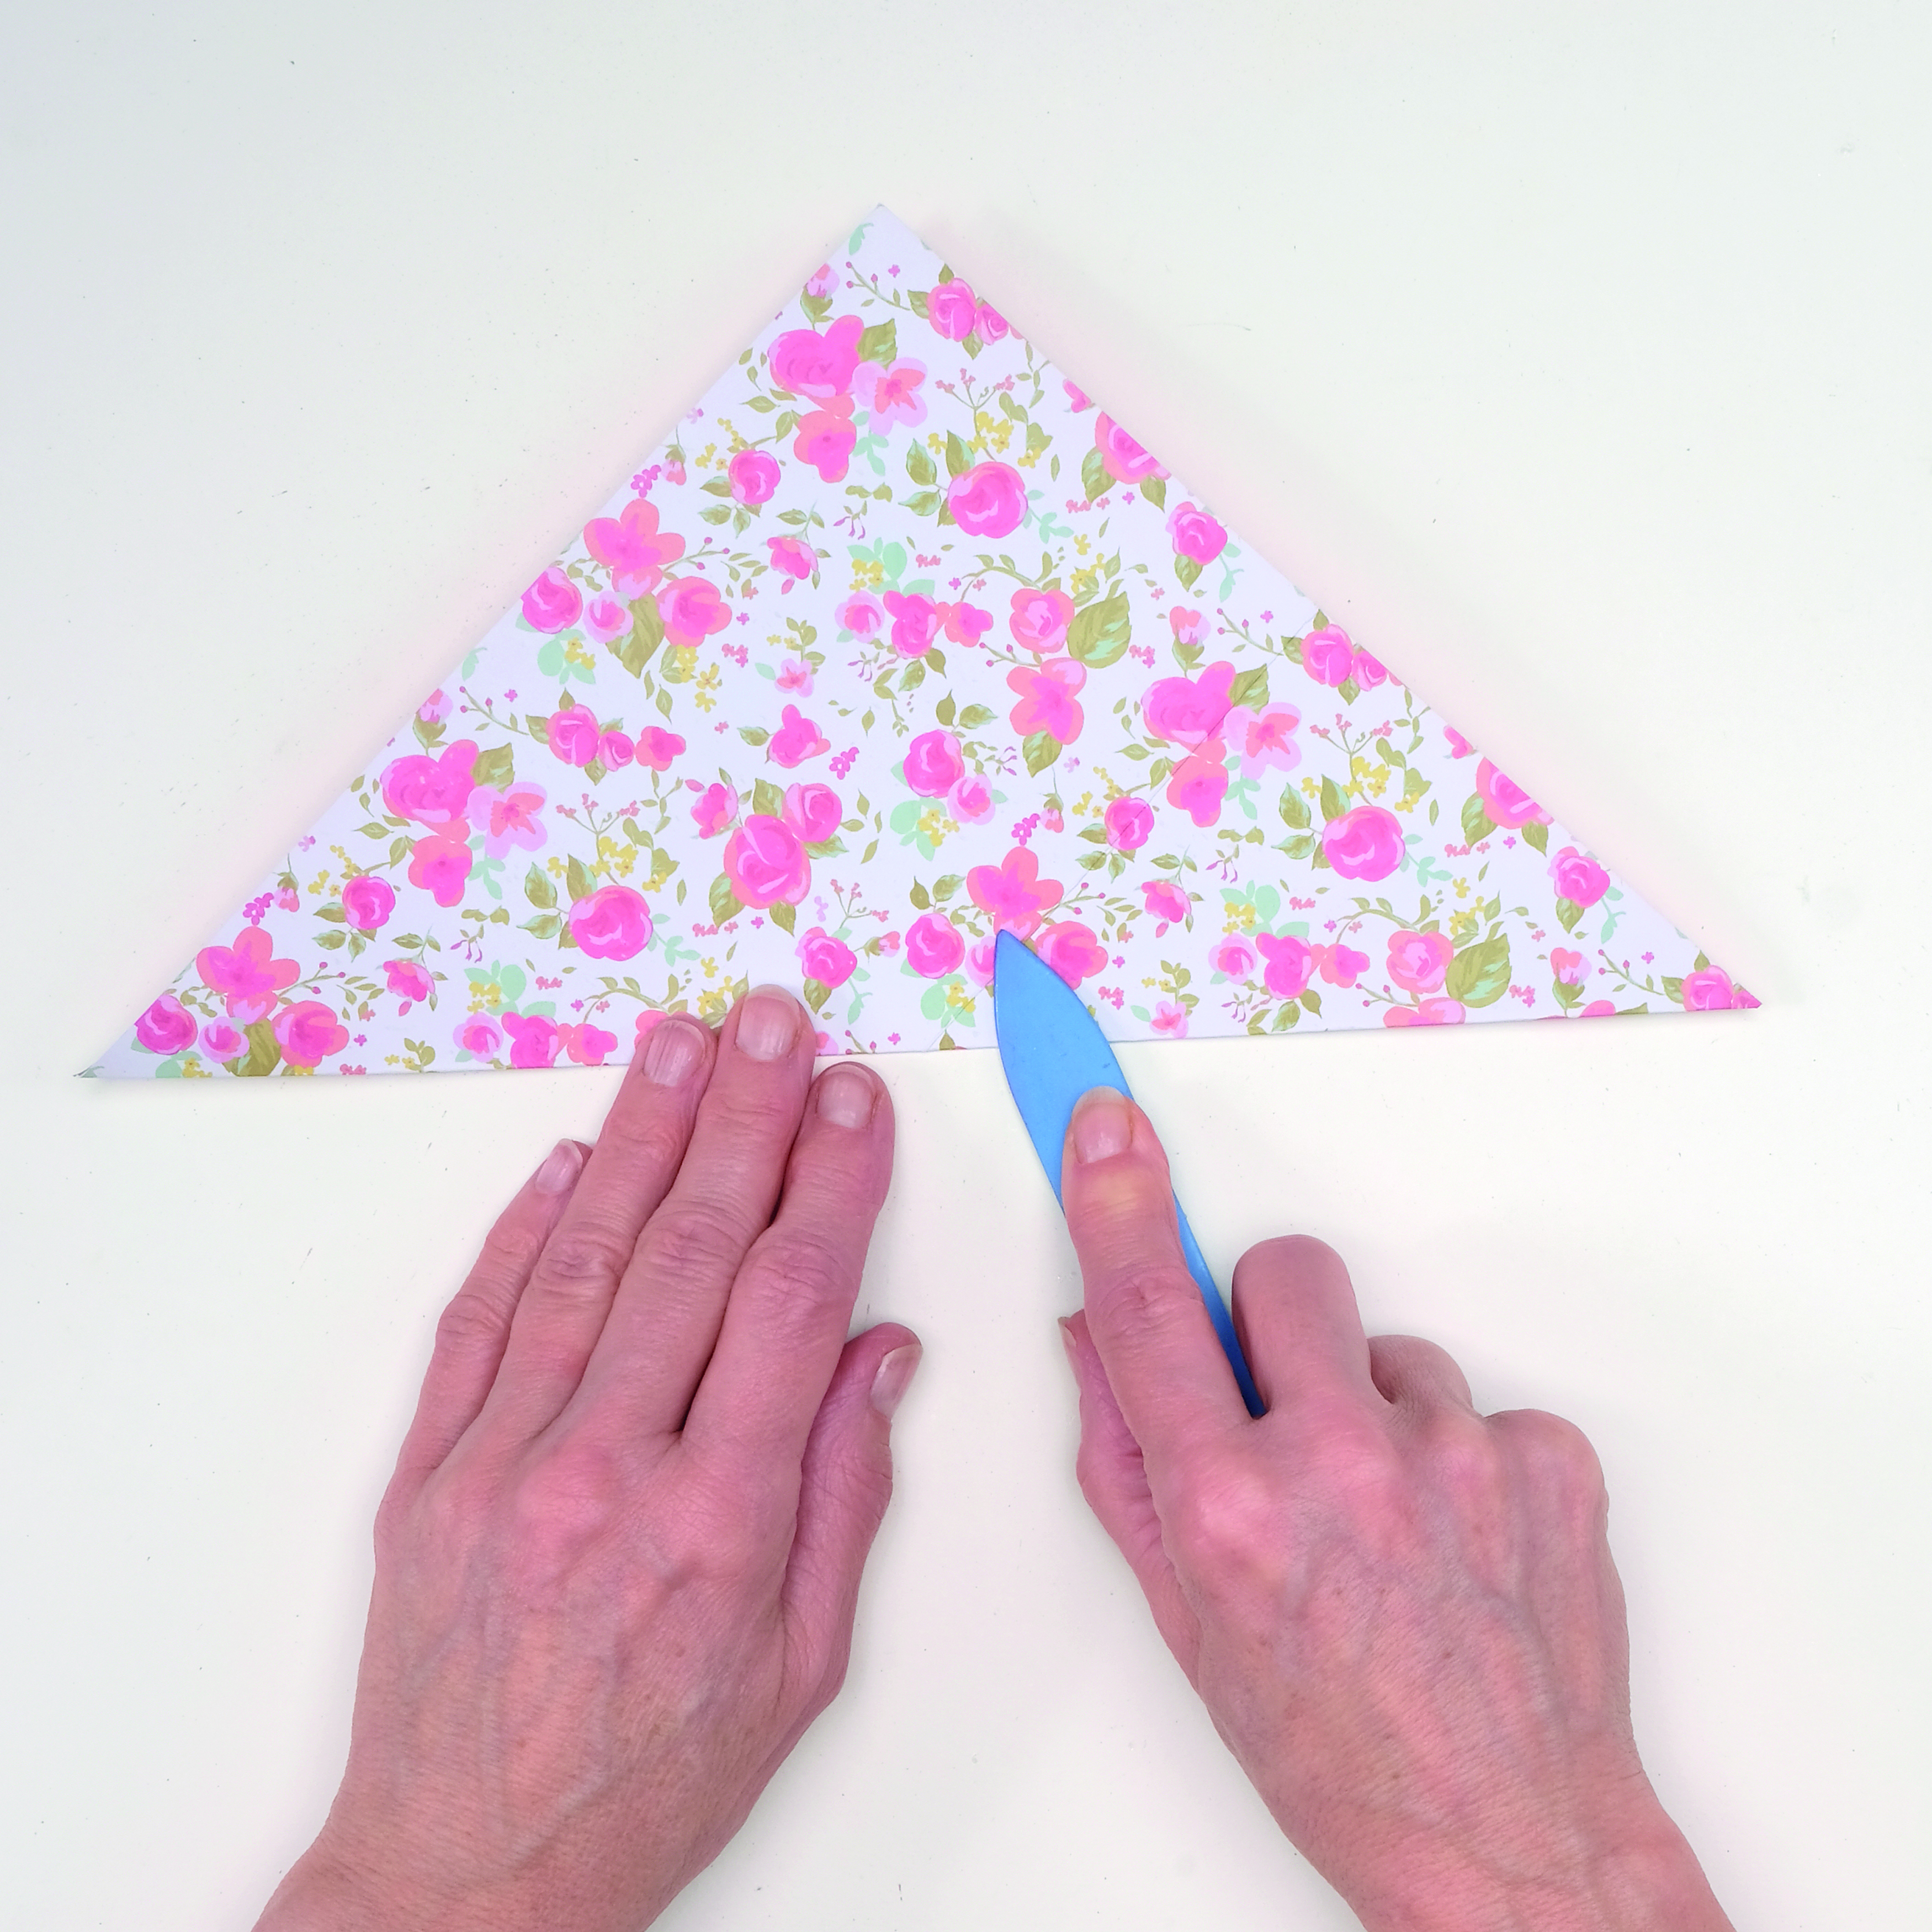
Measure and cut a 210mm square of patterned paper. Fold the square diagonally, open up and fold again in the opposite direction. Open out and flip over to the other side.

How to make an explosion card_01

Step 2

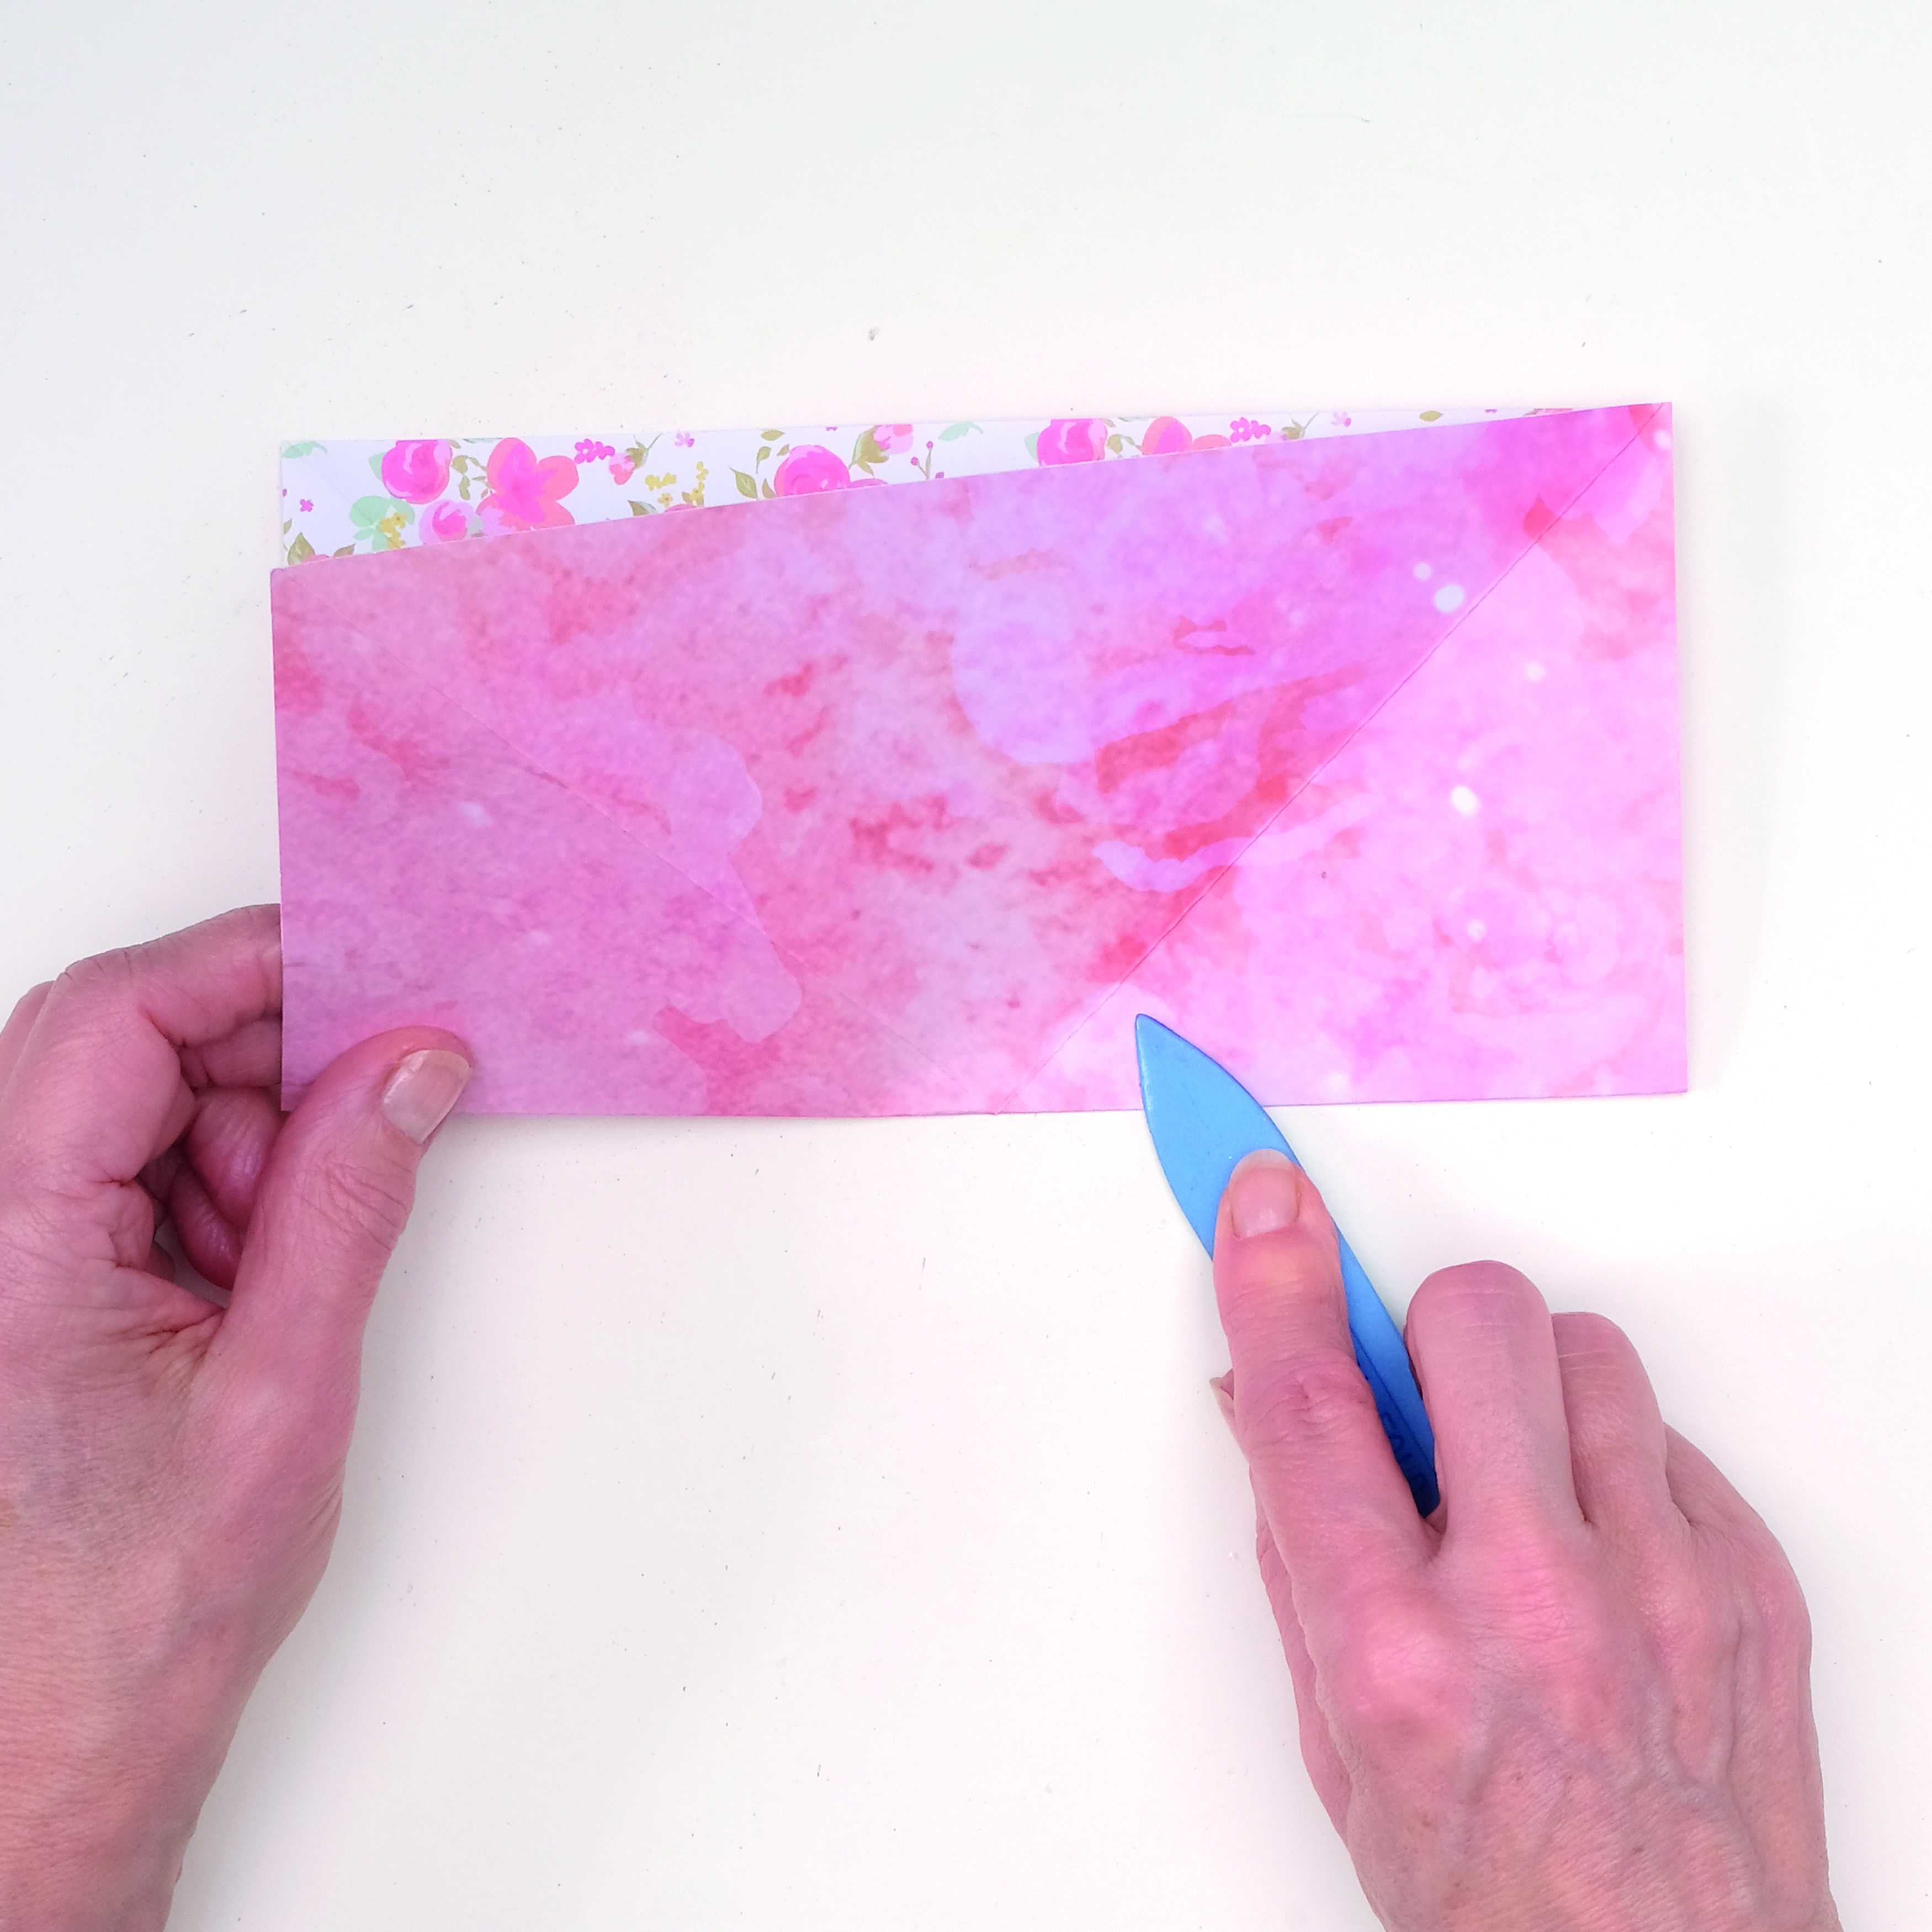
Fold the square in half horizontally, making sure that the corners meet. Use a bone folder along the crease to create a nice, crisp line. Open up square again.

How to make an explosion card_02

Step 3

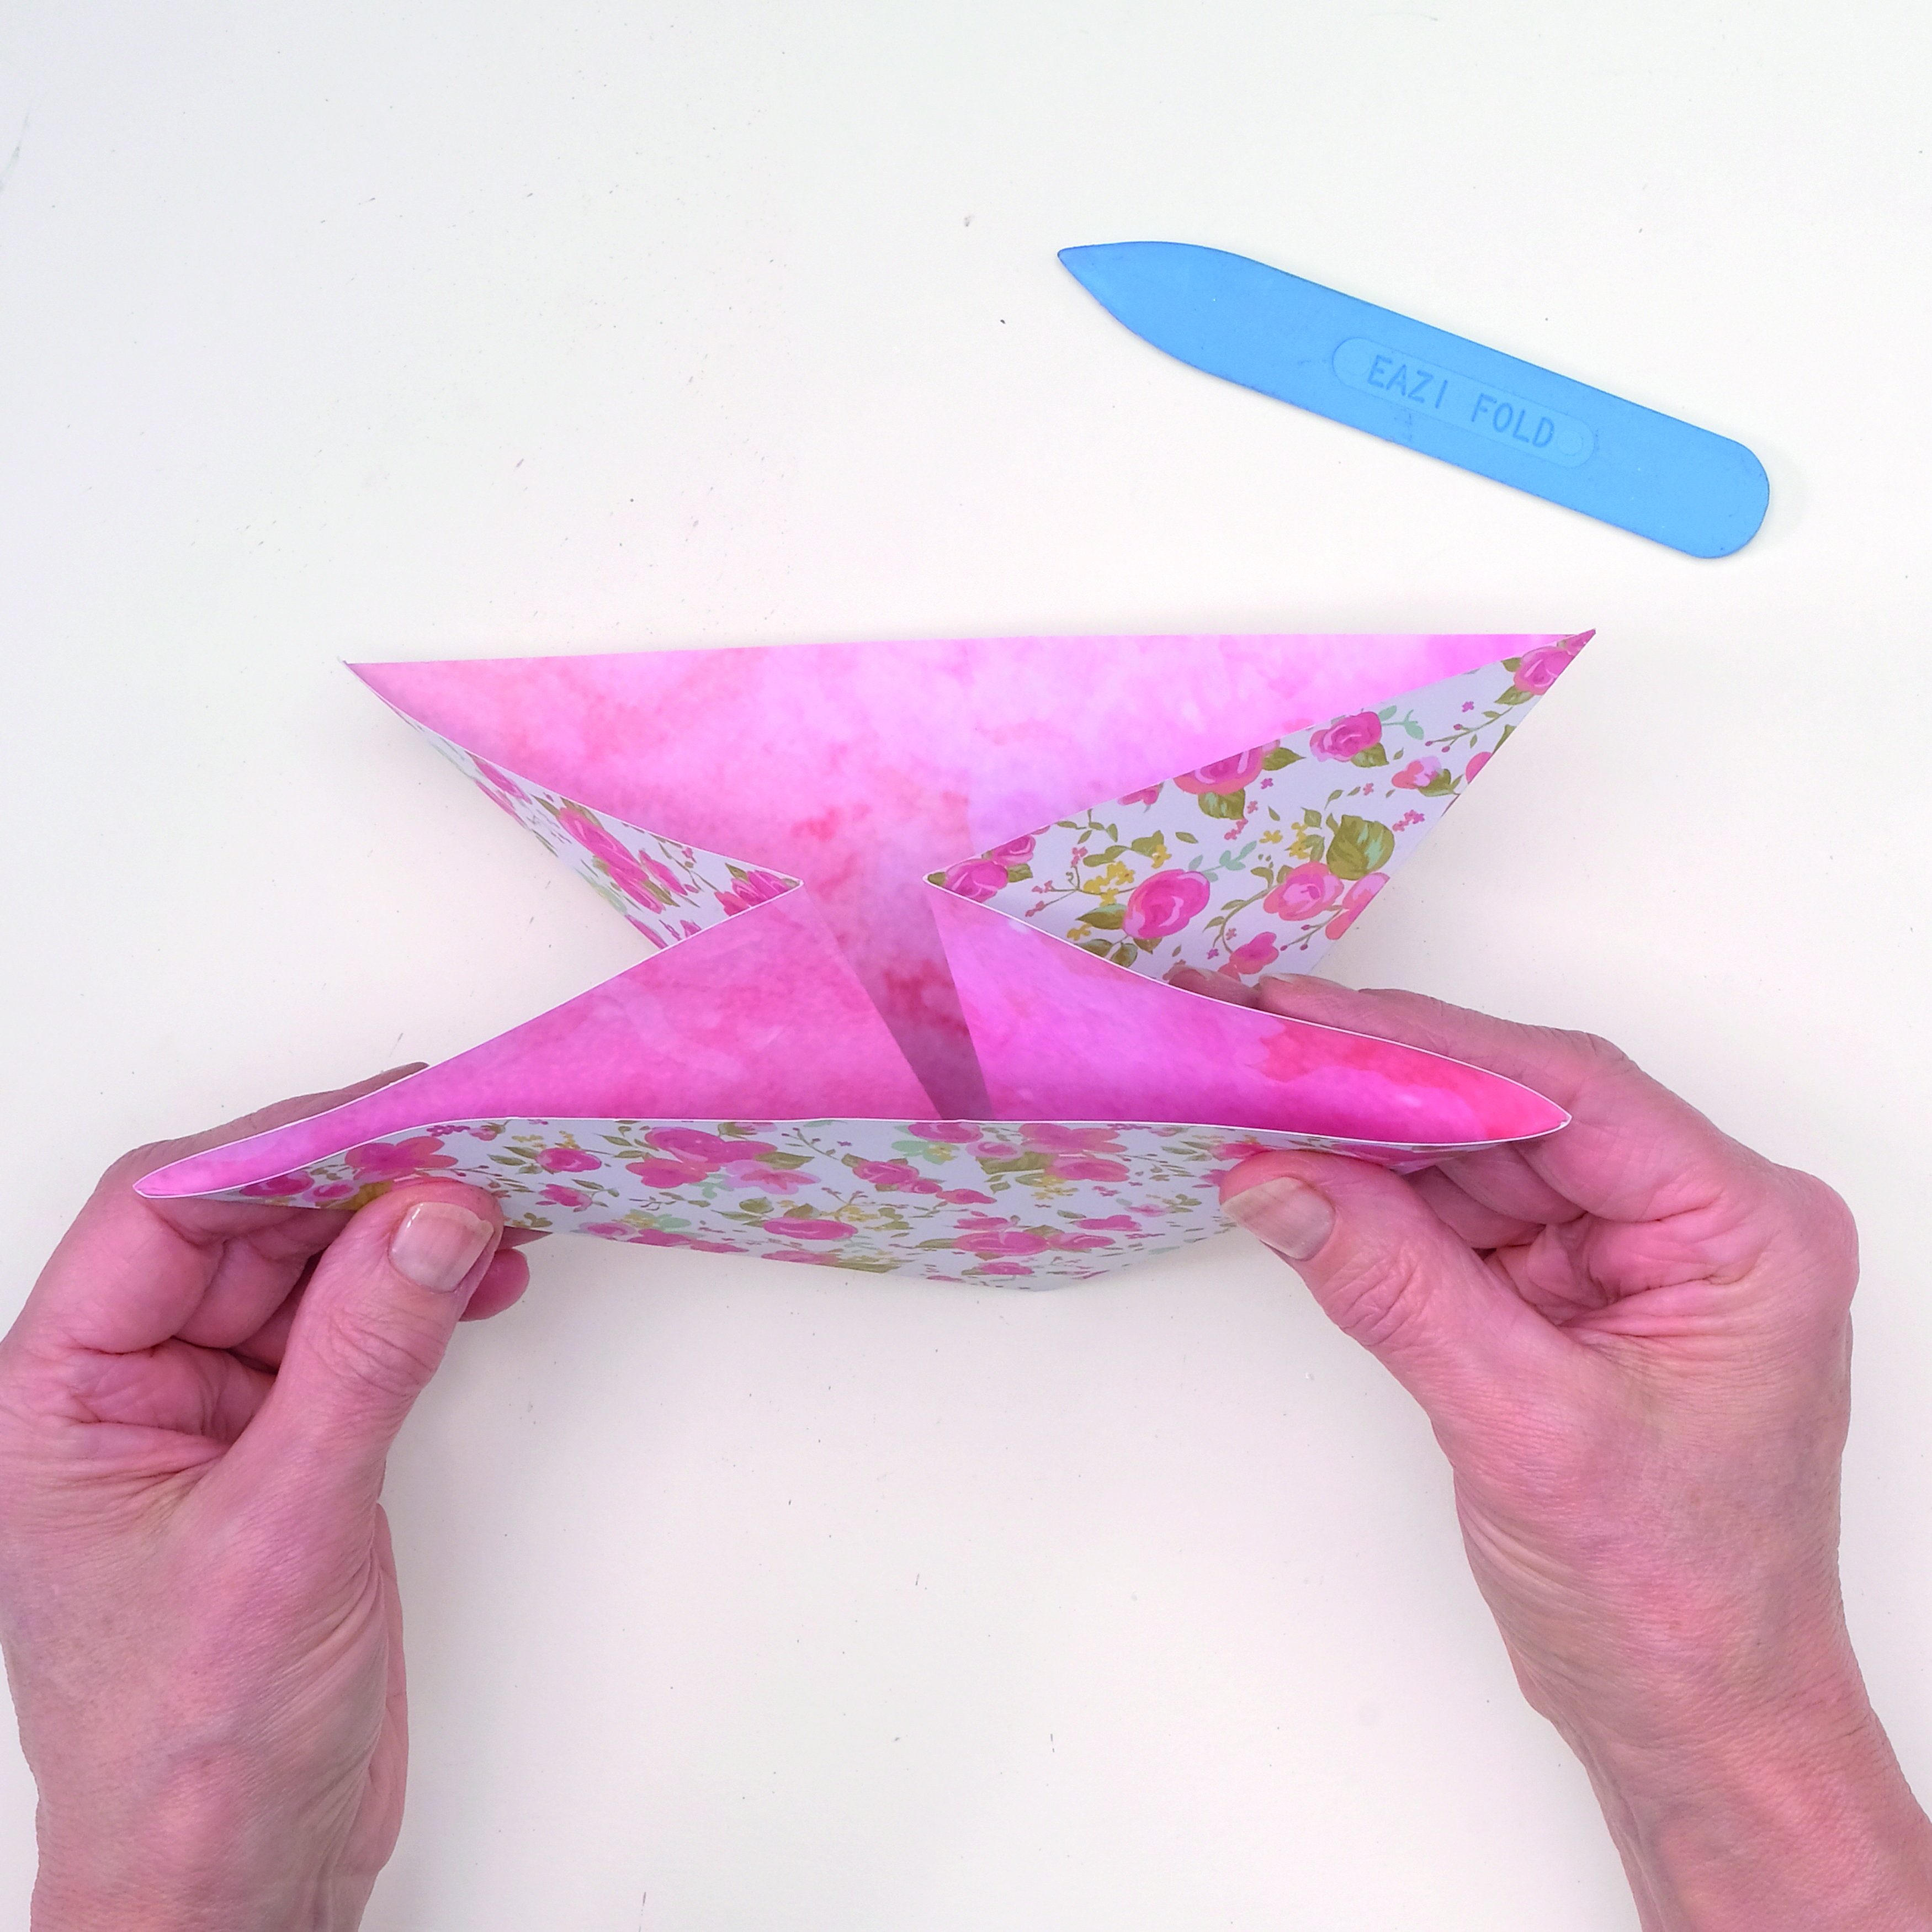
Gently push in the sides in to form a triangle, as shown. The long side should measure 210mm in length and the smaller sides should measure 147mm in length. Use a bone folder to crease the lines.

How to make an explosion card_03

Step 4

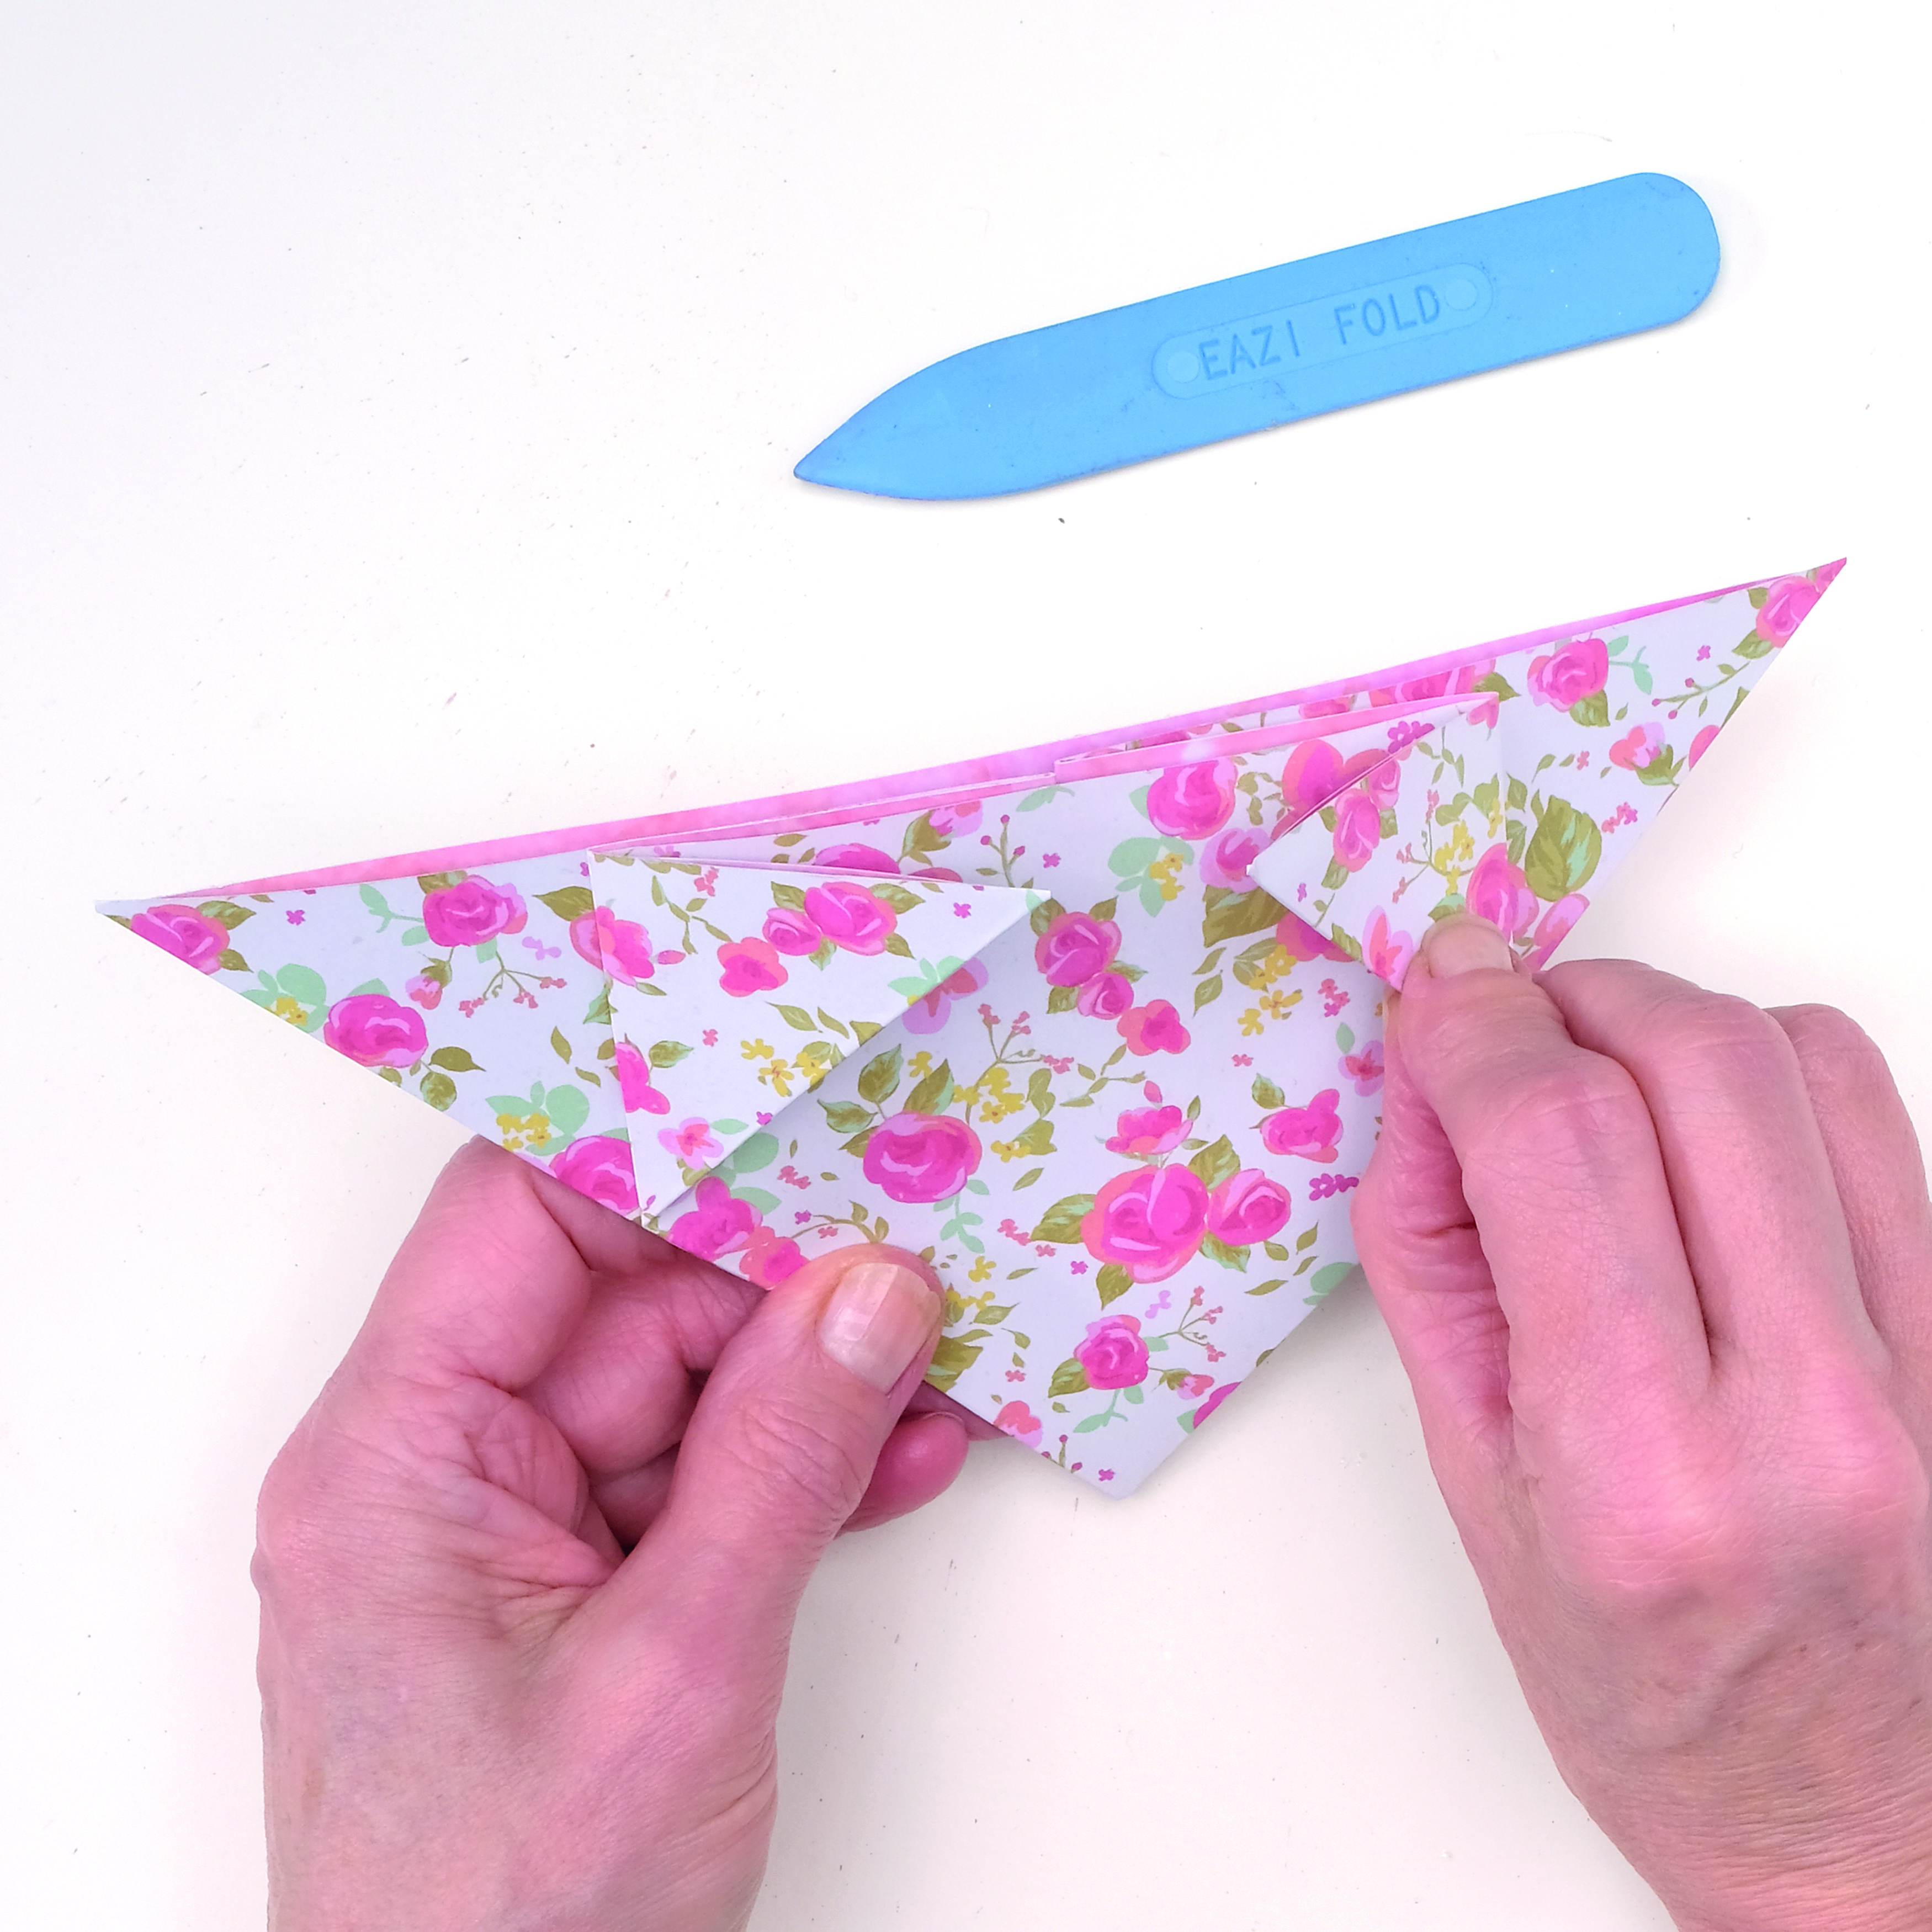
With the long edge at the top, fold the corners of the triangle inwards so the tips meet in the centre of the long straight edge. Flip over and repeat, folding on the other side of the triangle, using a bone folder.

How to make an explosion card_04

Step 5

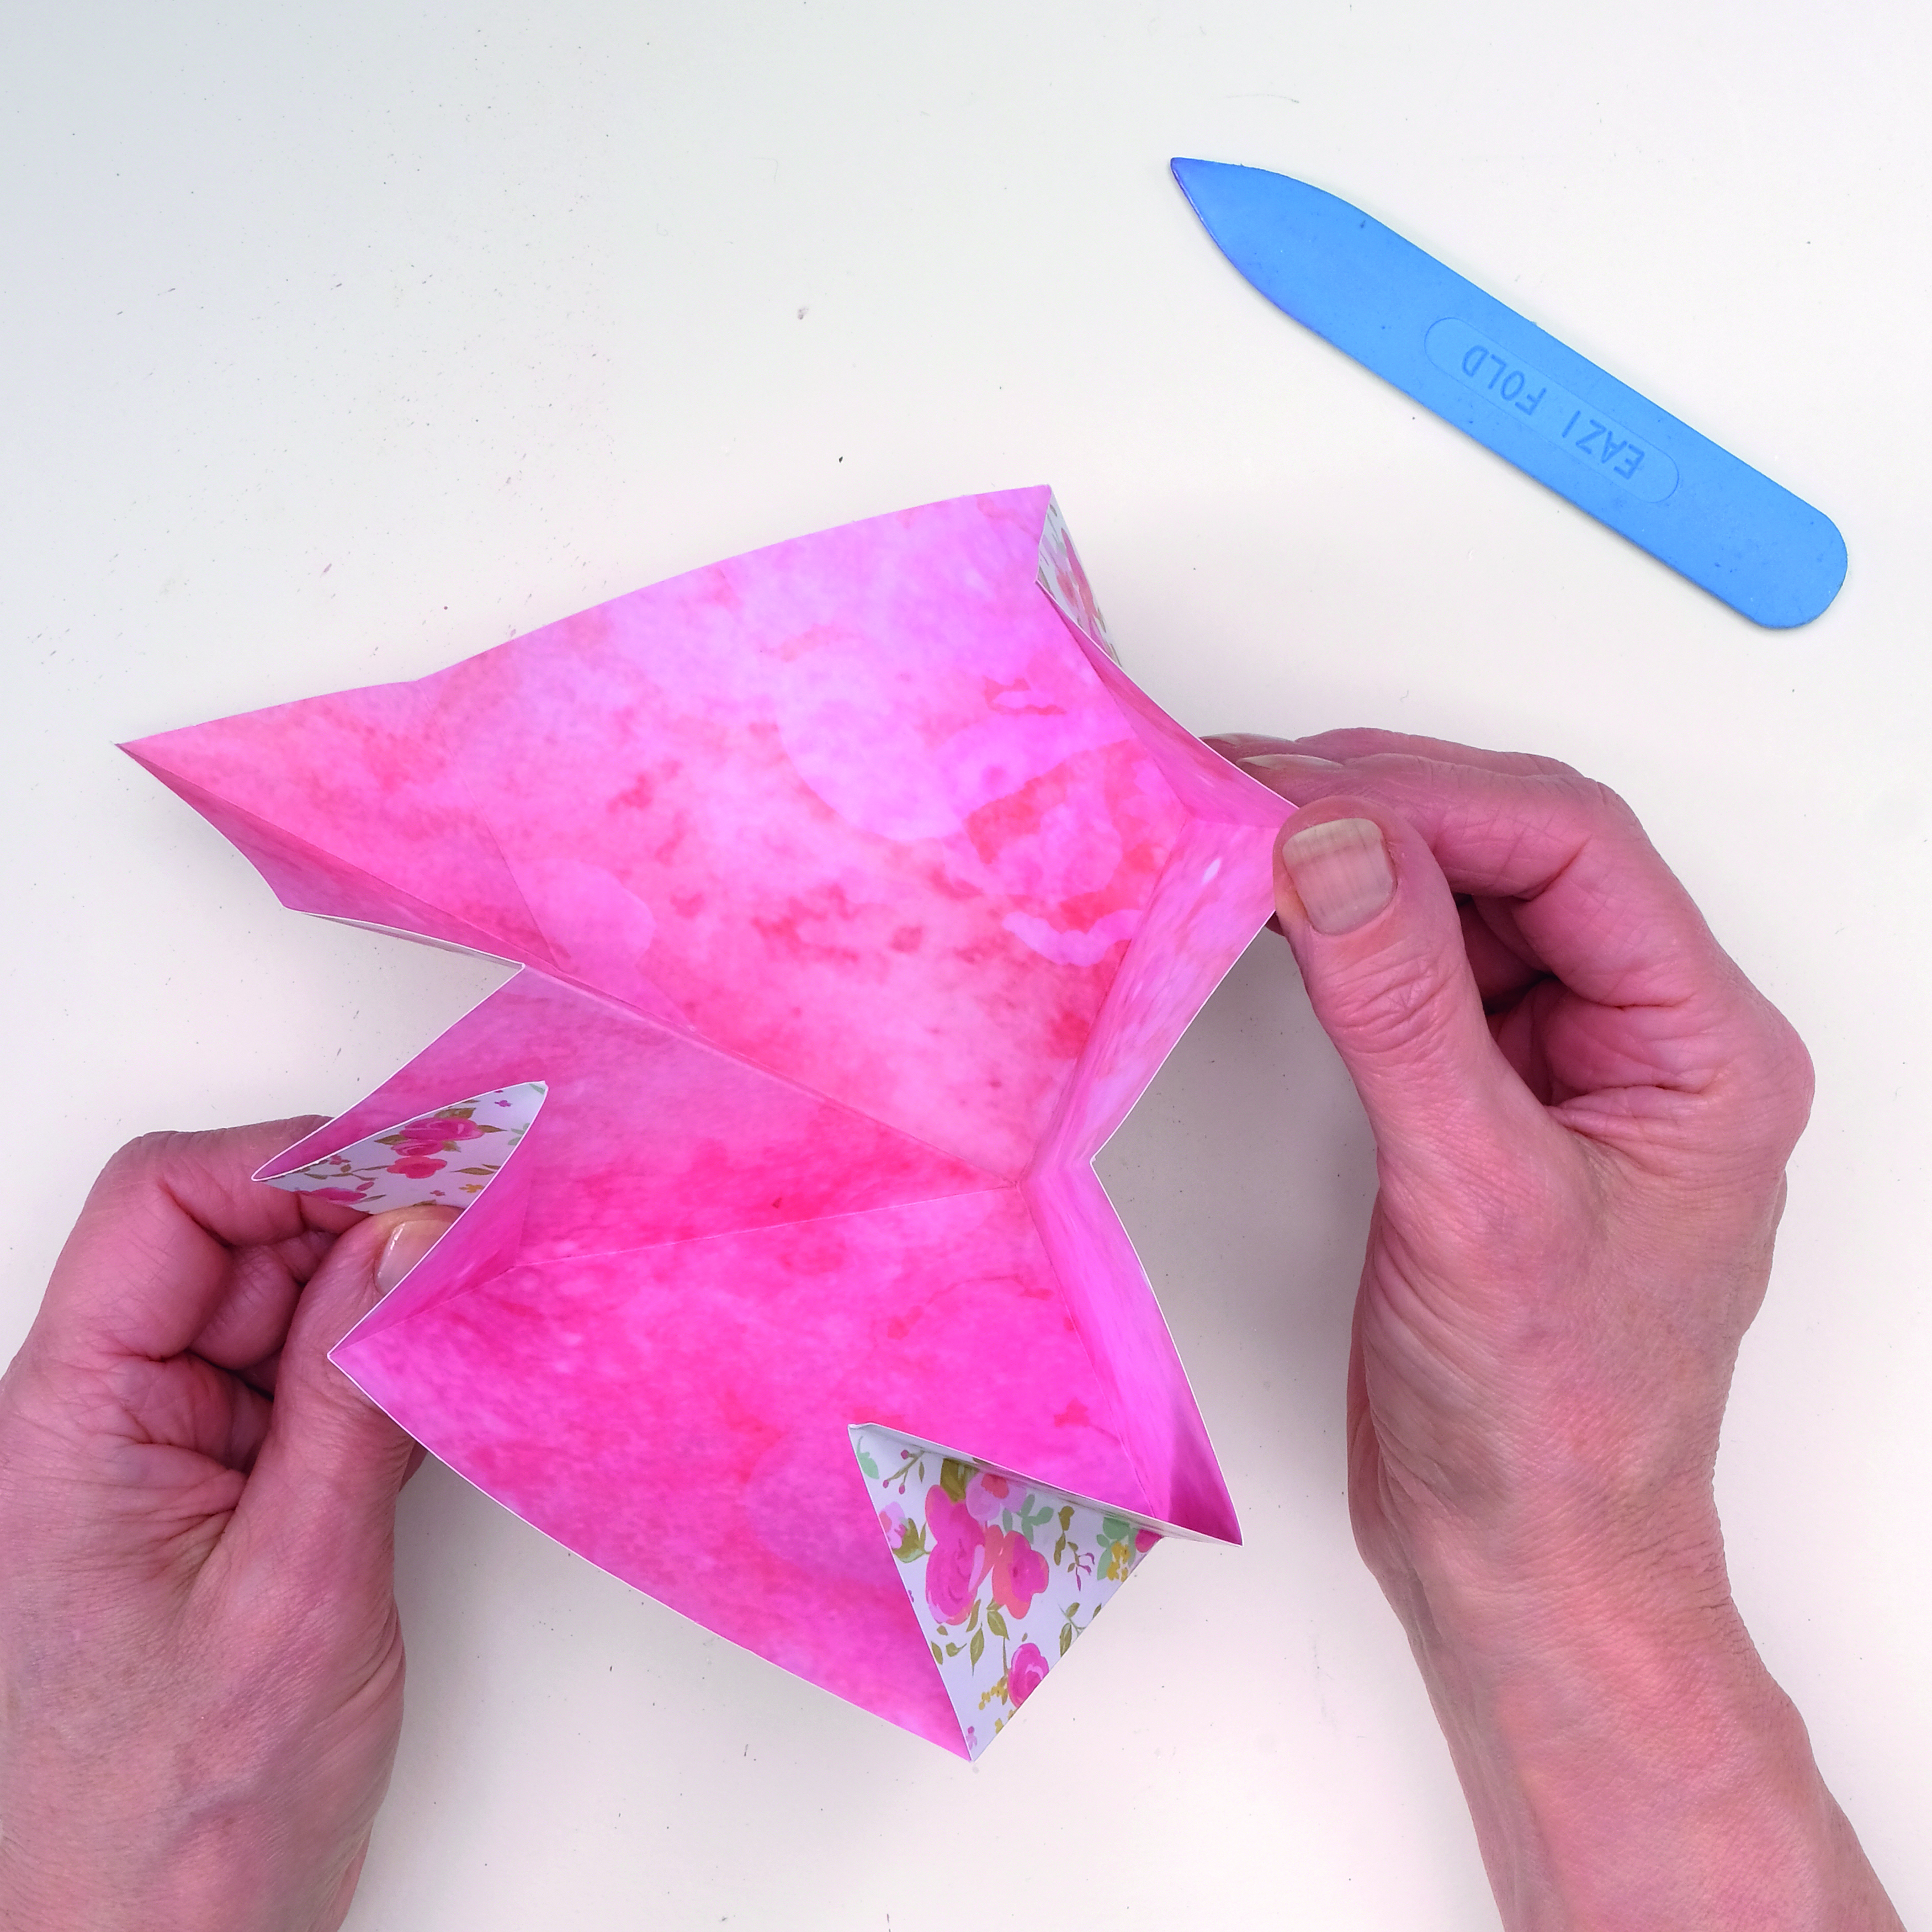
Open out the shape slightly and tuck the points in at each corner as shown. Fold flat and use the bone folder to crease the lines. This is the competed explosion insert ready for decoration once attached to the base.

How to make an explosion card_05

Step 6

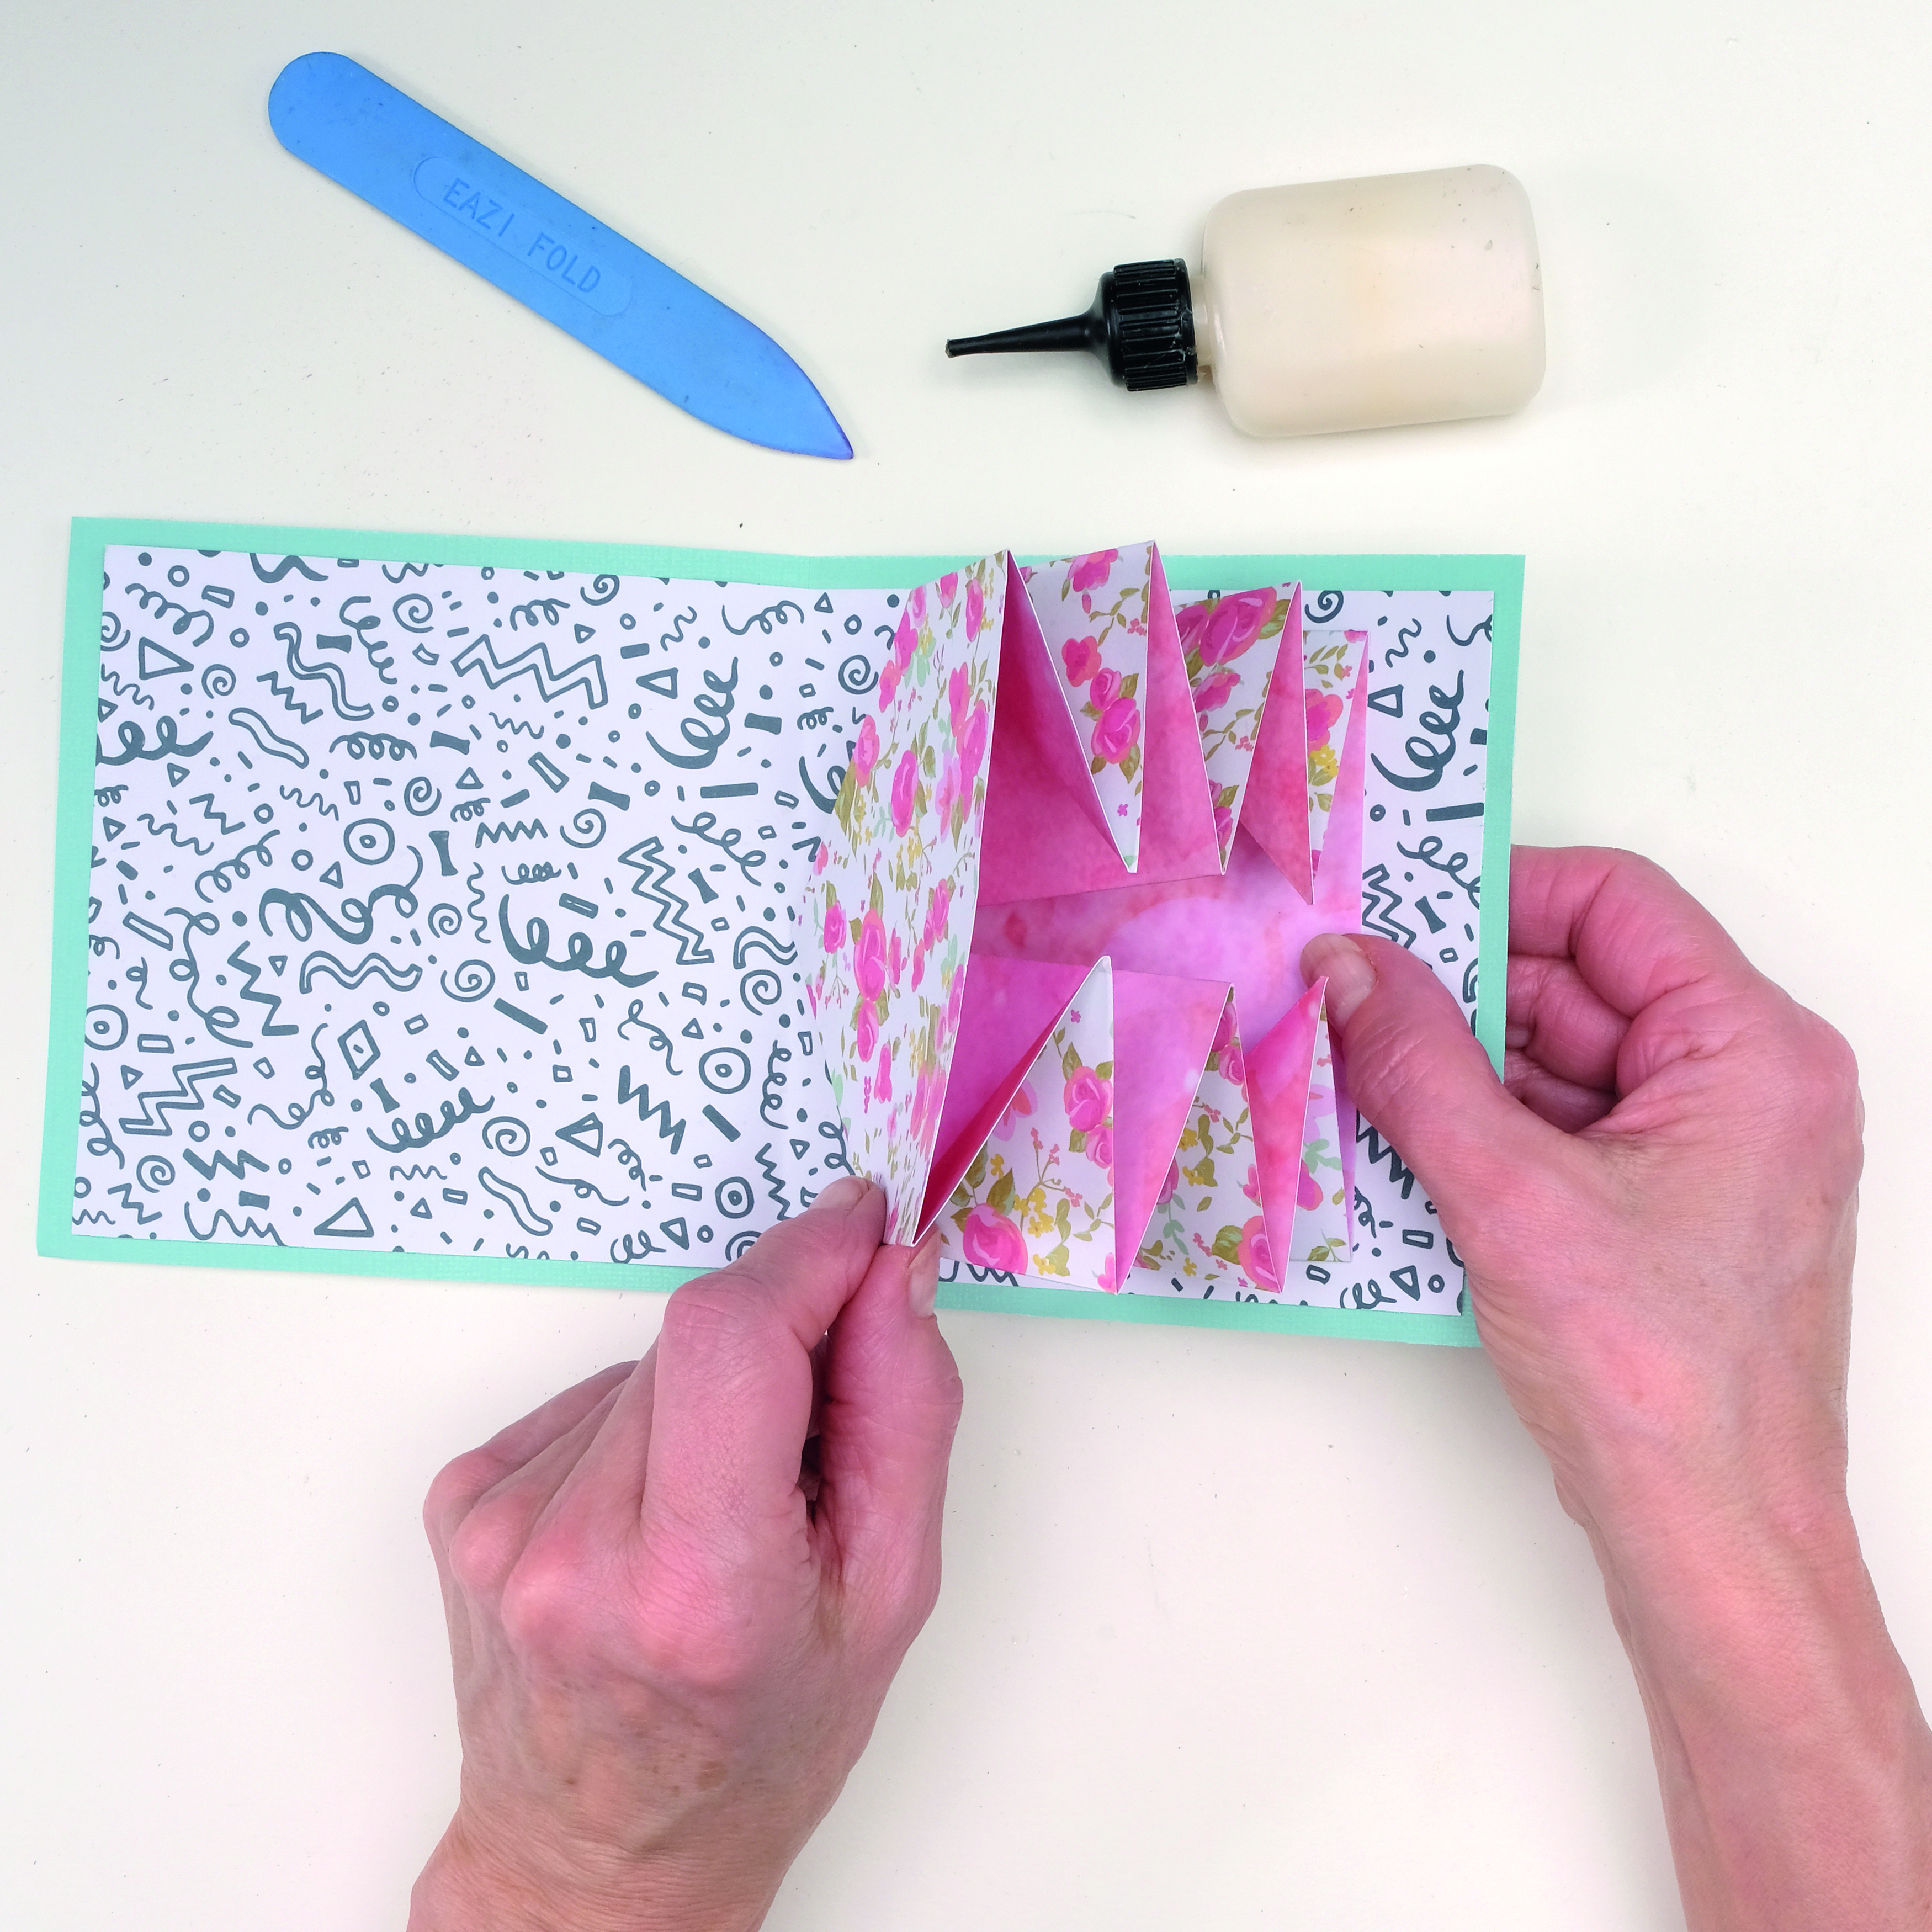
For a horizontal opening card, apply double-sided tape to one side of the insert. Align the point to the centrefold of the base and attach. Apply double-sided tape to the top of insert and close the base.

How to make an explosion card_06

Step 7

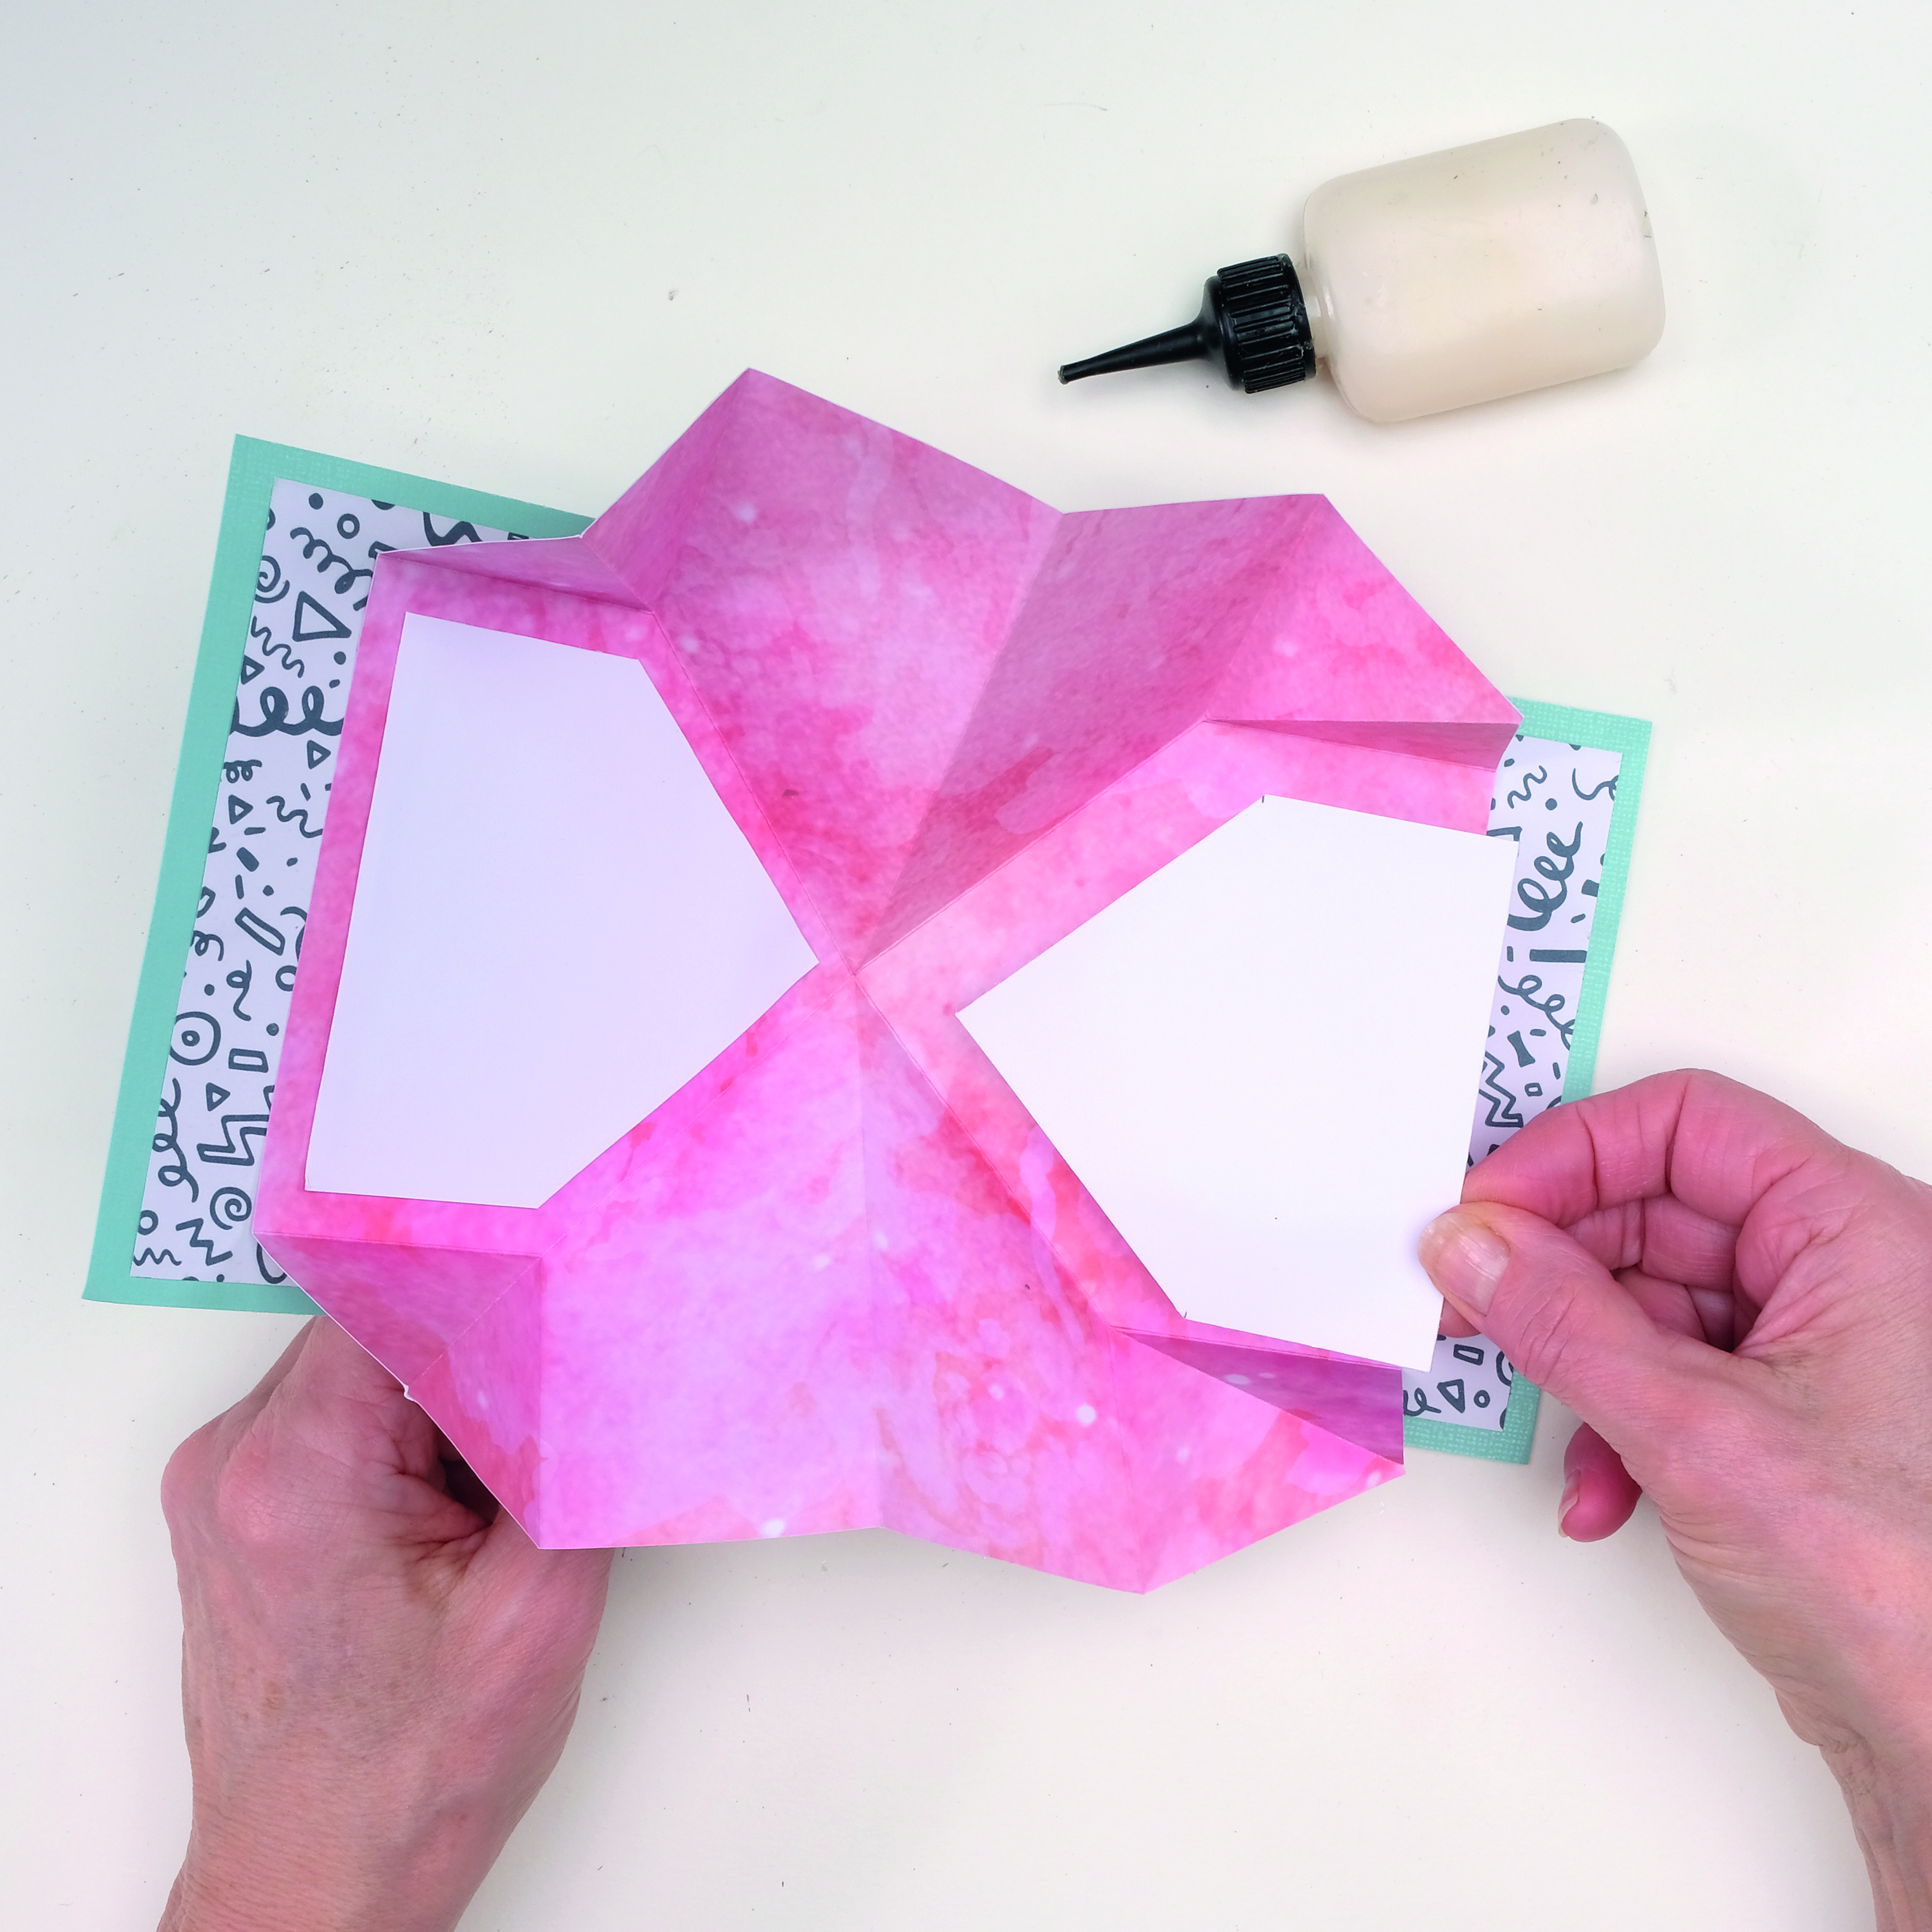
Once dry, open out and cut ‘house’ shaped white card to fit into the insert areas on either side as shown. Add pieces of patterned paper to remaining insert areas and decorate as desired.

How to make an explosion card_07

Step 8

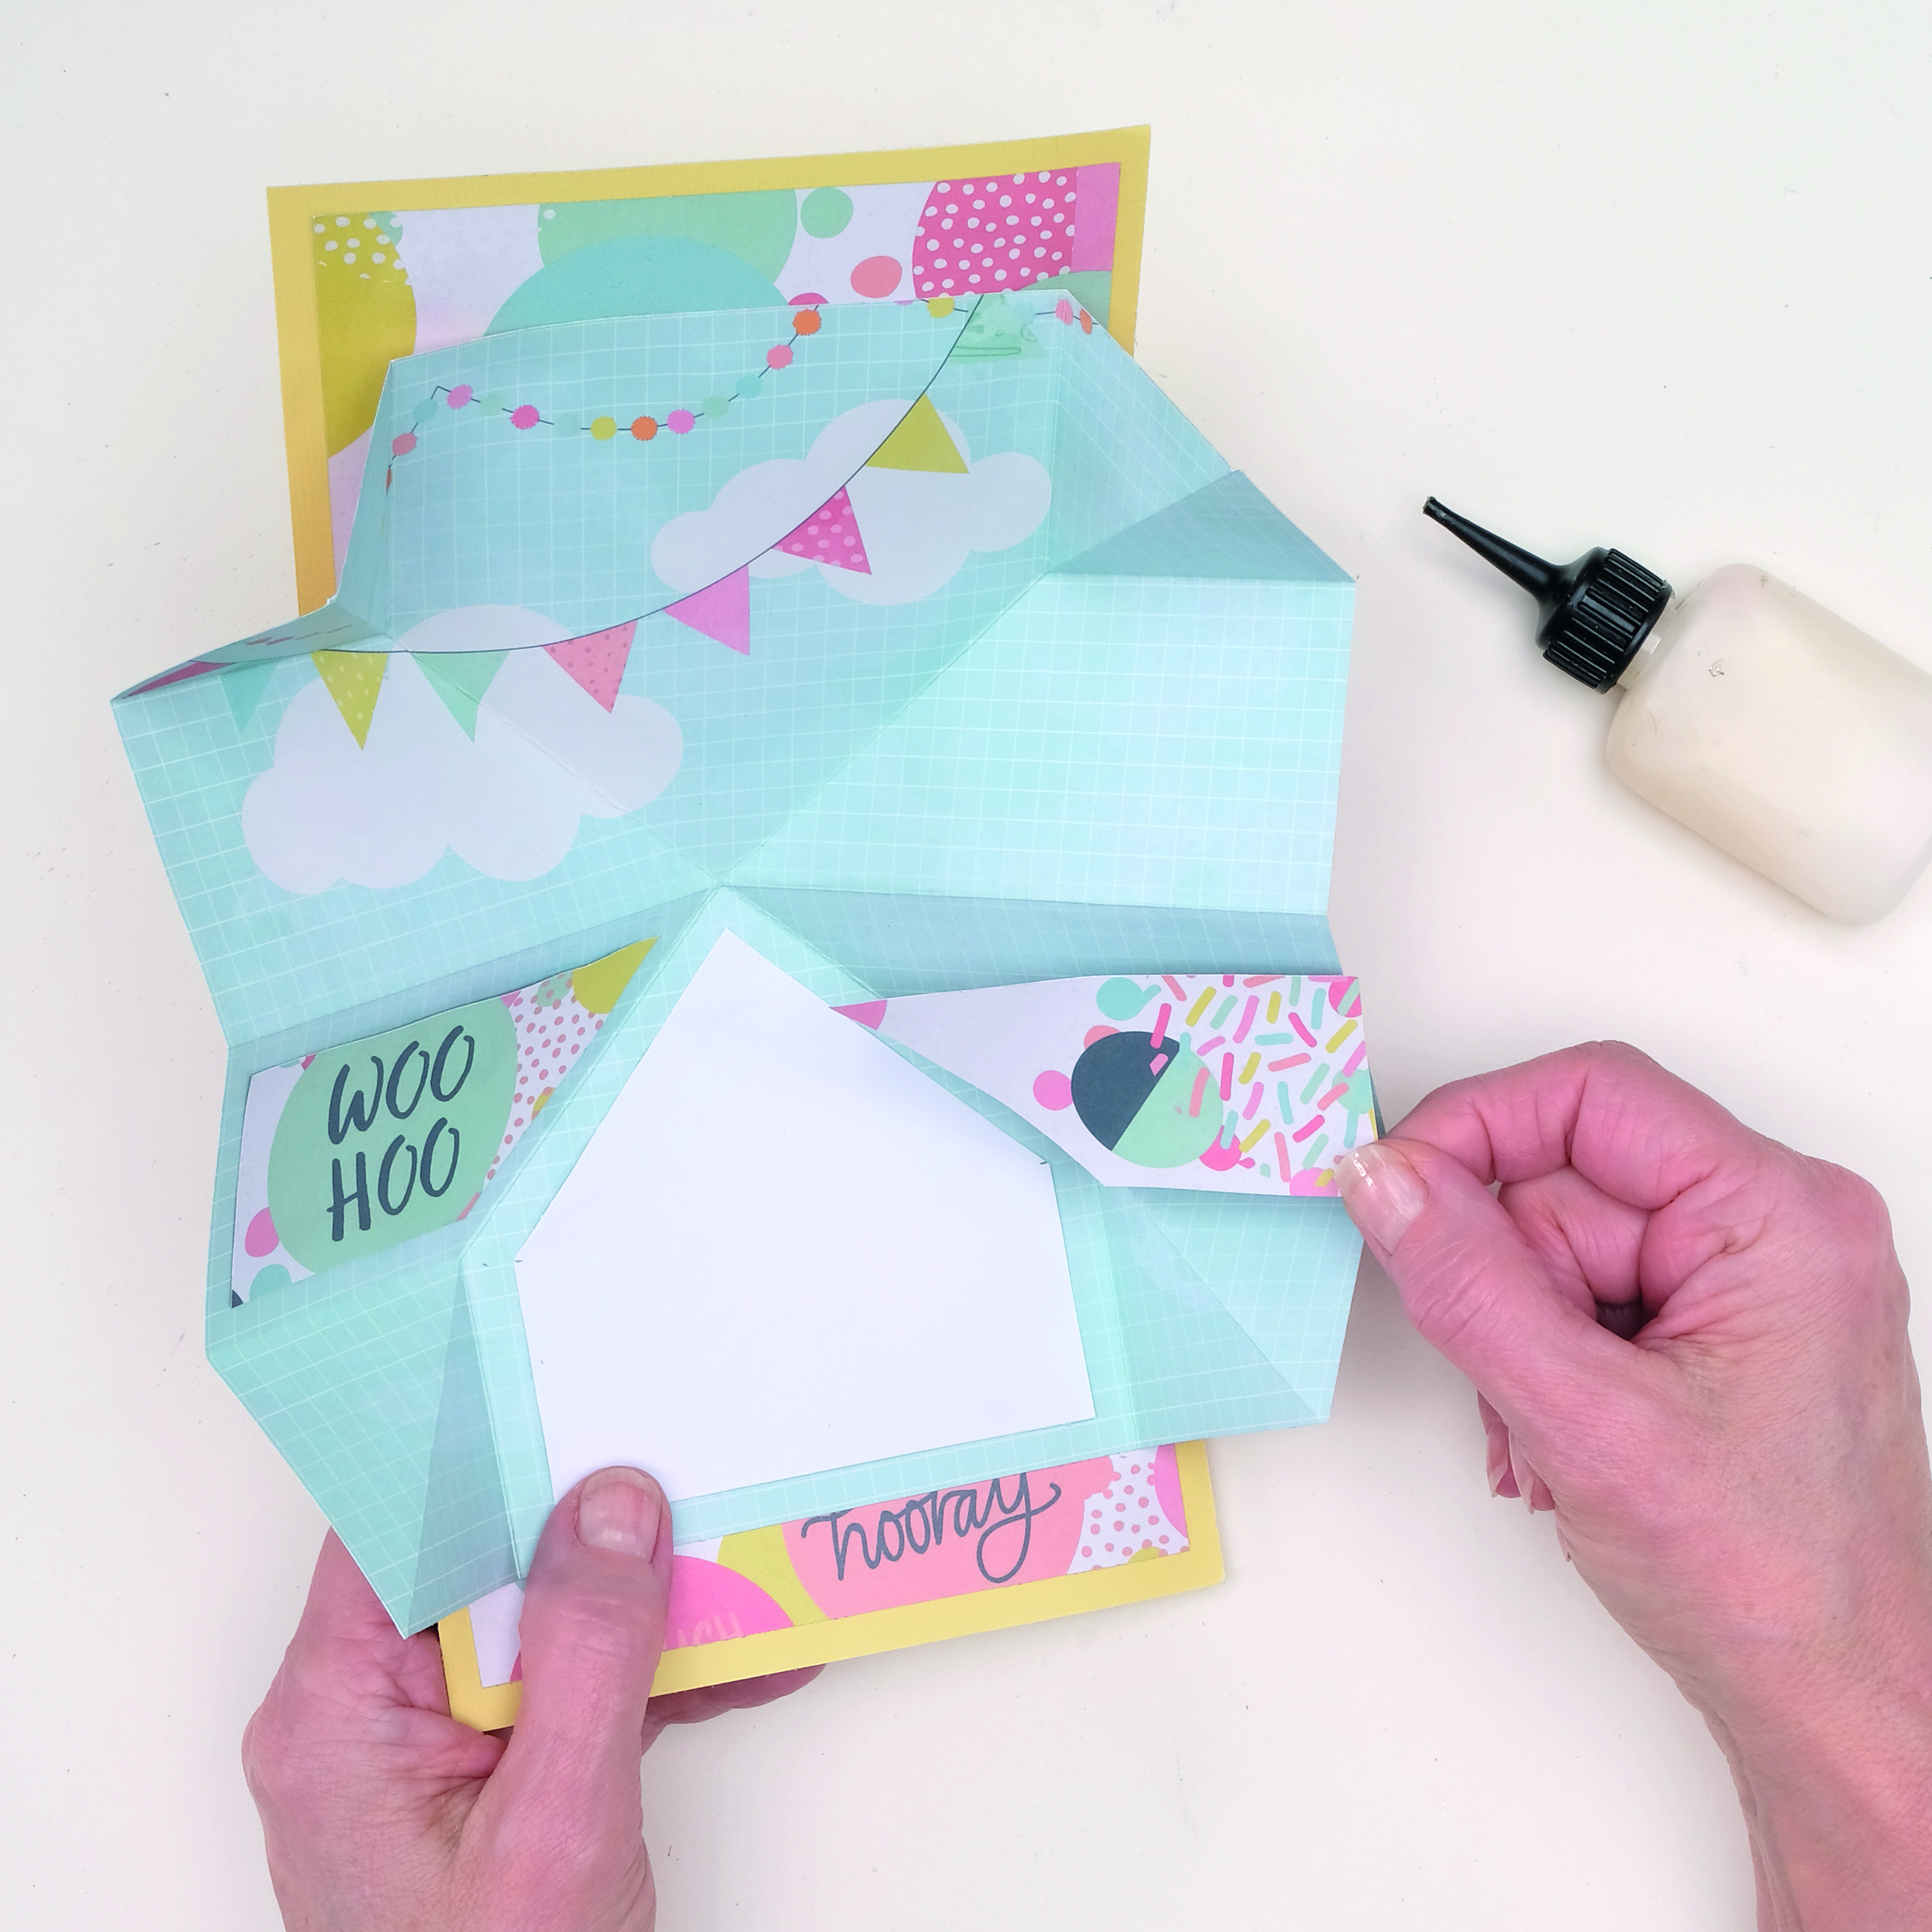
For the portrait opening, add a ‘house’ shaped piece of white card to the bottom panel and patterned paper to other areas. Add sentiments, then decorate the cards with stickers, twine and sequins, to finish.

How to make an explosion card_08

Looking for some eye-catching patterned papers to use on your explosion card? We’ve got loads on Gathered! Why not try our free stationery papers?