DIY illuminated letters

Make our gorgeous DIY illuminated letter project to brighten up your home this summer!

Try our magazines – get 6 issues from just £9.99!

Published: May 8, 2021 at 6:09 am

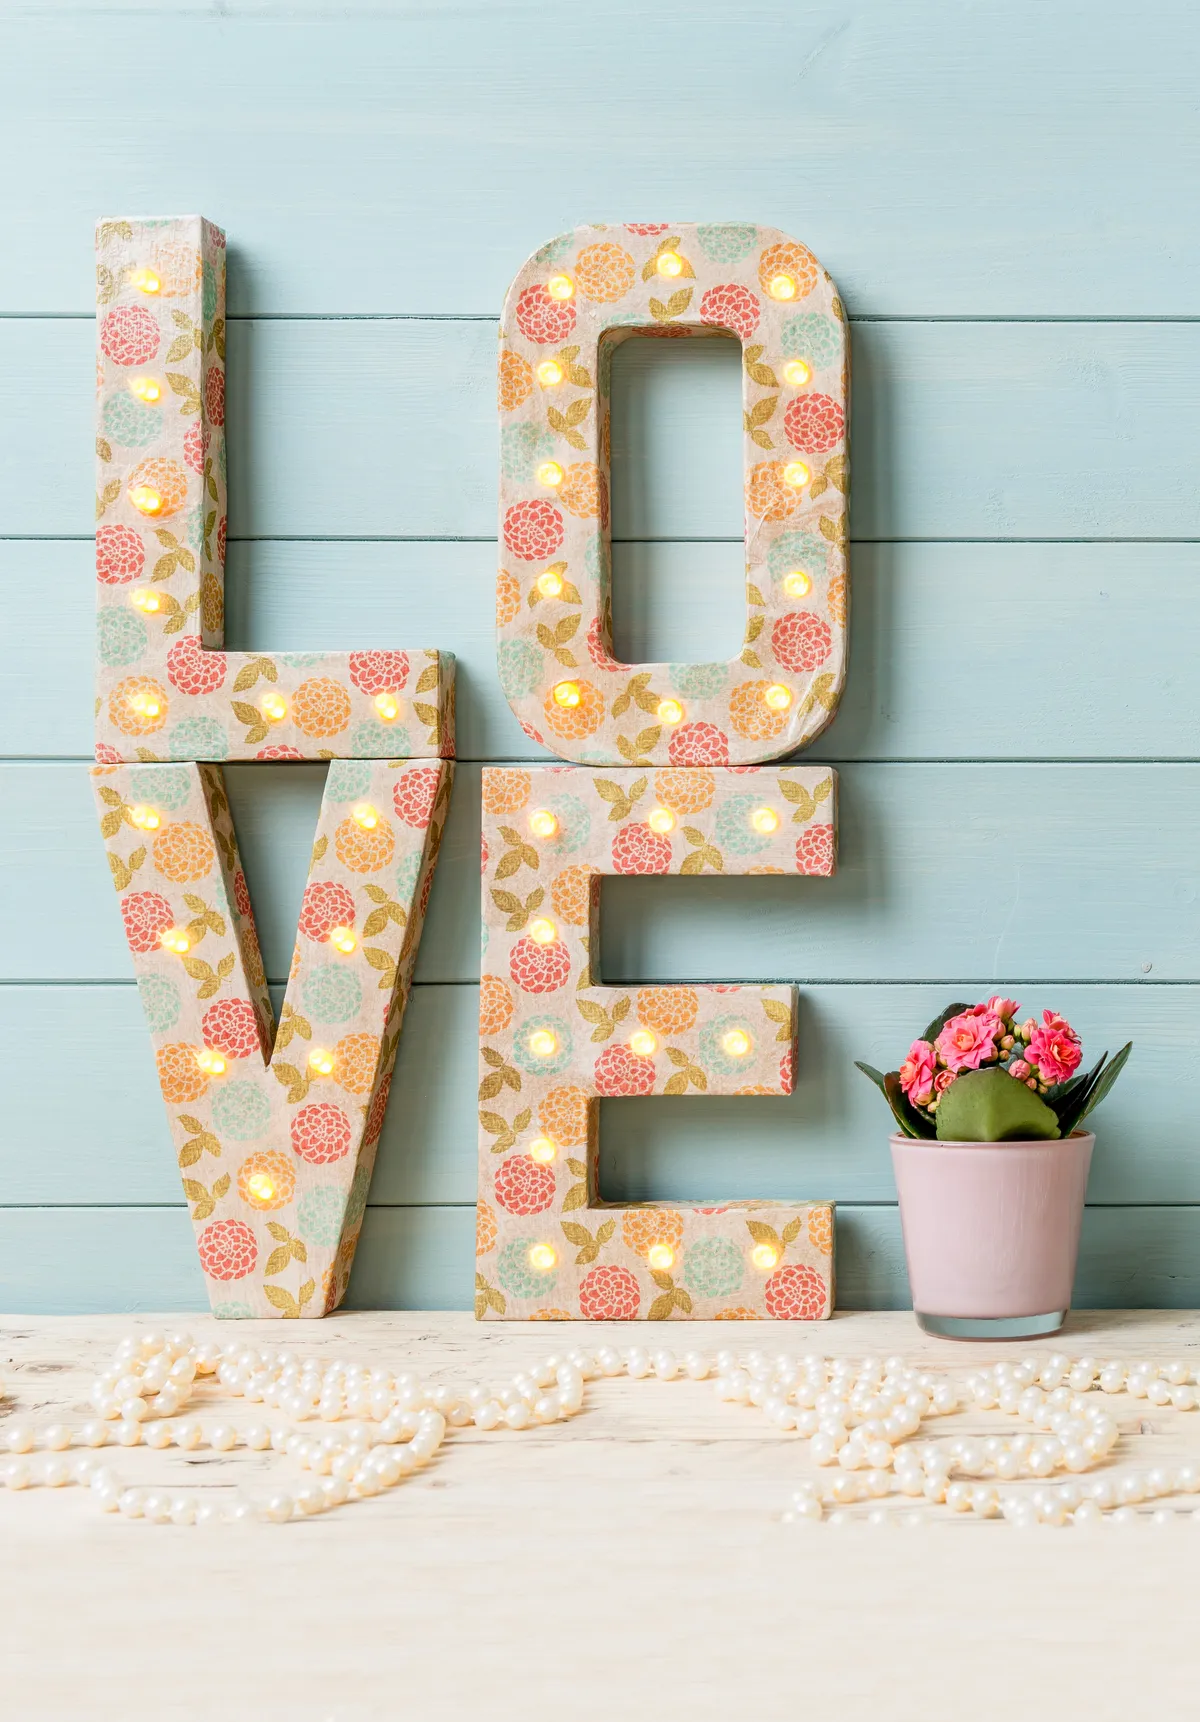
If you love the stylish light-up letters that are so popular this season but can’t justify splashing out on a ready-made set, this creative project for DIY illuminated letters will be right up your street. We've used some mache letters and découpage papers from Hobbycraft to create the basic look but has added a modern twist by placing battery-powered tea lights inside the letters to give them a warm glow. They’d look great as a decoration in an on-trend wedding, or use them to add a modern touch to your living room or craft room – DIY light-up letters are so versatile!

Short on patterned paper? Take a look at our ever-growing collection of free patterned papers, there are lots to choose from and there are lots of different themes. We love these animals baking in the kitchen! For more general card making, let us show you how to make cards.

We love seeing what you make with our free printable papers, so don’t forget to share your cards and papercraft projects with us on Facebook and Twitter, too!

You will need:

  • Mache letters
  • decoupage paper
  • Glue (pva is ideal)
  • Tea lights (battery powered)

Step 1

Mark the positions of the tealights evenly on the letters. Pierce a small hole at each with a paper pricker, then use a pencil to make a hole to fit the top of the tea light.

DIY illuminated letters

Step 2

Cutaway the back of the letter using a craft knife, carefully slotting the blade down through the paper, level with the inside of the side walls. Then carefully lift off the back panel.

DIY illuminated letters

Step 3

To decorate the DIY illuminated letters, lay each one on a sheet of découpage paper. Draw around both the front and back with a pencil, leaving roughly a 1cm border, and cut out.

DIY illuminated letters

Step 4

Stick the paper to the front of the letters by applying glue to both the letter and the paper. Snip and fold the excess onto the sides. Add strips to cover the side edges, too.

Or – if you prefer to the more random look, rip up little bits of the decoupage paper and layer up.

DIY illuminated letters

Step 5

Pierce through the holes on the front with a pencil. Place the tealight flames through the holes and secure them with double-sided tape to keep the lights in place.

DIY illuminated letters

DIY illuminated letters

Shop this project!

1. Mache letters

Buy now: Hobbycraft (£2.25 each)

Mache letters – Hobbycraft2. Decopatch glue

Buy now: Amazon (£9.54)

Decopatch glue – Amazon

3. Decoupage paper

Buy now: Amazon (£3.90)

Decopatch paper – Amazon4. Tealights

Buy now: Amazon (£11.99 for 48)

Battery powered tealights – Amazon


This website is owned and published by Our Media Ltd. www.ourmedia.co.uk
© Our Media 2023