All products were chosen independently by our editorial team. This review contains affiliate links and we may receive a commission for purchases made. Please read our affiliates FAQ page to find out more.

How to découpage a box

Make sure your wedding gift is the best-dressed with this gorgeous découpage heart-shaped box!

Try our magazines – get 6 issues from just £9.99!

Published: May 15, 2021 at 6:19 am

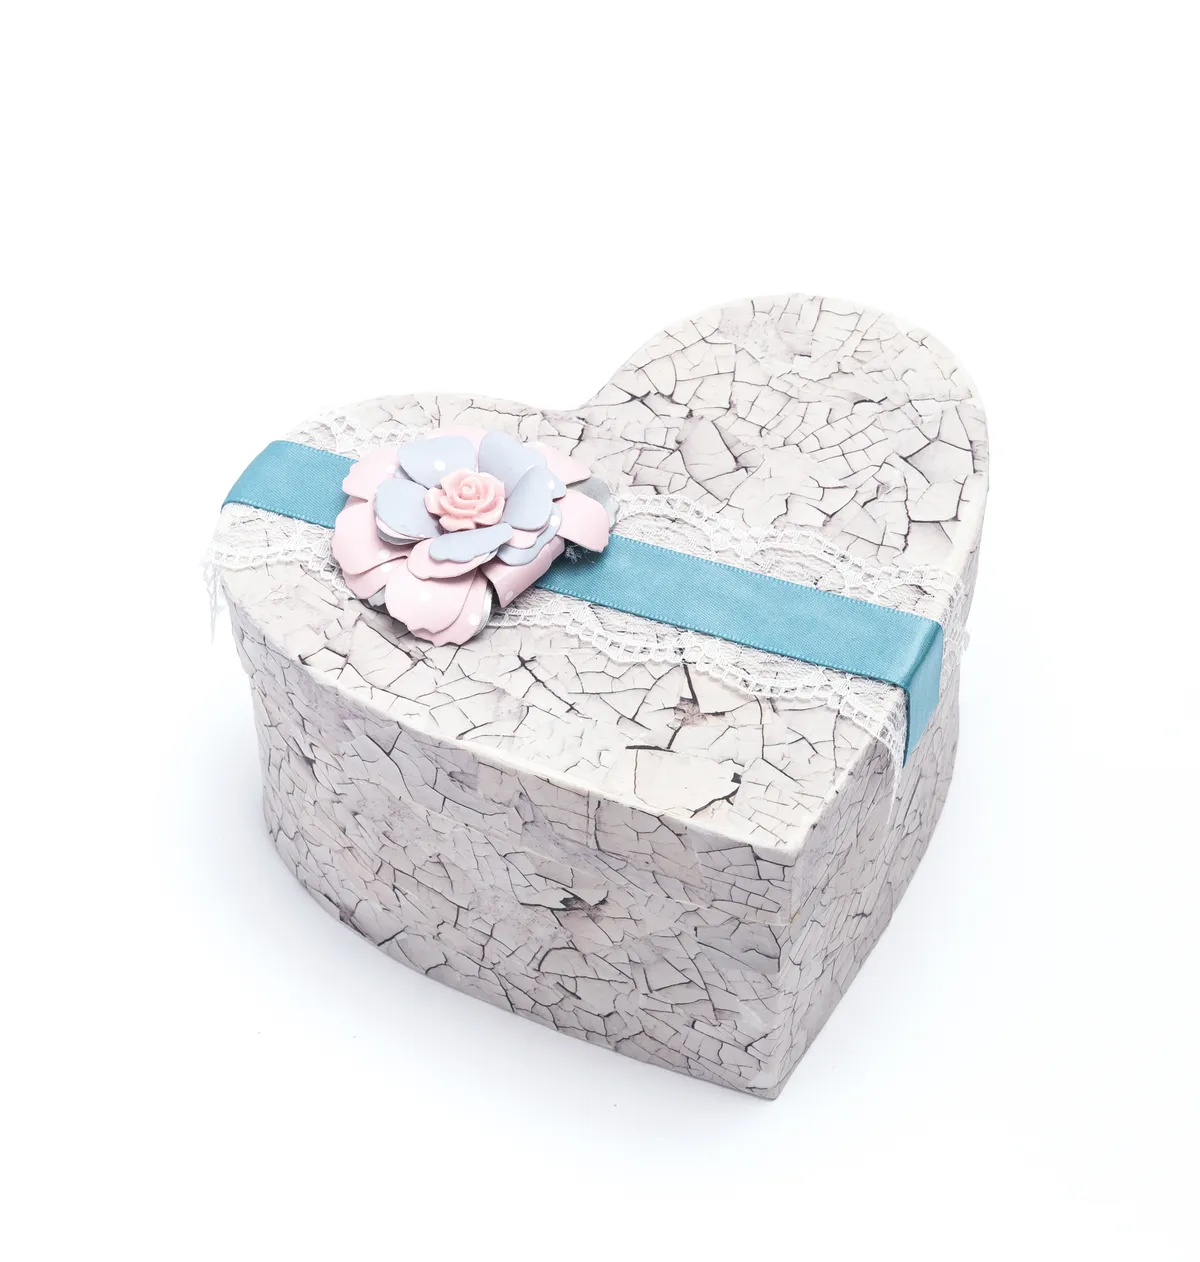
Presentation is everything when it comes to weddings, so why not get excited for the big day and learn how to decoupage a box. This beautiful heart-shaped découpage box is both super-stylish wrap and a gorgeous gift in itself. Choose elegant découpage papers to tear up and layer onto the box, then varnish over them for a neat and professional finish. Embellish with ribbon, lace, pearls and paper flowers for a feminine, bridal feel. Perfect for extra-special thank you gifts for bridesmaids, mothers, friends and more. If you're looking for some DIY wedding cards, we love these shaped bride and groom cards - there's a free template, too.

If you don’t have any patterned papers, how about these free floral designs or why not have a browse through our other free patterned papers?

How to decoupage a box - design 1

For more general card making, let us show you how to make cards. We love seeing what you make with our free printable papers, so don’t forget to share your cards and papercraft projects with us on Facebook and Twitter, too!

You will need:

  • Mache heart boxes
  • Flower die (or flower punch)
  • decoupage paper
  • Glue
  • Acrylic paint (white)
  • adhesive gems

Step 1

So, how to decoupage a box? Start by applying two thin coats of white acrylic paint to the inside and outside of the heart box and lid, making sure the paint dries completely between each coat.

How to decoupage a box

Step 2

The next step in this tutorial, how to decoupage a box, is to tear some découpage paper into small pieces and gradually cover the box lid with them using glue and a brush. Repeat for the base. Leave to dry, then add a coat of varnish.

How to decoupage a box

Step 3

Stick a length of ribbon around the edge of the lid using double-sided tape. Add a length of lace on top, then decorate with pearls along the edge of the lace.

How to decoupage a box – step 3

Step 4

Die-cut different sizes of flowers in complementary papers and roll one piece to make the flower centre. Shape the layers, and assemble. Make four flowers in total. If you don’t have a flower die – you can use a flower punch, or how about making your own with our free flower printables?

How to decoupage a box – step 4

Step 5

The final step in this tutorial, how to decoupage a box, is to attach the flowers to the box lid. Cut a mini tag, punch a hole in the top and tie with cotton. Stick the pearl heart to the bottom and attach it to the box lid.

How to decoupage a box

How to decoupage a box

Shop this project!

1. Mache heart boxes

Buy now: Amazon (£4.89 for two)

Heart boxes – Amazon

2. Crackle decoupage paper

Buy now: Amazon (£2.99)

(please note – the crackle decoupage paper used in this tutorial is no longer available, so we have listed a suitable alternative)

crackle decoupage paper

3. Decopatch glue (with glitter)

Buy now: Amazon (£4.54)

Decopatch glue with glitter

4. Flower dies

Buy now: Amazon (£8.59)

Flower dies – Amazon

5. White acrylic paint

Buy now: Amazon (£2.24 for 120ml)

White acrylic paint – Amazon