Create fantastic metallic blends and accents on your cards with our gilding wax tutorial

Give your cards a metallic makeover using gilding wax and die-cut shapes

Try 6 issues of any craft magazine from just £9.99

Published: October 7, 2022 at 6:08 am

Gilding wax creates fantastic metallic effects on paper, card or other surfaces.

Its metallic lustre won’t fade or tarnish over time, and you can apply the wax with a brush, cloth or directly with your finger. Each colour is stunning on its own, but the effect really comes to life if you mix and match the different shades on one piece. We'll show you how to blend them in our gilding wax tutorial.

What is gilding wax?

Gilding wax is a mix of wax and tiny metallic particles. The wax is usually beeswax, and the metallic particles will vary depend on the colour of the gilding wax. To make the mix runnier and easier to apply, resins are used to. Otherwise the man would be too solid to apply to soft materials like paper.

It used to be used on furniture but now can be added to all kinds of materials and id great on paper or card, to add a soft sparkle. It won't give you that solid metallic look you get from gilding flakes or foul accents. But it adds seem and sparkle, to give an antique and aged look. We'll show this off in out gilding wax tutorial.

Buy gilding wax

1. Silver gilding wax

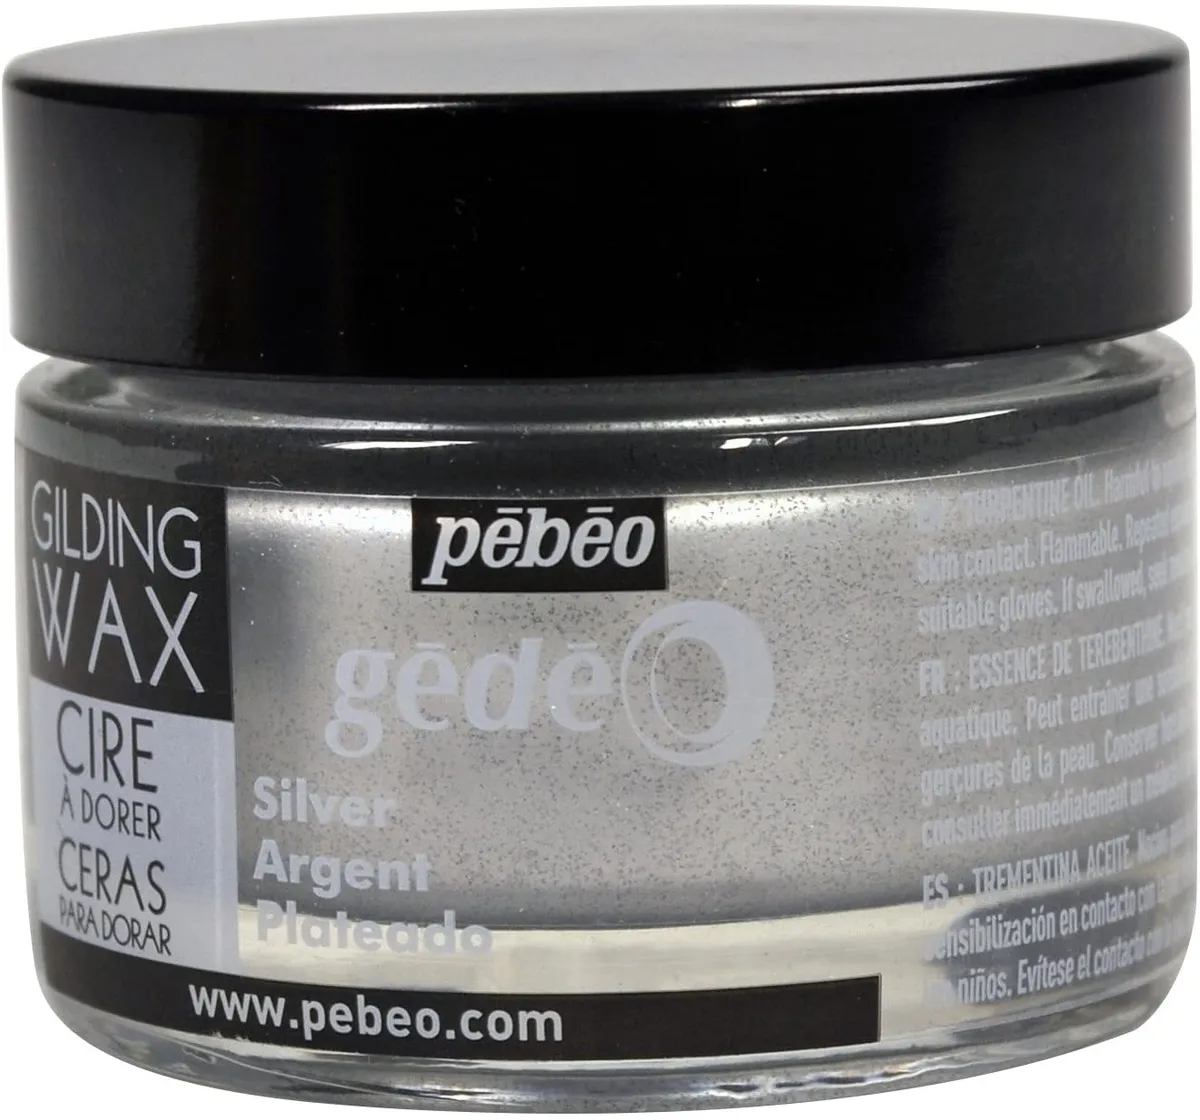
This silver gilding wax is the best we have tried if you want a lot of sparkle. A little goes a long way, so this one tub will be enough for hundreds of cards. Silver is a great colour to invest in for your Christmas makes!

Buy it now: £11, Amazon

2. King gold gilding wax

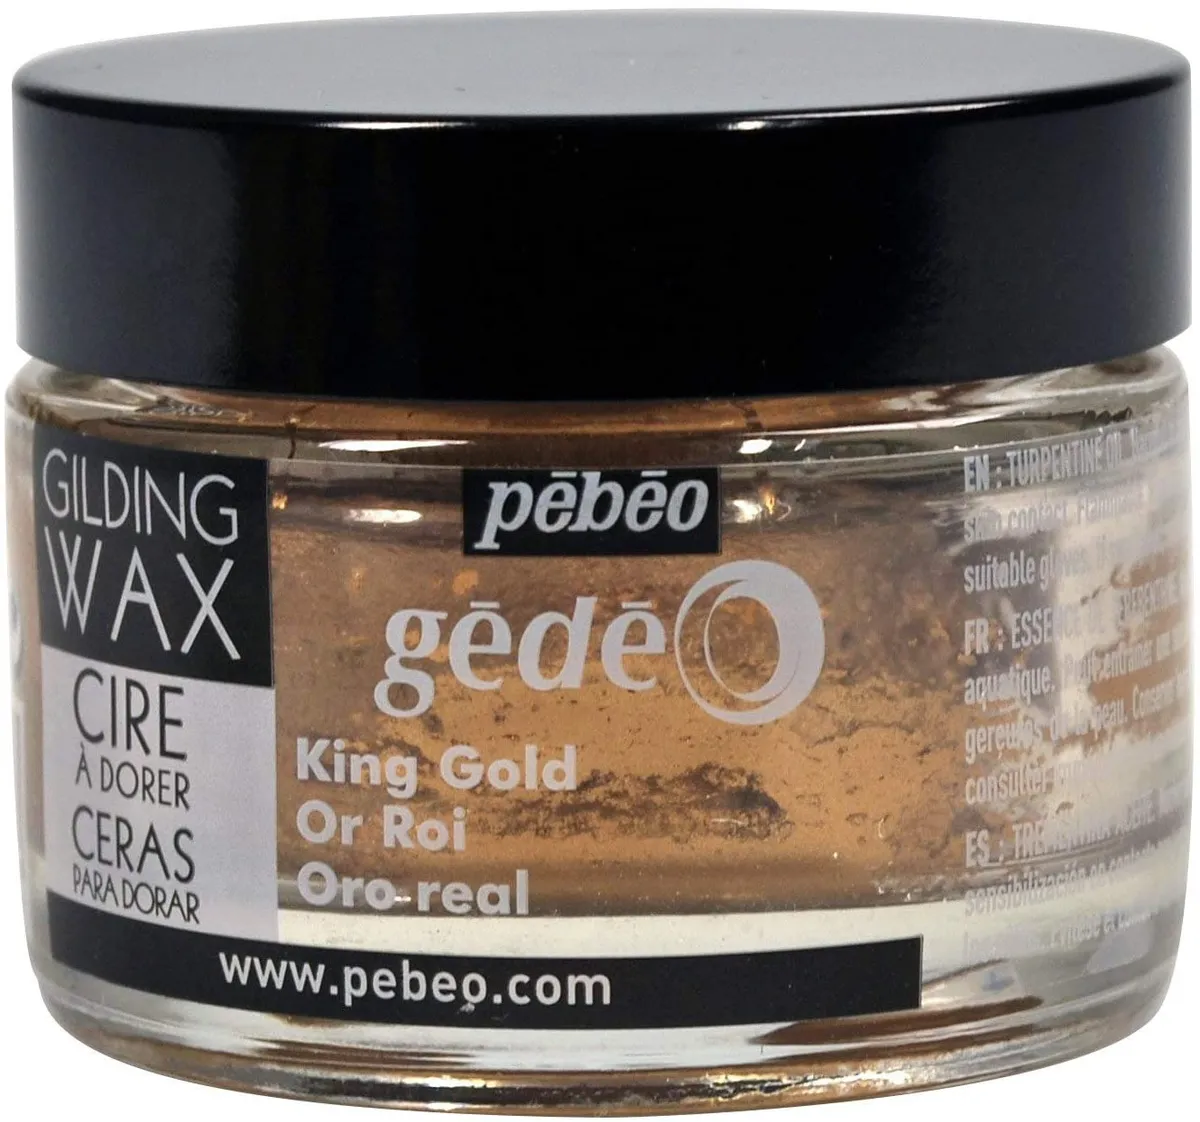
King gold is a really interesting colour. It has more of a coppery tint than pure gold, which is perfect for vintage-effect or steampunk cards. This would be a great gilding wax for a picture frame too – the colour accents add a lovely aged look that's very sophisticated.

Buy it now: £12.00, Amazon

3. Bronze gilding polish

Cosmic Shimmer is a brand most card makers will recognise, and this gilding wax is designed for papercraft projects. This means it is sold in smaller tubs, too, which is great if you want to experiment with it before going in for the larger tubs. It comes with its own applicator sponge built in to the lid.

Buy it now: £7.59, Amazon

How to use gilding wax

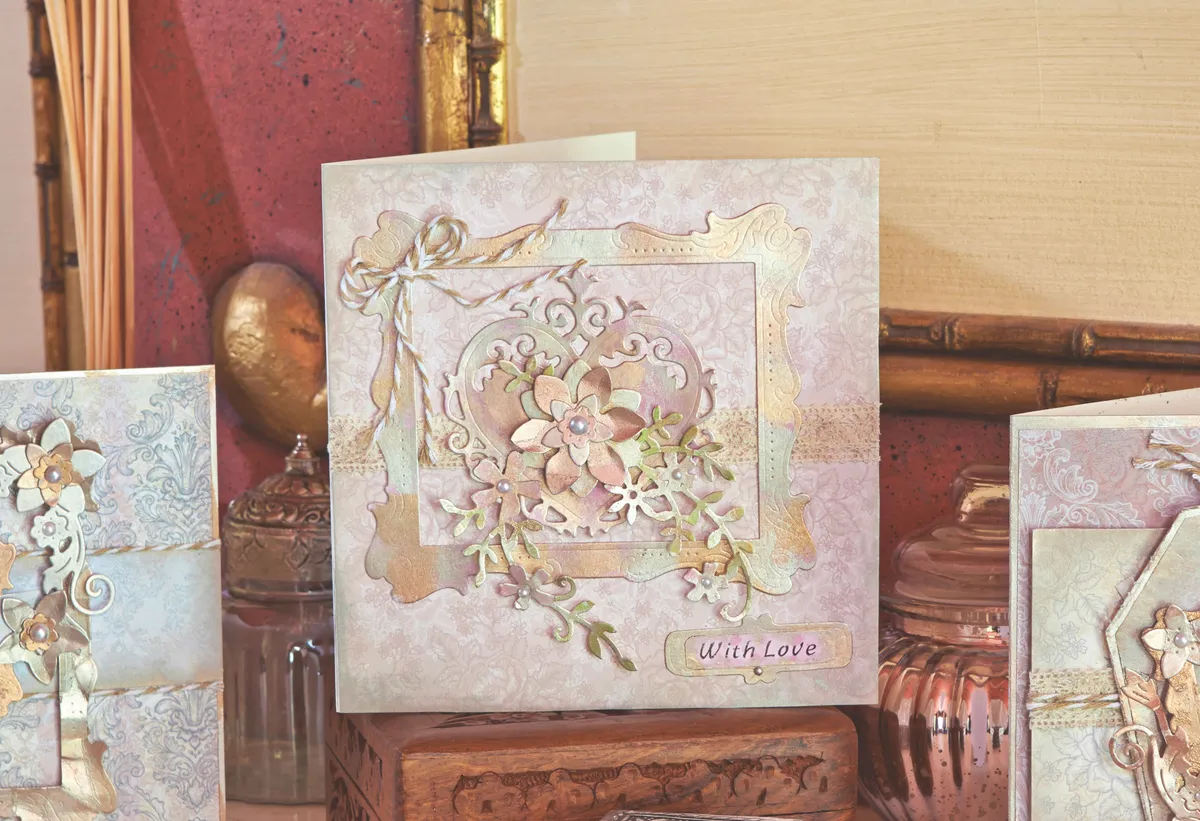
In this gilding wax tutorial, designer Dorothy Wood shows you how to work the gilding wax in such a way that creates an aged, vintage look to your papercraft projects.

If you leave gaps between the areas of wax, extra colour can be added with watercolour paints, and the wax can also be used to age edges in the same way as Distress Inks. Gilding wax works really well with other altered art techniques such as texture paint and torn or rough edges. Try using the wax with antique-themed die-cuts, and experimenting with different papers and card thicknesses for a variety of finishes.

You will need:

  • Gilding wax
  • Paintbrush
  • Dies
  • Die-cutting
  • Card
  • Patterned paper

Step 1

First, set up your workspace. Always work on a non-stick, heat-resistant craft mat (or sheet) for projects like this. It will protect your worktop, stop your project from sticking and be really easy to clean down afterwards.

Die-cut a large frame and any embellishments from favourite dies in your stash. Pick up some of your gilding wax with a paintbrush, we’re going in with a pewter colour, and add to your frame in a scattered, blotchy pattern by swirling the brush.

Clean your paintbrush by rubbing it onto a soft cloth before applying the next colour.

How to use gilding wax – step 1

Step 2

Repeat with different shades of metal gilding wax, we’re using gold and copper, to build up the colours and cover all of the frame. Then use a water brush to dab some watercolour paint over the frame (we’ve gone for a cherry sorbet colour), especially on any card shining through.

Use a heat gun to dry the wax gilt before you buff it with a soft cloth, or it will wipe off.

How to use gilding wax – step 2

Step 3

Repeat this method on your die-cut embellishments to give them a vintage, aged look using your gilding wax. You could also use paper ephemera!

How to use gilding wax – step 3

Step 4

Now let’s start building up the card. To tie the gilded wax theme in with the card, add some gilding wax around the edge of any panels of paper that you use as you build up the main design of your card.

How to use gilding wax – step 7

Step 5

Finally, add all the elements together to create a card or other papercraft project. If you’re building up a project with lots of elements, like we are here, it’s a good idea to test out where you want everything first, before glueing it down.

How to use gilding wax – step 4

Gilding wax is an easy way to add sparkle

Gilding wax lets you add sparkle to anything! It gives a more blended effects than glitter glue and looks much more sophisticated. But what if you want that solid, made-of-metal look in your cards

Get solid shine with foil

Using foil sheets will add that mirror-like finish to your paper makes. Think you need fancy machines to use it? Think again. Those do make it easier, but you can add foil using just a glue pen, too.

We show you four ways to add foil to your cards in our  How to make foil cards project.