Learn the bargello technique!

The bargello technique is the ideal way to use up leftover strips of paper and all those precious scraps!

Try our magazines – get 6 issues from just £9.99!

Published: June 3, 2021 at 5:30 am

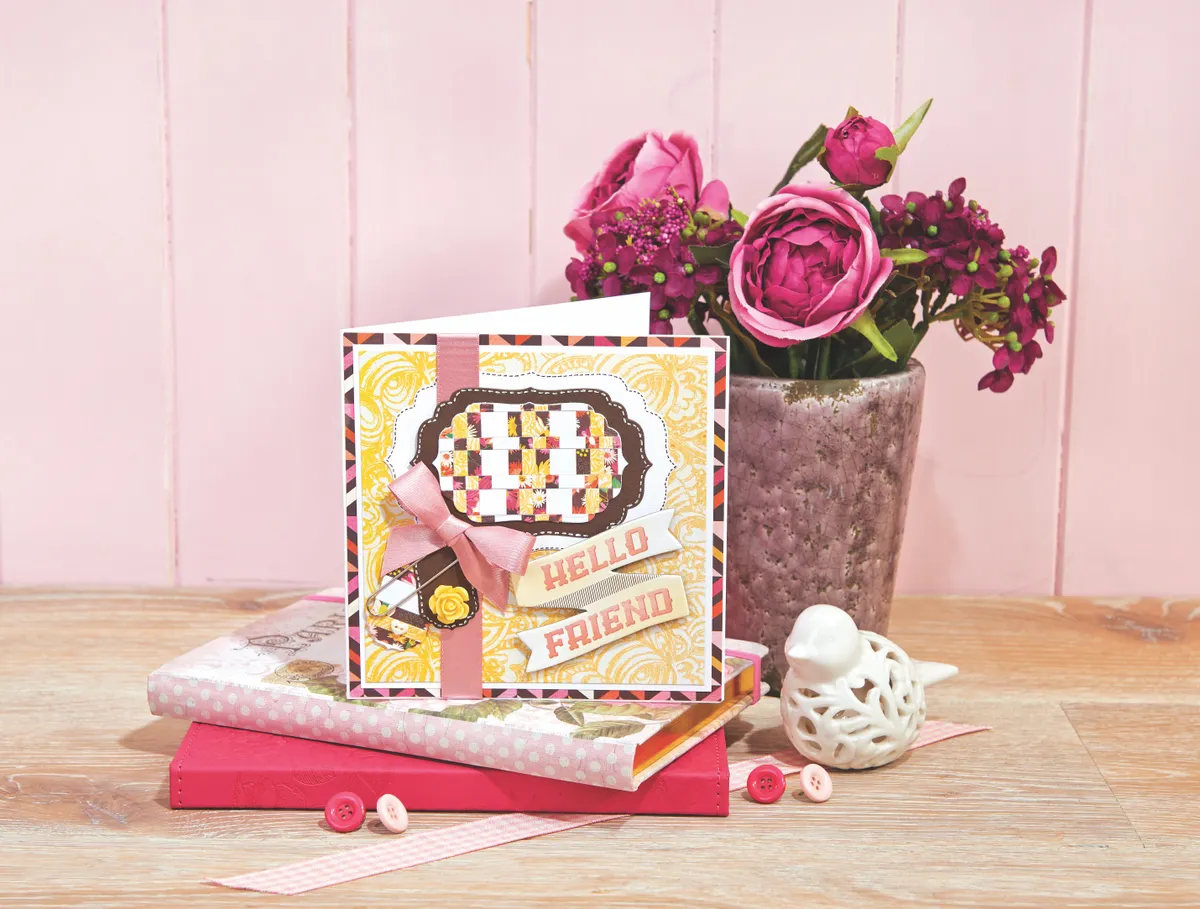
Bargello is a really nifty technique for using up your papers, or just to showcase a new paper collection you can’t get enough of! Start by using a paper trimmer to cut your papers into strips, then mount onto scrap paper without any gaps in between. Next, rotate the paper and cut strips running in the opposite direction. You’ll then have a selection of patterned strips that can be reassembled to create step or wave designs depending on how you choose to arrange them.

You can take the technique further by varying the width of your paper strips, too – we’ve given you some ideas so you can add another level of intricacy to your designs. Have fun experimenting with the technique!

Looking for more fancy card ideas? We love this bow fold card - or how about this fun bridge fold card?

We love seeing what you make, so don’t forget to share your craft projects with us on Facebook and Twitter, too!

You will need

  • Patterned or plain paper, cut into strips
  • Card
  • Distress Inks
  • Ribbon
  • Twine
  • Buttons

Make this friendship card

Step 1

Cover your base card with paper. Top with 13 x 13cm of coloured paper – we’ve chosen yellow paper. Cut a large label and draw a border. Wrap the panel with ribbon.

Bargello friendship card – step 1

Step 2

Cut 0.5cm strips of patterned paper and 1cm strips of white card. Layer onto paper, arranging three paper strips then a card strip.

Bargello friendship card – step 2

Step 3

Rotate, then cut into 1cm and 0.5cm strips. Alternate these, positioning the 0.5cm ones higher and 1cm ones lower each time.

Bargello friendship card – step 3

Step 4

Cut a label from the bargello panel. Mount onto a brown die-cut label, adding a border. Stick to the white label on your card.

Bargello friendship card – step 4

Step 5

Cut another, smaller, label from the bargello panel. Cut a brown die-cut label in the same size and add a fine liner border.

Bargello friendship card – step 5

Step 6

Glue the labels together and add some embellishments – we’ve chosen a flower, button and paperclip with a bow. Stick in place, along with any other embellishments you want – we’re using a chipboard sticker to finish!

Bargello friendship card – step 6


Make this sweetheart card

Bargello card – sweetheart card

Use your own patterned papers, or browse through our free papers to download some of our free digi papers to use in this project!

Step 1

Bargello sweetheart card – step 1

Cover half your card front with pink paper. Place a heart die on top. Arrange your plates so you only die cut the white area.

Step 2

Bargello sweetheart card – step 2

Stick 0.5cm and 1cm paper strips in three different designs onto white paper. Rotate, then cut into 1cm-wide strips.

Step 3

Bargello sweetheart card – step 3

Arrange the strips to create a wave pattern across them. Stick in place, then die cut a heart the same size as in Step 1 from it.

Step 4

Bargello sweetheart card – step 4

Stick the heart to your card front. Cover the inside with some pink paper, then top with brown card and floral paper. Draw a border.

Step 5

Bargello sweetheart card – step 5

Wrap some coordinating ribbon around your card spine. Top with a sentiment mounted onto floral paper and brown card.

Step 6

Bargello sweetheart card – step 6

Cut two butterflies. Add some Distress Ink before removing the die. Stick to your card. Finish with a bow, button, gems and flowers.


More bargello card ideas

Love card

Bargello card – LOVE card


  1. Cut a 14 x 14cm square of patterned paper. Mount onto some pink card and trim to leave a very narrow border. Add a 5.5cm strip of green paper and a 2cm strip of brown design paper, as shown. Stick the panel to your card base.
  2. Cut strips from a mixture of patterned paper, making the widths 1.5cm, 1cm and 0.5cm. Stick to some white paper, butting the strips tight up against each other. Trim the panel to remove the excess paper around the strips.
  3. With the stripes running horizontally, cut 1cm-wide strips and arrange these on your work surface. Start in the middle and work either side of the central strip by making each row slightly higher than the previous one.
  4. Cut the panel to create a large label shape (label dies are great for this or if you don’t have a die-cutting machine you could sketch out your shape first). Mount onto some brown card and wrap with ribbon. Stick the panel in place, adding a bow and chipboard sticker. Finish by embellishing with letters, some ephemera and a resin flower.

Hey Sunshine (left)

Bargello cards – sunshine & Happy card


  1. Using a paper trimmer or craft knife and metal ruler, cut 1cm- wide strips from three different design papers from your patterned paper – we’re using the Vivienne 6×6" paper stack. Alternating the designs, stick nine rows to a piece of white paper or thin white card, butting the strips tight up against each other. Trim to remove the excess paper.
  2. Position the panel so the strips of paper run horizontally, then use a paper trimmer or craft knife and metal ruler to cut the panel into 1cm-wide strips. This will give you lots of narrow strips of paper, each with nine small patterned rectangles running along it.
  3. Arrange the strips on your work surface so the patterns match up. Working from left to right, position each row slightly higher than the last. Stick the 10 strips to the card front, starting with the left edge. Trim them level across the top of the card.
  4. Add a sentiment – we’ve gone for the  ‘Hey Sunshine!’ chipboard sticker – to the bottom of the card with foam pads. Add embellishments, then finish your card with a small heart-shaped button.

Happy card (right)

Bargello cards – sunshine & Happy card


  1. Cut 1.5cm-wide strips of three different design papers from some patterned paper and stick these to a piece of white paper, butting the strips tight up against each other so there aren’t any gaps. Trim to remove the excess paper around the edges.
  2. Position the panel so the strips of paper run horizontally, then use a paper trimmer or craft knife to cut the panel into 1cm-wide strips.
  3. Arrange on your work surface, starting with a centre strip and working outwards in both directions. Start by matching the patterns and then lowering or raising the strips by half a pattern square. Stick each strip to some white paper. Trim into a rectangle 8.5cm deep and nine strips wide. Mount onto dark brown card. Stick to a 14.5 x 14.5cm card front.
  4. Use some letters to spell out the sentiment ‘#Happy’. Add two chipboard stickers to the bargello panel with foam pads and add a ribbon bow. Finish your card design by using a black fine liner to add faux stitching around the edge of the card base, as shown in the picture.