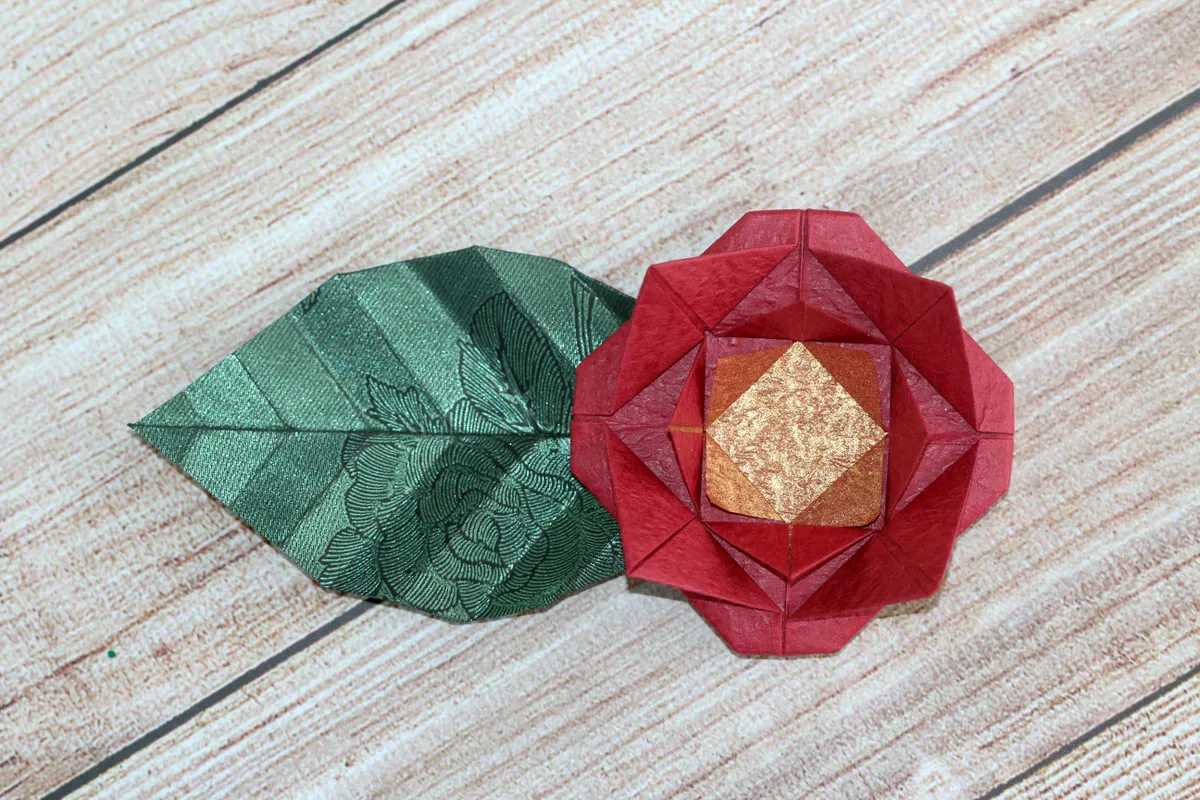
Origami has captivated the hearts and minds of enthusiasts around the world for centuries. Among the plethora of origami flowers you can create with only a single piece of paper, the origami rose is surely one of the most impressive.
It’s a timeless symbol of beauty and romance, and by carefully making several creases in the paper before actually folding the model, you can essentially map out the petals and curl of the flower. It makes the later stages of folding the model much easier, so it’s important to take your time and get the early stages correct.
Whether you are a seasoned origami artist or a novice eager to embark on a new creative journey, our in-depth step-by-step guides will show you how to fold an exquisite origami rose that blooms with elegance and grace.
We have two designs to choose from, first a closed rose origami which is suitable for intermediate skill levels of origami and the second is a flat rose origami which is suitable for beginners.
Read on for the closed rose tutorial, or jump to the origami rose for beginners tutorial.
How to make an origami rose step-by-step (intermediate)

Time: 40 minutes to 1 hour
Level: Intermediate to advanced
What you'll need:
- Square paper (21x21cm
- Paper creaser (optional)
Things to note:
Most of the folds are repeated four times, because there are four ‘sides’ to this origami rose, so you’ll get to learn the moves as you progress with the model.
For neat seams, you might like to use some paper that is the same colour on both sides. Then, when the seams show through, it will look all the same colour for a more professional finish. But for clarity of instructions, we’ve used paper that is different front and back in this origami rose tutorial.
Step 1
Start with a square piece of paper. It doesn’t need to be dedicated origami paper for this tutorial, just as long as it’s square.
For this tutorial, we are using 21cm2 paper which is pink on the front, and yellow on the back.
You can use the regular 15x15cm size origami paper if you prefer, but we recommend starting off with a slightly larger size while you learn. 21x21cm is ideal for this origami rose tutorial.
Start with the paper face up (with the colour you want on the outside of your rose facing upwards).
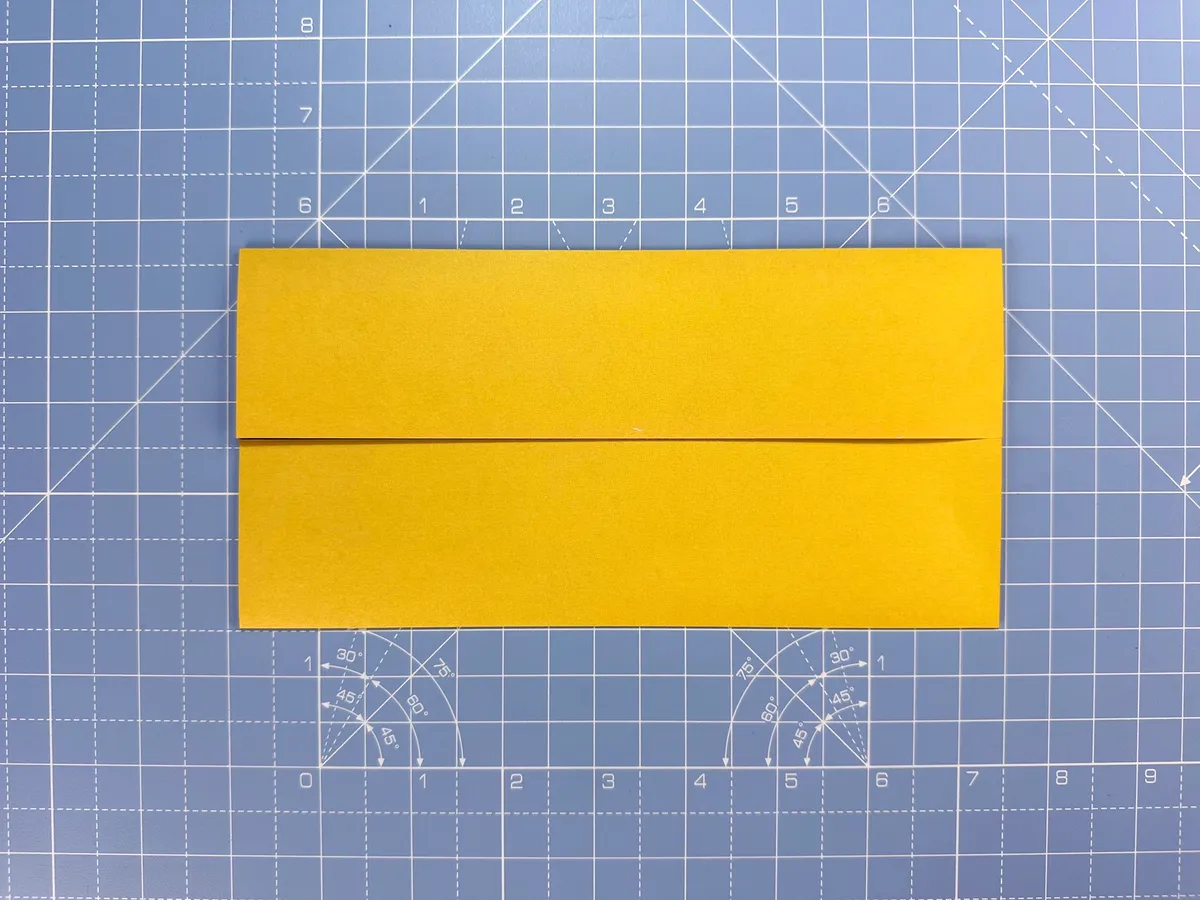
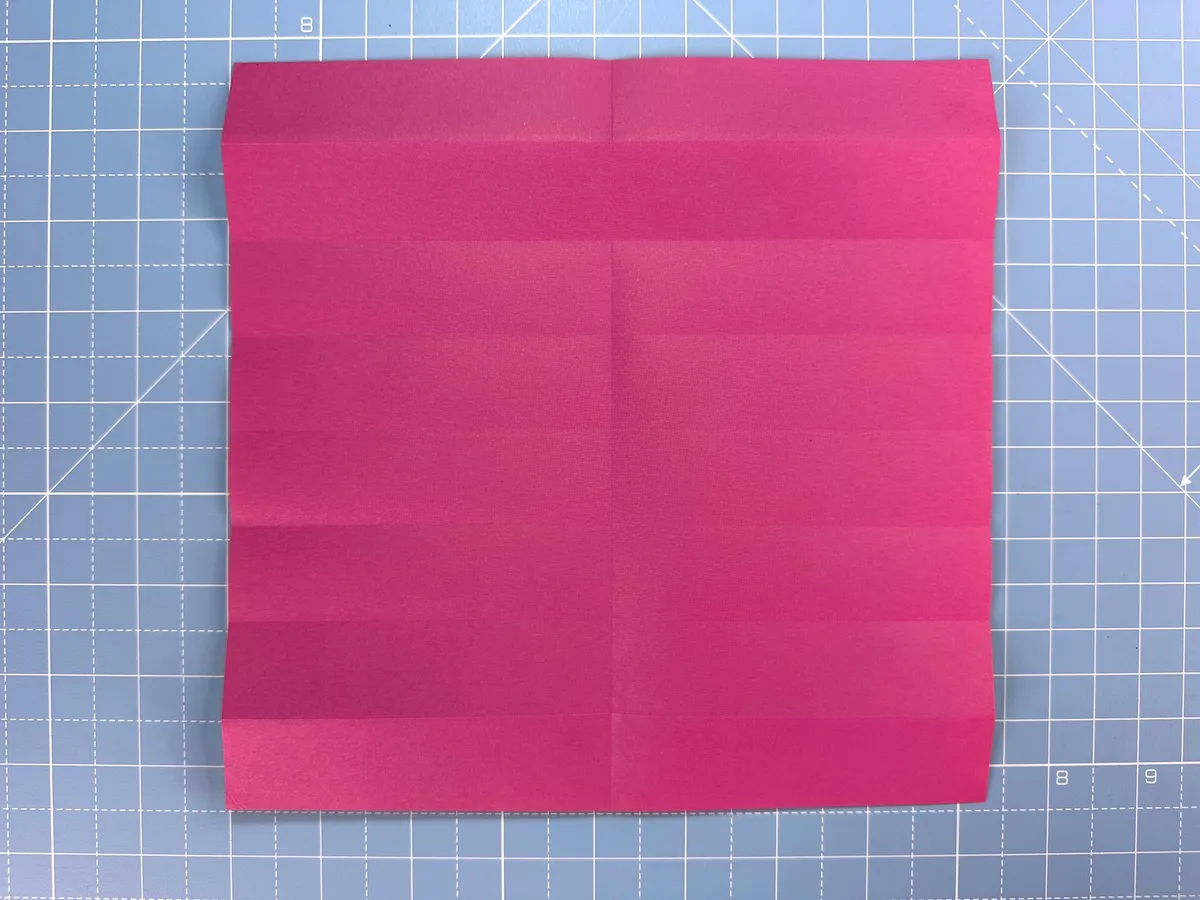
Book fold horizontally and unfold.

Step 2
Fold both the top and the bottom to the middle.
Step 3
Fold both the top and the bottom to the middle for a second time.
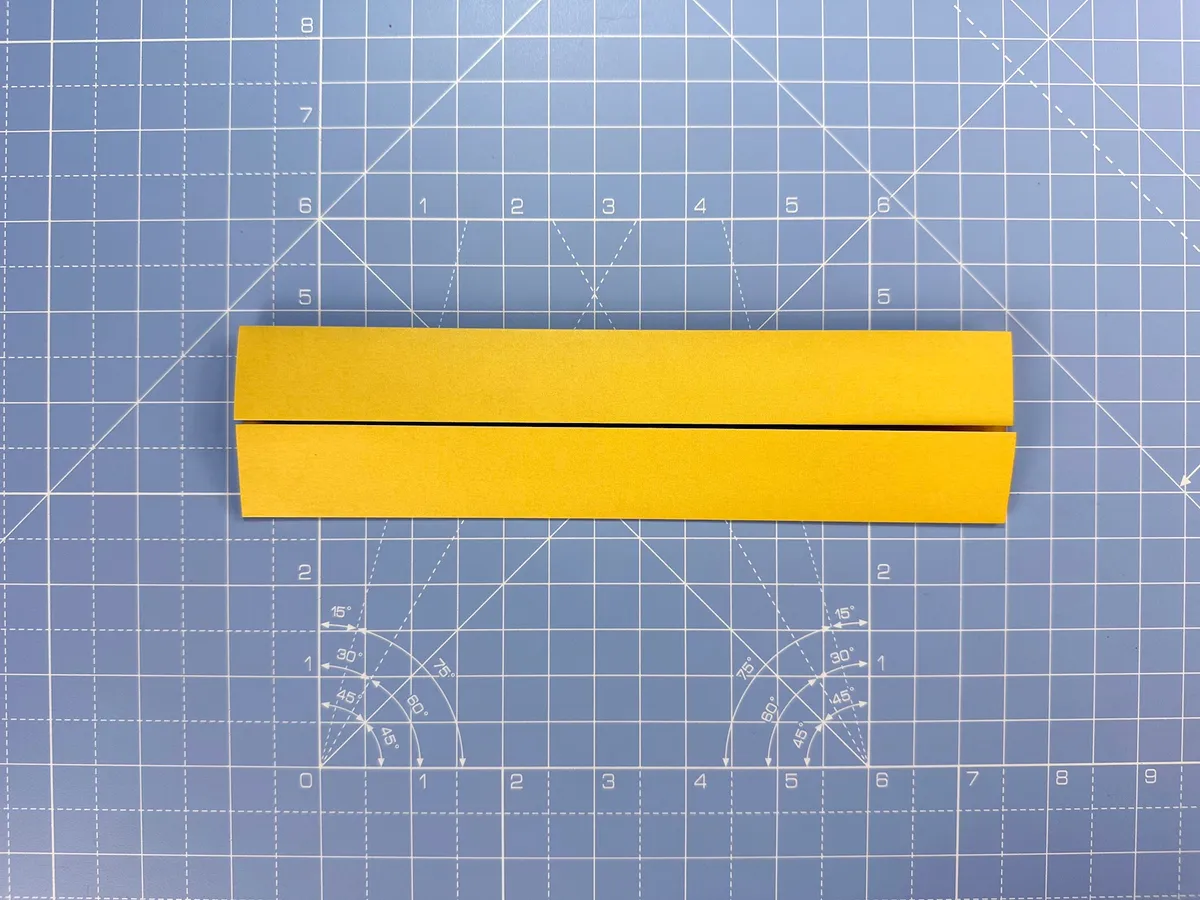
Step 4
Unfold to reveal eight equal sections running horizontally along the paper.
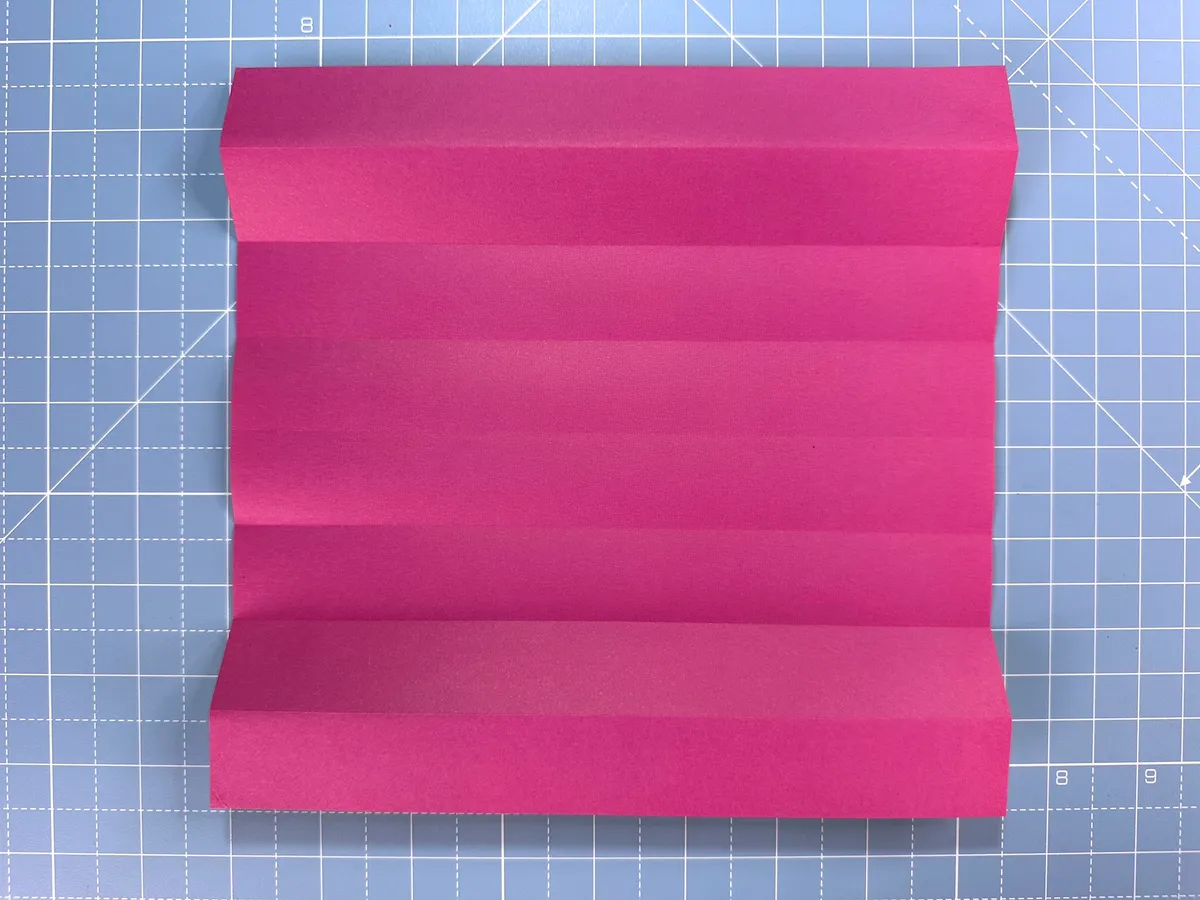
Step 5
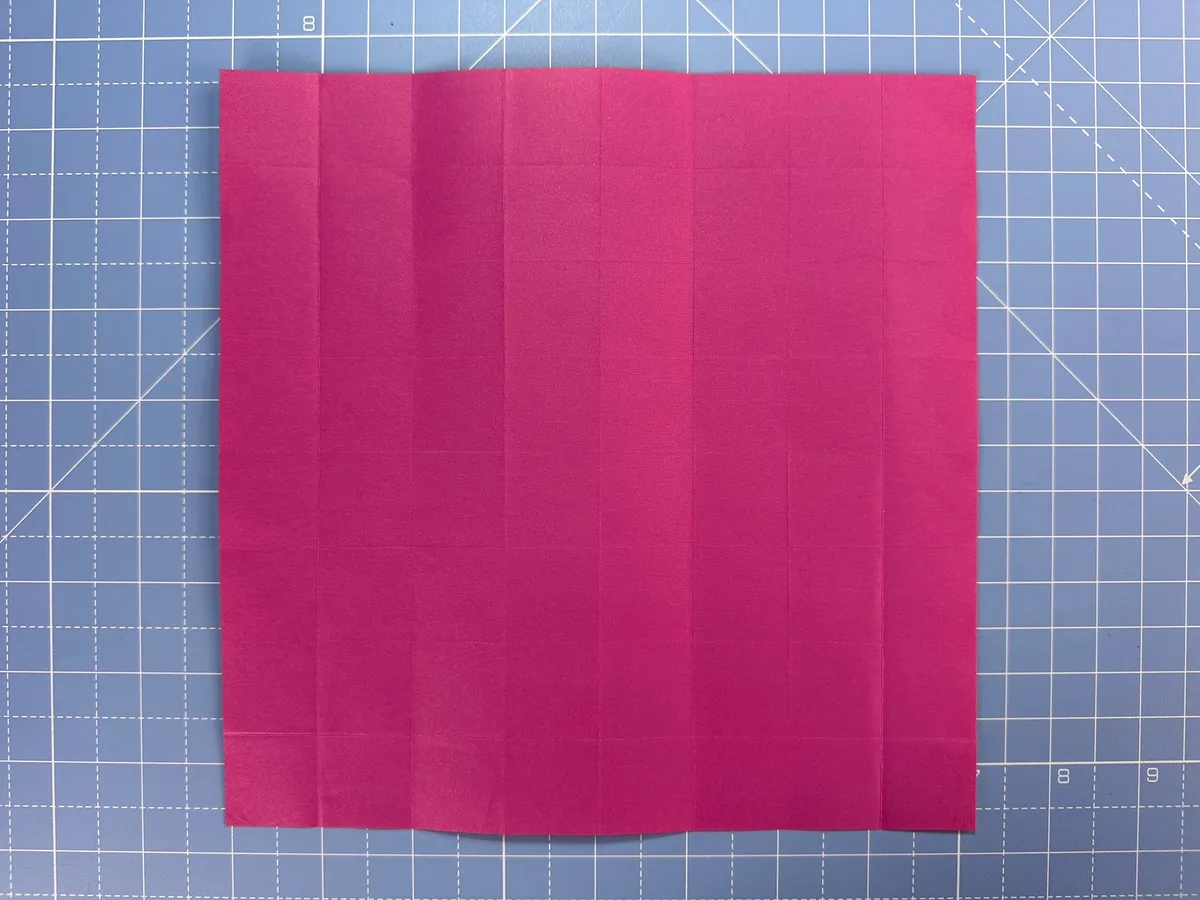
Book fold vertically and unfold.
Step 6
Like before, fold both sides to meet the middle vertical line.

Step 7
Without unfolding, fold both sides to the middle for a second time.
Step 8
Unfold to reveal 64 squares (8 x 8).
Note: In this tutorial, when we refer to a “square”, we are referring to one of these small 64 squares.
Step 9
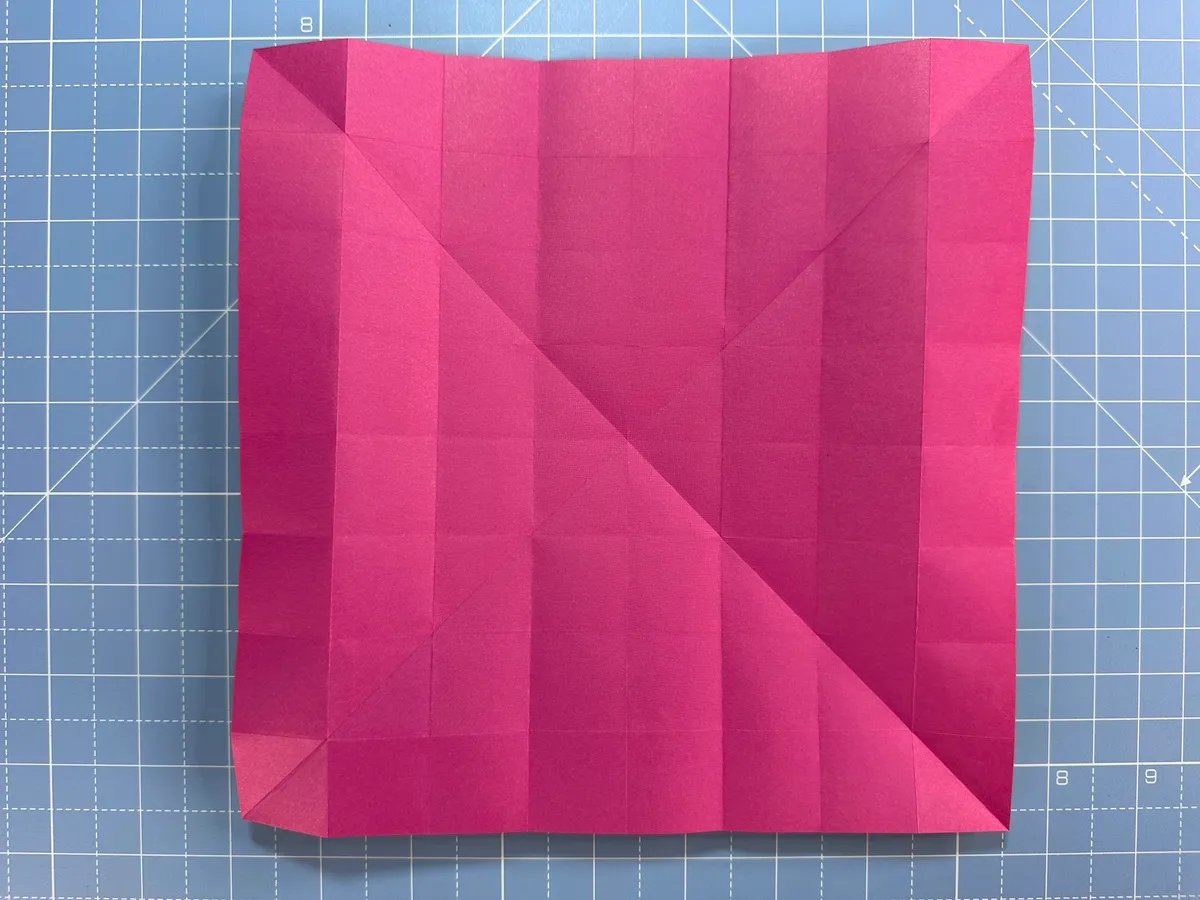
Fold the paper in half along both diagonals. Unfold.
Step 10
Turn the paper over.
Step 11
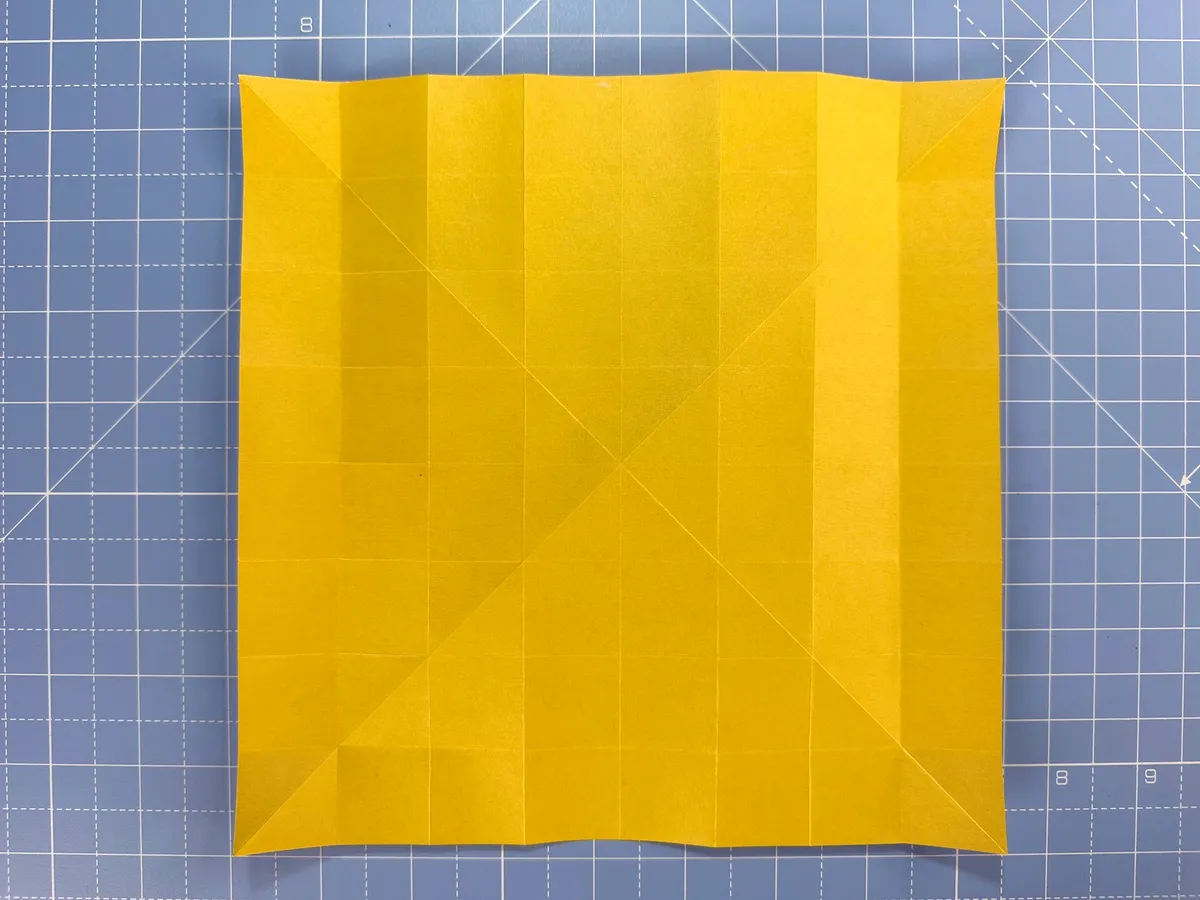
Line one corner up with the opposite corner, one square in. Then crease from the top of the middle square to the bottom left (across four squares). Unfold.

Step 12
Repeat with every corner. You will end up with a square diamond in the middle of the paper, with lines that radiate from each of the corners.
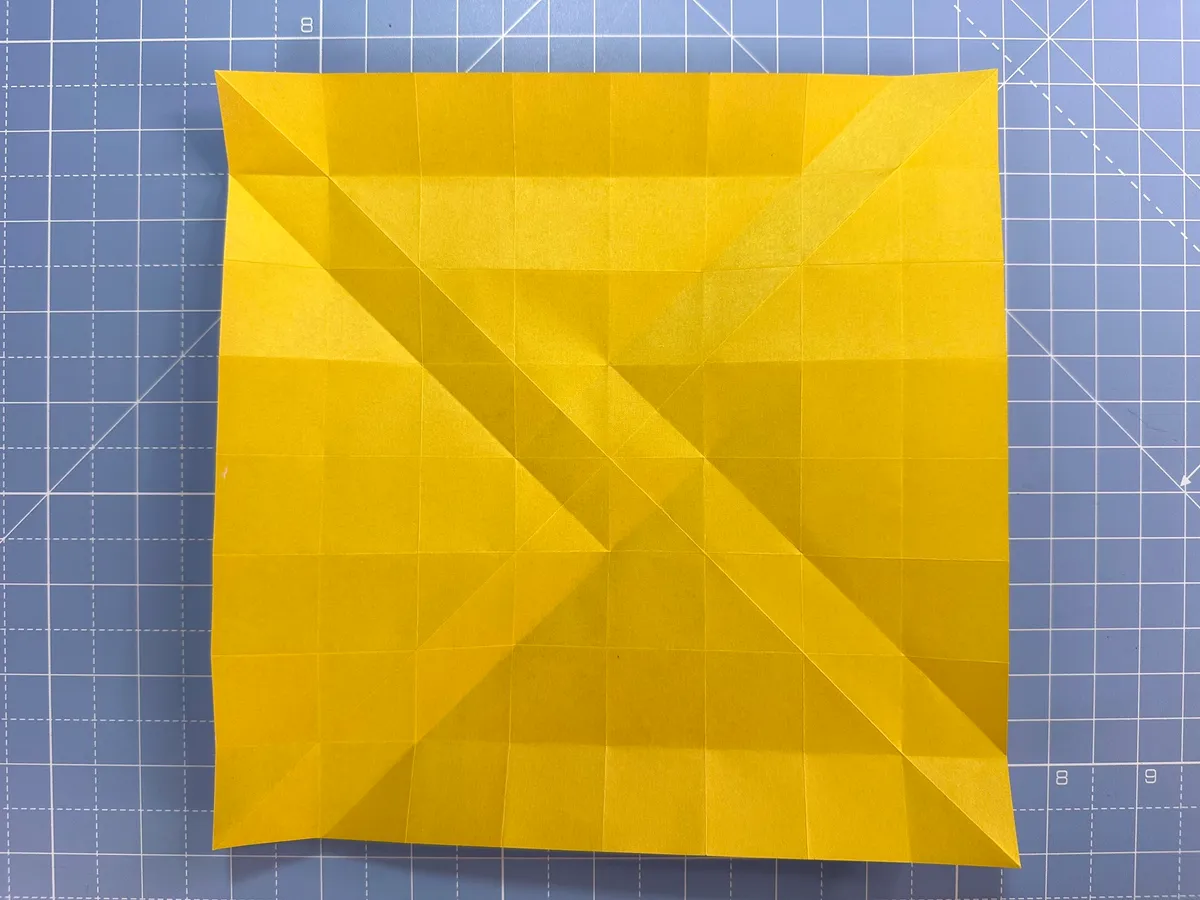
Step 13
Fold each of the four corners in, cutting two squares as you do so.

Step 14
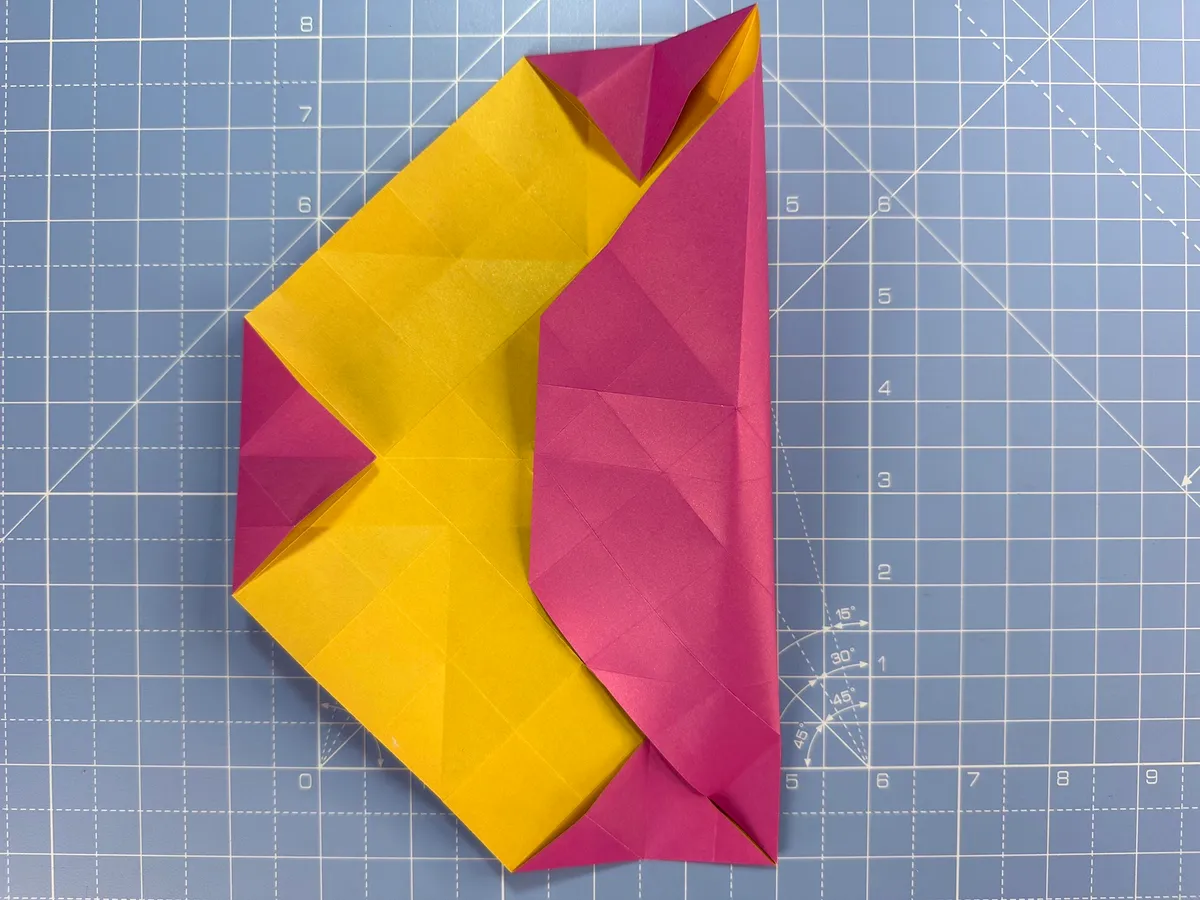
Rotate the paper as shown.
Step 15
Fold the bottom edge to the middle, but only crease from the right of the middle triangle all the way to the right (across two squares).

Step 16
Unfold to reveal a new four-sided-almost-triangle in the corner.

Step 17
Repeat on all of the other sides to create four x four-sided-almost-triangles.
Step 18
Fold the right-hand edge over to the left, lining the edge up with the edge of the triangle at the bottom. Crease downwards, but only in the small square to the right of this triangle (essentially cutting one square in half). Unfold.
Step 19
Fold the bottom edge up, so the right-hand edge of the bottom triangle meets the diagonal line two squares to the right (cutting across two squares). Crease only across the outer-most right-hand square, towards the right (creasing only in one square).


Step 20
Unfold to reveal a small triangle in the bottom right-hand corner.

Step 21
Repeat step 18-20 on the other corners, to create four of these small triangles in total.

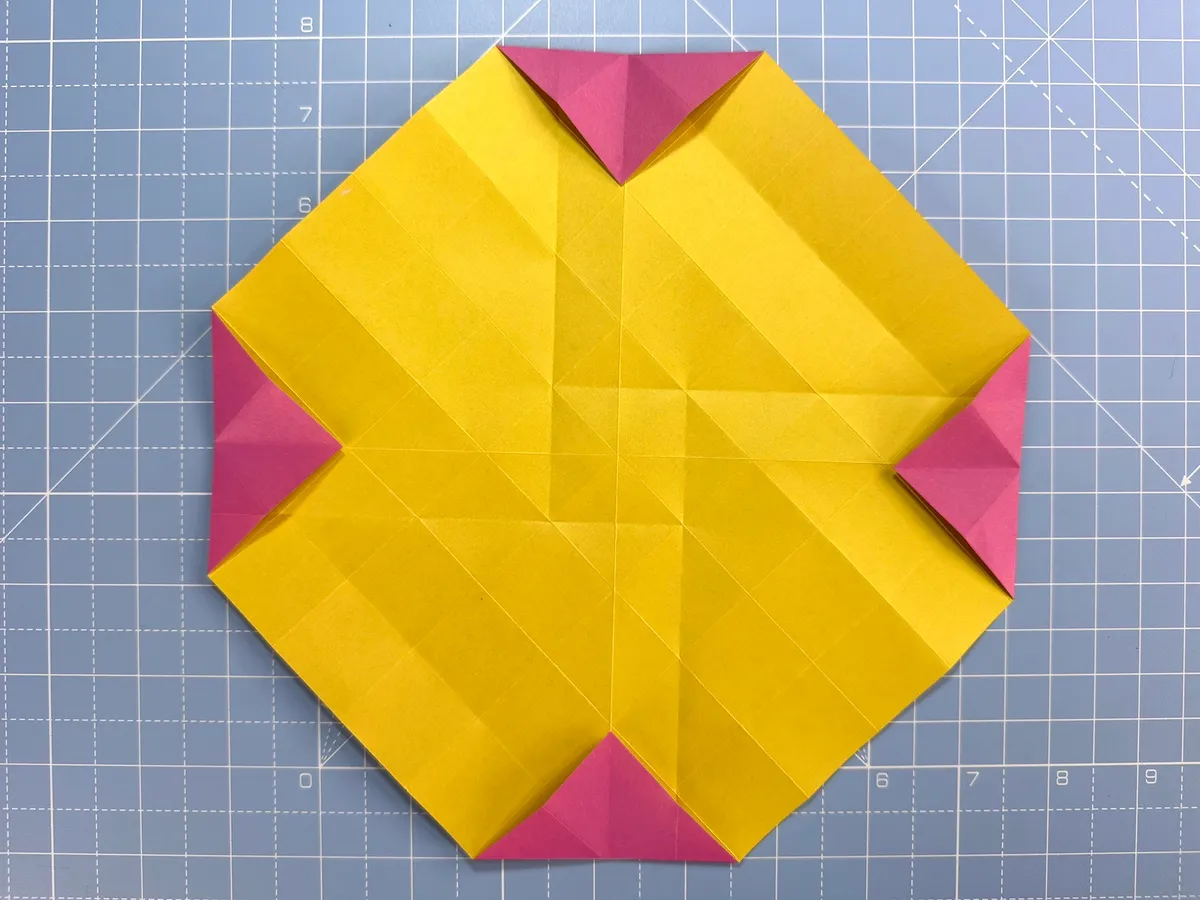
Step 22
Turn the paper over.

Step 23
Fold in half.

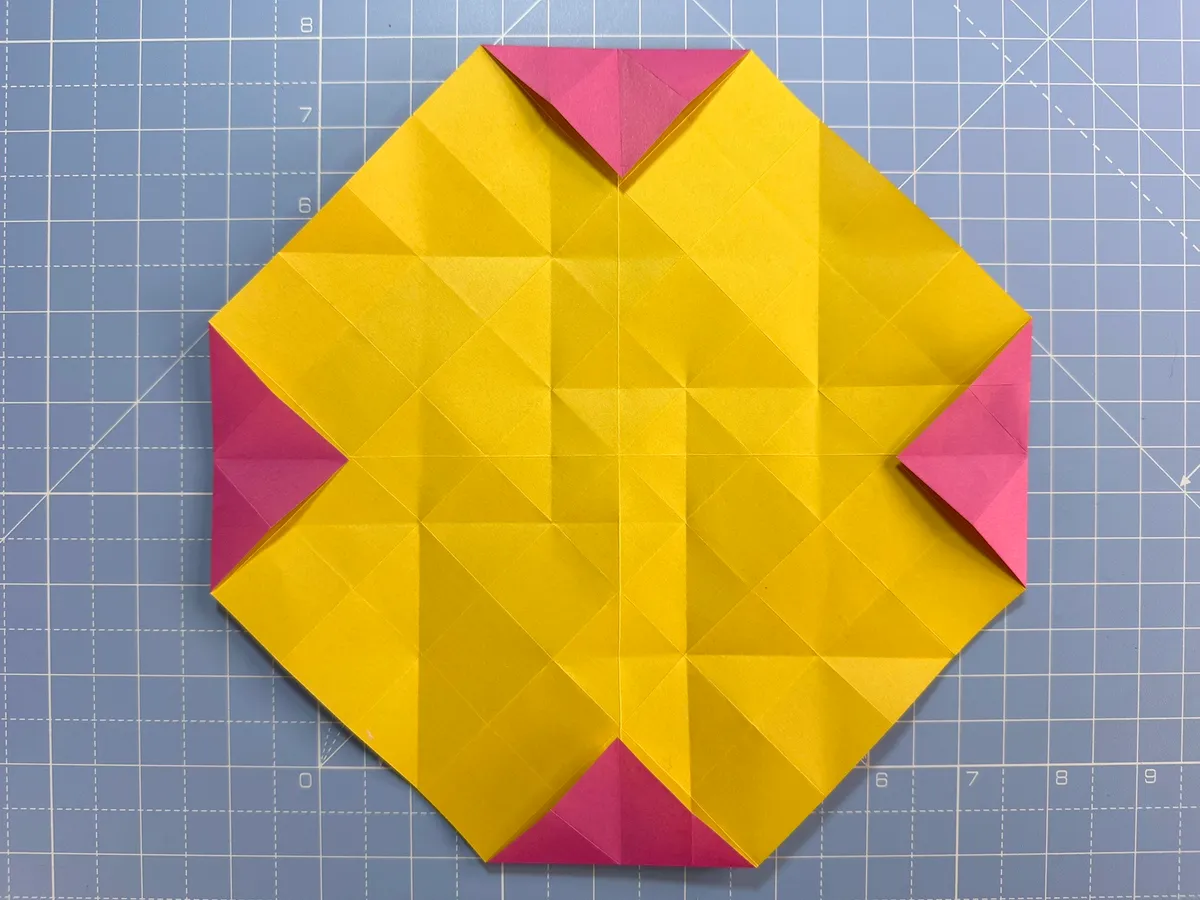
Step 24
Fold in half again.

Step 25
In the bottom left-hand corner, fold the small square in half. Burnish well.

Step 26
Unfold to reveal a small diamond square, inside the central square.

Step 27
Turn the paper over.

Step 28
The aim for this next section is to create a raised square in the middle of the paper. We’ll do this by first creating a cross.
Using the folds you made back in step 11-12, fold the opposite corners anticlockwise (fold the left-hand corner down, and the right-hand corner upwards).

Step 29
Repeat for the top and bottom corners, continuing to fold anticlockwise (fold the top corner towards the left, and the bottom corner towards the right).

Step 30
Work the folds, continuing to push each of the four ridges anticlockwise until you end up with a cross in the middle of the paper.

Step 31
Using your fingers in between the arms of the central cross, gently push each arm anti-clockwise. The cross will start to open up.

Step 32
Keep pushing round until the cross has opened up fully and you are left with a square diamond in the middle of the paper. Burnish the fold.

Step 33
Turn the paper over

Step 34
Open the edges of the paper up and push the four-sided-almost-triangle (that you made in step 16) upwards to create a ‘ledge’.

Step 35
Repeat on the other three sides to create four of these four-sided-triangular-ledges.

Step 36
This is what the paper will look like from the other side. (There is no action required in this step, it is for information only.)

Step 37
In the middle of each of these four-sided-triangular-ledges is a small triangle. Push this triangle in, and fold up the triangle immediately to the right. You’ll create a three-sided-square which is open along the bottom.
I’ve used a paperclip here to hold it in place, you might like to do the same (but not necessary).


Step 38
Fold this three-sided-square over to the left, using the diagonal fold line that partially bisects the shape you just made.


Step 39
Repeat steps 37-38 on the other three sides. The paper will pull in, and you’ll start to see the origami rose taking shape.

Step 40
This is what the model will look like from the reverse. (There is no action required in this step, it is for information only.)

Step 41
Rotate the model so that the open side is facing upwards. (I’ve removed the paperclip.)

Step 42
Fold the now-right-hand flap over, so that the three-sided-square is now ‘closed’.

Step 43
Secure this flap in place by folding it around the back, burnishing the fold to keep it in place.

Step 44
Repeat on the other three sides. The model will take on a more cylindrical shape at this point.

Step 45
There are now four narrow triangular flaps. Working on each one in turn, fold them down and crease gently at the base of these flaps (where the flaps meet the main body).


Step 46
When you have folded down the final flap, tuck the point of this final narrow triangle into the hole to secure the main body of the origami rose.

Step 47
This is what the model will look like from the top. (There is no action required in this step, it is for information only.)


Step 48
Gently pull the origami rose open, so that the centre ‘hole’ becomes a little larger.

Step 49
There are four diagonal-triangular-flaps on the side of your origami rose. These will form the outer petals of your origami rose. One at a time, gently pull these flaps out and down. Leave a rounded crease where the petal meets the main body of the rose.

Step 50
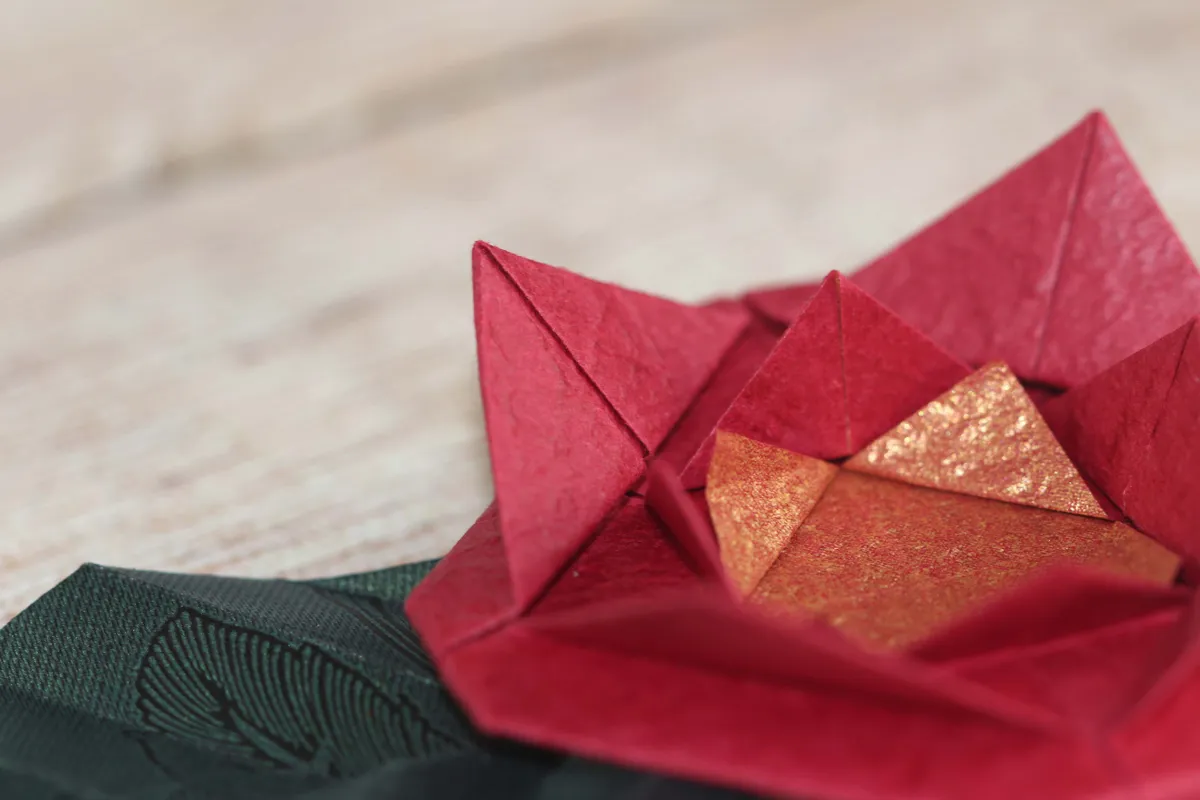
Finally, round the edges of the inner petals to add some shape to your origami rose. Using a cocktail stick is a good way to ensure you get a nice curl, and don’t accidentally press the edges creating an unwanted crease. Congratulations, you have completed your origami rose!


How to make an easy origami rose for beginners
In this tutorial, how to make an easy origami rose, we show you how to make both an origami rose and a matching origami leaf. Both will lay flat, so they make the perfect toppers if you’re looking for easy card ideas, or how about using them as a decoration for DIY napkin rings?
There are no tricky folds involved, just mountain folds (fold the paper back, so the fold resembles a mountain) and valley folds (fold the paper forward, so the fold resembles a valley). Double-sided paper works best for the easy origami rose; one side will form the petals and the other side will form the centre of the flower.