How to make an easy origami crane
Learn how to make an origami crane with our easy to follow step-by-step tutorial - so grab a piece of 15cm x 15cm paper, and let us show you how.

Published:
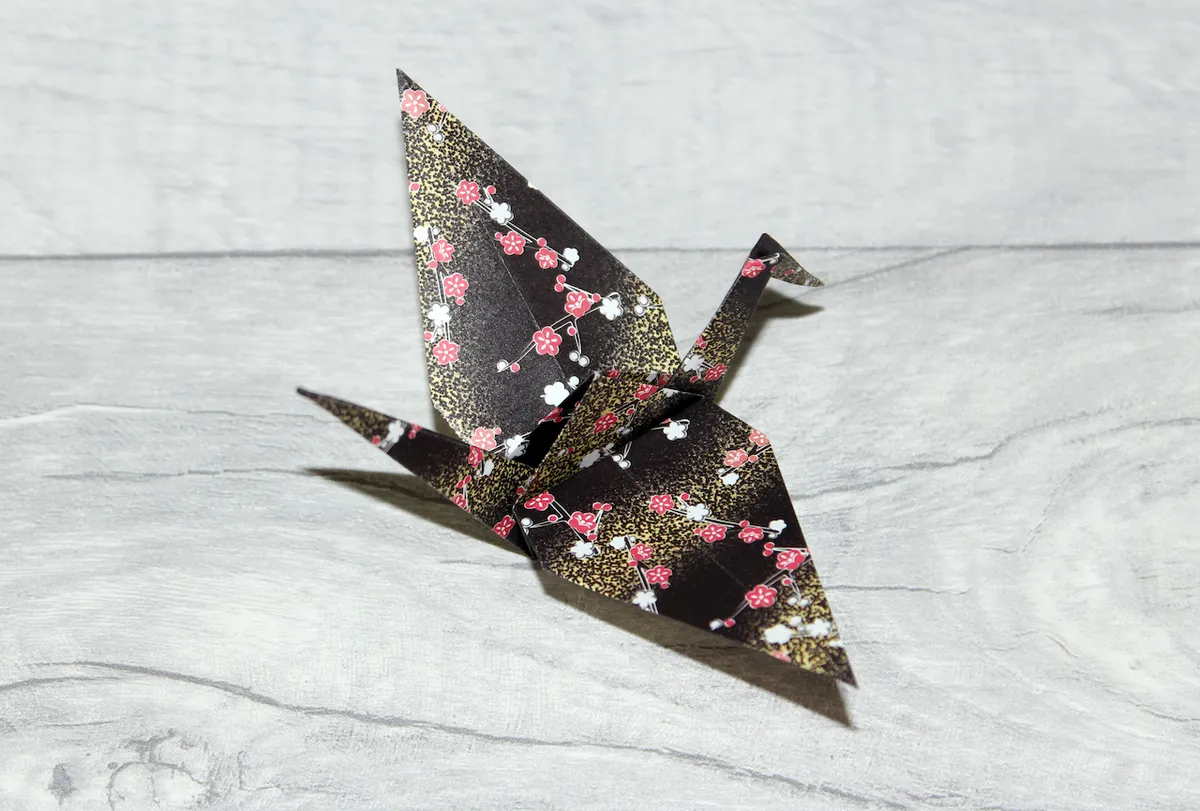
If you could have one wish, what would it be? There is an ancient Japanese legend that says, whosoever folds 1,000 paper cranes, will be rewarded with a wish from the gods.
Traditionally, these 1,000 paper cranes would be assembled onto 25 strings, each containing 40 cranes – called a senbazuru. Beads are placed at the ends of the strings to stop the cranes from falling off.
Why is the origami crane so popular?
The traditional Japanese paper crane is an image that many people all over the world are familiar with as a symbol of peace. Origami cranes are often given as gifts, and folding origami is often used in mindfulness techniques.
It is an extremely satisfying way to pass the time, and origami cranes (as well as other origami birds) make brilliant features for cards – just mount them onto a coloured background (or card blank) and you’re done.
What do I need for the crane origami?
The only thing you need for origami is paper and your hands! We’ve also outlined a few other optional tools which are useful for origami after the tutorial which can make the folding process much easier.
Origami paper

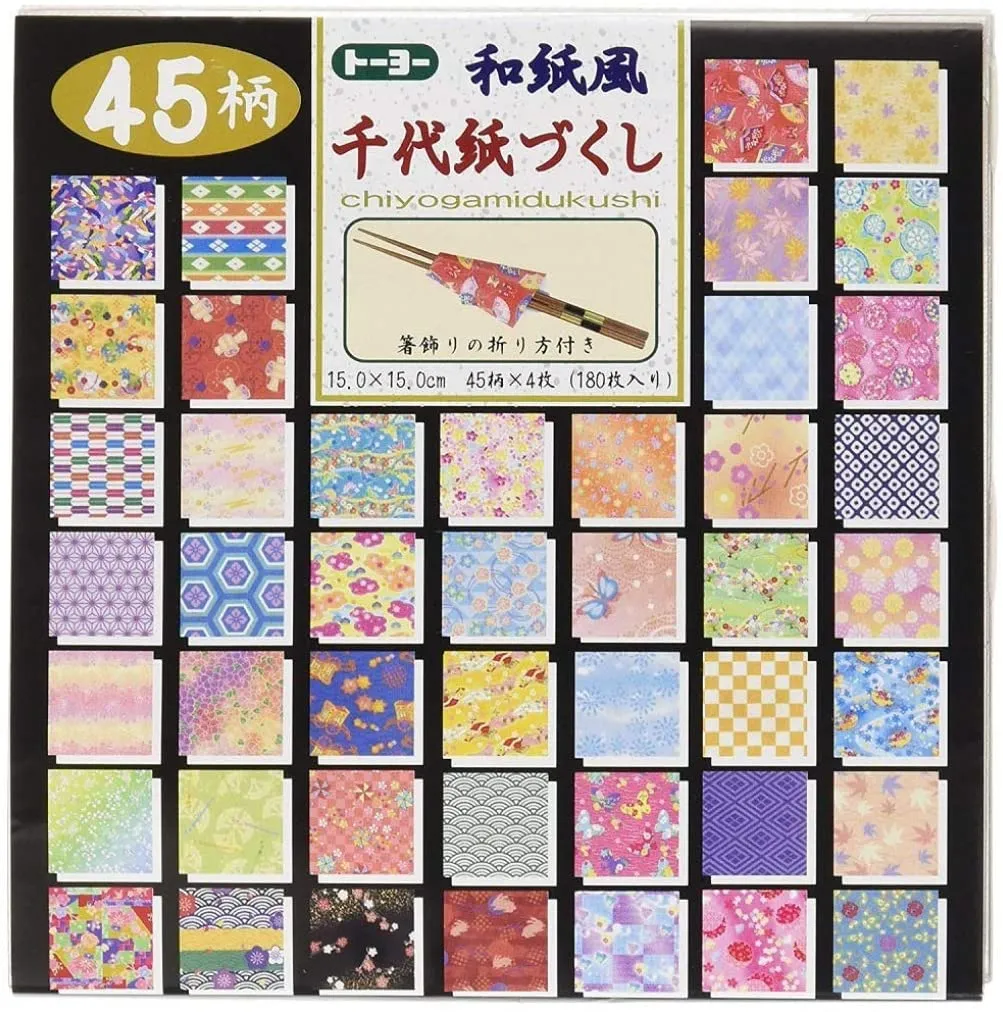
Speciality origami paper is thinner than regular paper, to enable greater manipulation in terms of the folds. If you’re keen to get into origami, it’s worth investing in some proper paper as it can make the whole experience more enjoyable.
This is the paper we used (bottom row, third from the left) – and you get a whopping 180 sheets with 45 beautiful traditional designs. Check out the plethora of 5-star reviews on Amazon for this product!
How to make an origami crane video tutorial

How to make an origami crane step-by-step (with photos)
You Will Need
- Origami paper
Total time:
Step 1
Start with a 15 x 15cm square of paper. Begin with the coloured side up (the side you want to show on your final model), then fold and unfold along the diagonals. Turn the paper over.


Step 2
With the “inside” facing up, book fold and unfold the paper.

Step 3
With the inside still facing up, bring the corners together so that they meet. You will find the paper wants to fold in a particular direction, thanks to the folds we made in steps 1 and 2.

Step 4
Fold one side of the top layer to meet the centre crease.

Step 5
Fold the other side of the top layer to meet the centre crease, creating a kite shape.

Step 6
Fold the top part (the triangle part) down, then unfold again. We’re just aiming to make a crease with this step.


Step 7
Unfold the two side flaps.

Step 8
Lift the top layer upwards. Thanks to the folds you’ve just made, the paper will want to go in a certain direction. Flatten the model and press the creases down.

Step 9
Turn your model over.

Step 10
Repeat steps 4-8 on this side. Your origami crane will now resemble an elongated diamond.


Step 11
Bring the sides in to meet the middle, so that you are narrowing the bottom points on the top layer.

Step 12
Repeat on the opposite side.

Step 13
Turn your model over, and fold the sides inwards on both sides.


Step 14
Next, fold one of the sides up. This is called a reverse fold – you are aiming to fold the point up so that the base sits inside the outer sections (this will become either the head or the tail of your origami crane). You may need to open the model a little to do this.

Step 15
Repeat for the other point.

Step 16
Decide which side you want to be the head, and which side you want to be the tail. To create the head, reverse fold one of the points down, about 1″ (2.5cm) from the end.

Step 17
Almost there! Next, bring the wings down, and fold so that it holds its shape. Pull the wings gently outwards (along the horizontal) to shape the body.

Step 18
Congratulations! You have completed a paper crane! If you make 999 more of them (so you have a 1000), your wish will be granted…


More origami paper
1. Handmade origami paper

Okay – so you’ve practised a model, and now you want to make a special one? Perhaps as a gift, or to make a topper on the front of a card? Well, this handmade paper is perfect for when you want to create something a little more special.
2. Vibrant colours, double-sided


This is the origami paper we used for the steps photos – it’s great, because not only is it double-sided, but the sides are different colours so it really adds a little bit extra to those designs where you see both sides of the paper. Plus it comes as loose leaf, which is handy.

Make your wishes come true with our origami crane tutorial
According to Japanese legend, if you fold 1,000 origami cranes you’ll be rewarded with a gift from the gods. As you fold your cranes, you can display them on 25 strings of 40 cranes, which is known as a senbazuru.
Folding these intricate origami cranes is a mindful activity and is guaranteed to bring a little calm into your day.
How to make an origami swan
Origami swans are so satisfying to make: they’re simple but elegant and can stand up by themselves! Learn how to make an origami swan with Gathered’s easy step-by-step guide.
