Make your own origami necklace

Make your own origami necklace with origami expert Esther Thorpe's free tutorial!

Try 6 issues of your choice of craft magazine from just £9.99

Published: October 17, 2021 at 9:53 am

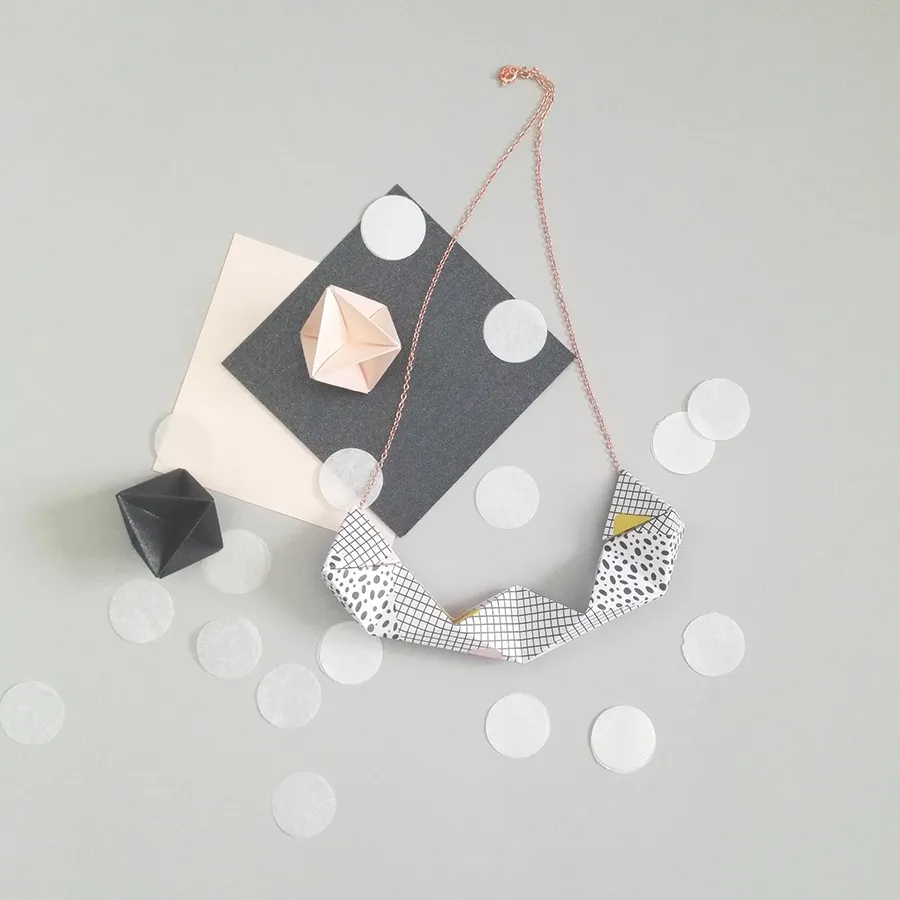
We love origami so much that we wanted to start wearing it! Luckily origami expert Esther Thorpe was on hand to make all our origami-wearing dreams come true. Esther shows you how to make your own origami necklace. It's a really simple tutorial but it'll bring your paper folding skills to the next level. Not to mention you'll be able to wear it and bask in everyone's compliments. You can make your origami necklace in whatever paper you'd like meaning you could make several to match different outfits. We have a ton of free printable papers here on Gathered for you to download, print and fold. There's festive ones, plain ones, floral ones, and many more. Why not print a few and make some origami necklaces for all your pals? They'd make fab handmade gifts this Christmas. If this origami necklace gives you the paper-folding bug, then check out our origami for beginners projects and this beautiful origami wreath.

You will need:

  • Patterned paper, 24 x 6cm (91⁄2 x 23/8")
  • Necklace chain, 60cm(235/8")
  • Strong glue

Make your own origami necklace

You will need:

  • Patterned paper
  • Necklace chain
  • Strong glue

Step 1

Fold the paper in half along the width with the patterned side up, then unfold. Fold the short edges in to the centre fold, then unfold.

Step 2

Make your own origami necklace step2

Using the pre-creases as a guide, fold each square in half along the width, creating eight equal-sized rectangular sections.

Step 3

Make your own origami necklace step3

With patterned side down, fold the paper in half along the length. Unfold, fold both long edges in to the centre fold, then unfold the paper again.

Step 4

Make your own origami necklace step4

You should now have a grid of pre-creases. Each section of the grid needs a diagonal fold from corner to corner, running in the opposite direction of the fold in the section next to it. Begin by folding up the bottom right corner to create a diagonal through the second grid in, and the second grid up. Unfold.

Step 5

Make your own origami necklace step5a

Fold up the bottom right corner through the fourth grid in and the fourth grid up. Unfold, then keep folding diagonals along alternate grids.

Step 6

Repeat Steps 4-5, this time working from the bottom left corner, folding diagonals into the alternate, unfolded grids as before. Continue until every section has a diagonal fold.

Step 7

Make your own origami necklace step7 Make your own origami necklace step7a

Turn the paper patterned side up, then gently bring the pre-creases together, pushing the diagonal folds up as mountains and the horizontal folds down as valleys.

Step 8

Lay the lower half of the chain along the inside of the necklace, between the folds, then glue the horizontal folds that naturally come together. Glue the two pyramids at either end to the rest of the sculpture to define the necklace’s curved shape.

We hope you’ve enjoyed making your own origami necklace! If you’re on the market for more papercraft goods and tools head to our best printer for card making and best die cutting machine round-ups. 

Meet the Maker

Esther Thorpe, AKA Origami Est, lives with her husband, their chatterbox toddler and two house rabbits. An origami artist specialising in multi- modular creations, Esther is also the author of Paper Home, and runs origami workshops across the UK. origamiest.co.uk