
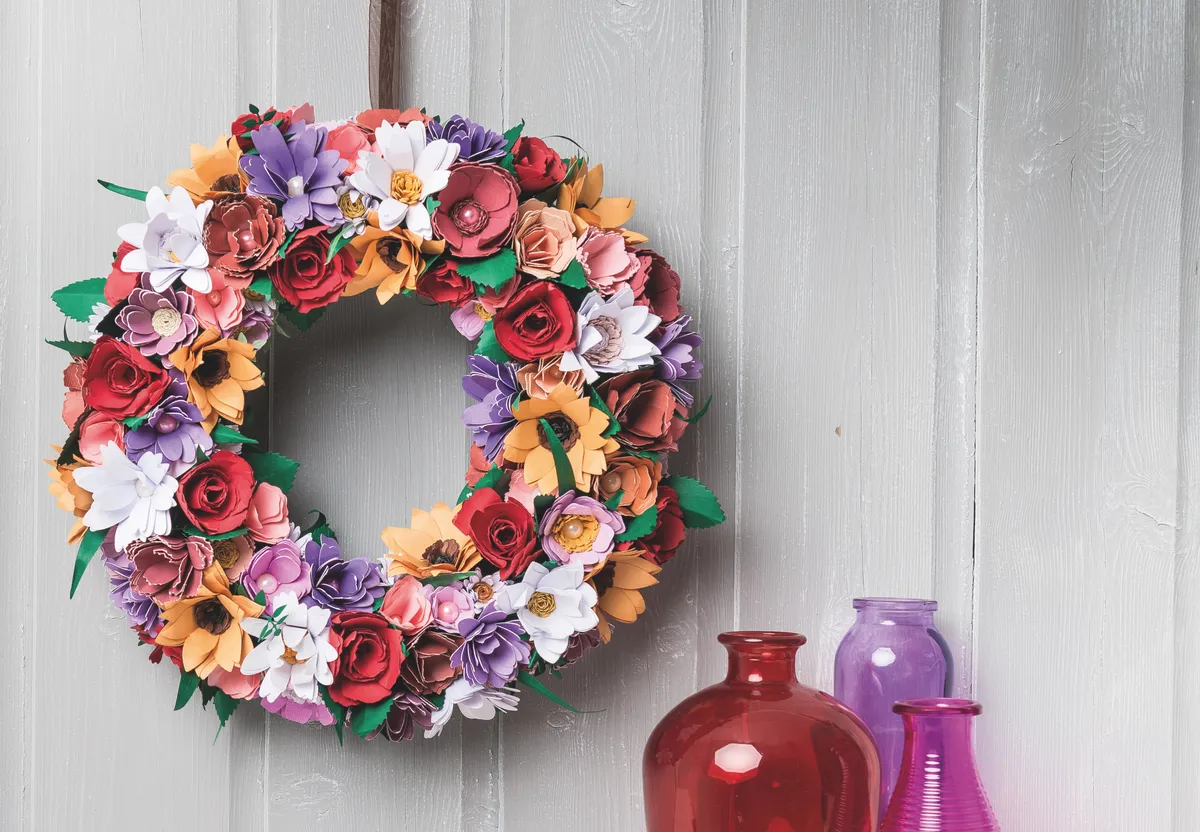
Make this stunning summer wreath, designed by Sharon Callis. The warm colours and full blooms make for a beautiful addition to your home this season. if you don't have a polystyrene ring, why not cut a ring of strong card (corrugated card would be ideal) instead?
Want to make this project? A glue gun would be very helpful. Check out our best glue guns for craft guide.
Short on patterned paper for this project? Take a look at our ever-growing collection of free patterned papers, there are lots to choose from and there are lots of different themes. We love these confetti-style papers! For more general card making, let us show you how to make cards.
We love seeing what you make with our free printable papers, so don’t forget to share your cards and papercraft projects with us on Facebook and Twitter, too!
 First – create your flowers! You can make paper flowers by using some of our free templates, like
 Next, we want to make the petals. We’re using the Fabulous Folding Flower die from
  Add some leaves to the base of your flowers. If you’re using dies, die-cut a finisher from green paper, we’re using the

 Add greenery to the base with various Fabulous Foliage die-cuts. Start on the outside edge and work in a clockwise direction adding pieces around the outer edge of the wreath. Repeat on the inner edge of your summer wreath.


