Water marbling made easy

Learn how to create water marbling art and beautifully marbled stationery with our easy to follow step-by-step tutorial with pictures!

Try 6 issues of any craft magazine from just £9.99

Published: June 10, 2021 at 6:42 am

New to water marbling? Water marbling is a great way to create bespoke artwork, cards or even book covers (who remembers covering their books for school?). Water marbling is easier by using a water marbling kit - there are lots on the market and contain everything you need to get started. Read our round-up of the best marbling kits!

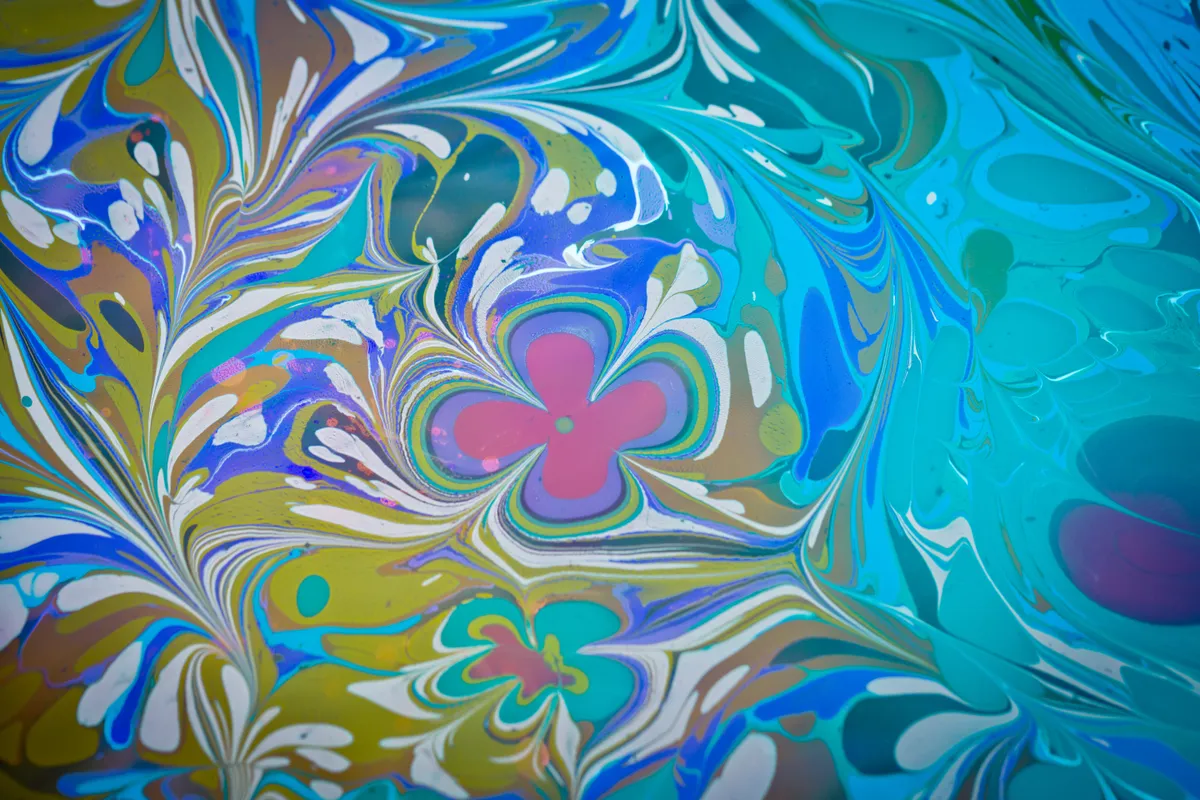
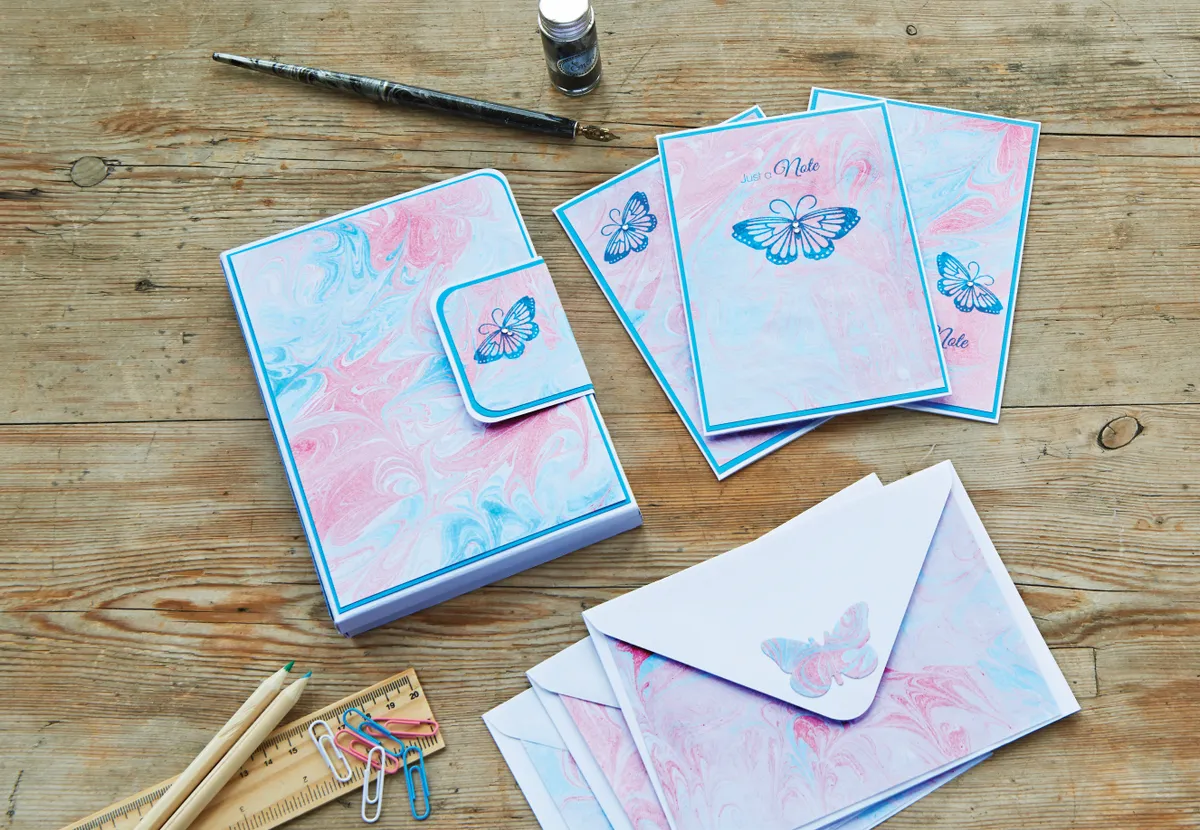
Water marbling is essentially coloured inks swirled together in water to create beautiful (random!) art, which in this tutorial we have used to create bespoke patterned papers for Sue Hughes’ stunning butterfly stationery set.

Water marbling

Here are Sue's top tips for water marbling:

  • Don’t worry if the water marbling inks spread too quickly on the surface, just add a little more of the powder to thicken the mixture. Or if the colours are not spreading enough, simply add more water and mix well.
  • You can create lots of different patterns just by changing what you use to drag the ink with – try flicking the ink using a paintbrush or running a plastic comb through it.
  • Marbled paper can be delicate when wet, so handle with care and remove carefully by holding and lifting it by the top corners.
  • Once dry, you can remove crinkles by placing it between two tea towels and then pressing with a dry iron set on a very low heat.
Water Marbling by Raimond Klavins

Want more marbling? Take a look at our Beginner's Guide to Paper Marbling for lots of tips and tricks, as well as a fun project on how to use shaving foam to marble with!

We love seeing what you make, so don’t forget to share your craft projects with us on Facebook and Twitter, too!

To make the notelets

Marble pieces of white paper and then trim each to 140 x 100mm. Stamp greeting and butterfly or butterflies in blue ink, layer each piece onto some blue card and then attach to a white A6 base card. Decorate with clear or silver gems to finish. Add to one side of the wallet.

Coordinating writing paper

Make coordinating writing paper by marbling white paper with a subtle pattern. To do this, don’t clean off the surface left on the Size mixture in step 3, just add one or two small drops of ink and reuse. Marble some additional white paper, and once dry, punch into butterflies and use to decorate the flap of each envelope.

Water marbling - detail

To make water marbling art you will need:

Step 1

Water marbling
Pour 300ml of warm water into marbling tray. Slowly sprinkle 1-1 1⁄2 teaspoons of Size powder over water, stirring continuously until you have a smooth, slightly thick consistency.Leave to cool to room temperature.

Step 2

Water marbling – step 2
Squeeze a few small drops of red ink onto the surface of the mixture, followed by a few drops of blue ink. Let the colours spread and merge together, then use a cocktail stick to push and swirl the inks around to create a pattern.

Step 3

Water marbling
Lay some white card onto the mixture. Remove after a few seconds, rinse off excess with cold water and leave to dry. Blot the surface of the water with newspaper before applying more inks for the next pattern. (Because of course, you’ll want to make lots!)

Step 4

Water marbling
Using the free notecard wallet template, cut the wallet shape from some white card. Fold where indicated to make a book shape with the lower edges folded inside. Next, round the top corners – we’ve used a corner rounder punch, but a pair of scissors works just as well!

Step 5

Water marbling – step 5
Using the free notecard wallet template, cut two inside pockets from some white card, score and fold. Add panels of blue card with rounded top edges, glue edge of flaps to the inside of wallet along the bottom edge, then wrap around the folds to create the pockets.

Step 6

Water marbling
Now let’s use some of that lovely water marbling! Layer two 115 x 165mm pieces of marbled card onto some blue card; rounding the top corners. Stick to front and back panels of wallet. Cut a 165 x 15mm strip of marbled card, layer onto some blue card then attach to the spine.

Step 7

Water marbling
Using the free notecard wallet template, cut a closure from some white card. Cut a 90 x 60mm piece of water marbled card, layer onto blue card and attach to the closure, rounding left edges. Score, and stamp a butterfly and then stick the back section to the back of the wallet.

Step 8

Water marbling
Wrap rest of closure around to the front of the wallet. Add some Velcro (hook) to the front of the wallet and the matching Velcro loop to the closure, to secure your wallet.Make matching notecards, papers and envelopes (see Sue’s tips in the introduction); place inside pockets of the wallet, to finish.

Water marbling – detail


Intro images by Raimond Klavins