Christmas Appliqué Robin – printable template and cushion DIY

Discover raw edge appliqué and make Victoria Carrington's charming winter robin scene to brighten your home, whatever the weather.

6 issues of Today's Quilter magazine for just £9.99|Save 76%

Published: October 17, 2020 at 5:46 am

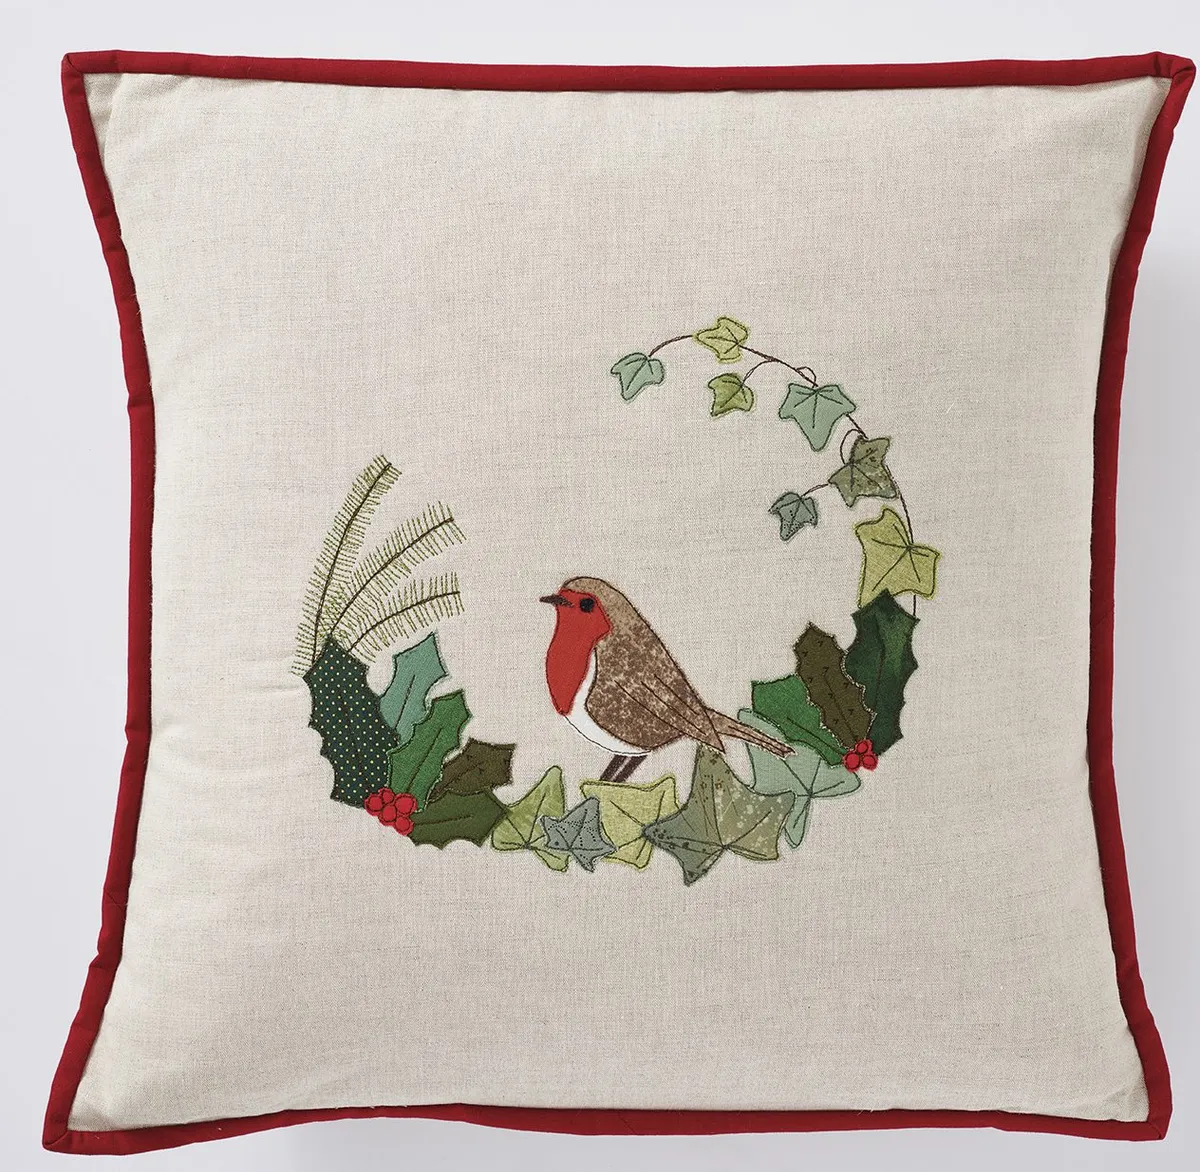
Curl up and enjoy the ultimate wintry weekend make with this appliqué robin cushion. It's perfect if you're looking for Christmas appliqué designs with a traditional touch, or if you're on the hunt for templates then you'll find our free printable robin template below. This is a lovely way to practise your raw edge appliqué – if this is a new method for you, have a read of our how to appliqué guide before you begin or scroll down to the bottom of this tutorial for designer Victoria Carrington's top tips before you cut into your fabrics. This red breasted beauty will make the perfect family heirloom to treasure for many winters to come.

If you like the look of our red-breasted beauty, you might also like our round up of the best free Christmas quilt patterns, or dive into our full quilting patterns collection.

2 ways to stitch this project

    1. Use a walking foot with the feed dogs up and a reduced straight stitch length, then simply stitch around the shapes. You will get a uniform stitch length but due to the size of the project, you will need to keep lifting the foot and rotating the work – this will stop your fabric from distorting.
    2. Use an open toe free-motion foot with the feed dogs down. Make sure the foot is just lightly resting on your work rather than in the air or pressing down hard. As the feed dogs are down, you can move the fabric in any direction to ‘draw’ (the needle will stitch on the spot until you move the fabric). You will need to establish a balance between the speed of your sewing machine and how quickly you move the fabric.

Collect the series

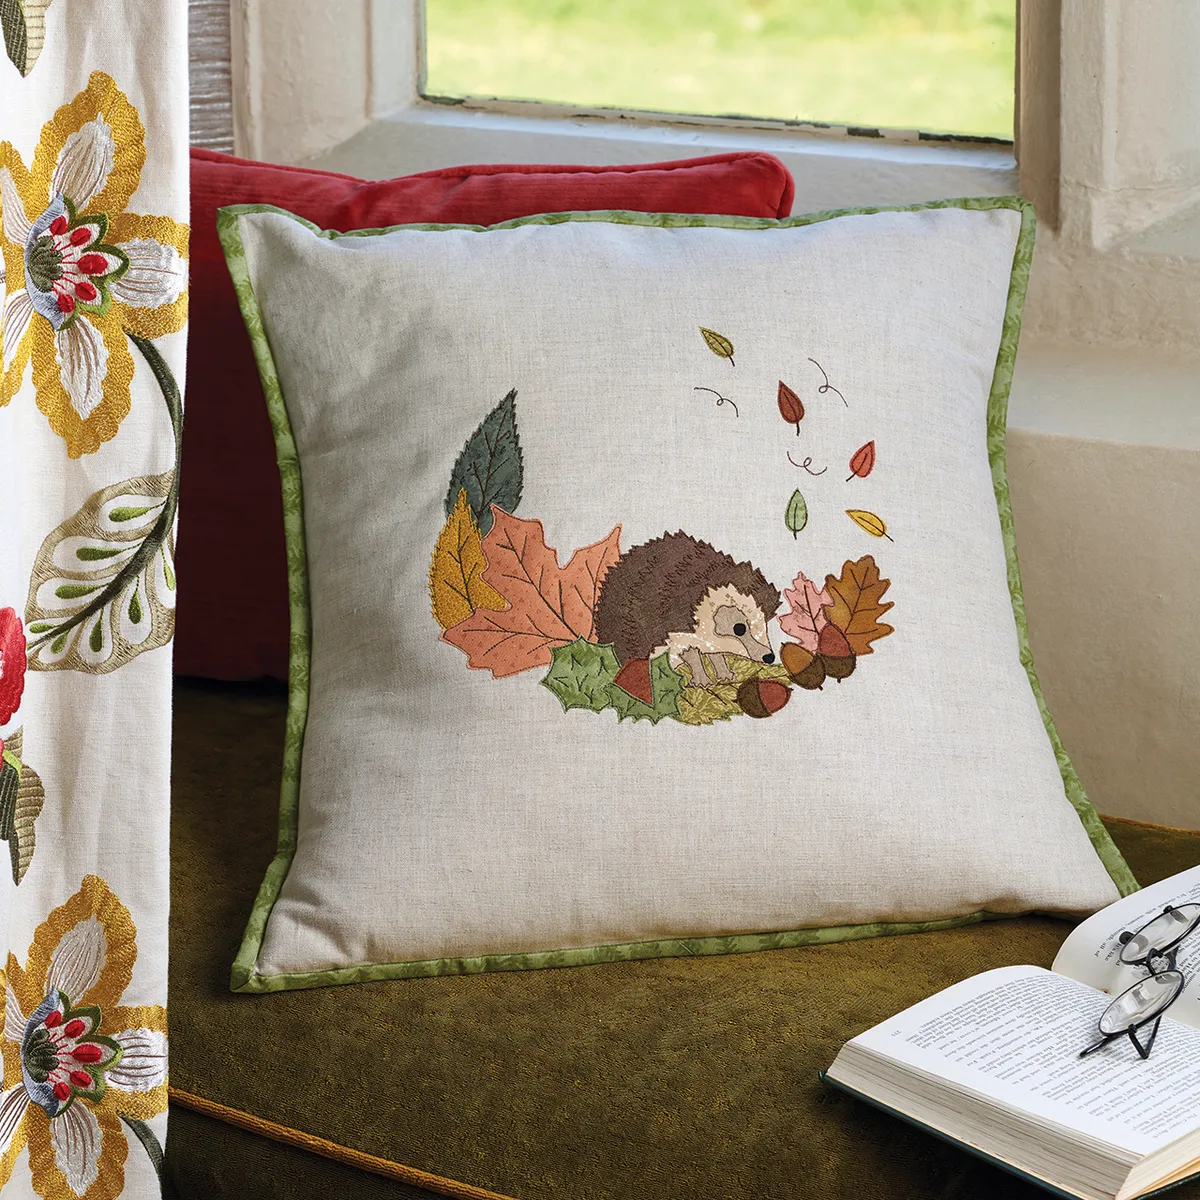
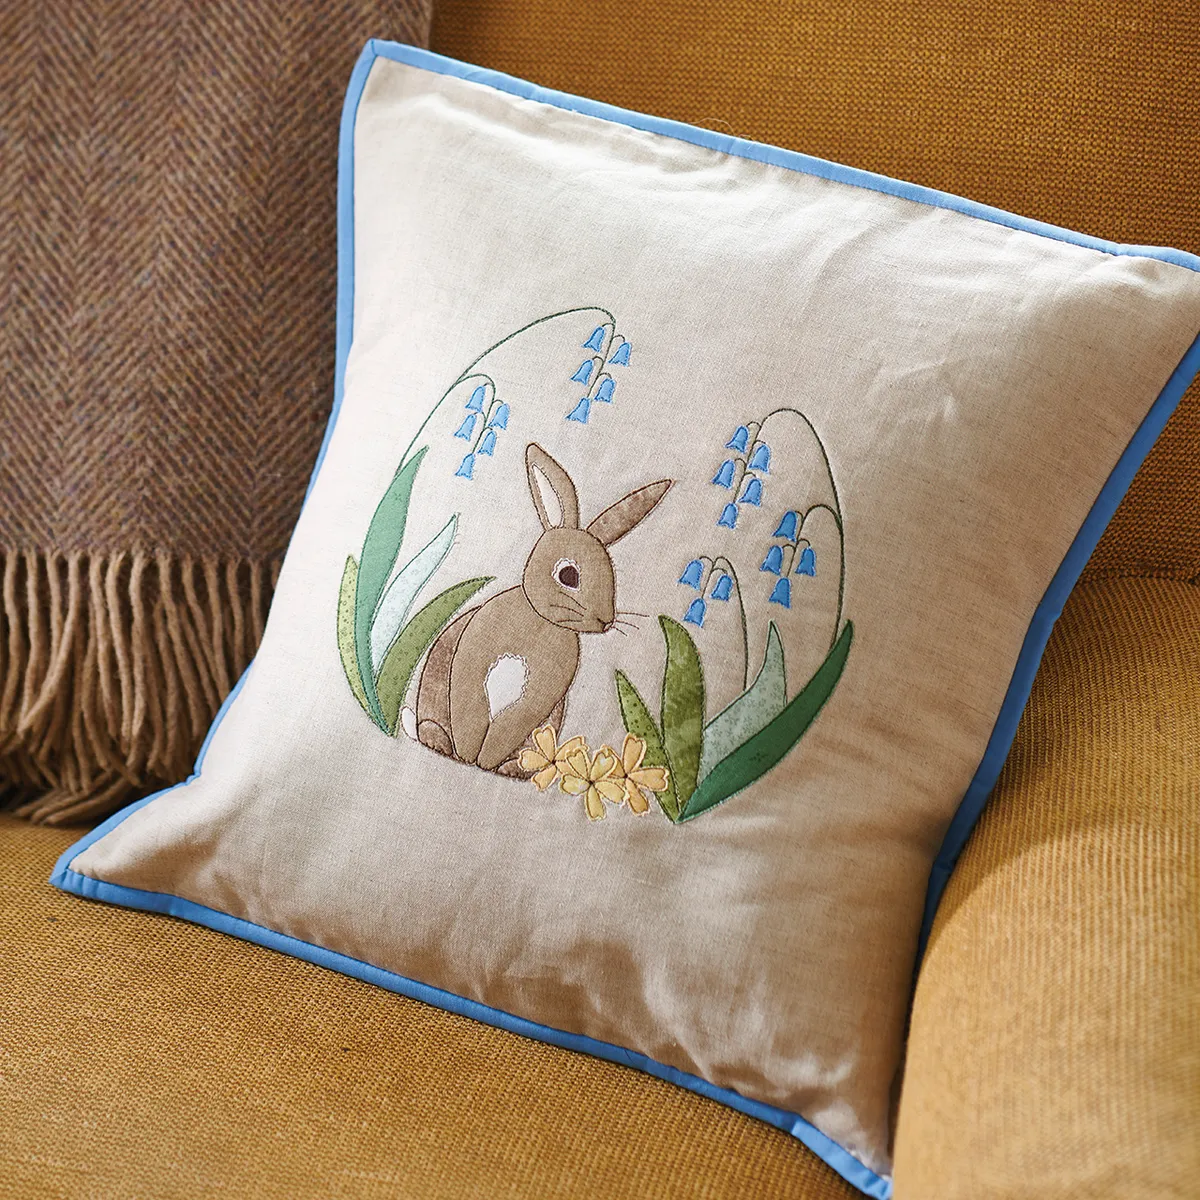
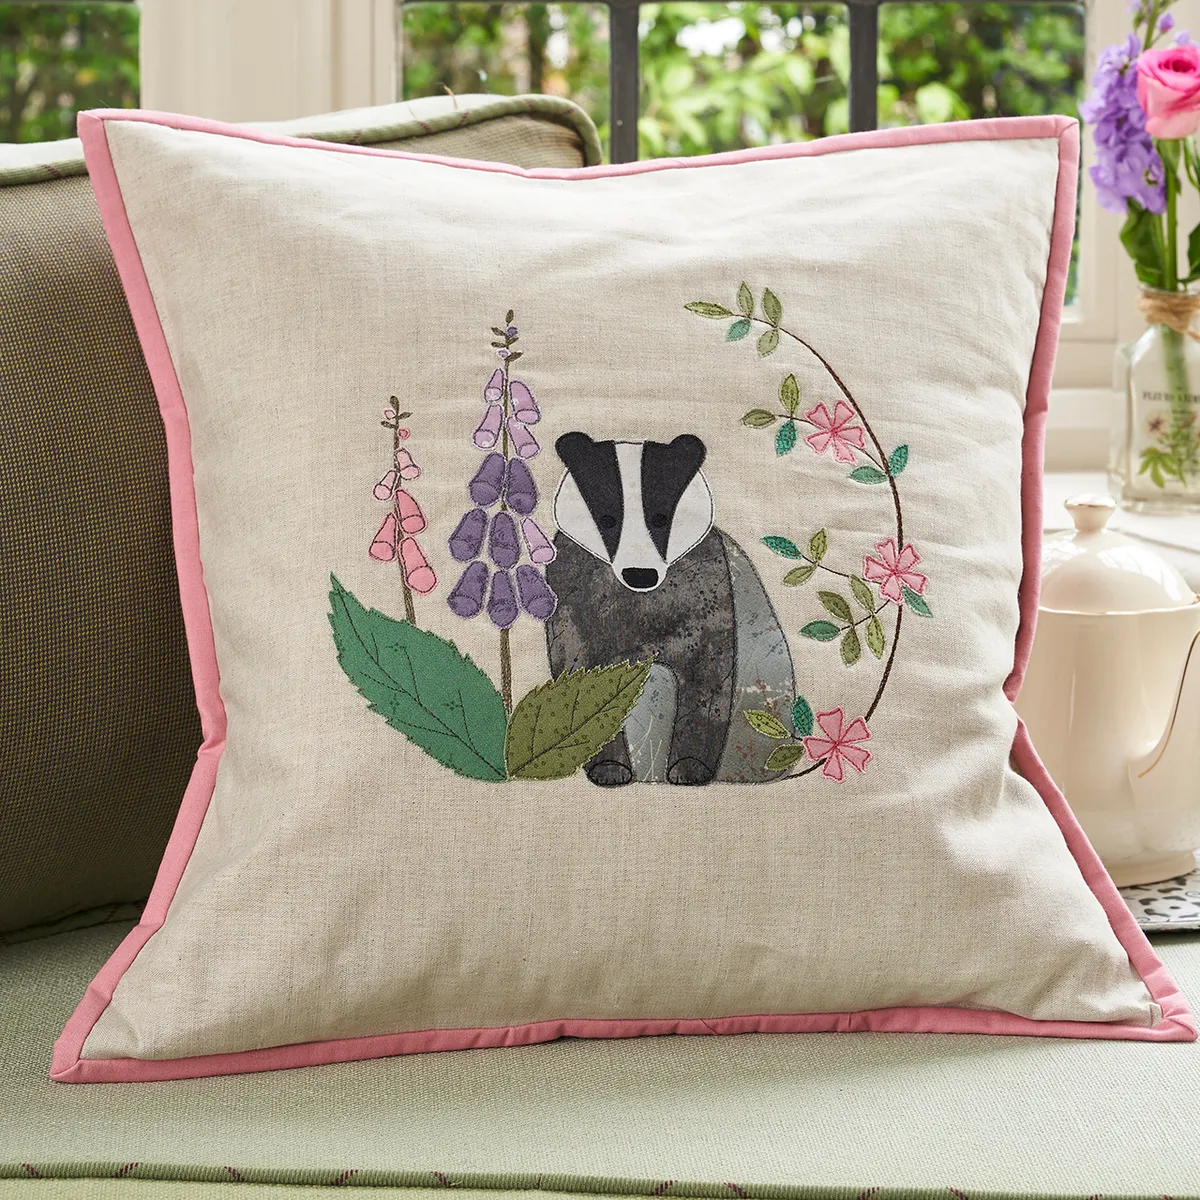
This winter cushion was first published as the final part of a seasonal series that was featured in Today’s Quilter magazine throughout 2019! The robin surrounded by winter foliage follows on from a spring rabbit in issue 47, a summer badger in issue 50 and an autumnal hedgehog in issue 53. The appliqué blocks can be made into individual cushions or you could make the whole series and incorporate them into a quilt or wall hanging. You can get the rest of the series by buying the back issues in the Today's Quilter app.

Christmas appliqué: How to make a classic robin cushion

  • Read pattern in full before starting.
  • Press all fabric well before starting.
  • All templates are drawn backwards.
  • Dashed lines on templates denote where pieces overlap.
  • WOF = width of fabric.
  • RS = right side.
  • WS = wrong side.
  • RST = right sides together.
  • WST = wrong sides together.
  • Download our Free Printable Robin templates
Christmas Applique Robin Cushion

You will need:

  • Fabric (For the cushion front and back – 1/2 yard)
  • Fabric scraps (For the applique including various shades of green, red, white, brown and black)
  • Wadding
  • Fabric (For the binding – 7 1/2 in x WOF)
  • Bondaweb
  • Interfacing (2 in square)
  • Cushion pad (18 in square)
  • Templates (Download our free robin template)

Cutting out

Step 1

From the cushion front and back fabric, cut one (1) 18in square and two (2) 12in x 18in pieces.

Step 2

From the binding fabric, cut three (3) 2½in strips x WOF.

Making the cushion front

Step 1

Using the templates, trace all the shapes onto the paper side of the Bondaweb as per the quantities stated, leaving ½in between each shape (Fig 1A).

Winter robin applique cushion Figure 1
Figure 1a

Number the Bondaweb holly leaves as per the templates. Cut out roughly, leaving approx. ¼in around the outside of the lines. With an iron, press the Bondaweb shapes onto the wrong side of your scraps of coloured fabrics (Fig 1B).

Winter robin applique cushion Figure 1b
Figure 1b

Cut out accurately along the lines (Fig 1C).

Winter robin applique cushion Figure 1c
1c

Score the Bondaweb paper backings with a pin in the centre and peel away (Fig 1D). Do not remove the backing from the numbered holly leaves at this stage. 

Winter robin applique cushion Figure 1d
1d

Step 2

 Take the 18in square cushion front fabric and place RS up on top of the positioning template. Using a light source (window or a lightbox) and making sure the image is central, trace the image with a removable marker, omitting the detail on the leaves (Fig 2). Victoria used a Frixion pen, but you should always test the marker on scrap fabric first as some markers become permanent when heated.

Winter robin applique cushion Figure 2

Step 3

Position the cushion front RS up on top of the batting. Use 505 spray or pins to secure.

Step 4

Stitch the fir needles with green thread using either free motion, standard straight stitch, or sew by hand. Start at the top centre of the ‘twig’, move your needle left along the design, then back to centre, then right and back to the centre again. Stitch downwards, then repeat for the whole stem. End within the drawn holly leaf outline to give a layered effect. To finish, stitch up and down the twig four (4) times with brown thread and stitch over the ivy stems twice (sew through the drawn leaf shapes as these will be covered) (Fig 3).  

Winter robin applique cushion Figure 3
Figure 3

Step 5

Position the robin’s legs and ivy leaves onto the cushion front and adhere with an iron (try to avoid removing other surrounding markings). The bottom of the legs should sit under the leaf and continue over the drawn line of the bird’s body. Draw in veins with a removable marker. Stitch around the legs, leaves and vein details (Fig 4). Victoria free-motion stitched around each shape twice and went over the veins twice to give them a ‘sketchy’ effect.

Winter robin applique cushion Figure 4

Step 6

Removing the Bondaweb paper as you go, adhere the holly leaves in numerical order referring to the positioning template. Stitch around the edges and add the vein details. Adhere the berries and stitch.

Step 7

Position the robin parts using the markings on the cushion front in this order: tummy, main body, face/ chest, eye and beak. Once you are happy, adhere then stitch around all shapes and add wing detail (Fig 5A and Fig 5B).

Winter robin applique cushion Figure 5a
Figure 5a
Winter robin applique cushion Figure 5b
Figure 5B

Step 8

 Trim back batting, press out any creases and remove any remaining markings.

Making the cushion back

Step 1

 To make the binding for the back panel, take one piece of binding fabric and cut a 20in length. Press in half lengthways WST. Open out and press the raw edges into the centre fold.

Step 2

 Take one (1) 12in x 18in back panel and wrap the binding around the 18in raw edge. Topstitch close to the edge and then trim off the binding overhang.

Step 3

 Finger press the back panel in half underneath the binding. Position the remaining holly leaves and berries on the fold and fuse as before. Position the 2in square piece of interfacing on the WS of the panel behind the leaves. Stitch as before, as in Fig 6.

Winter robin applique cushion Figure 6

Step 4

 Hem the other cushion back by pressing the longer raw edge over ¼in twice then topstitch.

Constructing the cushion

Step 1

 Place cushion front RS down with hemmed cushion back piece RS up on top, then position the bound backing piece RS up on top of that. Pin, then using a walking foot, stitch a scant ¼in seam around the edge (backstitch over the hems to secure).

Step 2

For the binding, join the remaining three (3) 2½in strips on the diagonal. Press lengthways WST. Matching the raw edges of the binding to the raw edges of the cushion front, stitch a scant 38in seam. Mitre corners. Join ends using your preferred method. Hand-stitch folded edge to the back of the cushion.


General tips for free-motion raw edge appliqué

  • Always use small, very sharp (preferably micro-serrated) scissors to cut out the fabric shapes as these will give you
    the best finish.
  • Victoria uses quilting gloves, as she finds that it gives her a little more control. She also uses an extension table to keep the work flat and a Teflon sheet can also give you a smoother glide.
  • When sitting at the sewing machine, your arms should be at right angles when stitching.
  • Before starting to sew, use Bondaweb to attach a scrap of fabric onto scrap background fabric with interfacing or batting underneath (whichever your project specifies). Practise stitching to get you into the flow and to ensure that your machine is threaded properly and your stitch tension is correct. Use the same thread in the top and bottom of your machine for smoother stitches.
  • When stitching around shapes, as a general rule, don’t use a thread the same colour or lighter than the fabric you are stitching (you will just see the needle holes). Victoria recommends using dark brown or dark grey thread for most projects as it stands out but doesn’t look too harsh.

[pullquote quote="Top tip: Try to use darker shades of green for the holly and lighter shades for the ivy to differentiate them. " /]

  • When quilting, it is important that your stitch length is even and curved lines are smooth, but less so with raw edge appliqué. If you like a ‘sketchy’ finish, or if your lines are a little wobbly, go around the shape twice and it will look great! Don’t worry if some stitches are long and others are short – it all adds to the effect.
  • Stitch as close to the edge of the fabric shape as possible without going onto the backing fabric. If your stitching is too far from the edge of the fabric, peel back and trim off excess. If you are unhappy with an area of stitching, just unpick that section and trim off threads close to your work and re-sew, going over the cut ends to secure.
  • If your project is going to get a lot of wear and tear, Victoria recommends tying off the threads at the back of the work. If it is for more ‘decorative’ purposes, make a few stitches, trim the top thread off close to the front of the work, stitch back over this end once you have sewn around the shape, then just trim it off close to the fabric.

Templates free printable robin applique cushion