How to appliqué: an introduction for beginners
Mastering how to appliqué will allow you to discover a whole world of new design options for your quilts and home sewing projects, yet many stitchers are a little unsure where to begin. That's where we come in!v
What is appliqué?
This soothing hand-stitching technique is super simple but produces beautiful results. Essentially, it involves stitching fabric elements onto an item such as a quilt or piece of clothing. From a colourful initial on a pair of children's dungarees to a floral motif on a cushion, hand appliqué is a fun quilting technique that everyone should know.
If you want to learn the art of appliqué to adorn a quilt or other sewing project, there are myriad ways to do it. We're here to show you three easy methods.
Whether you're already hooked and looking to try a new method or you've tried one in the past that you didn't get on with and it stopped you from attempting appliqué again, we're here to guide you.
In this post, we're going to explain what hand appliqué is and teach you three of our favourite techniques.
Your complete guide to hand appliqué
What do you need?
Stock up on these basic supplies! For more information on all these materials, take a look at our handy guide to quilting tools.
Fusible web

Fusible webbing is a key part of hand appliqué. It's the glue that sticks your designs to your quilt! It's cheap, easy to use, and a great time saver – we're big fans.
There are plenty of different fusible webbings available, but this affordable option from Amazon will do the job brilliantly.
Alternatively, you can also use a spray fabric glue. Head over to our guide to craft glue to discover all the different sticky options!
An iron
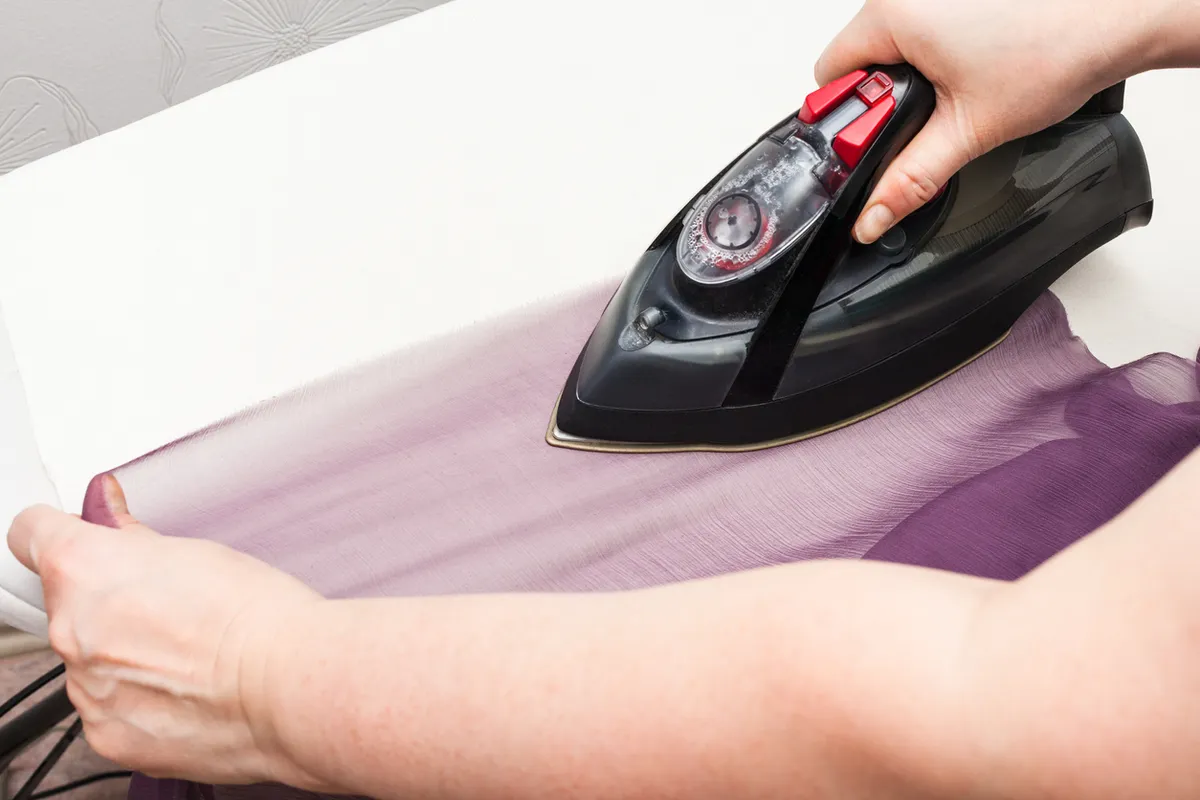
An iron is an essential tool when hand appliquéing. It's used to bind your design to your base fabric and to finish off your pieces.
If you're looking for the perfect iron, head over to our round-up of the best irons for quilting and sewing.
Iron-on interfacing
Iron-on interfacing is very similar to fusible webbing. Both are used to attach a motif to your base fabric, and both use an iron to activate the glue.
The main difference is that most iron-on interfacing uses a fabric substance as the glue, whereas fusible webbing is plastic.
3 hand appliqué techniques: pros and cons
How to appliqué: Raw edge fusible method
- Great for complex shapes
- Creates a flat, clean look
- Quick and easy method
- Stitching can be done by hand or machine
- Iron required
- You will need a fusible web product
How to appliqué: the "Inside out" method
- Creates a turned edge
- Has the same look as needle-turn. Slightly three-dimensional
- Stitching can be by hand or machine
- Iron required
- You will need a lightweight interfacing or fabric
How to appliqué: Needle-turn method
- Traditional method
- Stitching is by hand
- Great for sewing on the go
- No additional products or tools are necessary

Looking for more appliqué content?
If you're new to quilting, don't forget to check out our favourite quilt kits for beginners.
How to appliqué by hand: step-by-step instructions
How to appliqué: Raw edge fusible appliqué
Step 1
Take your chosen template shape and roughly cut a piece of fusible web large enough to cover it.

Step 2
On the paper side of your fusible web, draw around the template edge.

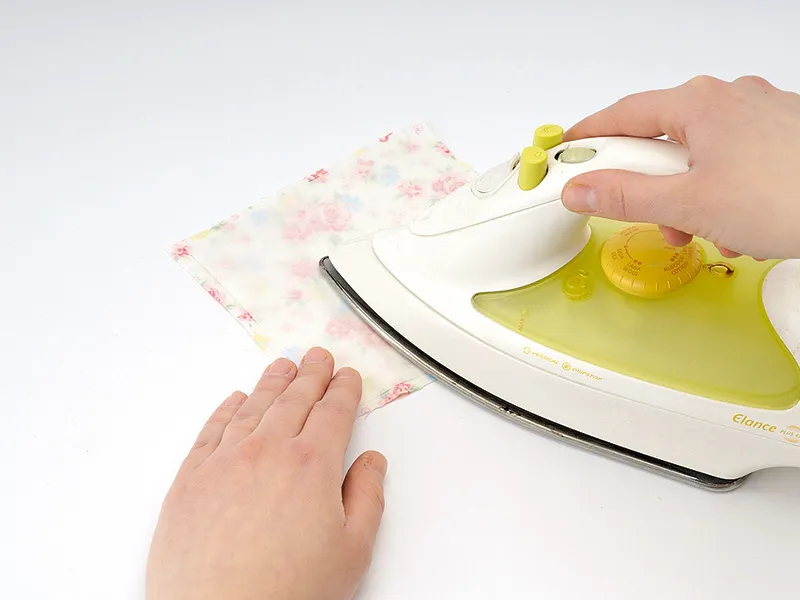
Step 3
With paper side up, fuse the web to the wrong side of your chosen scrap of fabric.
Usually this will take a few seconds, but be sure to follow the manufacturer’s instructions.

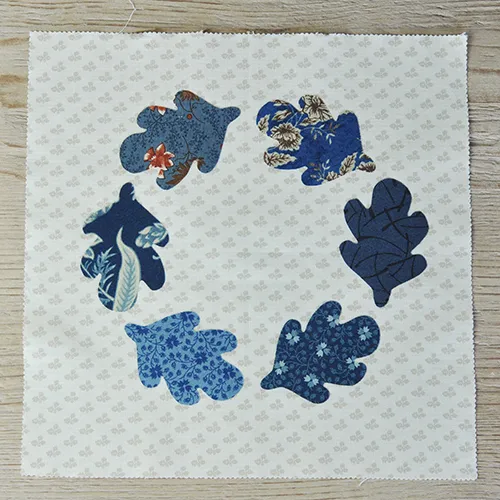
Step 4
Allow the piece to cool. You can now cut out the shape along the marked line.

Step 5
Peel away the paper on the reverse of the shape. If it’s hard to get hold of at the edges, you can score the paper with a pin.

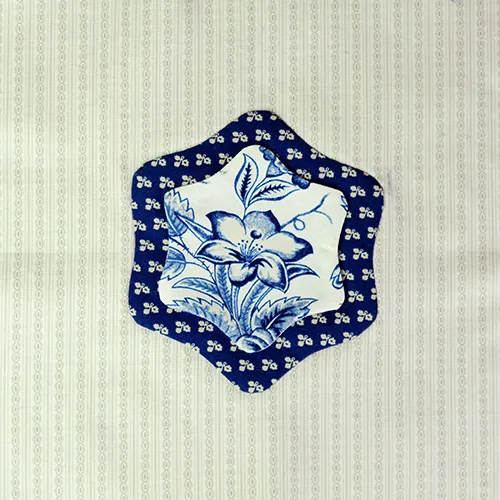
Step 6
Position the shape on your background fabric as per your design.
When you are happy with its location, use the iron to fuse it in place as before.

Step 7
Stitch around the edge of the shape to secure in place.
This can be done with freehand machine embroidery, top stitching close to the edge, or blanket stitching by hand or machine, depending on your preferred look.
How to appliqué: "inside out" method
Step 1
From each of the chosen fabric and the interfacing, cut a piece larger than your shape template.
Ensure there’s at least 1⁄4in around all edges.
Step 2
Place right sides together, with the interfacing uppermost.
Position the template on top and draw around the edge.

Step 3
Pin the two sides together and then stitch all around the edge following the marked line.
This can be done by machine or hand.

Step 4
Cut out with an approximate 1⁄8in-¼in seam.
The smaller the piece and the more acute the curves, the smaller you will want your seam to be.

Step 5
Clip all around the edge, taking care not to cut through your stitching.
Step 6
Carefully cut a slit through the interfacing side only.
Turn the shape right side out through this hole.
Roll out the edges and push out the curves of the shape until you get a smooth edge.
You will not need to stitch the gap closed.

Step 7
Press well with the iron.
Make sure there is a slight margin of the appliqué fabric showing on the wrong side.
This will ensure the interfacing won't protrude out of the edges of the shape and be seen from the front.


Step 8
Position the shape on your background fabric as per your design.
You can use the markings on the template to help position it centrally.

Step 9
Slip stitch in place by hand or top stitch close to the edge of the shape by machine.

Want to find out more about bias strip appliqué?
Head to our pro guide for more advice on how to masterstrip appliqué and be inspired with ideas for how to use it on your quilts, sewing and patchwork projects.
How to use this method to appliqué stems and vines
Step 1
Read on if you'd like to add stems to flowers, create curving vines, or tackle Celtic knot appliqué designs.
Note: If you are doing raw edge appliqué, these can be created in the same fusible way described above.

Step 2
Cut a strip along the bias of your fabric, twice the width of the finished stem plus 1⁄4in. So, if you want a 1⁄4in finished stem, cut your strip 1in wide.
You can use a piece of string curved around the pattern and then measured, to work out the length.

Step 3
Fold the strip in half lengthwise, wrong sides together, and stitch into a tube with a scant 1⁄4in seam.


Step 4
Roll the tube with your fingers so that the seam will sit on the back of the strip.
If you have a narrow stem, you may need to trim the seam allowance back to 1⁄8in or less, so that the raw edges will not be seen from the front.
Press well with the iron.


Step 5
Position the stem as desired on the background fabric.
You can coax it around curves using pins or tacking stitches to secure it temporarily.
The heat of the iron will help encourage the fabric around tight curves.

Step 6
Slip stitch in place along both edges with matching thread.

How to do needle turn appliqué
Step 1
Mark the shape position on the wrong side of the background. This can be drawn on directly using the template or traced from a pattern.
Step 2
Cut a piece of scrap fabric roughly ¼in larger than the shape on all sides.
Place this right side up on the right side of the fabric.
Hold it up to the light to make sure it covers the whole of the marked shape on the reverse, plus ¼in all around.
An alternate step is described in step four.

Step 3
Optional: If you want to fussy cut your fabric, you can draw around the shape template on the wrong side of the fabric. Then cut it out with a roughly 3⁄16in seam allowance.
Place over the marked shape as in step 2.

Step 4
Tack the fabric in place with running stitch using a cheap/old thread, thicker needle and following the marked line on the reverse.

Step 5
Tie a knot in a length of thread that tones with the appliqué fabric and secure your thread under the appliqué shape.

Step 6
Unpick the first stitch or two of tacking thread and fold under the raw edge and hold in place with your thumb.
Bring the needle and thread up through this fold, and then down into the background fabric beside it, angling the needle in towards the appliqué piece slightly.
Step 7
Come up approx. 1⁄8in away, again through the fold, and then back down into the background fabric.
Continue around the shape in this way - removing a couple of tacking stitches, sweeping the raw edge under with the side of the needle, holding with your thumb and securing with an invisible stitch.

Further appliqué techniques to master
Once you're feeling confident with appliqué, why not go on and learn the next-stage methods? With our step-by-step, we will guide you throughhand appliqué,machine appliqué, andreverse appliqué.

Adding appliqué to quilts produces beautiful results
If you want to take your quilts and sewing projects to the next level, getting to grips with appliqué is key to your success. There are three methods to try – find the one that works best for you. With our guidance, we're sure you'll master this fabulous technique in no time.
Use your applique skills on these projects
After all that stitching, it looks like we have the beginnings of an appliqué expert! Why not test your new skills and make our free appliqué birds cushion pattern? It’s super cute and perfect for spring.
Now for a cup of tea and a slice of something sweet…