If you've been busy piecing strips since you saw Karen Lewis' brilliant strip quilt tutorial, we've got just the thing to use up those springy scraps. Take a look at more of Karen's designs over at karenlewistextiles.com, or follow her on Instagram @karenlewistextiles.
You will need
- Print fabrics (red): two (2) fat sixteenth and one (1) fat eighth
- Background fabric: 1⁄2yd
- Backing fabric: 3⁄4yd
- Batting: 25in square
Notes
- Seam allowances are 1⁄4in, unless otherwise noted.
- Press seams open, unless otherwise instructed.
- RST = right sides together.
- WOF = width of fabric.
- WST = wrong sides together.
- Fabric provided by Robert Kaufman.
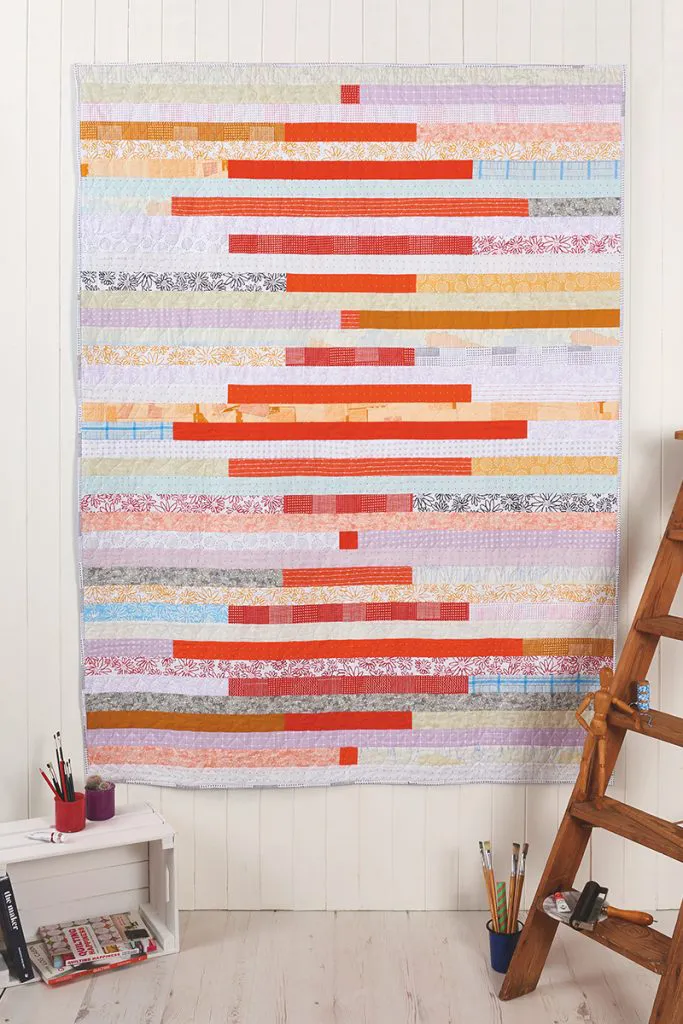
Make a quilt to match
Loved making this cute patchwork cushion? Head to our easy stripe quilt step by step guide to make thequilt to complete this pair of projects!
We used...
Print fabrics are from the Euclid collection by Carolyn Friedlander for Robert Kaufman, along with solids from the Brussels Linen collection also by Robert Kaufman, that Karen screen-printed.
How to sew the cushion
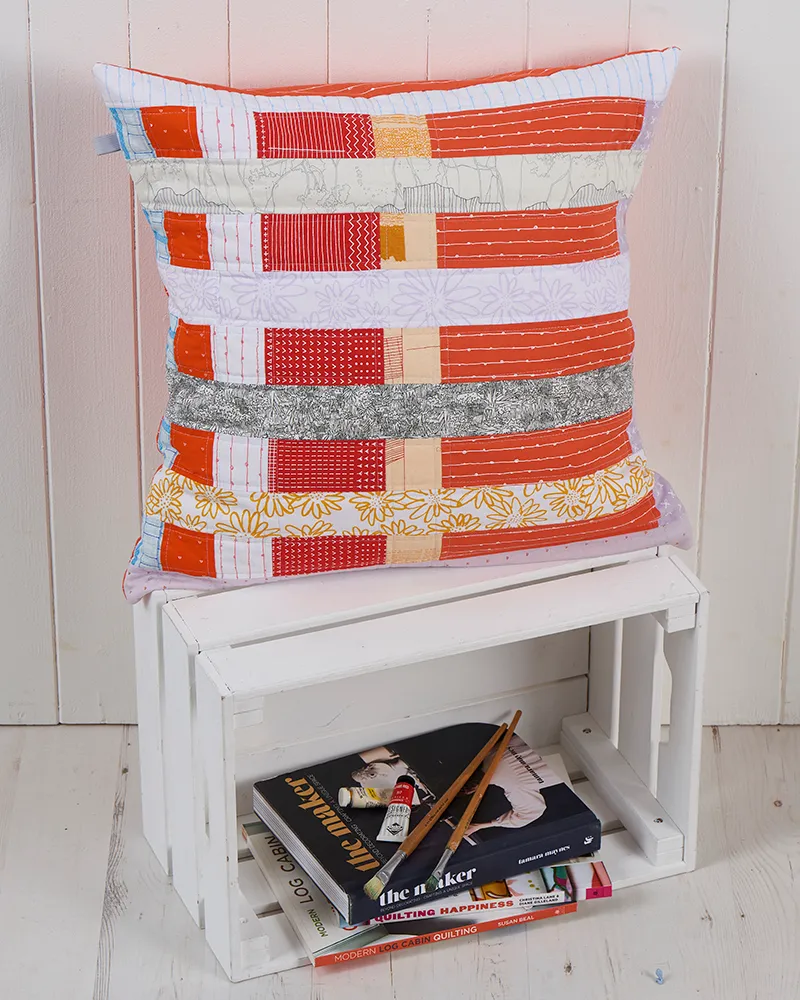
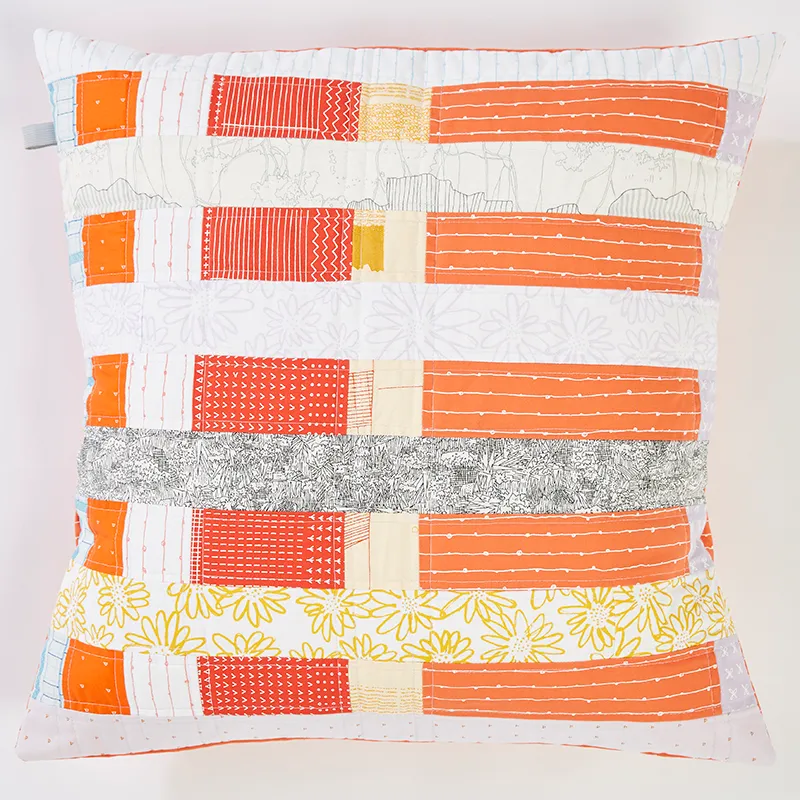
Finished size
22in square
Cutting out
Step 1
From the print fabrics cut:
- One (1) 2 1⁄2 x 14in rectangle.
- One (1) 4 1⁄2 x 14in rectangle.
- One (1) 8 1⁄2 in x 14in rectangle.
Step 2
From the background fabric cut four (4) 2 1⁄2in x 14 in strips and six (6) 2 1⁄2in x 22 1⁄2in strips.
Step 3
From the backing fabric cut two 15in x 22 1⁄2in rectangles.
Piecing the cushion top
Step 4
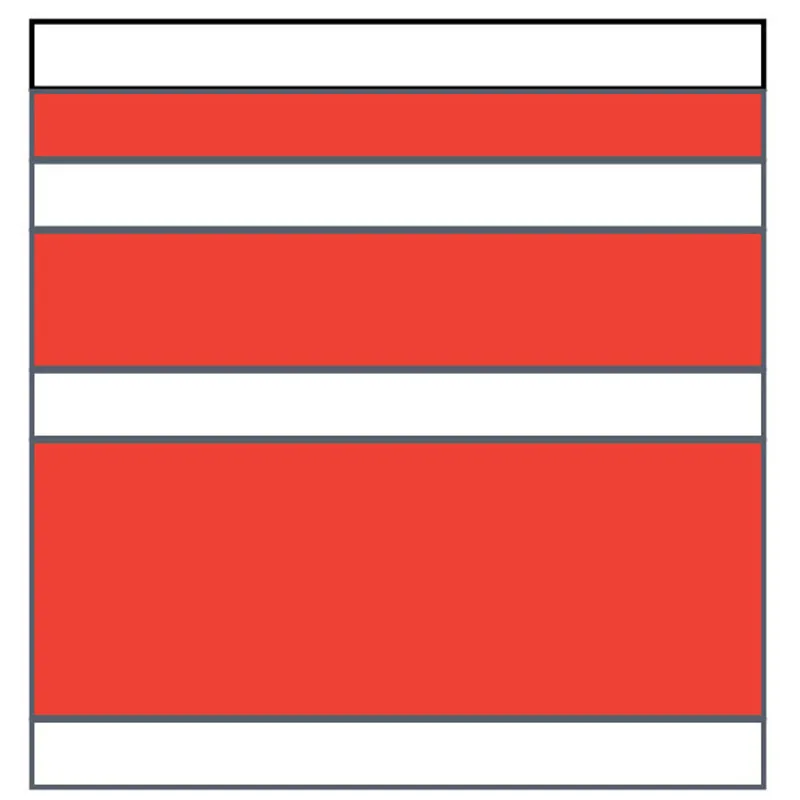
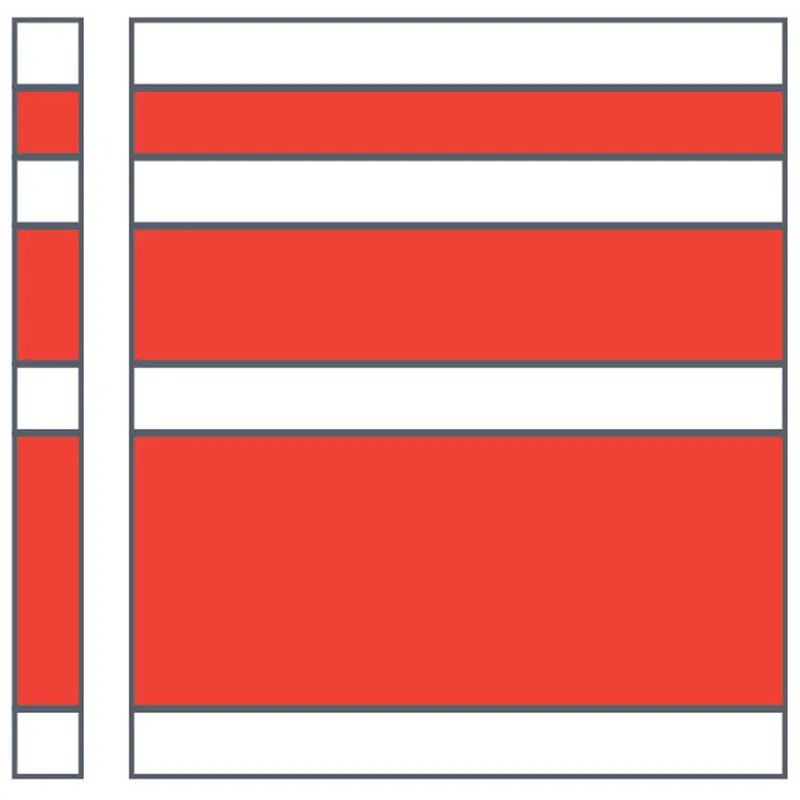
Sew together the print fabric strips with the background 21⁄2in x strips as shown, to form a pieced unit.
Step 5
Subcut the pieced unit into five (5) 2 1⁄2in x 22 1⁄2in pieced strips, cutting horizontally across the unit.
Step 6
Sew the pieces strips together with the 2 1⁄2in x 22 1⁄2in background fabric strips, in an alternating pattern, referring to the photo for placement. Press seams toward background strips to complete the cushion top.
Step 7
Baste the cushion top to the batting and quilt as desired. Karen quilted straight lines, just outside the seam lines.
Assembling the cushion
Step 8
Press under 1⁄4in along one long edge of each backing piece. Press under again and topstitch in place.

Step 9
Place the cushion top right side up. Lay each backing piece on top, right sides down, so the hems overlap in the centre and raw edges are aligned with the cushion top. Sew around all four sides using a 1⁄4in seam allowance.
Step 10
Turn the cushion right way out and insert a cushion pad to finish.