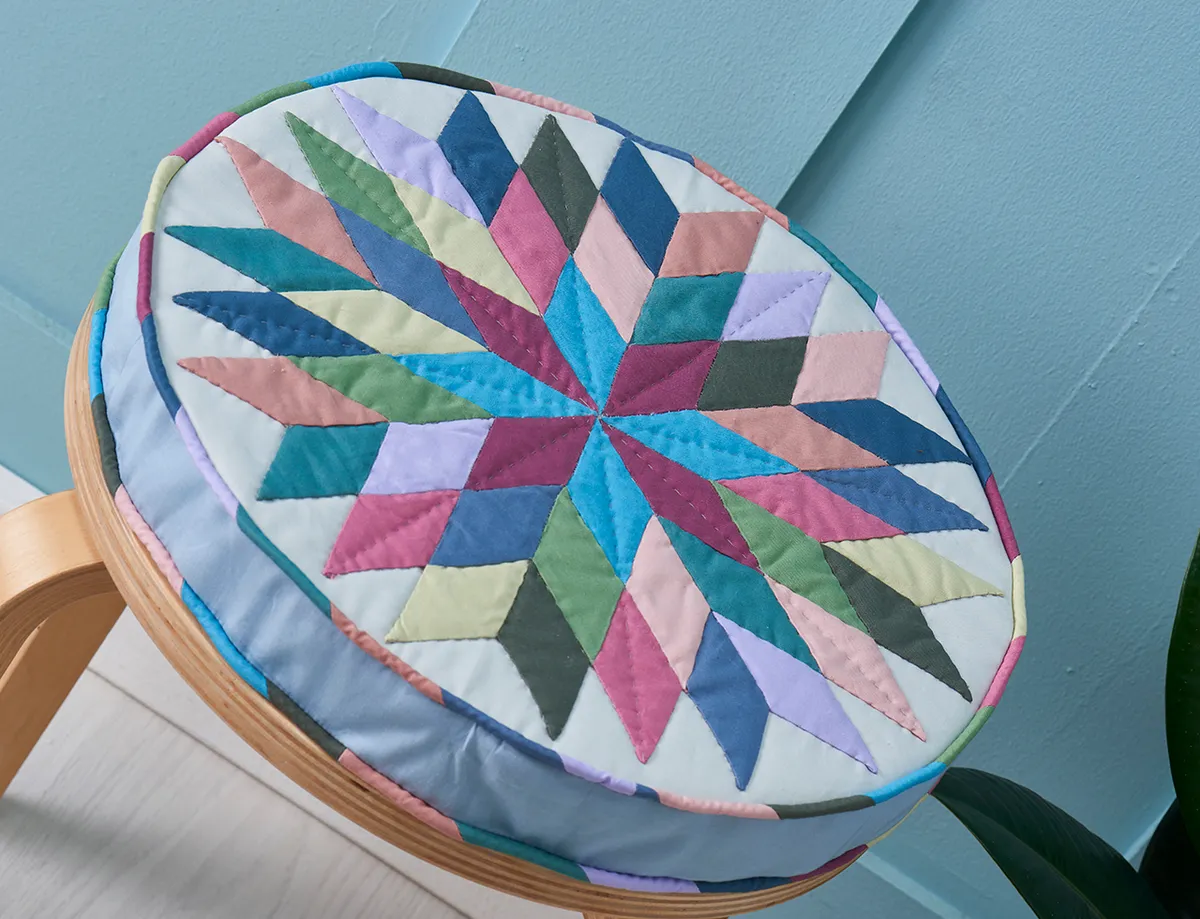
English Paper Piece interlocking diamonds in succulent-inspired shades to make a stylish circular stool patchwork cushion and give your home some DIY style!
English paper piecing and hand quilting are two of the most soothing slow stitching methods you could wish for. If you'd like to try your hand at a project that combines the two, look no further. Curl up on the sofa and get settled in for a cosy evening creating your very own stool cover!
f you're new to these techniques, fear not – we've got some beginner guides to show you the ropes. You can read more about English Paper Piecingor check out our guide to paper piecing diamonds to learn more about sewing diamond shapes using the technique. Or of course you can just dive into our step by step guide to this project and learn as you go.
If you're loving the diamonds vibe, why not make a whole quilt of them with our Diamonds Quilt Pattern?
Press seams to one side, unless otherwise instructed.
EPP = English Paper Piecing.
RST = right sides together.
EPP templates don’t include seam allowances.
Cutting out
Step 1
From the background fabric cut:
One (1) 18in square for cushion front.
Two (2) pieces using the Cushion Back template as featured in Love Patchwork & Quilting issue 76
One (1) 2½in x 43½in strip for gusset.
Step 2
From each of the appliqué solid fabrics cut:
Four (4) 4¼in x 1¾in pieces for EPP.
Four (4) 1½in x 4in pieces for piping.
Piecing the EPP
Step 1
Pin or glue baste the Diamond templates to the wrong side of the 4¼in x 1¾n pieces. Trim around the diamonds, adding a ¼in seam allowance all the way around. Glue or thread baste the raw edges around the diamonds.
Step 2
Arrange the diamonds into a star shape, ensuring an even mix of colours across the design. Begin sewing together, stitching the diamonds into wedges (Fig 1),
Figure 1
then sew the wedges together (Fig 2). To join two pieces, place RST and whipstitch along the edge to be joined, knotting off the threads at each end.
Step 3
Press the completed star well. Remove the paper pieces, and press again, paying attention to the outer edges (Fig A).
Figure A
Assembling the cushion front
Step 1
Centre the EPP panel right side up on the cushion front piece and pin into place. Stitch in place around the outer edge using small, neat slip stitches (Fig B).
Figure B
Step 2
Make a quilt sandwich by placing the lining fabric right side down, the batting on top, then place the cushion front centrally and right side up. Baste the layers together using your preferred method.
Step 3
Quilt as desired. Rebecca hand quilted around the diamonds, then diagonally through the centre to the outer edge (Fig C). Trim the quilted sandwich into a 14in diameter circle.
Figure C
Assembling the cushion back
Step 1
Place the two cushion back pieces RST. Sew together along the straight edge, using a ½in seam allowance, as follows. Sew from each end to the dot, using a normal stitch length, and backstitch at the dot. Increase your stitch length for basting (approx. 5mm) and sew the seam between the two dots.
Step 2
Press the seam open on the backing piece. With the backing piece wrong side up, centre the zip right side down on top of the seam. Pin and baste in place.
Step 3
Using a zipper foot, sew the zip in place. Remove the basting stitches.
Making the covered piping
Step 1
Join twenty four of the 1½in x 4in solid rectangles end to end, using diagonal seams (Figs D–E). Repeat the process to make a second piping strip using the remaining rectangles.
Figure DFigure E
Step 2
Fold each strip from step 12 in half lengthwise, wrong sides together. Cut your piping cord in half to make two equal lengths. Place one inside each of the folded strips. Baste the strips together around the piping cord, using a zipper foot to get close to the cord. Trim any excess cord from the ends.
Attaching the piping
Step 1
Pin and baste one length of covered piping around the edge of the cushion front, using a 1⁄8in seam allowance. Leave 2in unsewn at the beginning and end. Note, you will have excess piping at this point.
Step 2
Trim the beginning of the piping to 2in. Unbaste the edges of the piping along this section, and trim away approx. 1in of the cord, being careful not to cut the fabric strip. Press the short edge under ¼in to the wrong side.
Step 3
Nest the remaining end of the piping inside the beginning end, and mark where it meets the trimmed cord. Trim the covered end at the mark. Refold the beginning over this end, pin and then baste in place.
Step 4
Sew the piping in place using a zipper foot (Fig F)
Figure F
Step 5
Repeat steps 14–17 to sew the remaining piping to the cushion back (Fig G).
Assembling the cover
Step 1
Sew the 2½in x 43½in gusset strip together along the short edges, using a ½in seam allowance, to make a circle. Press the seam open. Pin RST with the cushion front and baste in place. Stitch RST, close to the piping.
Step 2
Open the zip in the cushion back at least halfway, then join the other long edge of the gusset RST to the cushion (Fig H).
Figure H
Step 3
Turn the cover right side out and press. Put the foam inside the cushion cover and close the zip to complete.
Rebecca is founder of Amber Makes and has previously worked as Senior Technical Editor of Love Embroidery and Simply Sewing magazines. She works with sewing TV channels including Sewing Street, Yarn Lane and Sewing Quarter. She been stitching since she was a child and has worked on many craft magazines as well as running her own curtain-making business. She is known by her colleagues as a sewing oracle – you name it, she can sew it. She’s hugely knowledgeable about sewing techniques, fabrics and tools and is full of helpful advice for her fellow sewists, from the best place to buy curtain-making materials to which books and websites are handy for that sewing problem you’re stuck on.
This website is owned and published by Our Media Ltd. www.ourmedia.co.uk