How to make a fanny pack: easy step-by-step pattern
Is there anything more practical than a fanny pack? A fanny pack (or a bum bag for UK readers) is extremely useful if you're on the go and just need a small bag for a few essentials.
- Make this stylish hoodie pattern and keep cosy all year round
- 20 of the best sewing books to buy
- 30+ best bag patterns to sew
Keep scrolling to learn more about the history of the bumbag and discover how to make a fanny pack with our easy-to-follow tutorial.
What is a fanny pack?
Also known as a bum bag, the fanny pack is a small lightweight bag which is attached around the hips usually by a clip. They rose to popularity in the 1980s and are making a comeback. They leave your hands free, so are perfect for holidays and festivals.

Sew a whole outfit with Gathered
Why not make a matching dress to wear with your new fanny pack? Browse our 10 free dress patterns and sew something beautiful today.
Free fanny pack sewing pattern
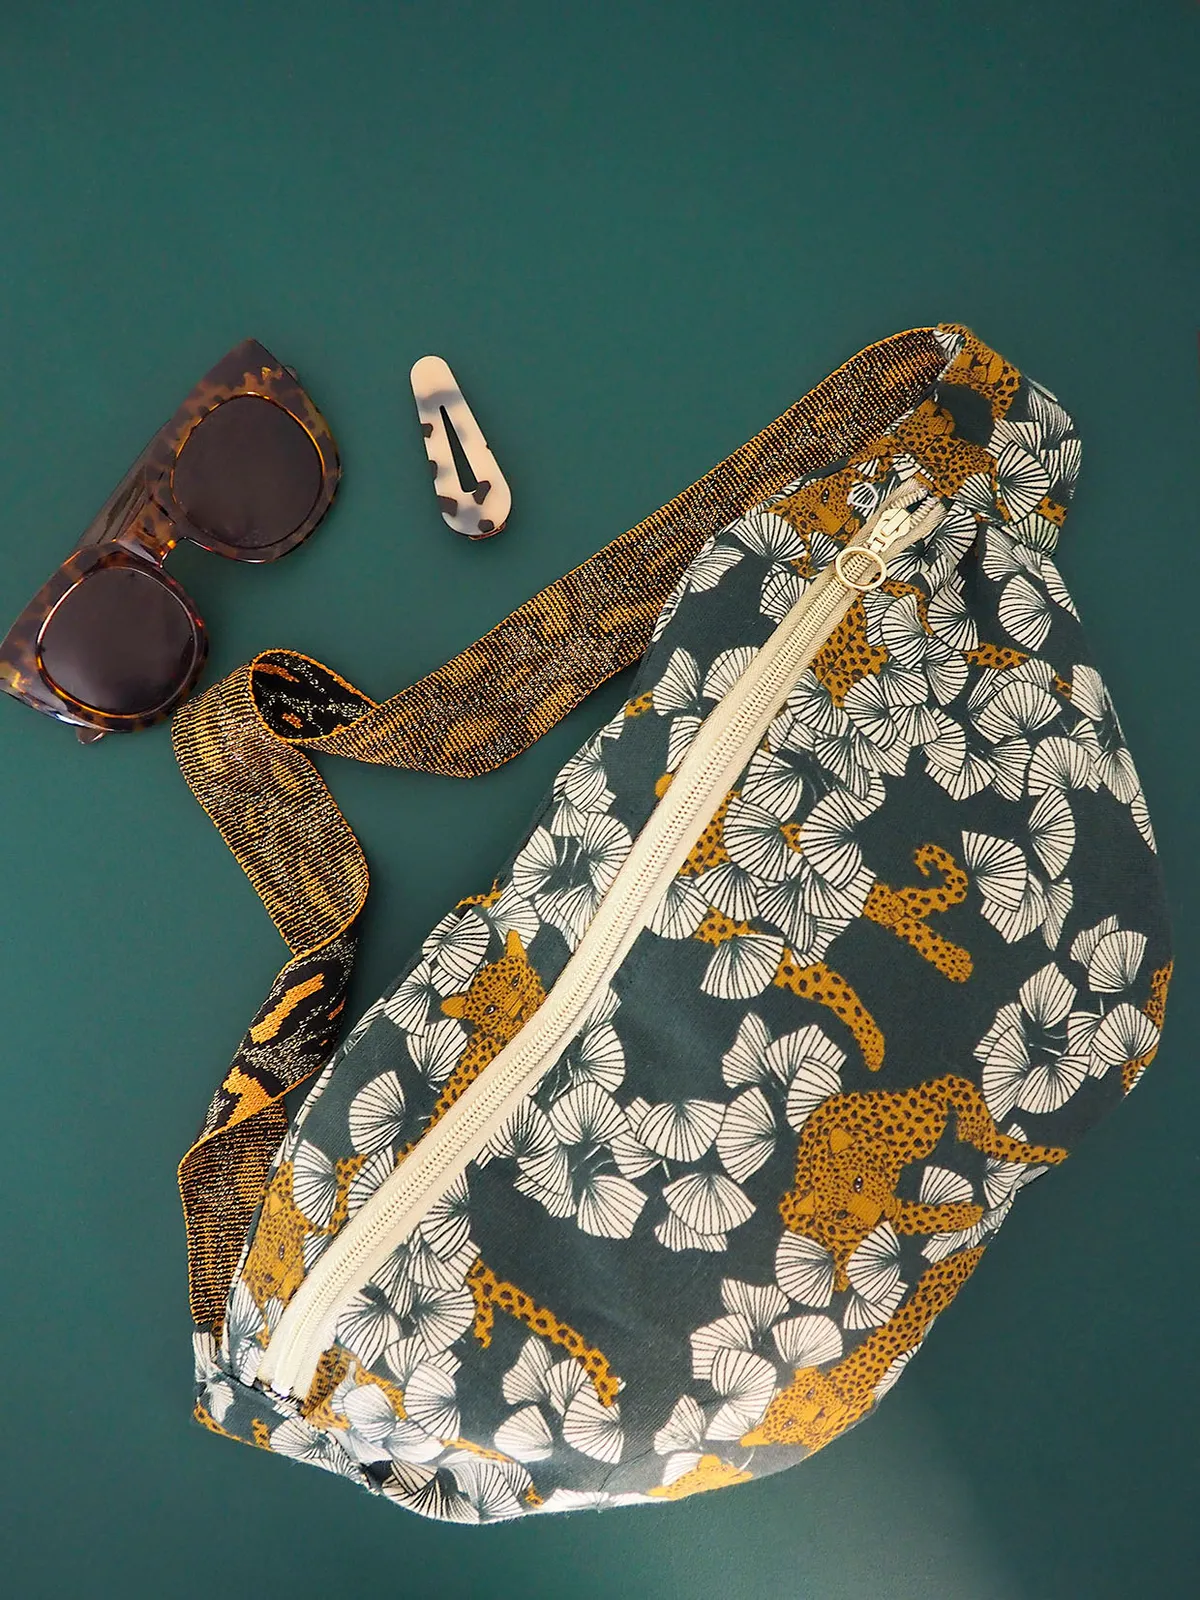
Use Karoline's fanny pack pattern to make your own retro bum bags and coordinate them with your favourite outfits.
We've chosen a dark green leopard-patterned fabric for our bum bag pattern, which can be worn all year round. Use metallic or patterned webbing for the strap for an 80s look.
This fanny pack pattern is also adjustable, so they can be made for children to wear too. This can be very handy when you take them on a day out and they need somewhere to keep their pocket money.
This pattern originally appeared in Simply Sewing, which is a best-selling craft magazine packed with brilliant patterns and tips for sewers of all abilities.
Things to note about the fanny pack pattern
- Unfortunately, the original fabric used to make this pattern is no longer available, but this jungle print fabric from Rose & Hubble would make a good substitute. We recommend using heavyweight cotton, corduroy or velvet for the main fabric and lightweight satin or cotton for the lining.
- Seam allowance is 1cm (3⁄8in) unless otherwise stated
- This method is patternless, but you can opt to trace onto paper first if you prefer
- Measure the exact required ribbon length when you have made the bag before you cut the precise length
You will need
- Main fabric: 30x140cm (12x55in)
- Lining fabric: 30x140cm (12x55in)
- Zip: 40cm (16in)
- Fabric tape, webbing or ribbon: 4x90cm (11/2x351/2in)
- Matching thread
- Basic sewing kit
How to make a fanny pack: Step-by-step tutorial
Cutting out the fanny pack pattern
From the main fabric cut:
- Zip Tab Ends: four 10x10cm (4x4in)
- Fanny Pack Front: 26x44cm (10¼x173⁄8in)
- Fanny Pack Back: 26x44cm (10¼x173⁄8in)
From the lining fabric cut:
- Fanny Pack Front Lining: 26x44cm (10¼x173⁄8in)
- Fanny Pack Back Lining: 26x44cm (10¼x173⁄8in)
Preparing the outer bag of your fanny pack pattern
Step 1
Take the Fanny Pack Front piece and lay it out in landscape position.
Measure 4cm (15⁄8in) down from the top, 10cm (4in) from the bottom, and 11cm (43⁄8in) from the side in towards the centre as shown in the image and draw curves connecting the points.
Draw one side first and cut out.
Step 2
Fold the Fanny Pack Front in half so that you can trace the first curves on the other side, so they will be symmetrical.

Step 3
Repeat the above steps with the Fanny Pack Back piece.
Step 4
On the Fanny Pack Front piece, measure down 6cm (23⁄8in) from the top and mark two lines with 1cm (3⁄8in) between them. This is where the zip will be positioned.
Cut away the 1cm (3⁄8in) strip of fabric between the lines.

Preparing the lining of your fanny pack pattern
Step 5
Place the two front pieces and the Fanny Pack Back piece on one layer of lining fabric and trace around them to make lining copies of the pieces.

Step 6
Cut out these lining pieces.
Inserting the zip of your fanny pack pattern
Step 7
Take the Zip Tab End pieces and mark them as shown in the image. We have marked 6cm (23⁄8in) because the tape used for the strap is 4cm (15⁄8in) wide, and we need 1cm (3⁄8in) seam allowance on either side.
If your tape is 3cm (1¼in) wide, then you will need to mark 5cm (2in) etc.

Step 8
Pin one Zip Tab End right side (RS) facing the reverse side of the zip at each end with the raw edge of the fabric aligned with the end of the zip and stitch across.
Fold the tab over the end of the zip and press. Stitch the tab to the front side of the zip end.

Step 9
To sew the zip in place begin by placing the larger, lower piece of the fanny pack front RS up on your work surface.
Place the zip, with the edges aligned RS down along the top edge. Stitch the zip to the fabric as close to the zip teeth as possible.
Step 10
Place the lining layer on top of the zip, RS down and stitch on top of the seam already sewn to attach the lining to the zip. Open out the lining so the zip is facing out.

Step 11
On the RS, topstitch the outer fabric and the lining along the edge of the zip.

Step 12
Repeat for the other side of the zip and the upper part of the bumbag front.
To keep the layers in place you can machine tack the outer and lining fabrics together close to the edges all the way around.

Assembling the fanny pack pattern
Step 13
Lay out the Fanny Pack Back Lining WS up. Place the fanny pack front (with the zip attached) on top so that the lining side of the fanny pack front is facing the WS of the Fanny Pack Back Lining piece.
Step 14
Then place the main fabric Fanny Pack Back, on top with the WS facing up.
Step 15
Secure with clips and sew all four layers along the top and along the bottom of the bag, leaving the sides open.
Step 16
Turn the bag through one of these sides. If the layers have been placed correctly the seams should be hidden inside the bag.

Adding the fanny pack pattern straps
Step 17
Cut the remaining two Zip Tab End pieces along the lines marked previously.
Step 18
Take one end of the strap and stitch it to the narrow end of one of the Zip Tab Ends.
Step 19
Take another Zip Tab End piece and stitch that on top, RS facing.
Step 20
Now sew along the sides, with a 1cm (3⁄8in) seam allowance. Trim the seam allowance down near the wider end as in the image.

Step 21
Turn RS out. Fold the open end in on itself 1cm (3⁄8in) from the edge. Pin it in place and press.

Step 22
This open end will go over one end of the bag, and that end will have to be gathered a little to make it fit.
Place the open end over the raw edges and pin or clip in place to hold. Try to evenly distribute any gathers that are necessary to make the bag fit.
Step 23
Stitch the Zip Tab End in place as close to the folded edge as possible. Remember to check the back, to make sure both layers of the zip tab end are being sewn through for a secure finish.

Step 24
Try on your bag to see how long you need the strap to be for it to sit comfortably on, or slightly above, your hips.
Cut away any excess, leaving enough to insert into the opposite zip tab end opening.
Step 25
When the strap length has been corrected repeat the steps above to attach the other end of the strap into the Zip Tab End.

Fanny packs are back!
Fanny packs are certainly back with a storm, and we can see why. They’re convenient, fun and easy to make.
We hope you enjoyed learning how to make a fanny pack and will sew up your own, ready for all your events.
Keep the festival vibe going
Fanny packs are perfect for festivals. If you want to keep creating your own festival gear, check out this gorgeous tutorial on how to turn a scarf into a summer coverup.

Read more