How to make a Christmas face mask

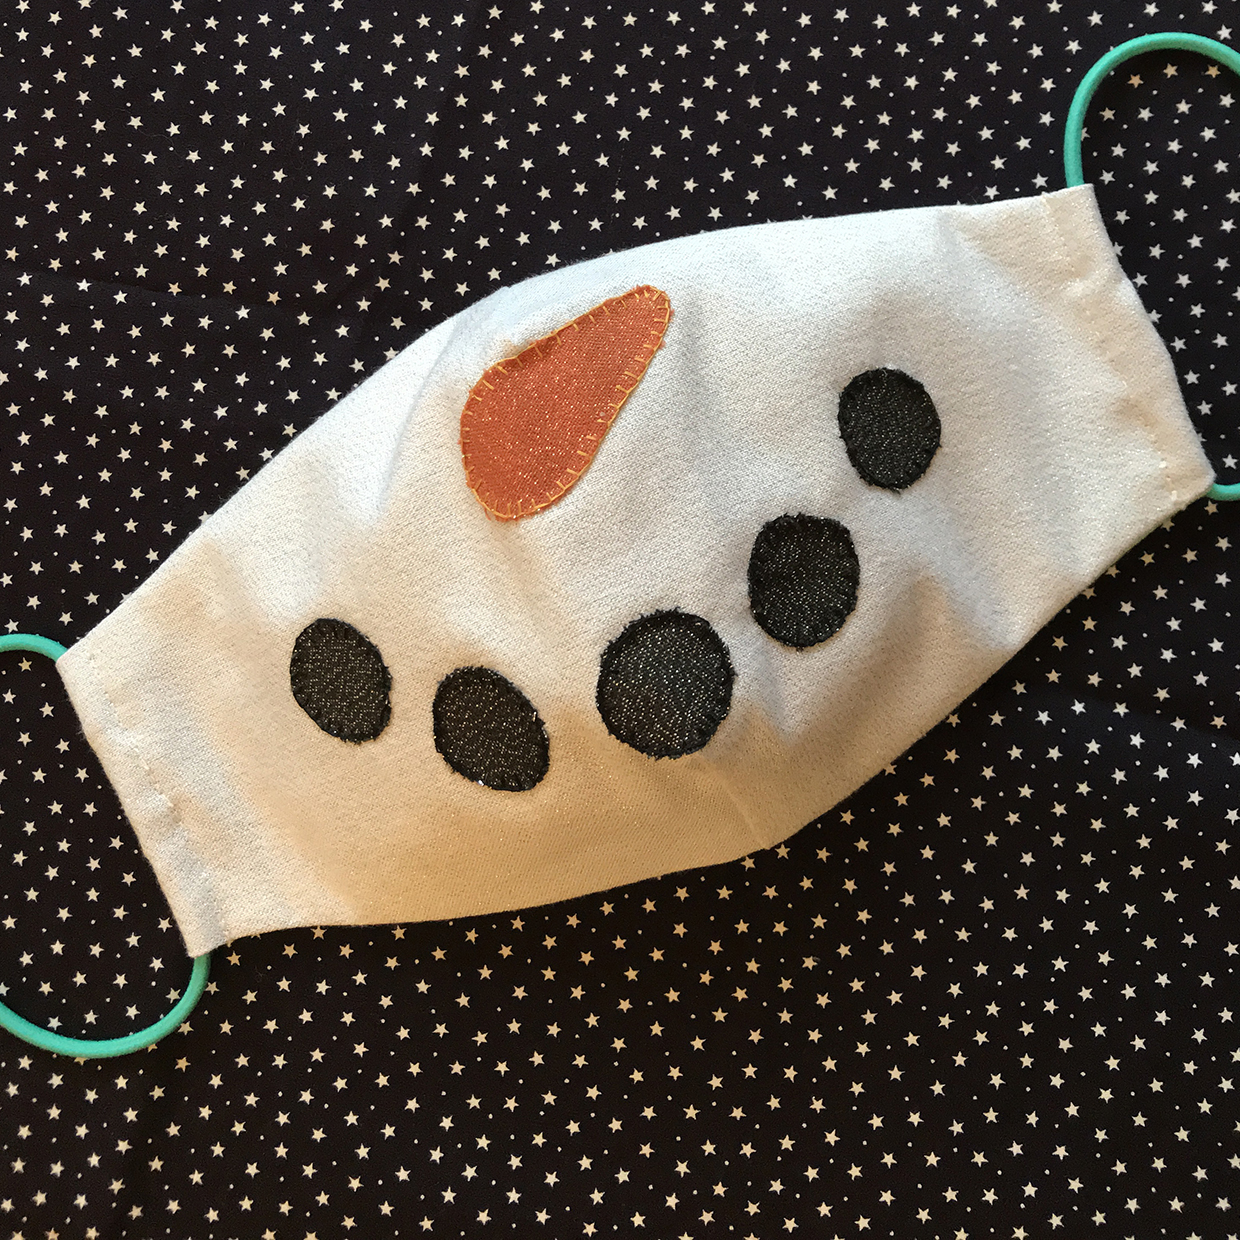
Who needs a jumper when the 2020 star accessory is the Christmas face mask! We'll show you how to make this snowman Christmas face mask

Published: November 27, 2020 at 1:35 pm

This has been the year of the face mask. Hard to imagine at the beginning of 2020, but these are now an essential part of out daily lives. We hope you have already made a good supply of these for your friends and family – take a look at our How to make a face mask article if you are still after patterns and tutorials to craft these for everyday wear.

But what about if you want to jazz up your look, Christmas face mask style? Top your head with a Santa hat (we have the Santa hat knitting pattern if you want to make your own!) and cover your face with this snowman Christmas face mask for a look that will outshine even the most lurid of the Christmas jumpers you may see. Anna Alicia shows us how to add sewn-in shapes to the front of your mask so that your nose become a carrot and your mouth a chain of lumps of coal, snowman style. This pattern makes a full-size Christmas face mask that will fit a large man or woman. If you are after a smaller Christmas face mask, try reducing the templates by 10 or 20 percent, depending on the size of the person you are making it for.

This Christmas face mask is a cloth mask designed as a festive accessory. While it meets all the requirements to be worn when face coverings are required in retail, we are not recommending it for use in hospital settings or for those working closely with confirmed cases of covid-19.

Looking for more festive patterns to sew? Try this adorable reindeer pattern by Lucy Ward.

For the Christmas face mask you will need:

  • 20cm (h) x 30cm (w) outer mask fabric, quilting weight cotton (because we’re going to embroider this, it’s best to use a fabric that isn’t stretchy) – Anna used Glimmer solids from Cloud9 fabrics in Frost, which has metallic threads running through it!
  • 20cm (h) x 25cm (w) middle layer mask fabric, old t-shirt material or quilting weight cotton works well for this layer
  • 20cm (h) x 25cm (w) lining mask fabric, plain quilting weight cotton – Anna used Kona Solids in Pond
  • Scraps of fabric for details, quilting weight cotton in black and orange, Anna used Glimmer solids from Cloud9 fabrics in Graphite (for the coal mouth) and Copper (for the carrot nose)
  • Scraps of single sided interfacing (just enough to back the fabric for cutting out your details – see Christmas face mask templates)
  • 50cm elastic (round 1-2mm elastic works well and Anna chose to add some colour with a bright turquoise elastic)
  • Christmas face mask templates
  • Matching thread
  • Basic sewing kit

You will need:

  • Quilting weight cotton (20cm (h) x 30cm (w))
  • Fusible interfacing
  • Elastic

Step 1

Christmas face mask step 1

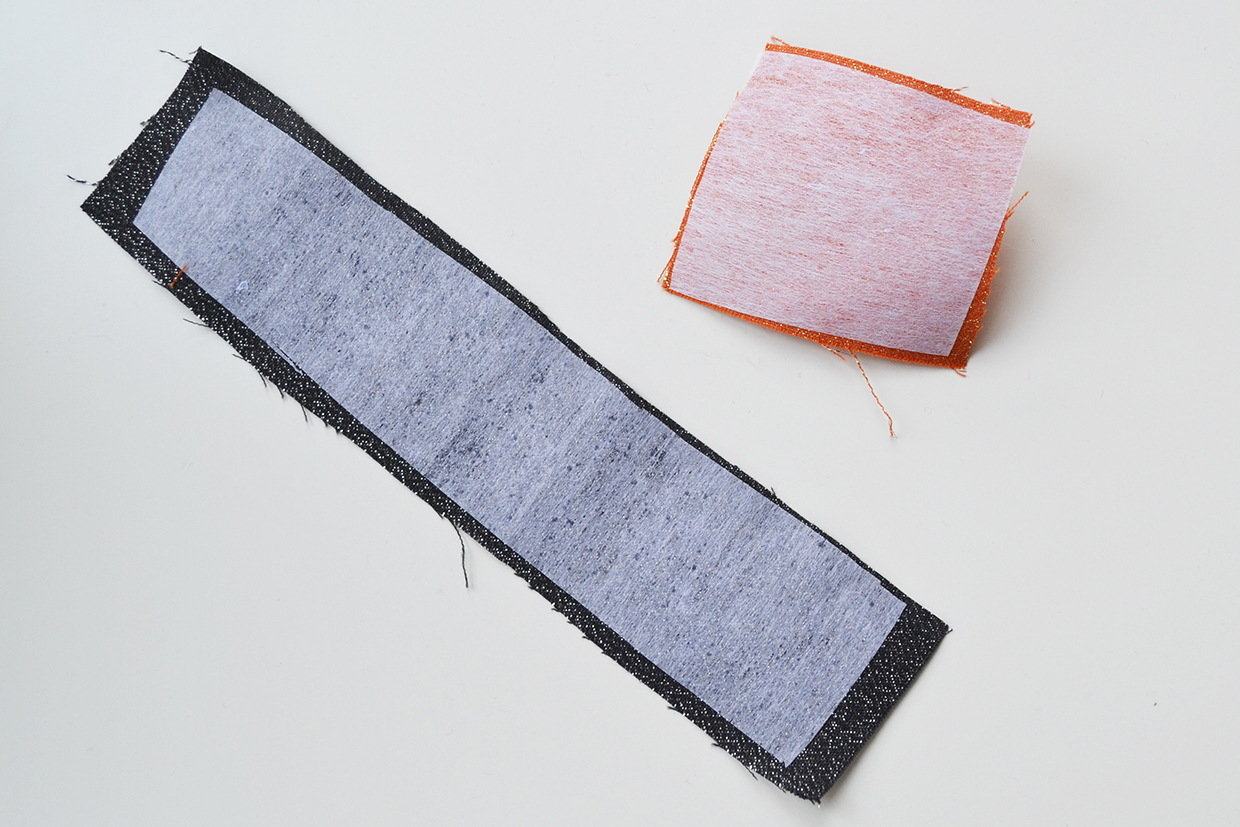
We’ll start by preparing the fabric to make the nose and mouth details for the Christmas face mask using the Christmas face mask templates. Cut a strip of your black fabric large enough to draw out 5 of template D on. Cut out a rectangle of your orange fabric large enough to draw your template C on once. Cut pieces of interfacing to fit both of your pieces of fabric. Lay your fabric pieces out face-down, place the interfacing on top (shiny side down) and press with your iron to fuse the interfacing in place.

Step 2

Christmas face mask step 2a

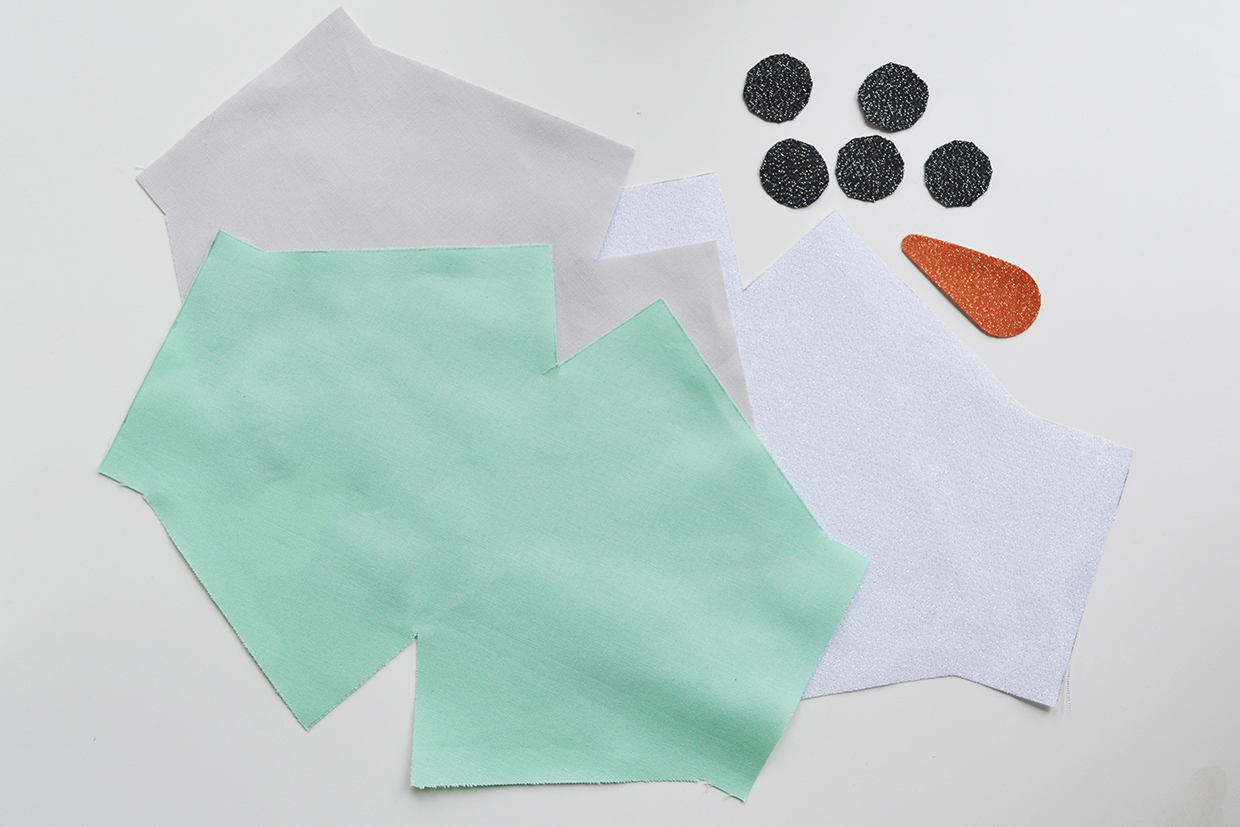
Once your interfaced pieces have cooled down, draw out 5 lots of template D on the back of your black piece and one template C on your orange piece. Cut these out.
Next, lay out your outer mask fabric. Use template A to draw and cut out your outer mask piece. Lay out your lining and inner fabrics and use template B to draw and cut out these pieces. Set aside the lining and inner pieces for now.

Step 3

Christmas face mask step 3

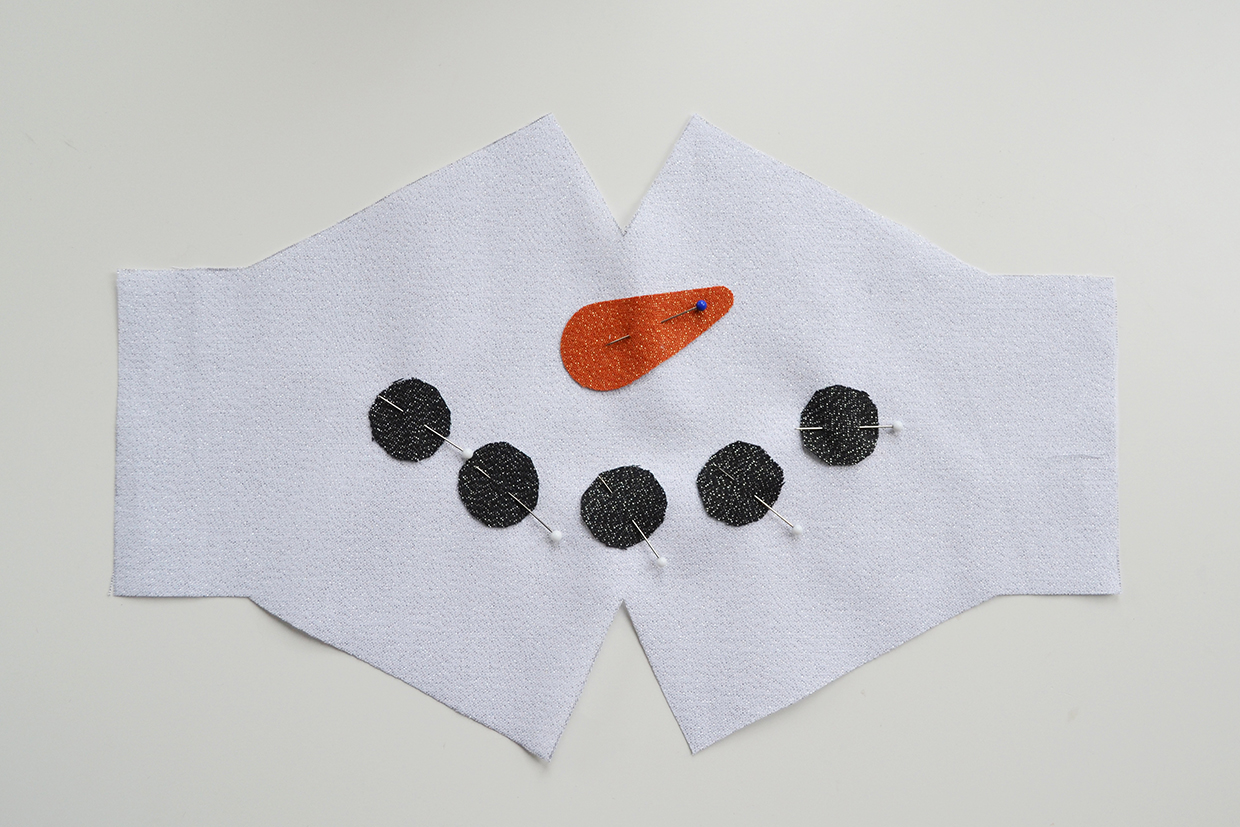
Lay out your outer Christmas face mask piece face-up, making sure the deeper V (marked ‘chin’ on the template) is at the bottom. Place your carrot and coal pieces as pictured, to form a face, making sure they are at least 1.5cm from the tips of the Vs that cut into the top and bottom of the mask shape. Once you’re happy with the placement pin your details in place.


Step 4

christmas face mask step 4

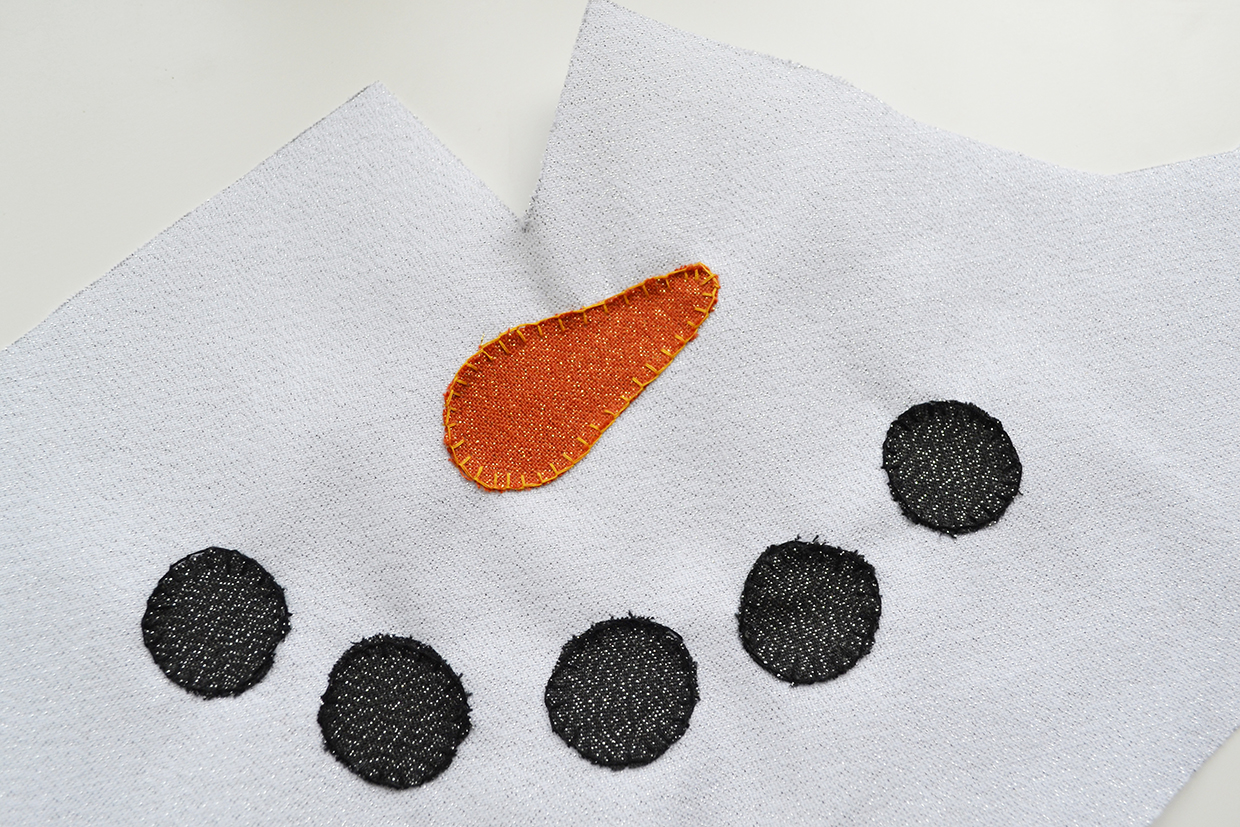
Hand-sew your detail pieces in place using a blanket stitch around the edges (alternatively you can use a zigzag stitch on your machine). Give your outer Christmas face mask piece a press once you’ve finished sewing.

Step 5

Christmas face mask step 5

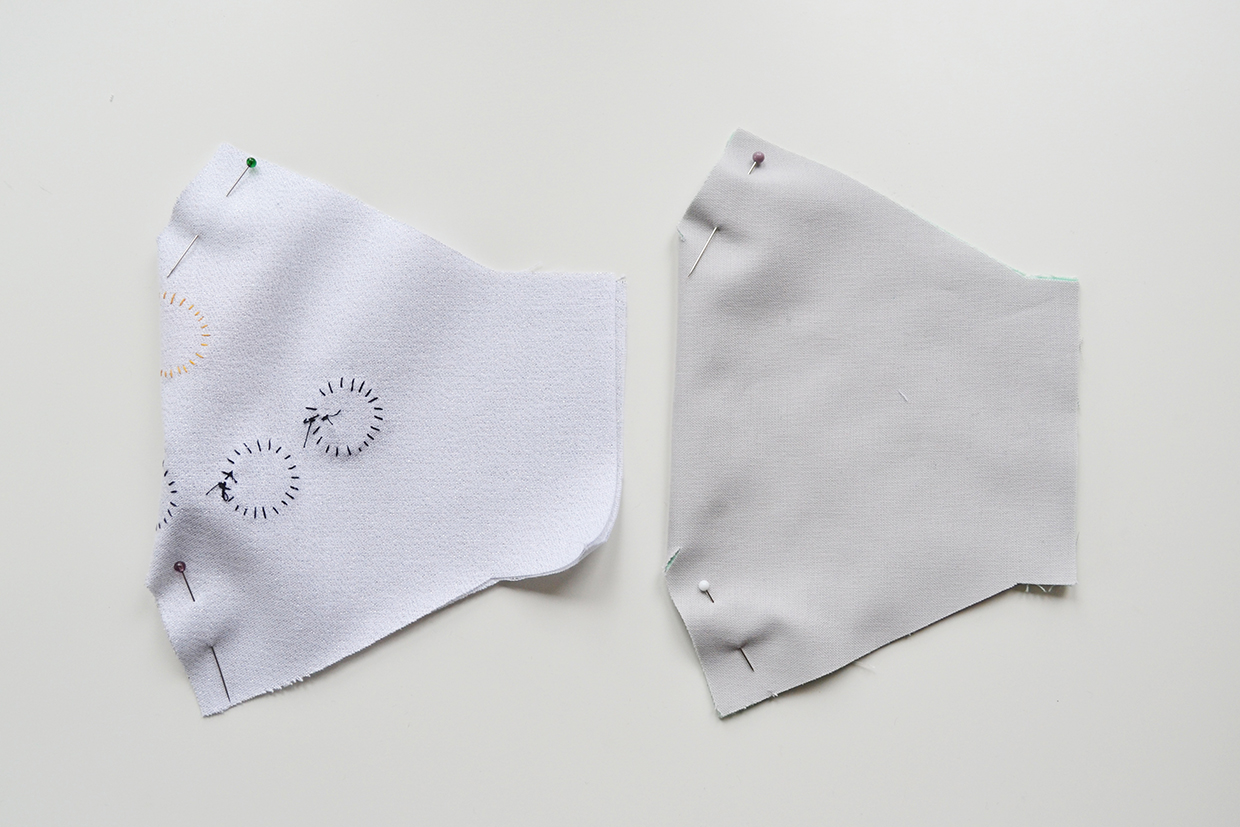
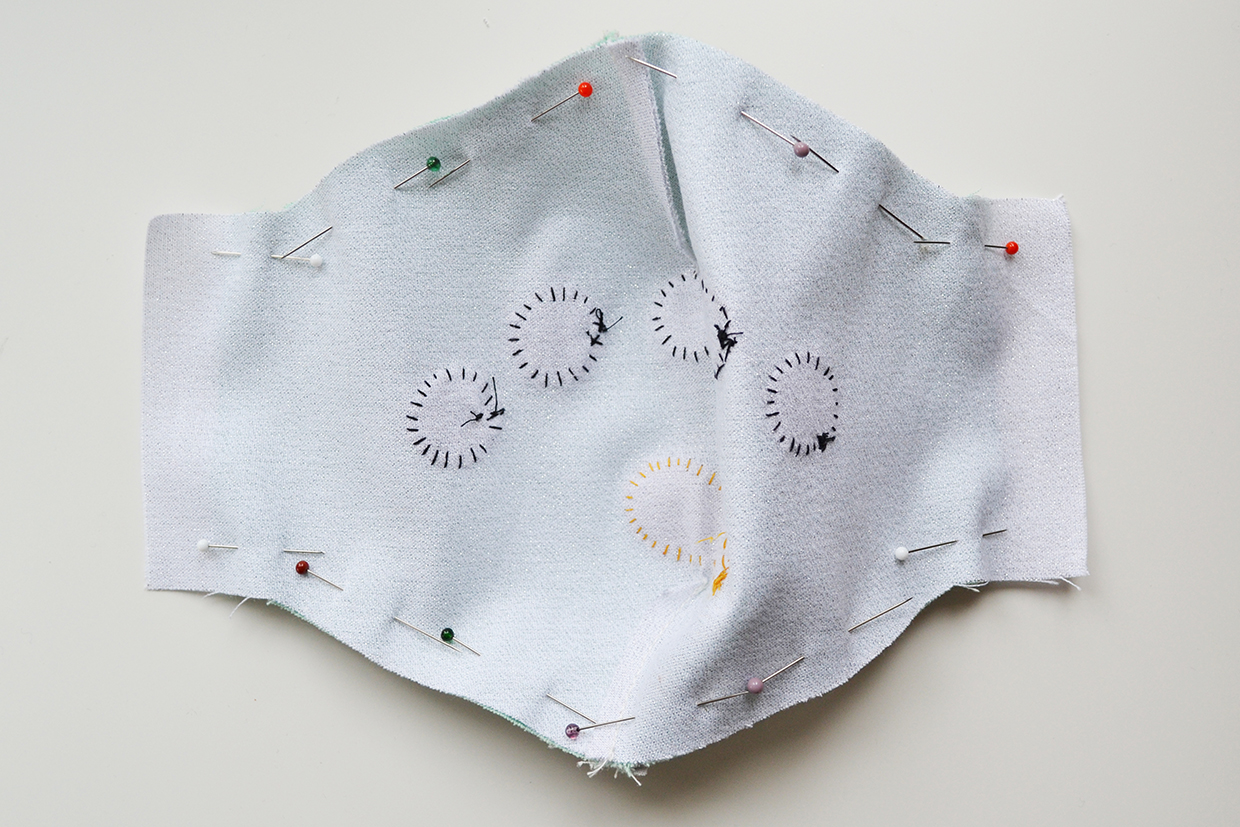
Fold your outer Christmas face mask piece in half, right-sides in, so that the flat edges at either side come together. Lay out your inner Christmas face mask piece and place your lining piece on top, face-up, then fold these (as if they are one piece) in half in the same way. On both your folded Christmas face mask pieces pin along the edges of the V cut outs at top and bottom. Sew along those pinned edges only, 5mm in.


Step 6

christmas face mask step 6

Unfold both your Christmas face mask pieces and press. Lay out the inner/lining piece with the lining side up. Place the outer piece face-down on top (it will be about 2cm wider at the sides than the inner/lining piece). Line up the top and bottom edges, lining up the seams of the Vs you just sewed. Pin along the top and bottom edges of your mask (leaving the side edges open).

Step 7

christmas face mask step 7

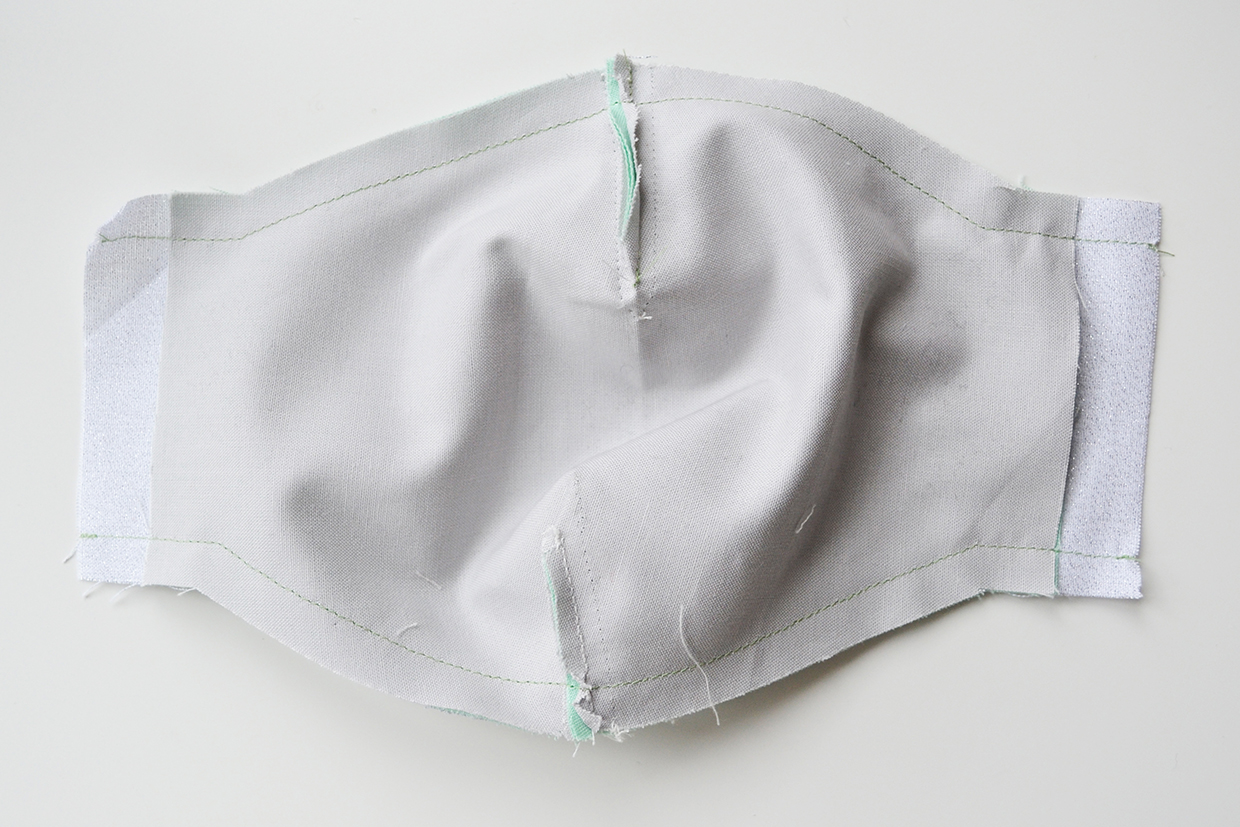
Sew along the top and bottom edges 1cm in. Now turn your Christmas face mask right way out through one of the side openings and give it a good press.

Step 8

christmas face mask step 8

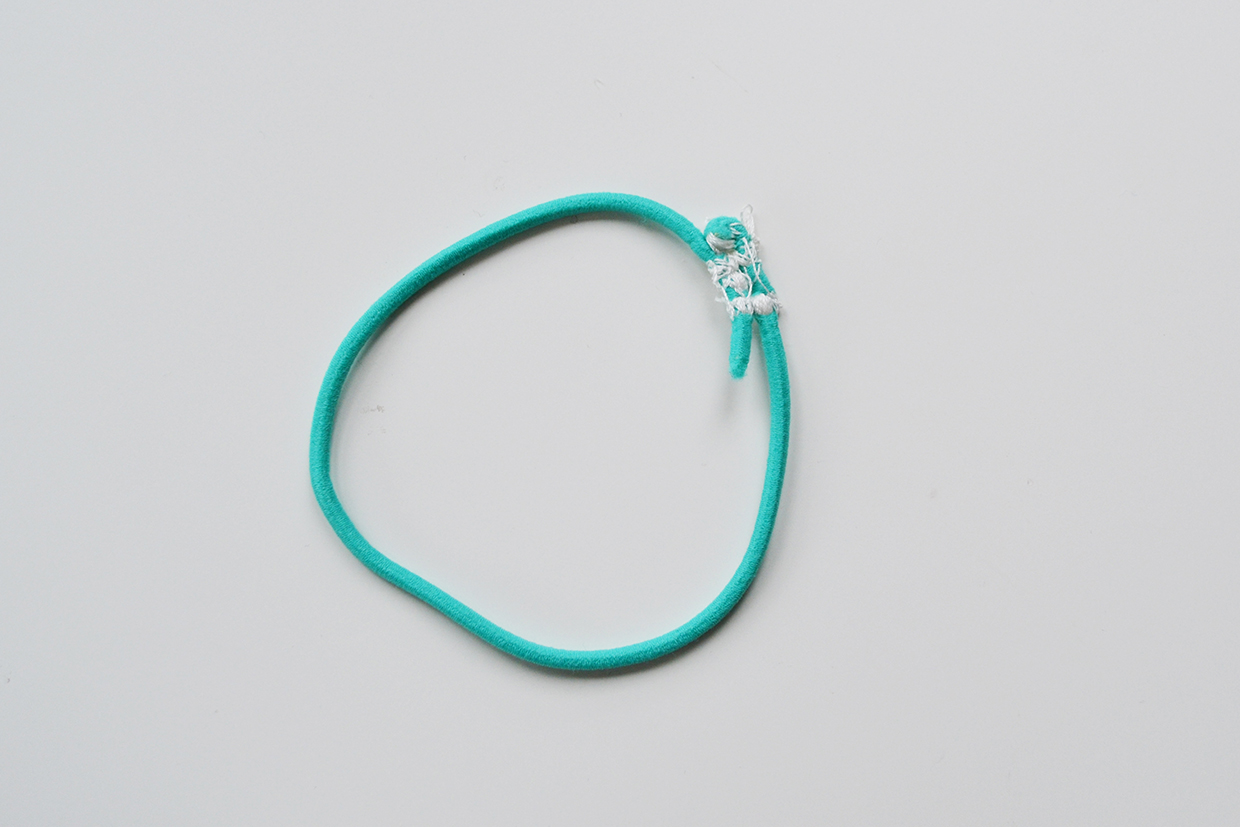
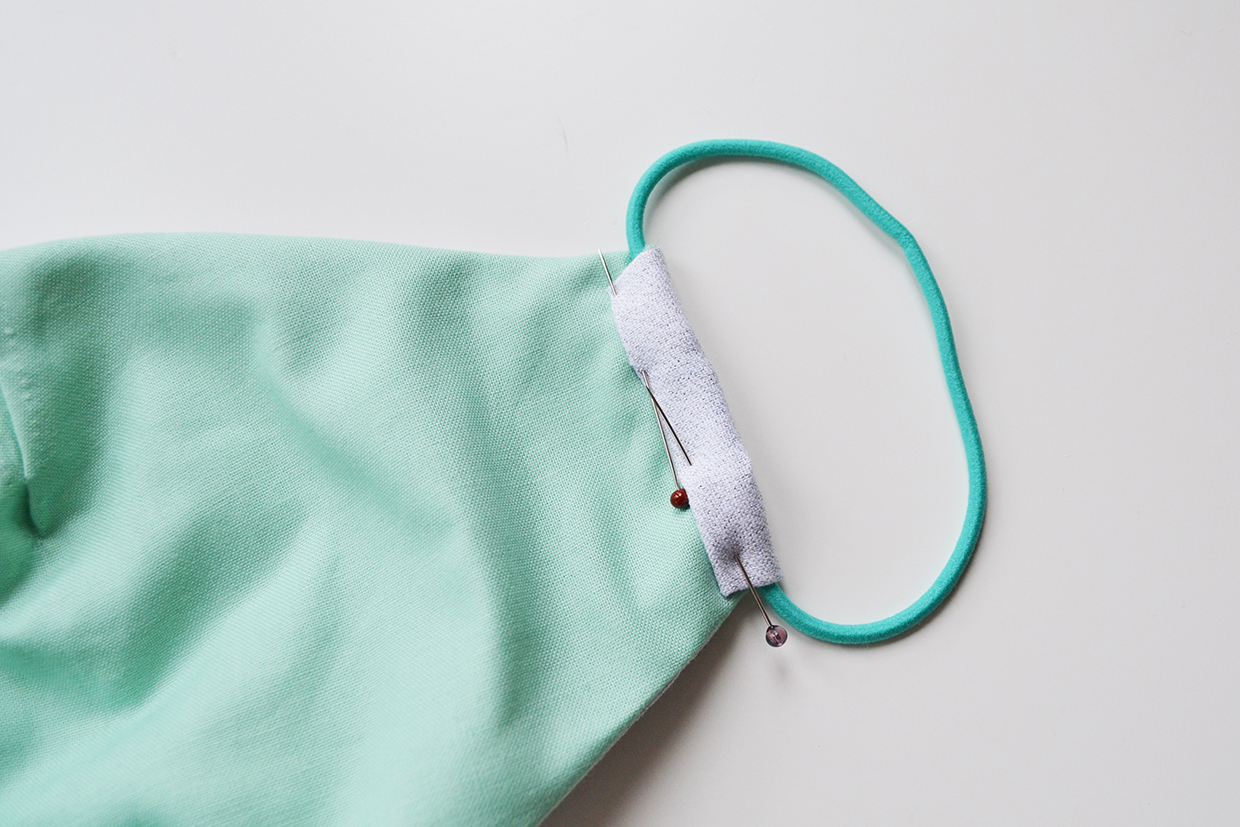
Cut two lengths of elastic (Anna made hers about 22cm each, but you can adjust this to suit). Make each length of elastic into a hoop, overlapping the ends by about 1.5cm and pinning the overlap to hold. Use a zigzag stitch (or stitch by hand) to go over the overlapping area several times to secure the ends together.

.

Step 9

christmas face mask step 9

Finally, with your Christmas face mask face-down, fold the excess of the outer fabric at one side in by 1cm then 1cm again. Tuck the stitched section of one of your elastic loops under the folded fabric, pin and sew the folded edge in place. Do the same at the other side.

Christmas face mask tips

 For a quicker version of the Christmas face mask you could cut the shapes out from felt and use fabric glue to attach them without sewing.

If you prefer a mask with ties instead of elastic, simply use lengths of ribbon through the channels at either side, long enough to tie at the back of the head.

Christmas Face Mask square

More Christmas wearables

You’ll find some more brilliant free patterns and tutorials for Christmas items you can wear here on Gathered! As well as our Santa hat knitting pattern we have have a Christmas pudding hat knitting pattern you should check out! We’ll also show you how to sew your own Christmas jumper or use our free star and Christmas tree knitting patterns to craft yourself some festive earrings!