How to make a fabric wallet
Learn how to make a fabric wallet with Leanne Garrity's quick and simple tutorial. It's a great beginner sewing project and will keep those pennies and cards safe while you're traveling.

Published:
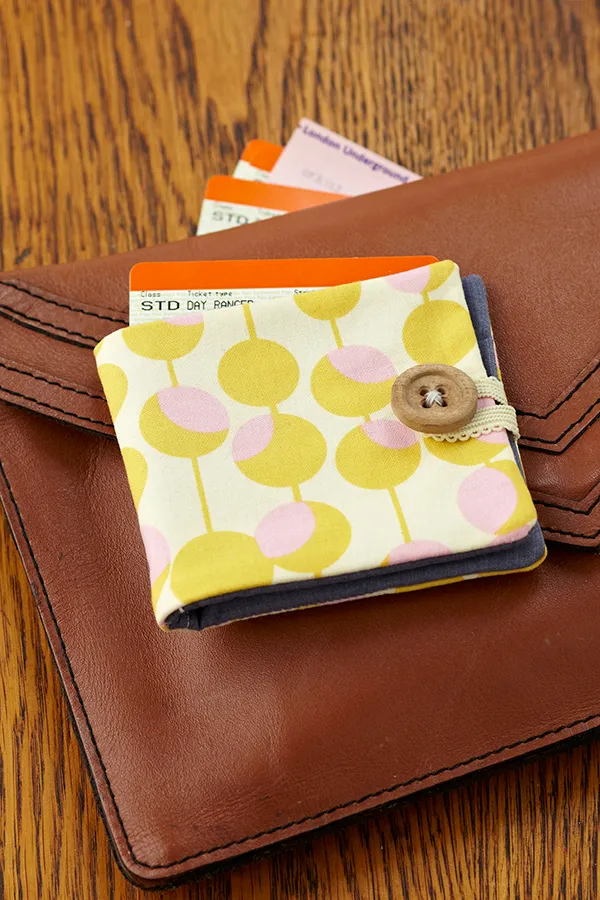
Leanne Garrity is back with another fantastic sewing project that makes us want to get the needle and thread out immediately. Leanne’s shows you how to make the essential travel accessory for wanderers… a fabric wallet! Use Leanne’s tutorial to sew up a simple fabric wallet in just ten steps using leftover fabrics, elastic, and a simple button! It’s a great stashbuster project that’s perfect for newbie sewers. This fabric wallet will store your loyalty cards, train tickets, pennies and more inside and can be whipped up in one evening. Plus they’re small enough to fit into any handbag or pocket. Make yours using your favourite fabrics and once you’ve mastered the tutorial make some for your friends too. Or we think these fabric wallets would make a great Fathers Day gift for grumpy dads who always have loose change hanging about!
Use our sewing for beginners and how to use a sewing machine guides to help you sew with ease but now it’s over to Leanne. Show us how to make a fabric wallet Leanne!

You will need:
• Main outer fabric, 23x11cm (9⅛ x 4⅜”)
• Contrasting lining fabric, 23x11cm (9⅛ x 4⅜”)
• Pocket pieces in lining fabric: 1. 23x10cm (9⅛ x 4”); 2. 23x13cm (9⅛ x 5¼”); 3. 23x16cm (9⅛ x 6¾”)
• Wooden button, 2cm (¾”)
• Elastic, 7cm long (2¾”)
• Sewing machine (if you’re on the market for a new machine check out our best sewing machines for beginners)
• Optional interfacing piece if fabric choices are light weight, 23x11cm (9⅛ x 4⅜”)
How to make a fabric wallet
You Will Need
- Fabric
- Sewing machine
- Wooden button
- Elastic
Total time:
Step 1

Fold all pocket pieces in half with long sides touching. Press and sew raw edges with a ½cm (¼”) seam allowance.
Step 2

Place pocket 2 on top of pocket 3, aligning bottom raw edges. Measure 4cm (1⅝”) down from folded edge of pocket 2. Pin and sew a straight stitch across.
Step 3

Place pocket 1 on top of pocket 2, aligning bottom raw edges. Pin and sew bottom edge with a ½cm (¼”) seam allowance.
Step 4

Fold in half widthways to find the centre vertical fold. Pin and sew a vertical line.
Step 5

Now sew another vertical line on either side of centre line, spaced 1cm (⅜”) away from the stitch
Step 6

Place pockets on top of lining, matching bottom raw edges. Stitch along bottom edge with a ½cm (¼”) seam allowance. Pin elastic in a loop to the centre of the right hand side. Keep pins clear of sewing path, set aside.
Step 7

Place outer fabric on top of interfacing fabric, right side up. Now place pocket section face down on top of outer fabric, right sides together. Pin and sew with a ½cm (¼”) seam allowance, leaving gap at the bottom to turn.
Step 8

Turn using a knitting needle to gently push corners into points. Use a pin to coax out stubborn corners. Press.
Step 9

Whip stitch the opening closed.
Step 10

Sew the button to the front of the wallet, making sure the elastic is neatly aligned with it when closed.
We hope you’ve enjoyed Leanne’s how-to make a fabric wallet tutorial. For more simple sewing projects check out these sewing kits for beginners and our sewing patterns for beginners which are full of easy and fun things to sew!
Meet the Maker
Leanne is a DIY blogger, writer, reviewer and designer-maker for her own indie fashion accessories label, Chi Chi Dee Handmade.