How to mitre corners – a super simple guide

Follow our step by step guide to creating perfectly mitred corners on your sewing projects and quilts.

Try 6 issues of Love Patchwork & Quilting magazine for £9.99| SAVE 76%

Published: September 30, 2020 at 12:33 pm

Mitred corners are a favourite of many makers – both woodworkers and sewists, but in this article we're focusing on all those of you who are working with fabric. Mitres are a way of joining two pieces of fabric which meet at a right angle, so that the finished result shows the two sections meeting with a neat diagonal line. Whether you choose to mitre corners is partly personal choice but it looks great. It's also a technique that many find a bit daunting at first, so we've put together this beginner's guide to how to mitre corners to show you how it's done.

There are two common times that sewists may need to mitre corners – one of the most common ways is when you finish a quilt and are attaching the binding to seal all the edges in place. The other is when you're making home sewing projects like cushions and you want to add a mitred finish to corner points.

In this post, we'll talk you through a step-by-step method to how to mitre the corners of your quilt binding, and then how to mitre corners on a cushion border. Let's go!

How to mitre corners on a quilt

Before you begin this tutorial, you'll need to have finished making your quilt sandwich, trimmed and squared up the edges of the quilt, and then prepared sufficient binding to go all around the quilt plus about 10in (25cm) extra. If you're new to quilting, for help with these stages of your quilt making, see our beginner's guide to how to make a quilt and our guide to binding a quilt by machine. The later article also includes a handy video which shows you the technique below in more detail.

Once you've got your quilt sandwich and binding strips ready to go, you’re ready to attach the binding edge to your quilt – complete with mitred corners!

Note

This method uses binding strips with a starting width of 2½in (6.5cm), but you can use a similar process to attach single-fold binding. The time this method takes will depend on the size of your quilt. We've guessed an hour for those of you making mini quilts but for a full Queen size quilt, this method may take a little longer!
You will need:

  • Fabric (Cut into binding strips (see above notes))
  • Quilt sandwich
  • Sewing machine
  • Thread

Step 1

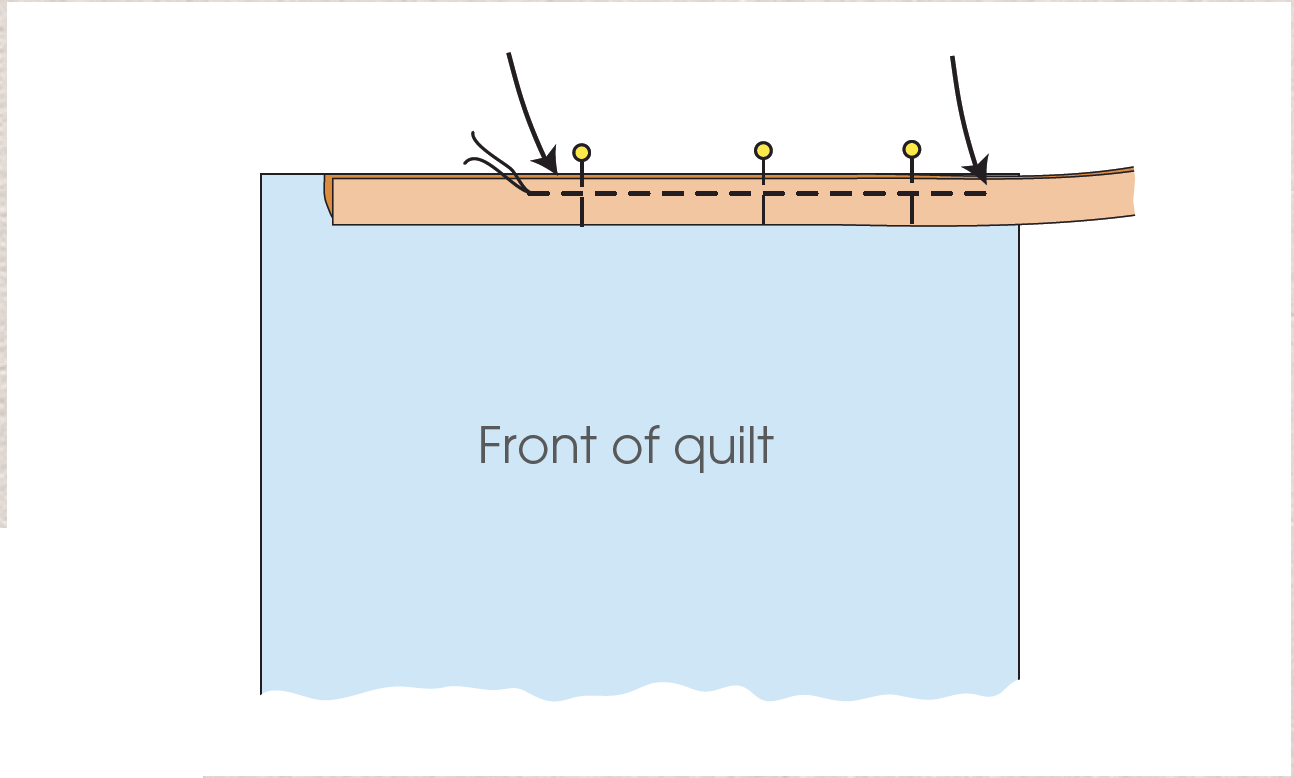
Pin the raw edge of the folded binding along one side of the quilt front. With a ¼in (6mm) seam, sew it in place 6in (15cm) from the end of the binding. Sew up to ¼in (6mm) from the quilt end.How to mitre corners step 0

Step 2

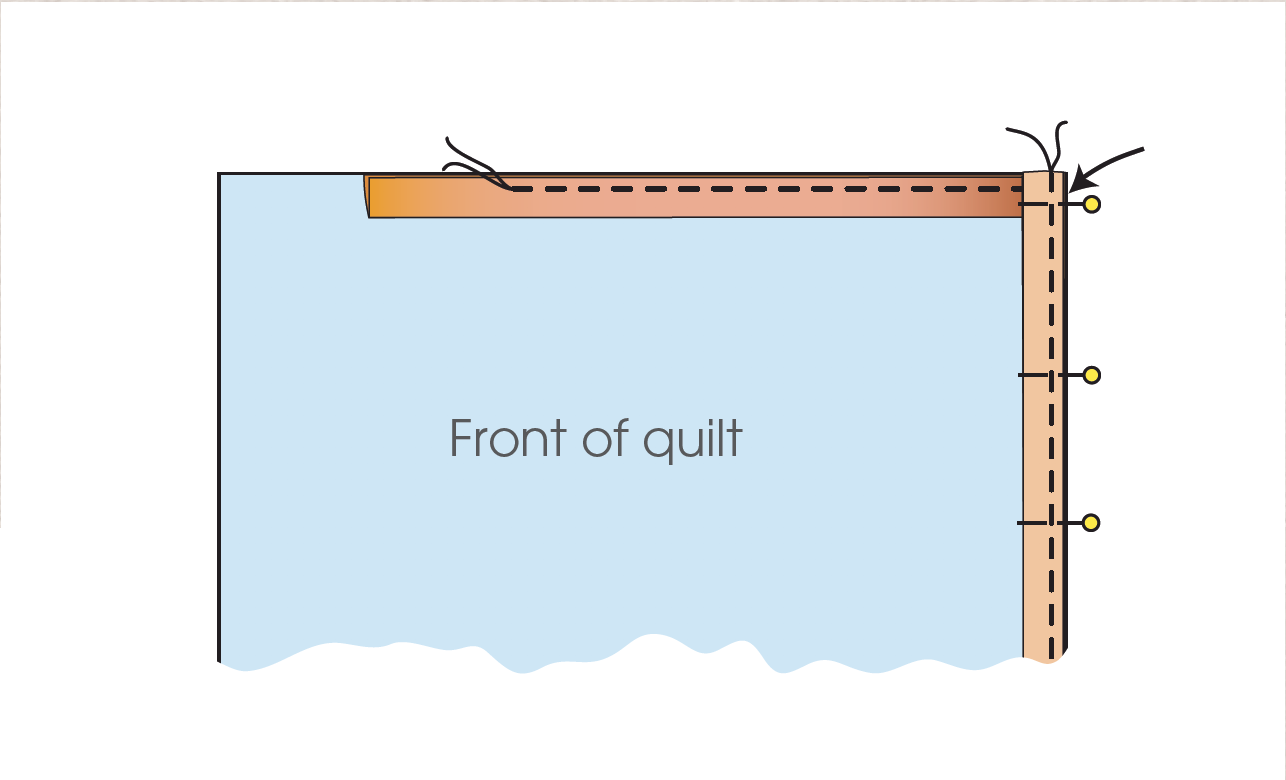
Take the quilt off machine. Fold binding upwards then back down, pinning in place – this is the mitre. Sew from the top to within ¼in (6mm) of the next corner. Repeat the folding process. Continue round the quilt.

How to mitre corners step 2

Step 3

Leave about 6in (15cm) of unsewn binding at the end. Trim off the excess so the ends overlap by 2in (5cm). Turn over a corner at the end at 45° and pin in place. Finish stitching binding in place on the quilt front.

How to mitre corners step 3

Step 4

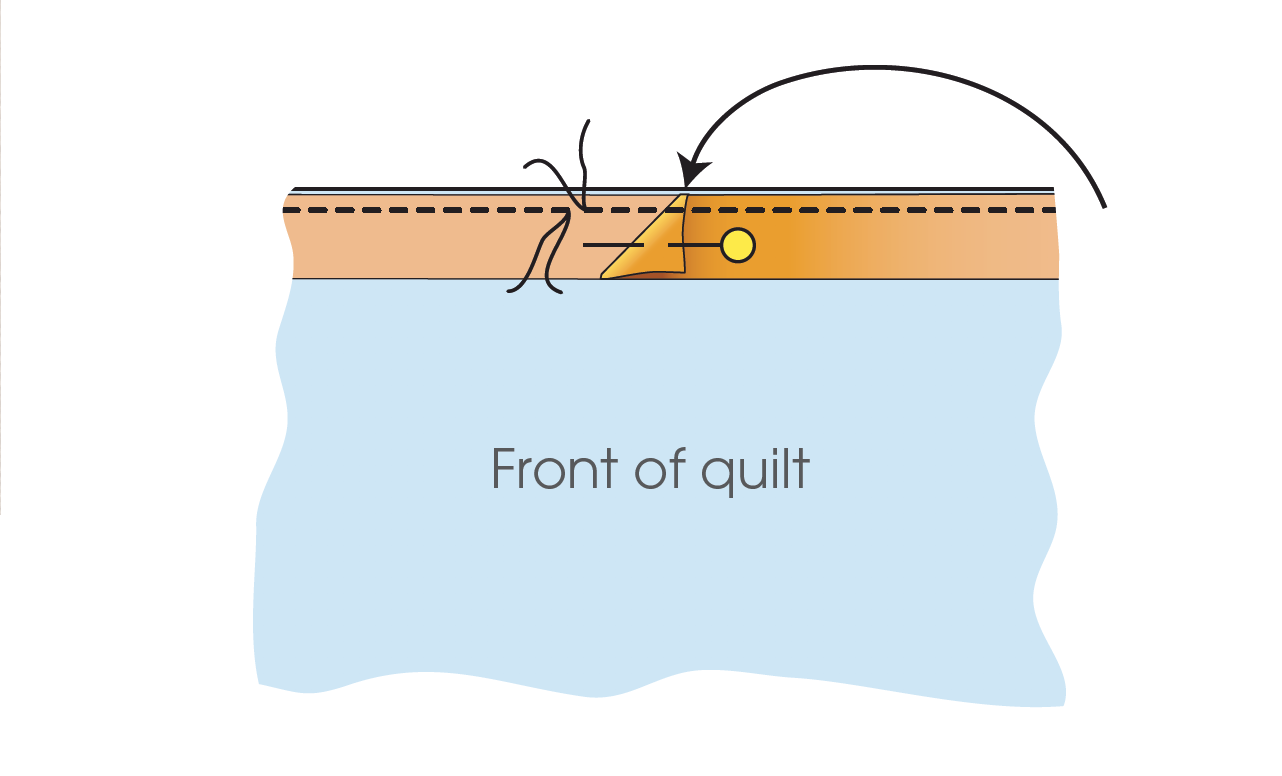
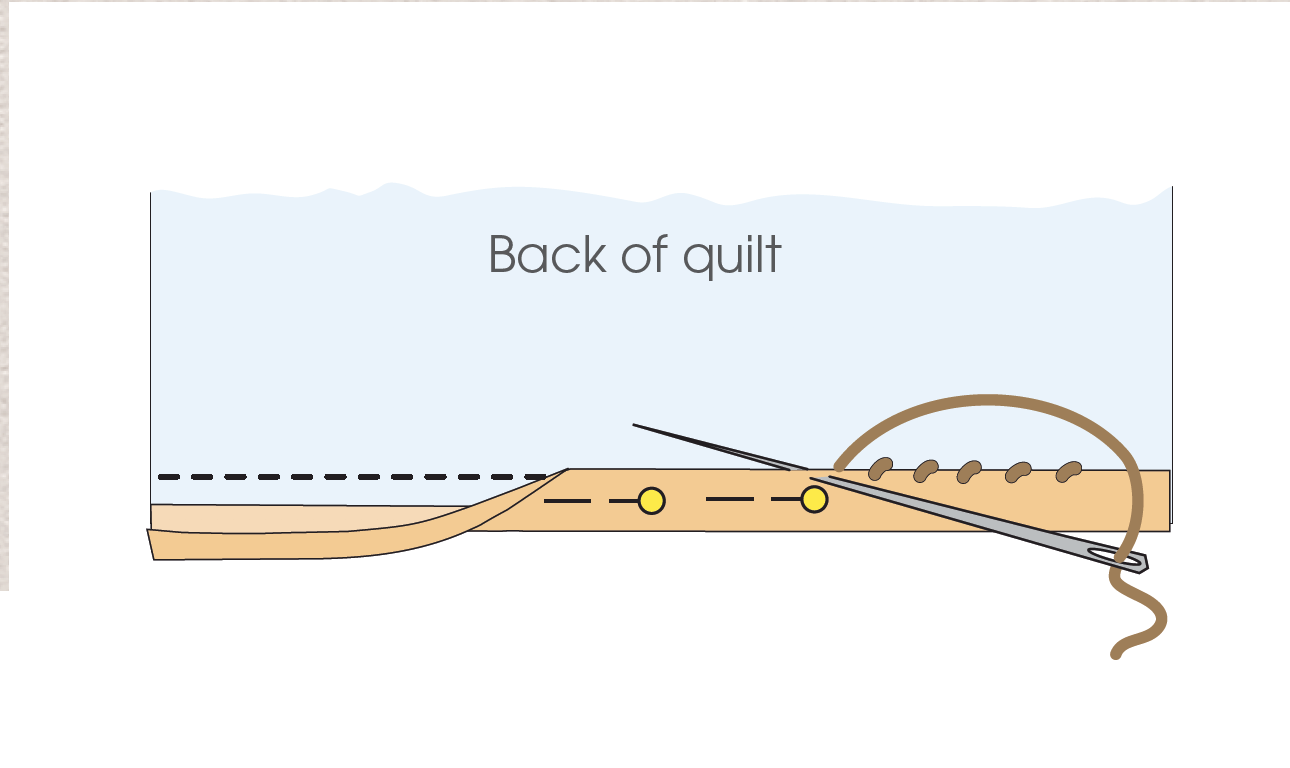
Now turn the binding over to the back of the quilt all around, pinning in place and creating neat mitres at each corner. Slipstitch in place all around, using matching sewing thread and tiny stitches.

How to mitre corners step 1

How to mitre corners of a cushion border

Adding a border to a piece of fabric (from cushions to tablecloths) gives it that extra special finishing touch which is quite easy to do but will make it look more professional. You can add a border to ‘frame’ a piece of fabric for a cushion front before you attach the back to it. Or, add a deep mitred border to a length of fabric for a table runner.

You could very quickly make a lovely gift by bordering a blanket or length of fleece in a contrasting fabric to make a very attractive throw. This step-by-step method will show you how to mitre corners to achieve a pleasing look to your fabric frame. With a little practise you can use this technique to achieve a professional looking effect.

In this step by step guide, we’ll show you how to make a simple framed cushion cover with mitred corners.

Step 1

Decide on the finished size of your cushion cover, then trim the main fabric to the central dimensions plus a 1.5cm (½in) seam allowance all round.

Step 2

Cut four fabric border strips – each one needs to be:

  • Length: same length as finished cover plus seam allowance
  • Width: the width of the border strip plus the seam allowance.

Step 3

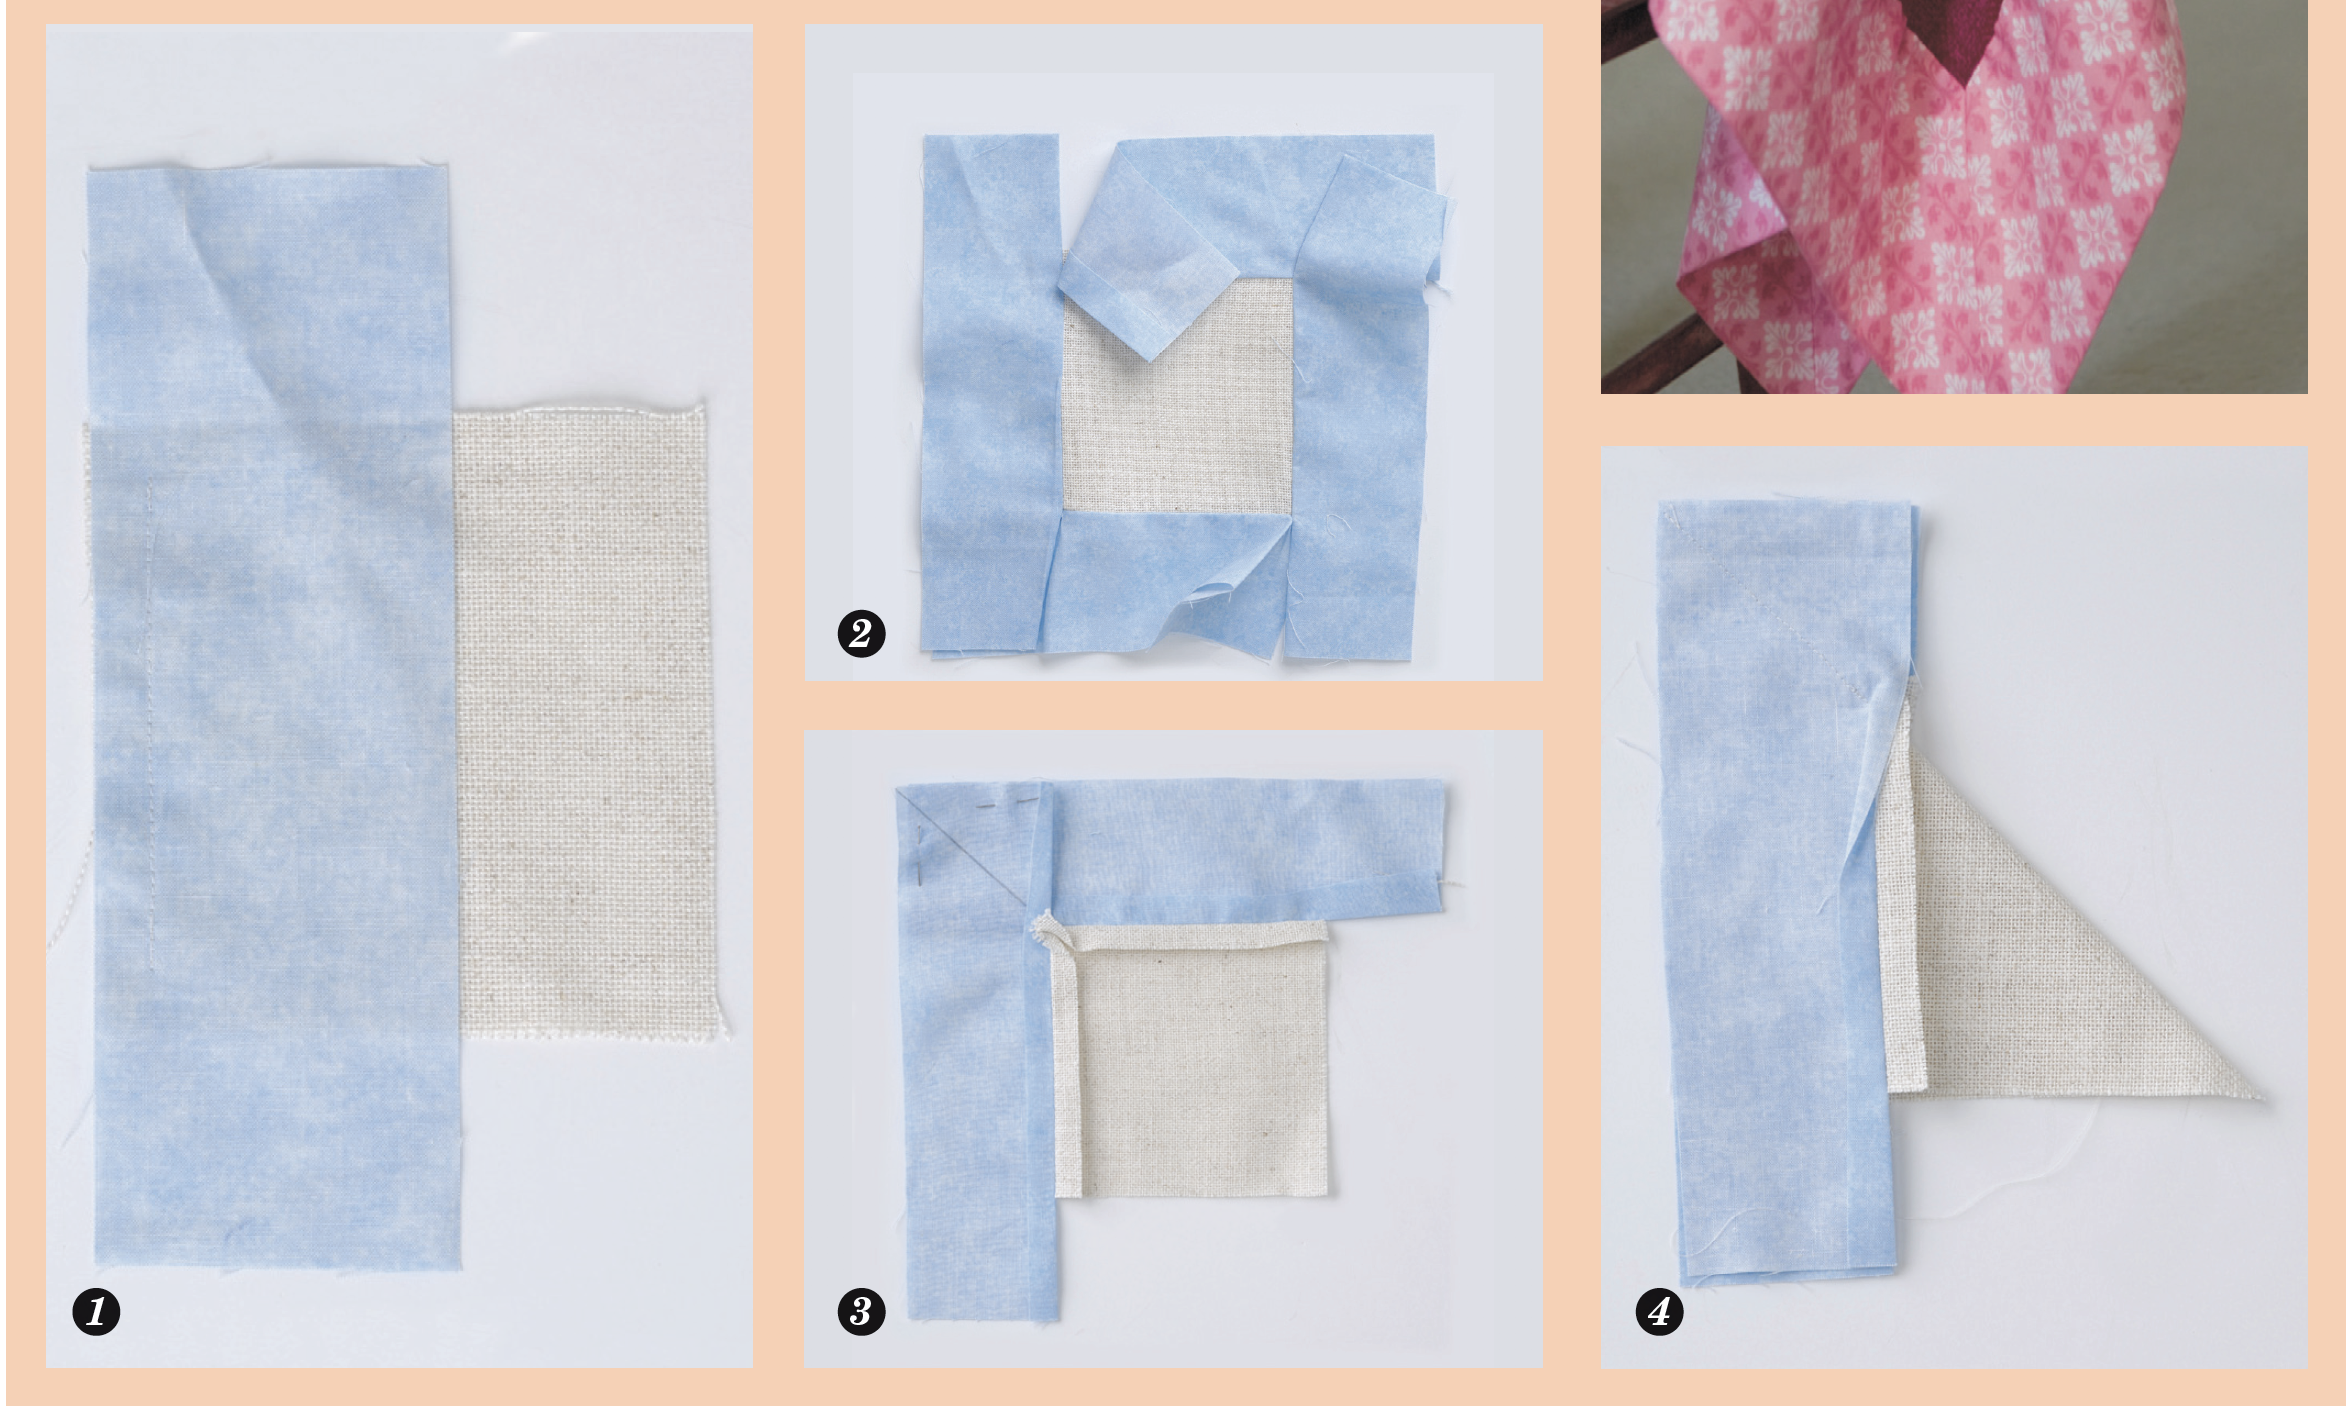
Pin one border strip to one side of the main fabric, making sure it is placed centrally and has right sides together. Stitch the border to the centre using a 1.5cm (½in) seam allowance but starting and finishing 1.5cm (½in) in from each edge (fig. 1).

Step 4

Attach the other border strips in the same way. Be careful not to stitch into the strips already attached (fig. 2).

Step 5

To create the mitred corners, place your cushion front right sides down and work on one corner at a time. Fold one strip over the other and pin. Draw a diagonal line on the border from the inner corner where the two border strips meet to the outer corner of the strip.

Step 6

Swap the positions of the border strips and draw this same line on the other border (fig. 3).

Step 7

With right sides of the border strips together, match up the pencil lines, pin, then stitch along these lines. Press the seam open and trim (fig. 4).

Step 8

Mitre the other three corners in the same way then trim the seam allowances and press to finish.

How to mitre corners