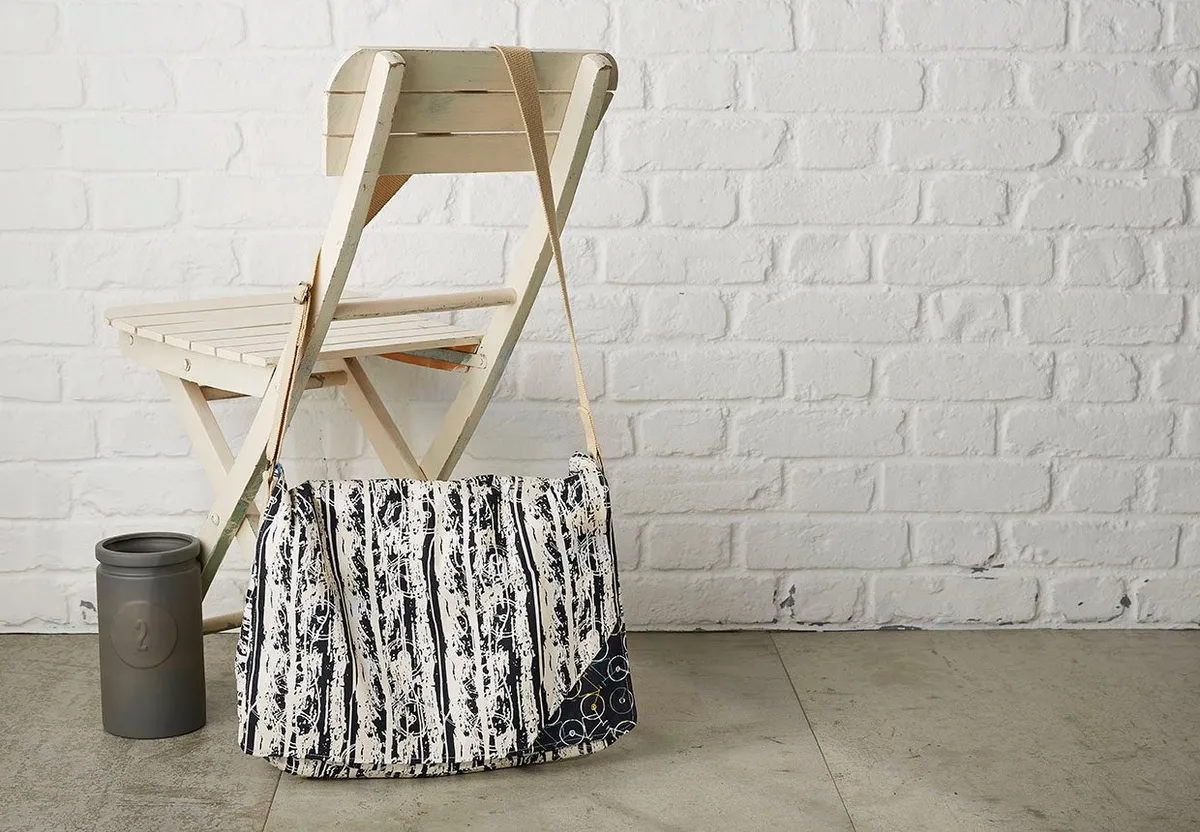
Laptop bag pattern
When you're on the go, it's good to keep your tech protected from wear and tear (or accidental bumps!). This beautiful quilted laptop bag pattern by Mr Domestic is the stylish way to keep your computer safe when travelling.
A laptop case can be a wonderful personalised gift too – you can make it in your choice of fabrics and could sew other accessories to match. You could personalise this DIY laptop pattern further by adding a pocket too.
Mr Domestic says: "Add a tassel to the zip for a handy zip pull and decorative finish!"
This pattern was first published in Simply Sewing Magazine. Simply Sewing is a practical magazine for sewers of all abilities. It features lots of beautiful projects to sew, plus expert tips and advice to help you boost your sewing abilities along the way.
If you're new to sewing, we'd recommend reading some of our sewing guides for beginners before you get started. Take a look at our sewing for beginners and how to use a sewing machine guide for lots of tips and technical advice.
Read on to learn how to make this laptop bag sewing pattern step by step…
DIY laptop bag pattern
Notes
Seam allowance is ¼in (6mm) unless otherwise stated.
You will need:
- Main fabric (1/2ydx45in (50x108cm))
- Lining/backing fabric (3/4ydx45in (70x128cm))
- Wadding (80/20 cotton/polyester)
- Black polyester zip (18in)
- Matching thread
- Basic sewing kit
Cutting out
Step 1
From the wadding cut:
- Wadding: four 17x13in
Step 2
From the main fabric cut:
- Outer: two 17x13in
Step 3
From lining/backing fabric cut:
- Lining: two 17x13in
- Outer Backing: two 16.5×12.5in

Quilting the exterior
Step 1
Place two of the Wadding rectangles on top of one Lining panel on the wrong side (WS), if your fabric has one. Place a main fabric Outer on top of the wadding, right side (RS) up. Line up all raw edges.
Step 2
Using a 3mm stitch length and sewing in one direction, quilt straight lines at 45 degrees from the bottom raw edge every ¾in (2cm). Quilt 45-degree straight lines going in the other direction, creating a ¾in (2cm) grid-on-point.

Step 3
Repeat steps one and two with the second set of Wadding rectangles.
Step 4
Trim both panels to 16.5×12.5in (42x32cm).

Inserting the zip
Step 1
Making sure the zip teeth/pull are facing down, align the zip along one of the 16.5in raw edges on the RS of the exterior.
Step 2
Align the raw edges of one of the remaining Lining rectangles with the zip. Clip or pin in place.
Step 3
Sew along the raw edge with the zip. Because of the thickness of the wadding, it might not be necessary to change to a zip foot but make this decision based on the weight of your fabric/wadding.
Step 4
Repeat steps one and two with the other side of the zip and the remaining Outer and Lining.
Constructing the pouch
Step 1
With the zip installed and the pouch inside out, press the seam allowances flat with a steam iron.
Step 2
Backstitching at the beginning and end of the seam, stitch the first side edge of the pouch. Unzip the zip halfway. Stitch the second side seam of the pouch, leaving a 4in (10cm) gap in the stitching along the Lining.
Step 3
Stitch along the raw edge of the bottom of both the Lining and the Outer.
Step 4
Not including the side seam allowance, mark a ¾x¾in (2x2cm) square from both bottom corners of the Lining and Outer. At the centre seam with the zip, mark a 1½x¾in (3.8x2cm) rectangle, (this will create a ¾x¾in/2x2cm square from both sides of the seam).
Step 5
Cut out the marked squares/ rectangles.
Step 6
Open and flatten the opening of one cut corner, centring the side seam and the pressed bottom fold. Backstitch and sew across the opening. Repeat this step with the remaining three bottom cut corners.
Step 7
Folding both the Lining and Outer on top of one another, follow steps one to four with the top cut corners.
Step 8
Using the gap in the Lining side seam, pull the Outer and Lining RS out.
Step 9
Edge stitch along the turning gap in the Lining to close.
Step 10
Insert the Lining into the Outer. Press well and enjoy!
You’ve finished! We hope you enjoyed making this lovely laptop bag pattern.

Laptop bag complete!
A handmade laptop sleeve is such a satisfying make, and it’s a lovely way to keep your tech safe in a fabric you love. Once you’ve stitched one, you can easily adapt the pattern for gifts, travel, or any device that needs a snug little home.
How to make a messenger bag
Looking for more bags to make? Make a messenger bag pattern with our simple guide.