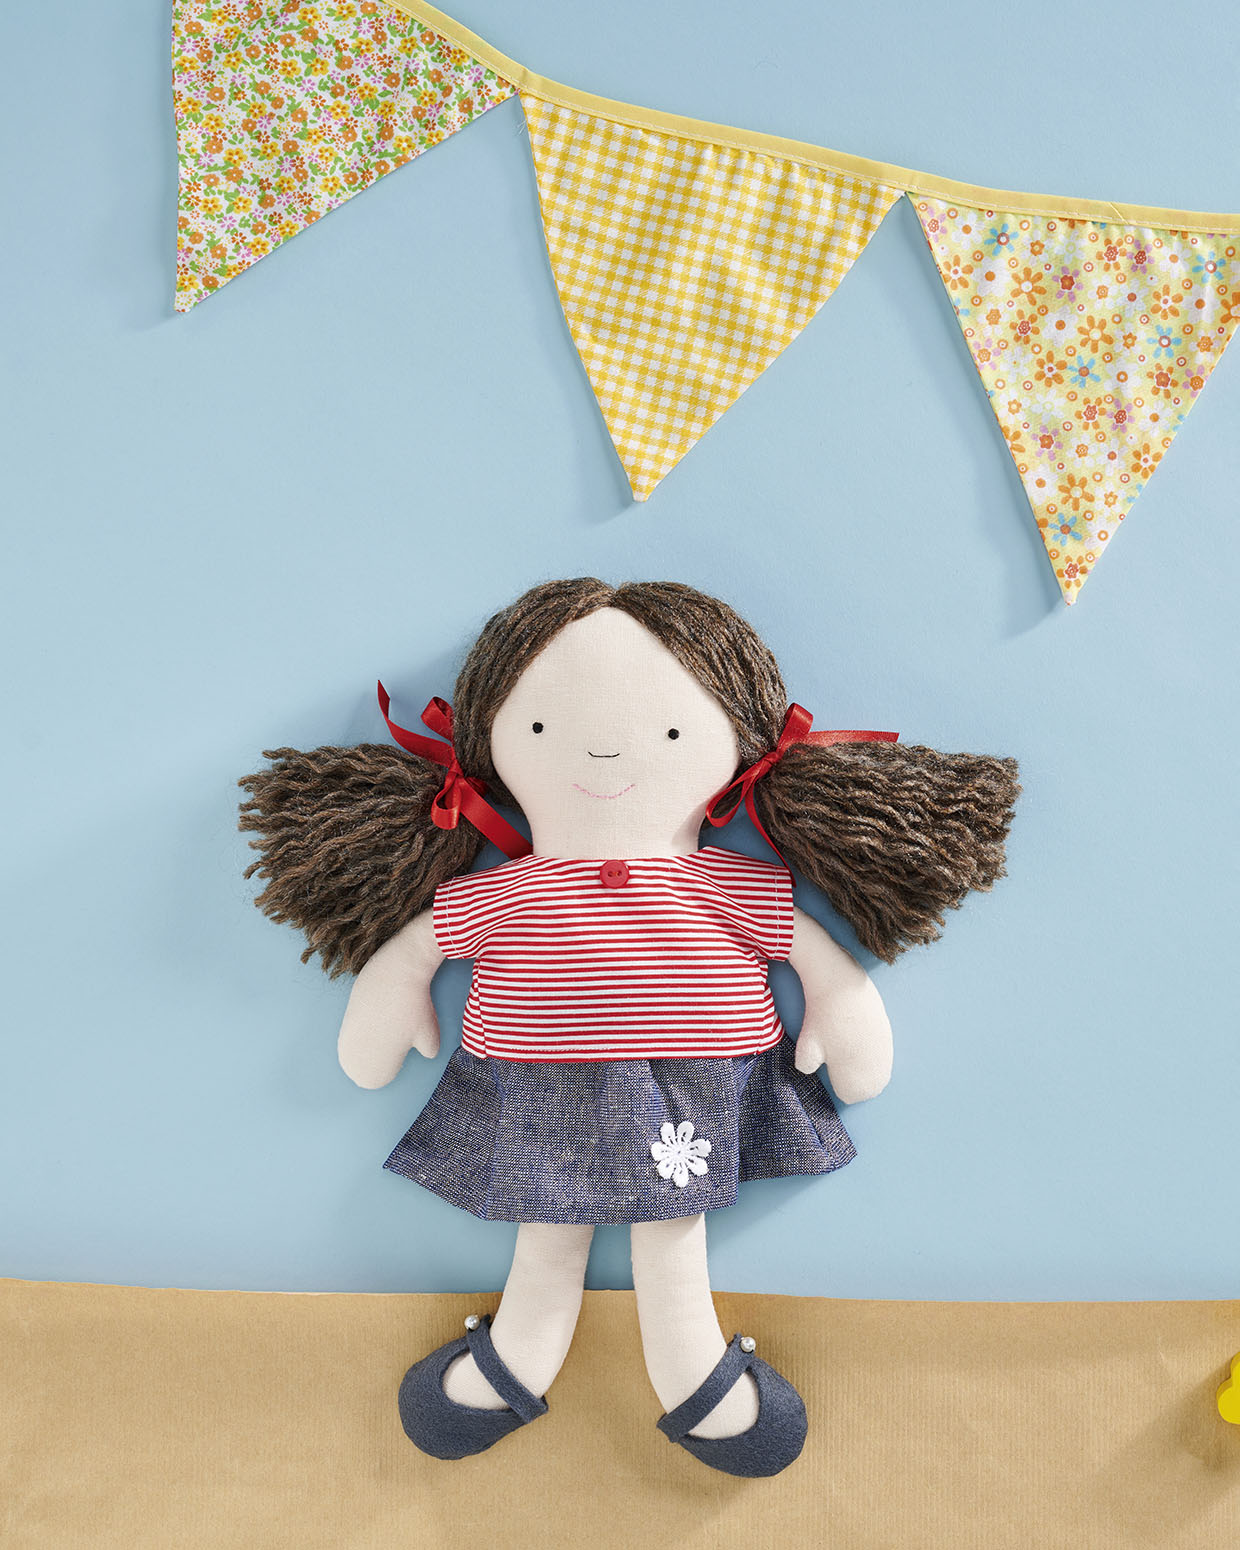
Cutting out
Step 1
Download and print the rag doll pattern templates.
Step 2
From the linen fabric, cut:
- Body: one pair
- Arm: two pairs
- Leg: two pairs
Step 3
From the blue fabric, cut:
Step 4
From the stripe fabric, cut:
- Top Front: one
- Top Back: one pair
Step 5
From the felt fabric, cut:
- Shoe Front: one pair
- Shoe Back: one pair
- Strap: one pair
Making the arms, legs and body
Step 1
Pin a pair of Arm pieces right sides (RS) together and tack. Sew, leaving a turning gap in the side. Trim the seams and cut notches, especially in-between the thumb and rest of the hand, to ease the seam. Turn RS out. Turn the raw edges of the opening under and press flat. Repeat for the second arm. Leave unstuffed.
Step 2
Step two Pin a pair of Leg pieces RS together, tack and sew, leaving a turning gap. Clip notches in the curved seam and turn RS out. Turn the raw edges of the opening under and press flat. Repeat for the second Leg. Leave both legs unstuffed and the openings unsewn.
Step 3
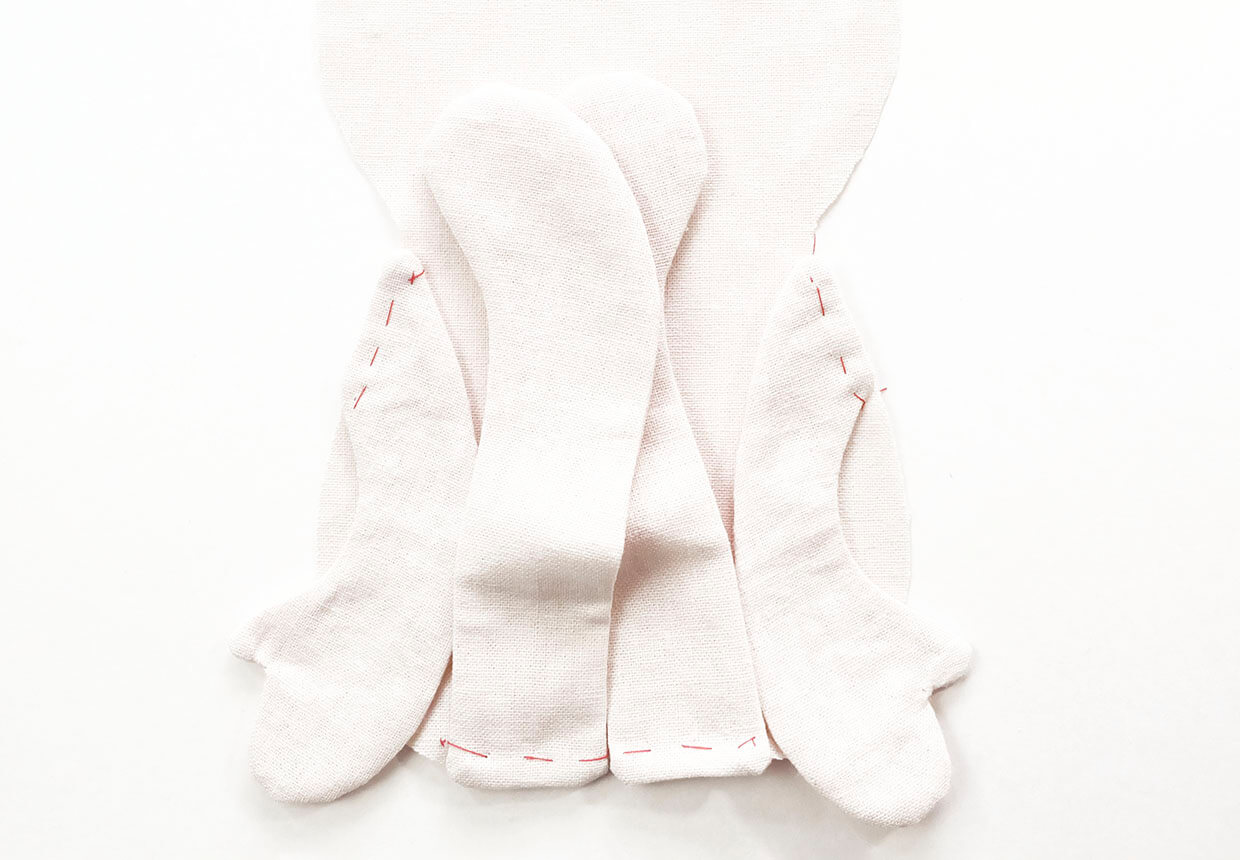
Lay the Arms in position, on the RS of one Body side, facing in. Make sure to have the thumbs oriented the correct way. Pin and tack in place. Lay the Legs in position, one either side of the centre mark, on the RS of one Body piece facing in to the body. Pin and tack.
Step 4
Lay the opposite Body RS down on top, sandwiching the limbs between the layers. Bundle the limbs together to keep them away from the outer seam you are about to sew. Pin and tack all around, then sew, leaving a turning gap at the top of the head. Clip notches, trim the seams and turn RS out. Press with an iron.
Step 5
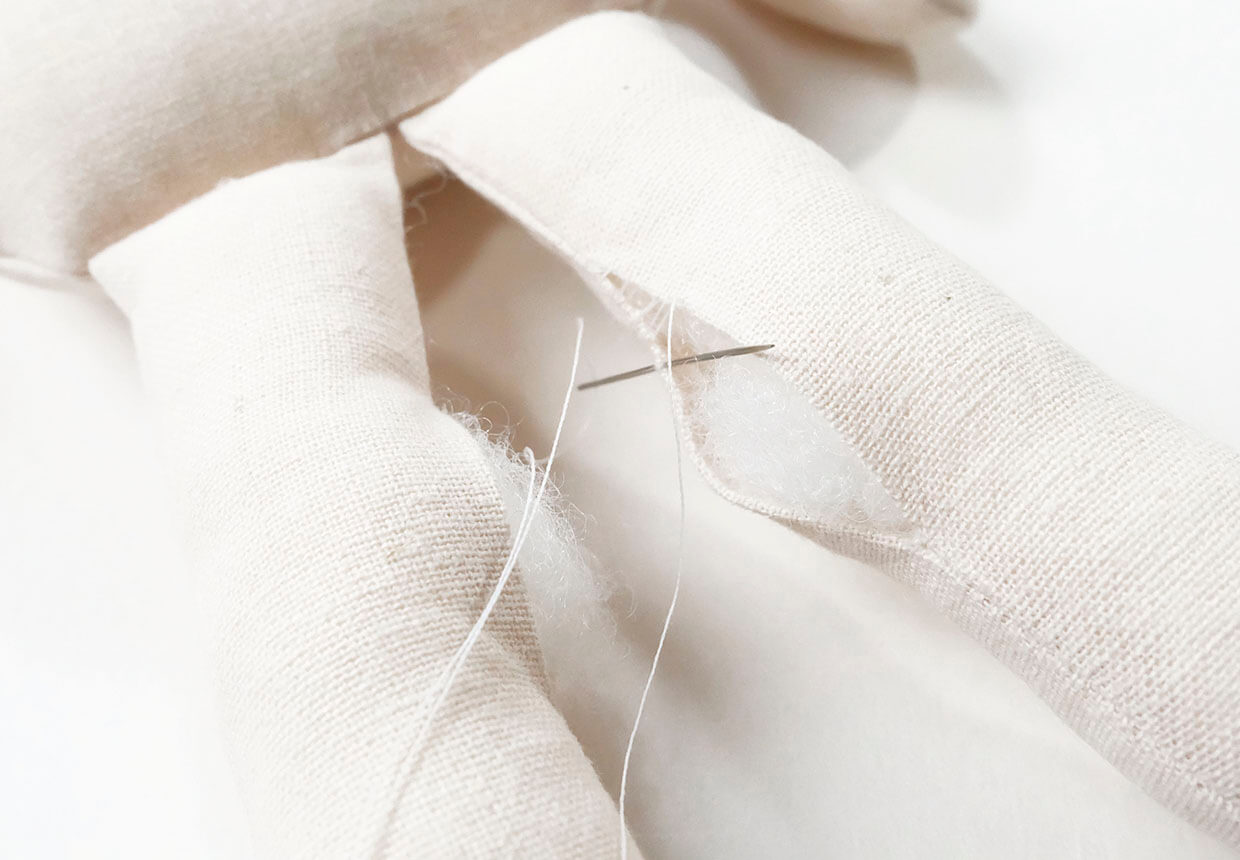
Stuff the legs and arms first. Stuff firmly into the hand and thumb using a stuffing stick. Stuff the rest of the arm, not too firmly as you work your way up to the top, so the arms can flop a little. With the raw edge of the opening turned under, ladder stitch closed. Repeat for the legs; again ladder stitch the openings closed.
Step 6
Stuff the body/head through the top opening. Turn the raw edges of the opening in the head under and ladder stitch closed.
Making the hair
Step 1
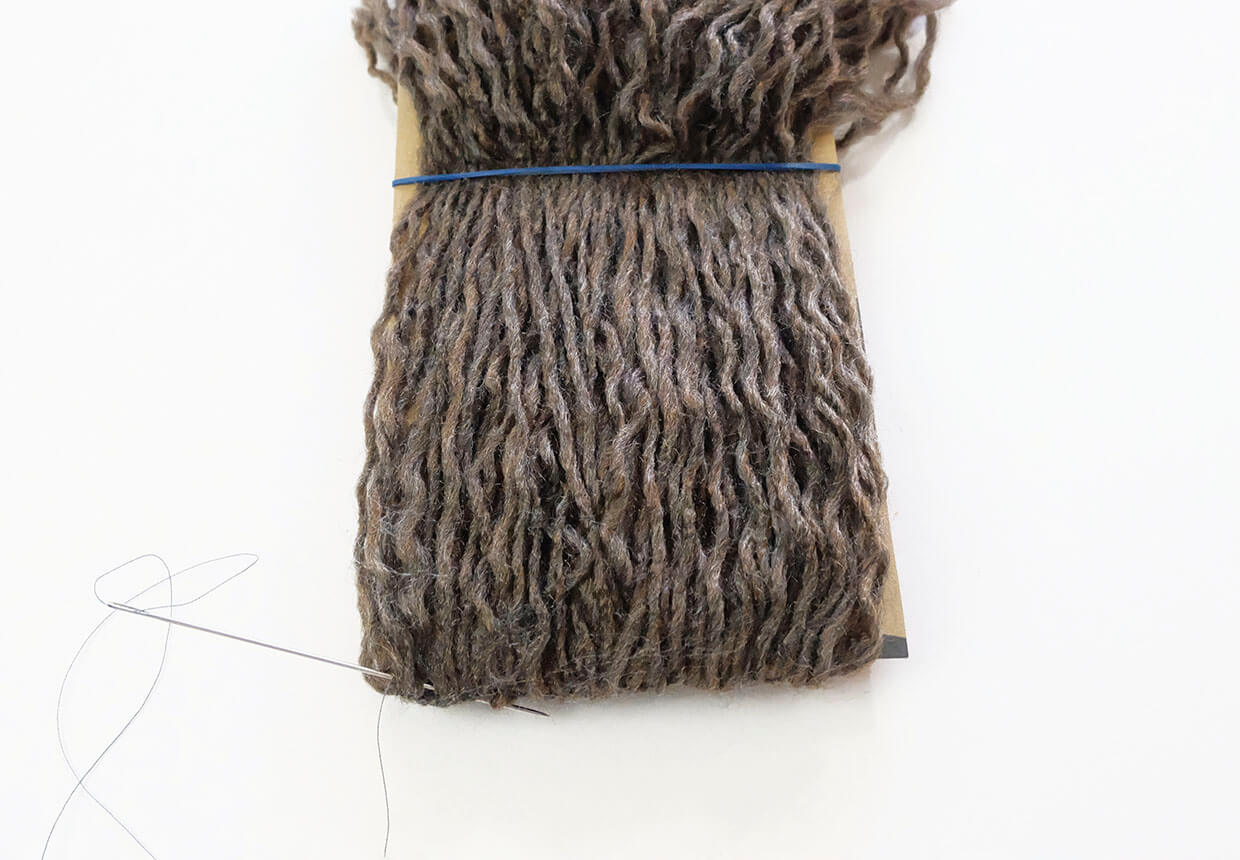
Cut 32x38cm (13x15in) long pieces of wool. Separate each strand into four smaller strands. You need around 128 of the smaller strands, depending on the thickness of your wool. Drape the strands over the 12cm (4¾in) edge of the cardboard. Place a rubber band around the card to keep the wool in place.
Step 2
Hand sew a backstitch seam directly across the top edge of the card, catching the wool strands as you work. Go back along to reinforce the seam.
Step 3
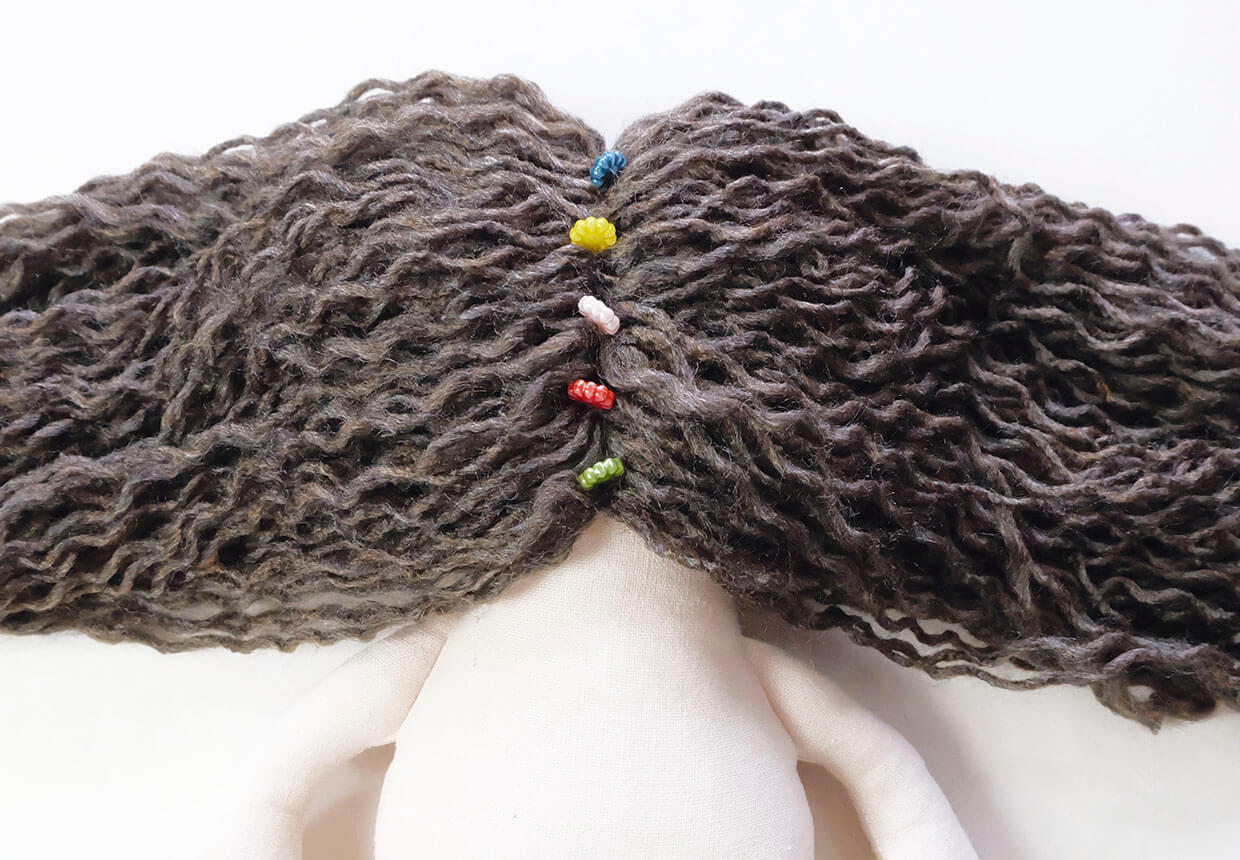
Slip the wool off the card and lay it on the doll’s head, with the front of the hair 1cm (½in) in front of the head seam. Pin in place, continue to pin down the back of the head.
Step 4
Hand sew a backstitch seam down the middle of the hair, attaching it to the head. Repeat a couple of times to make it really secure.
Step 5
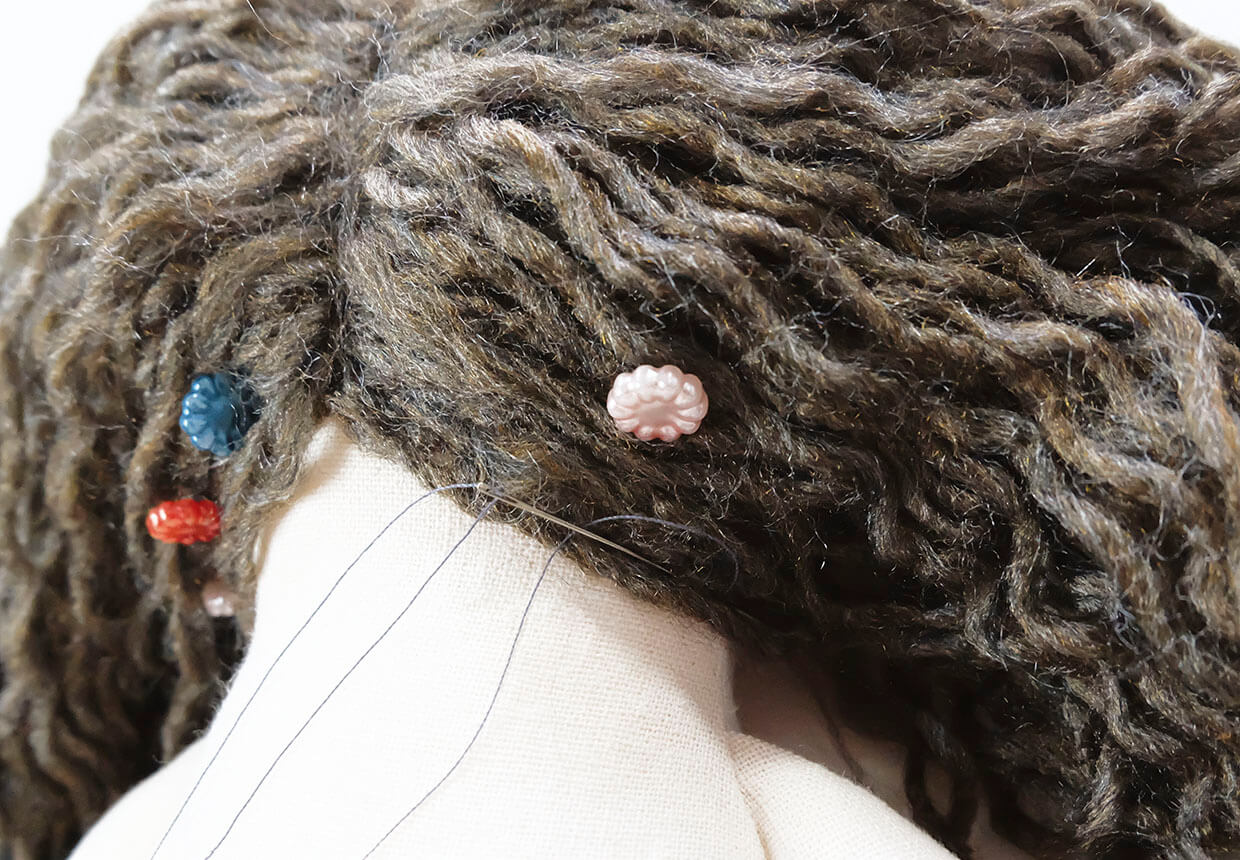
Pin along the hairline at the back and add some stitches to keep the parting and hairline in place.
Step 6
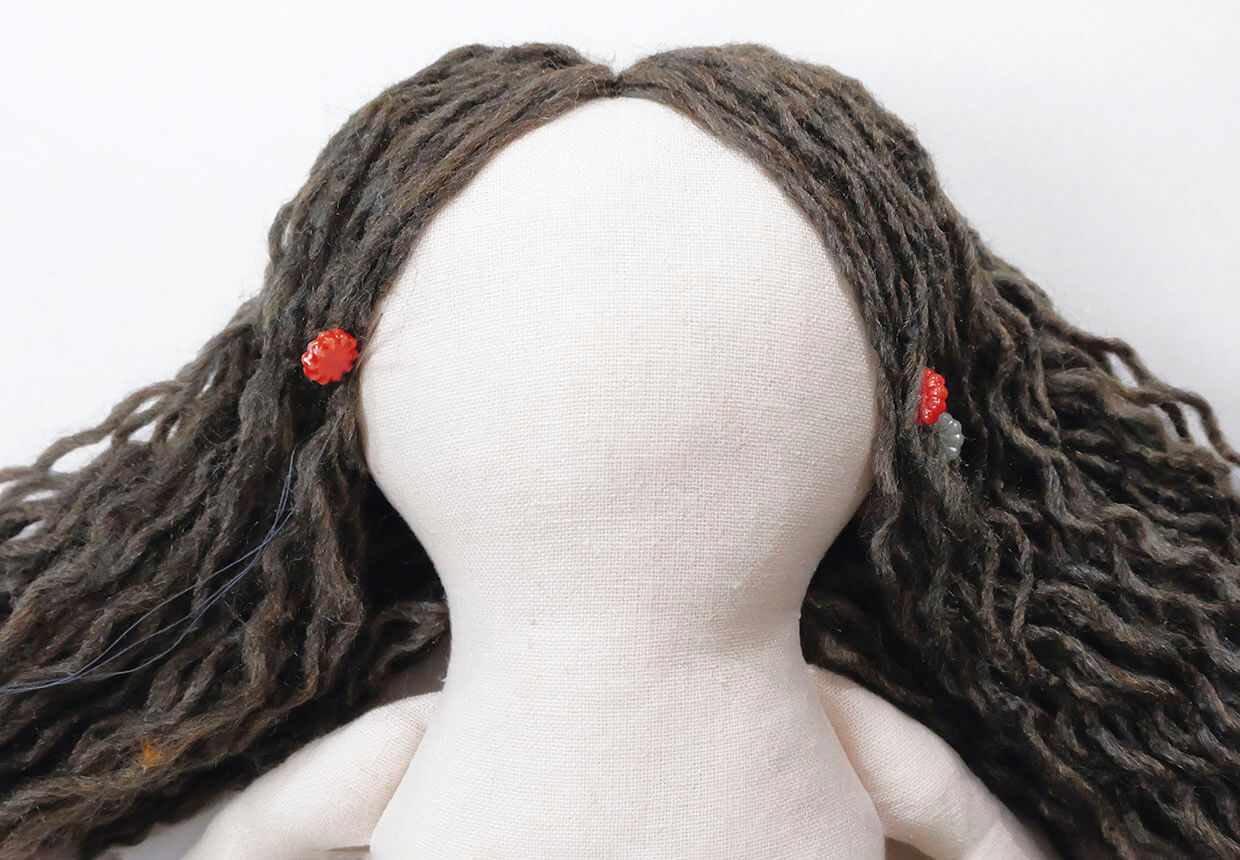
Repeat at the front of the hair, with a couple of pins positioned around ear level. Add some stitches to hold.
Step 7
Trim the hair to the length you would like, then tie into two bunches using red ribbon.
Making the face
Step 1
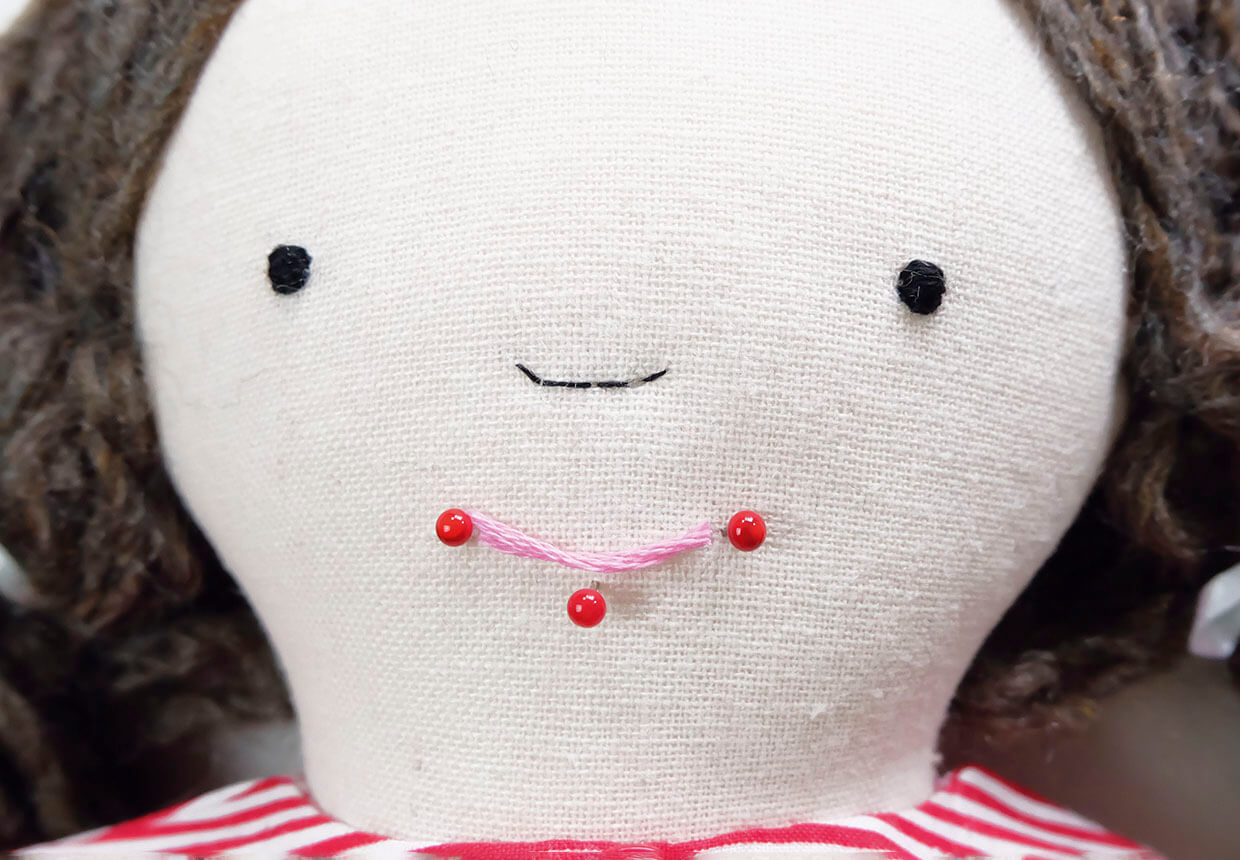
Mark the position of the eyes, mouth and nose using pins. Use four strands of the black stranded cotton to satin stitch small eyes. Fasten off by threading the needle away from the face area towards the hair, burying the thread in the hair before snipping it off.
Step 2
Form the nose with four or five backstitches using one strand of black stranded cotton. Use two strands of pink stranded cotton to backstitch the mouth. Fasten off as before.
Making the skirt
Step 1
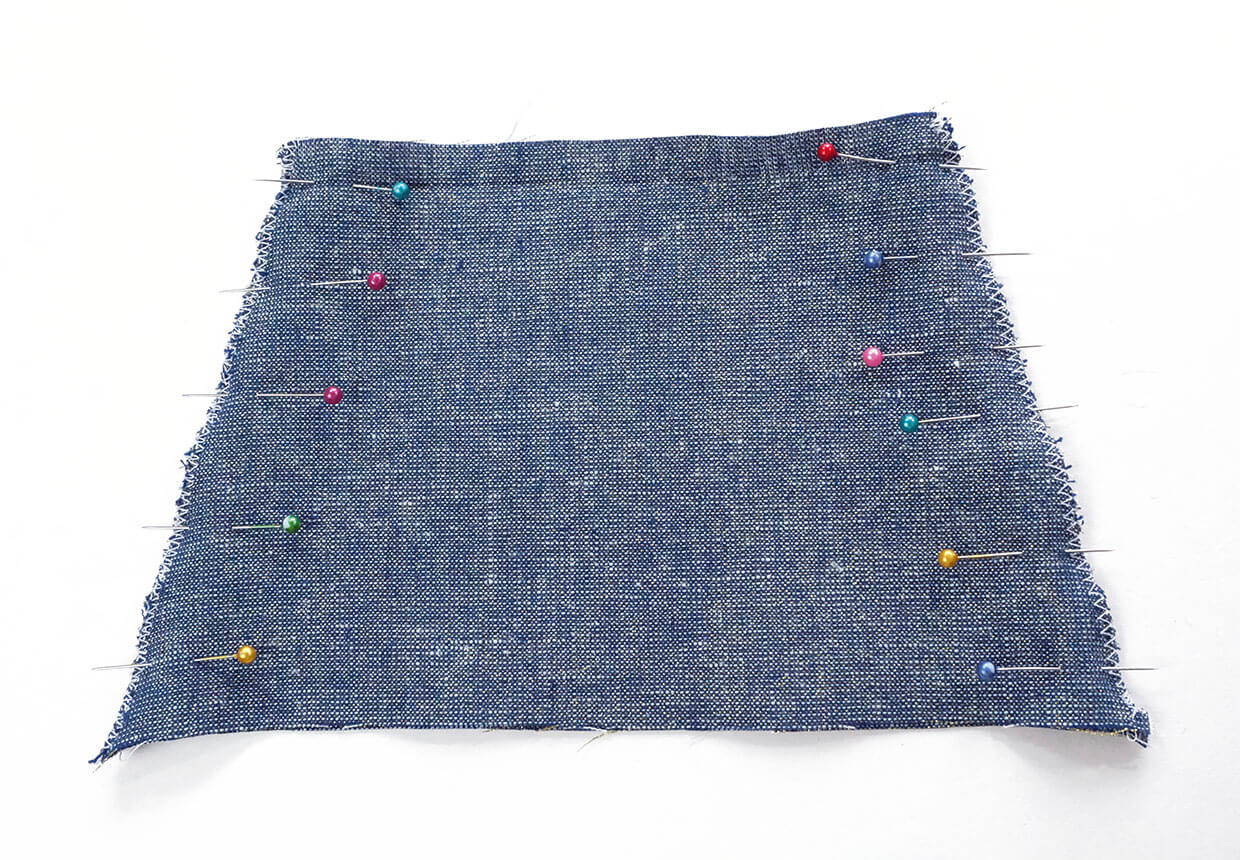
Zigzag stitch the edges of both sides of the Skirt pieces. Then pin the pieces RS together, and sew a 5mm (¼in) seam down the sides.
Step 2
Press a 5mm (¼in) hem to the wrong side (WS) around the top edge of the skirt, then turn over another 1cm (½in). Press flat. Pin and sew along the bottom of this hem, leaving a 3.5cm (13⁄8in) gap at the back. Then sew a second seam along the very top edge of the hem, all the way around without leaving a gap.
Step 3
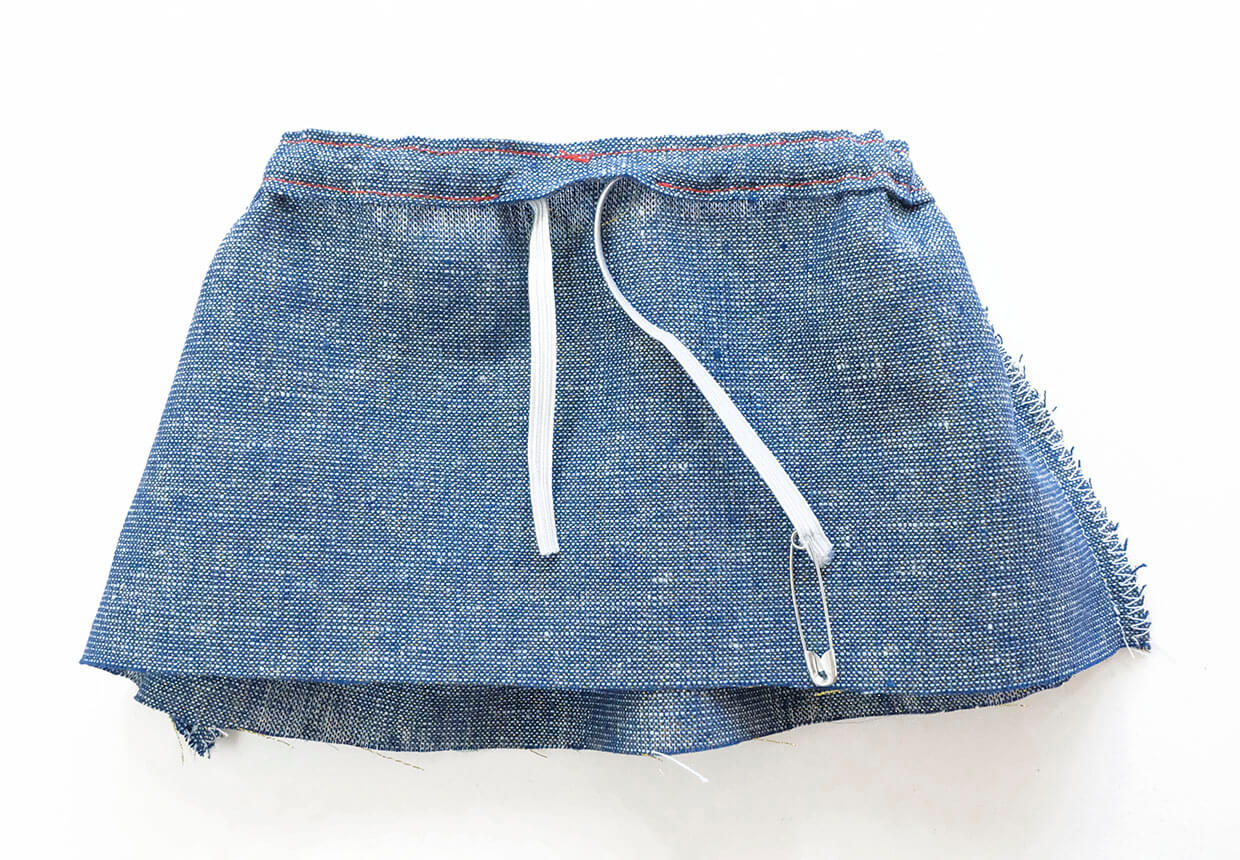
Attach the elastic to the safety pin and thread it through the casing.
Step 4
Pull the elastic to gather as you go. Once threaded, put the skirt on the doll and adjust. When happy with the fit, tie a knot in the elastic and trim the ends. Remove and sew up the remainder of the seam to encase the elastic.
Step 5
Turn a 5mm (¼in) double hem at the skirt bottom and hem stitch by hand. Press. Add a flower from a trim to the bottom of the skirt.
Making the top
Step 1
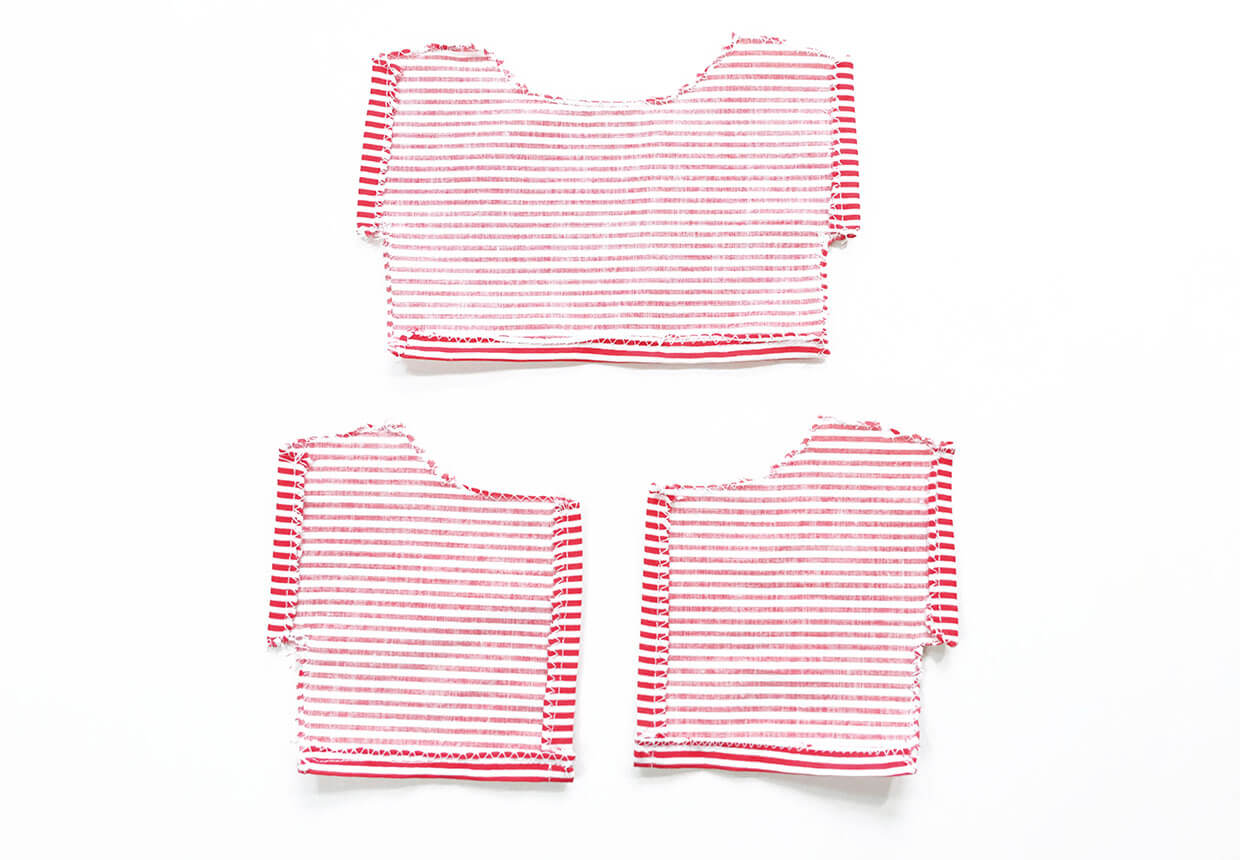
Zigzag, using a short stitch length, around all of the raw edges of the Top Front and the two Top Back pieces.
Step 2
On the four outer sleeve edges of both the Top Front and Top Back, turn the raw edges under to the WS and sew a single hem. Down the inside edge of each Top Back piece turn a single hem to the WS and sew. Fold and sew a hem along the bottom three edges of all pieces.
Step 3
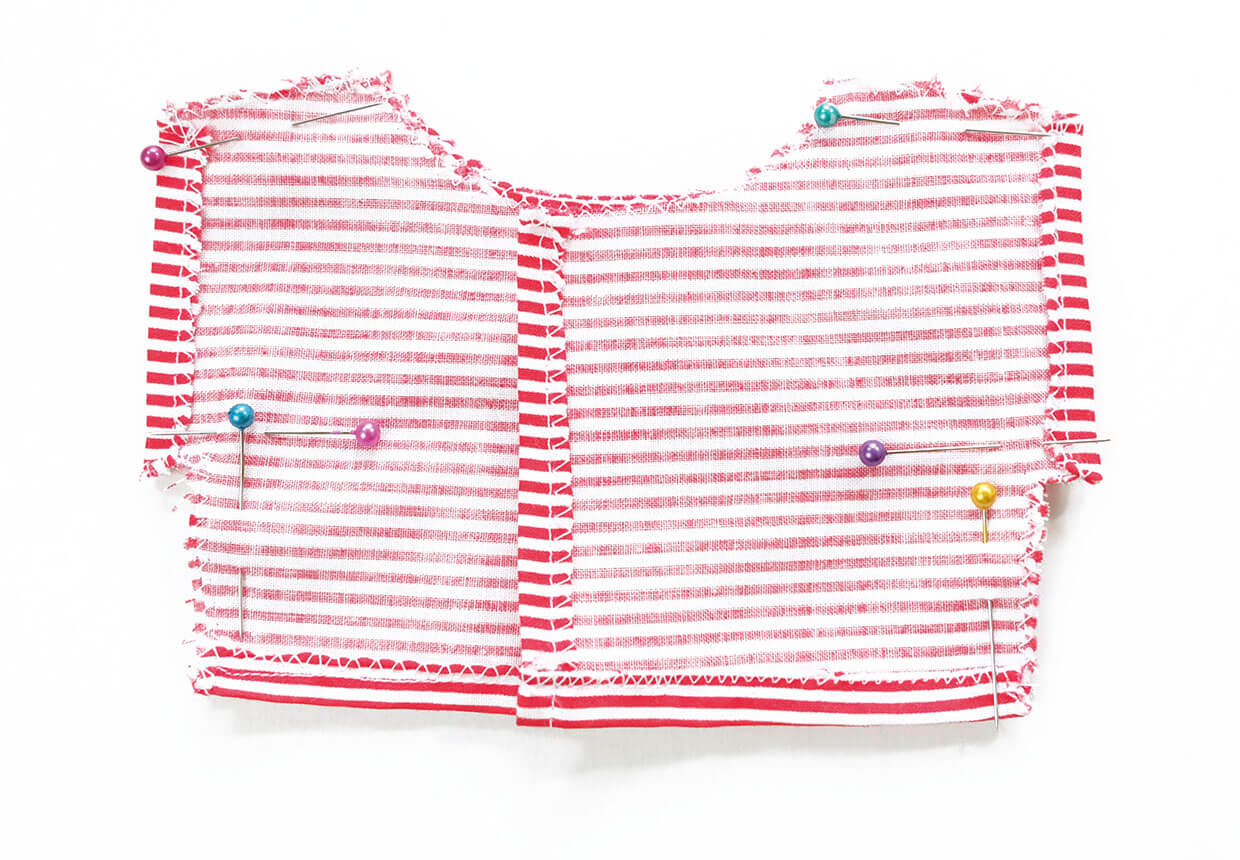
Pin and sew the Top Front to the Top Backs, RS facing. Sew from points A to B on the shoulder and from Point C to D on both sides. Clip notches at the underarms to ease.
Step 4
Roll over the fabric at the neck edge and hem stitch by hand. Put the top on the doll and, using a pencil, mark the press studs positions on either side of the top back. Remove, and then sew the press stud halves in place. Add a red button to the centre of the top at the neck.
Making the shoes
Step 1
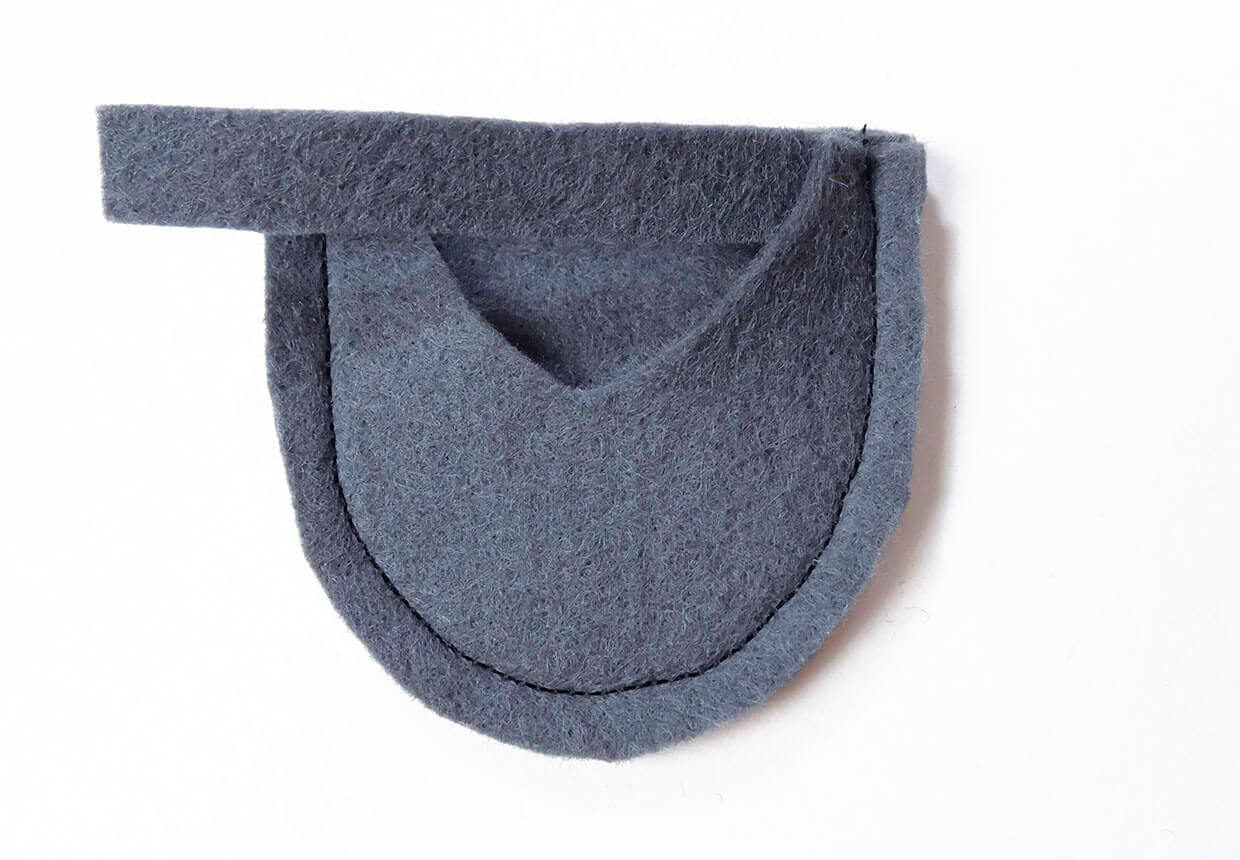
Lay the Shoe Front on top of the Shoe Back, and sandwich the Strap in between them on one side at the top, leaving the other end of the Strap free on top of the layers. Pin and sew around the shoe edge.
Step 2
Trim the seam. Turn RS out. Fit the shoe on the foot, pin the strap to fit. Mark the position. Remove the shoe, sew the strap in place and add a decorative bead. Repeat for the other shoe.


