So you're sewing a project from Simply Sewing magazine? Check this page before you begin - we keep it up to date with all of our latest pattern corrections.
Use the links below to hop to the project you're working on or scroll down to browse each project.
We apologise for any inconvenience caused by this error. If you have any questions, feel free to email us at simplysewing@ourmedia.co.uk
-
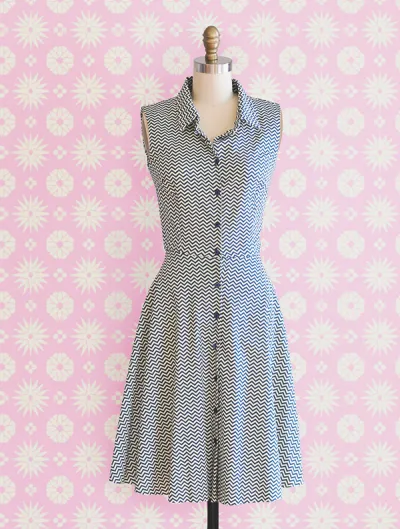
- The Shirt Dress, Issue 5
- The Tulip Skirt, Issue 6
- Cat Cape, issue 9
- The Daisy Dress, issue 15
- The Pencil Skirt, issue 20
- Baby Shoes Pattern, issue 29
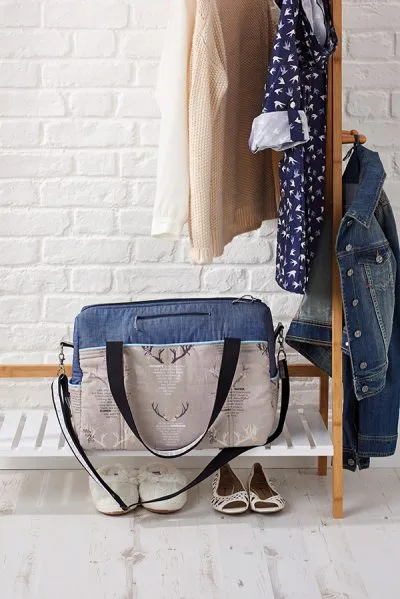
- The Overnight Bag, issue 34
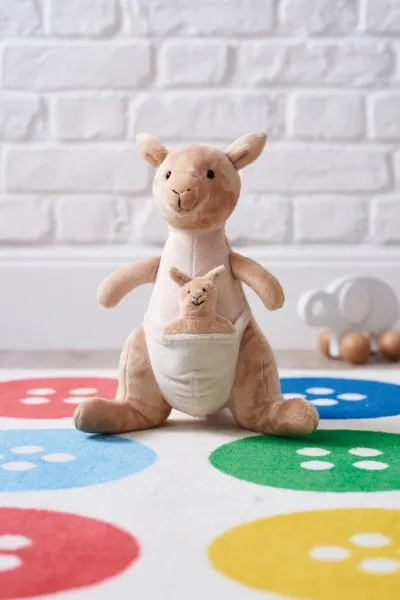
- Kangaroo Toy, Issue 41
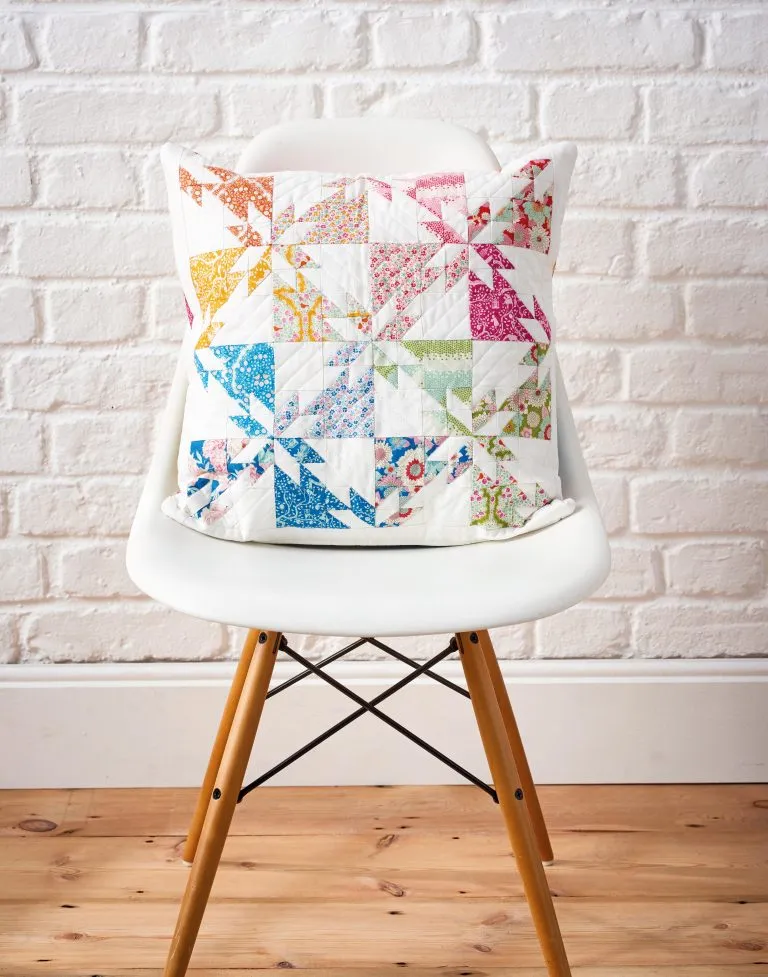
- Hunter's Star Patchwork cushion, issue 42
- The Eden Set, Issue 43
- The Silk Cami, Issue 43
- Cami Top Hack, Issue 46
- The Bowling Bag, Issue 47
- Halloween set bunting, Issue 47
- Hooded bath towel, issue 52
- The Pinafore Dress pattern, issue 61
- The Carmen Hoodie, issue 63
- The Vivian Dress, issue 68
- The Maxi Dress, issue 70
- The Maxi Dress, issue 70 (midi version)
- Tara Tea Dress, issue 93
- Patsy Overalls, issue 94
- Amena Set, issue 96
- The Amena Set, issue 96
- The Kiko Jacket, issue 103
- The Marie Dress, issue 104
- The Penny Dress, issue 105
- The Joni Jumpsuit, issue 110
- The Vita Blouse, issue 112
- The Milan Dress, issue 121
Sew Over It Tulip Skirt, issue 5
We are sorry we have printed an error in issue 5 of Simply Sewing for Sewalong with Lisa. Some information was missing on the size chart. Download the corrected chart here:
Simply Sewing Patterns issue 06 Tulip skirt sewing pattern
This error was made in sending the magazine to print (digital edition is correct) and was not in any way connected to Lisa Comfort.

The Shirt Dress, issue 8
Whoops! We missed a pattern piece for the shirt dress project on the pattern sheet included with Simply Sewing magazine, issue 8. To make this garment you'll need an additional piece of the pattern: Simply Sewing issue 8 The Shirt Dress Button Extension
- The full pattern sheet and template pages for issue 8 can be downloaded here.
- You will also need to cut 2 of the collar and band pattern pieces on the fold, rather than 1 as stated on the pattern.
The Cat Cape, issue 9
In Simply Sewing magazine issue 9, there was an omission with the scale used for the hood of the cat cape pattern.
You will need to increase the scale of the template in the magazine by 140%.
For your ease we have also produced a new template, which you can download by clicking here and which can be used at 100%.

The Daisy Dress, issue 15
In the instruction sheet for The Daisy Dress pattern from Simply Sewing issue 15, incorrect steps for attaching the all-in-one neckline and armhole facing were included.
Here is the correct instruction sheet in full to download.

The Pencil Skirt, issue 20
In Simply Sewing magazine issue 20, there was an error in the instructions for the patternless pencil skirt on page 50. On the diagram it states that the measurements should be divided by 2 – however, the measurements should instead be divided by 4 so that the pattern piece can be cut out on the fold.

Baby shoes pattern, issue 29
Oops – it seems that our baby shoes project in issue 29 has tiptoed off the pull-out pattern sheet!
You can download the templates page featuring the baby shoes pattern, plus the template for issue 29’s embroidery hoop project, to print out at home here.

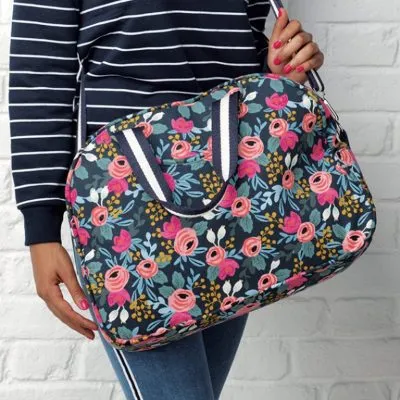
The Overnight Bag, issue 34
Oops – issue 34’s Overnight Bag pattern included an incorrect quantity for the foam interfacing. Sorry, stitchers!
You can download the amended version of The Overnight Bag materials list here
Kangaroo Toy, issue 41
Whoops! You may have spotted that when we shared our sewing pattern for Jo Carter’s Kangaroo softie toy, the Side Body B template was uploaded at the wrong size. We have updated the original templates page so this is at the correct size. You can download the correct template here.
Hunter's Star Patchwork Cushion, issue 42
Oops! We’ve spotted an error in issue 42’s hunter’s star patchwork cushion cutting out instructions.
Follow these amended instructions for cutting out your large block square and small block square pieces (all other instructions in the magazine are correct):
Step one Cut each of the print fabrics into:
- Large block square: two pieces measuring 7x7cm (2¾x2¾in).
6x6cm (23⁄8x23⁄8in). - Small block square: 6x6cm (23⁄8x23⁄8in).
Step two Cut the solid fabric into the following pieces:
- Large block square: two pieces measuring 7x7cm (2¾x2¾in).
6x6cm (23⁄8x23⁄8in).
The Eden Set, issue 43
The cutting layout for the dress version shows the skirt back pattern piece cut as two pieces, but this needs to be cut as one piece on the fold.
We have updated this in the amended cutting layout above.

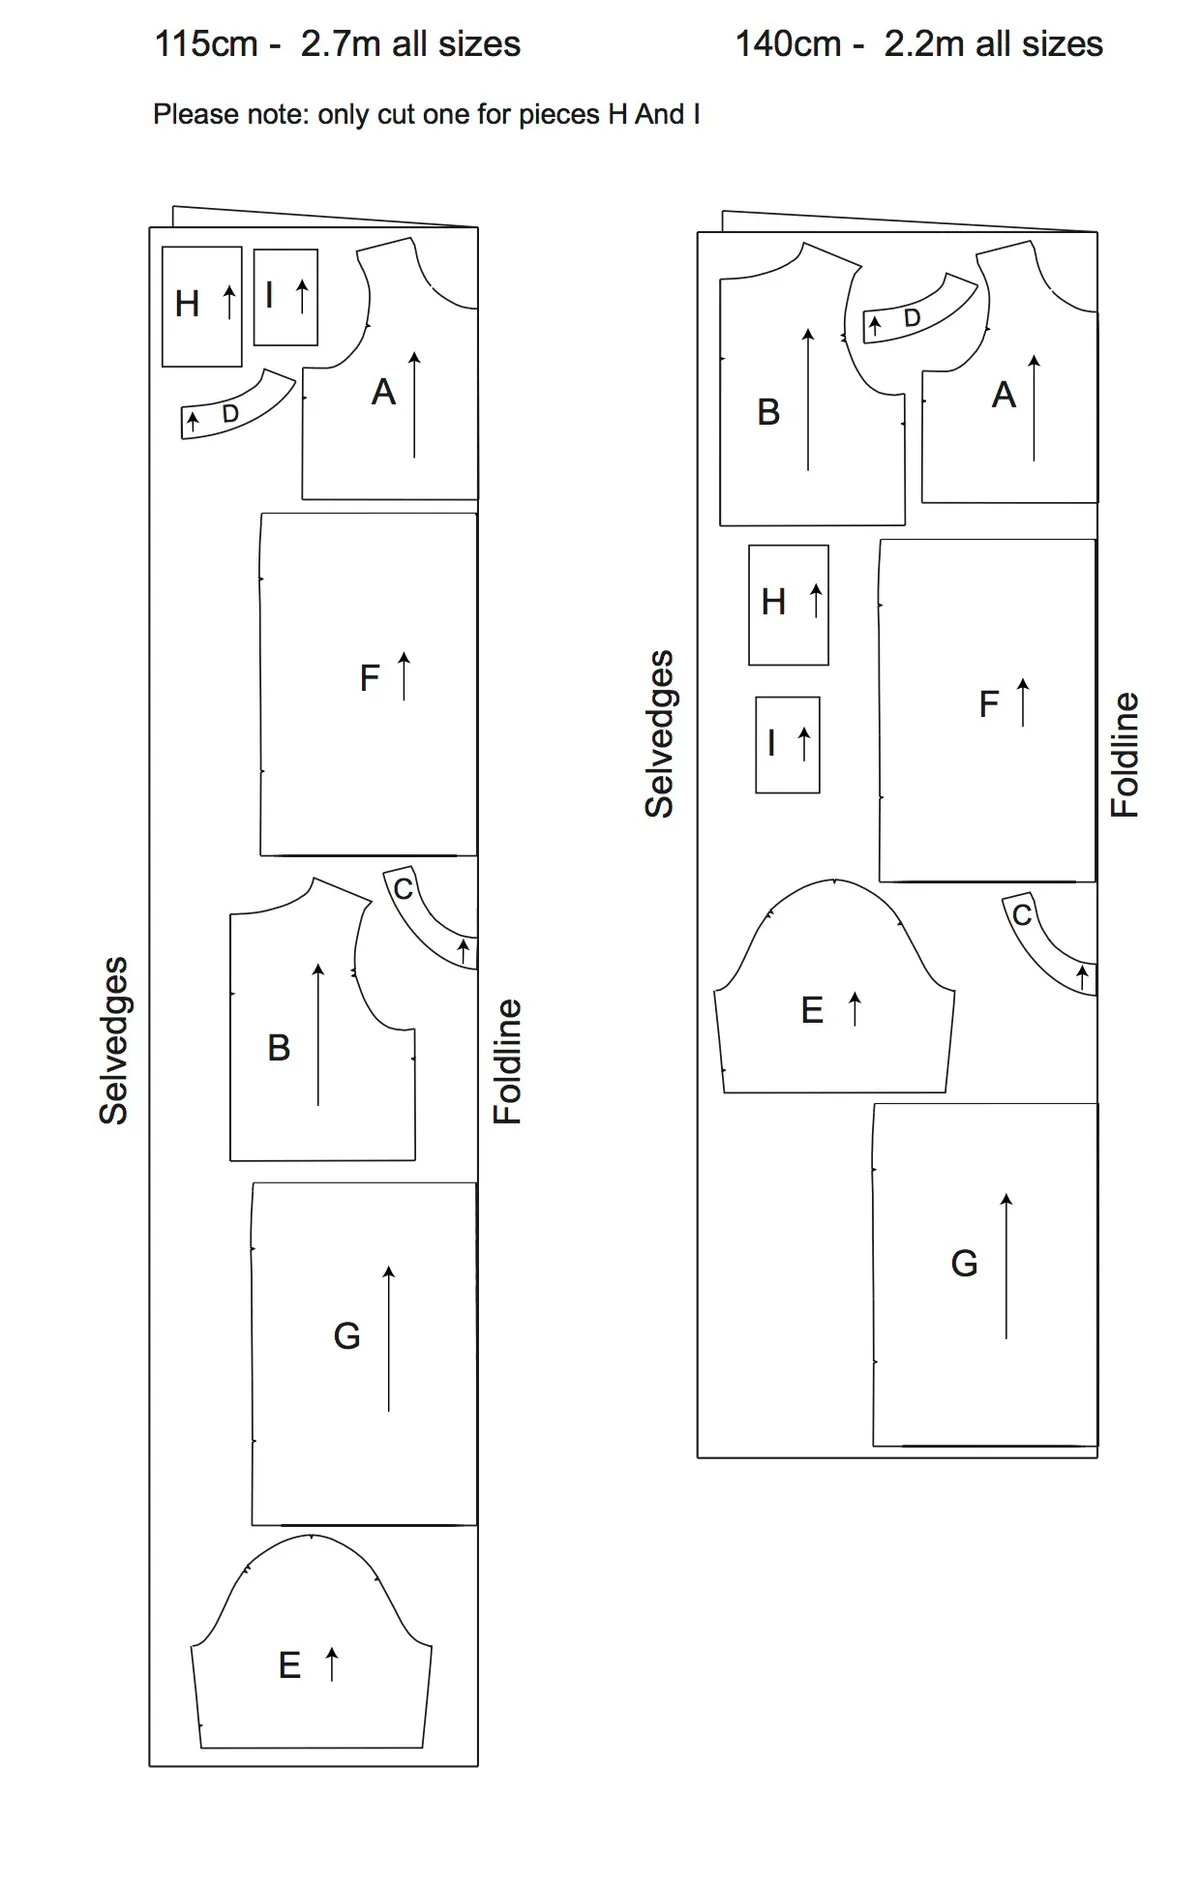
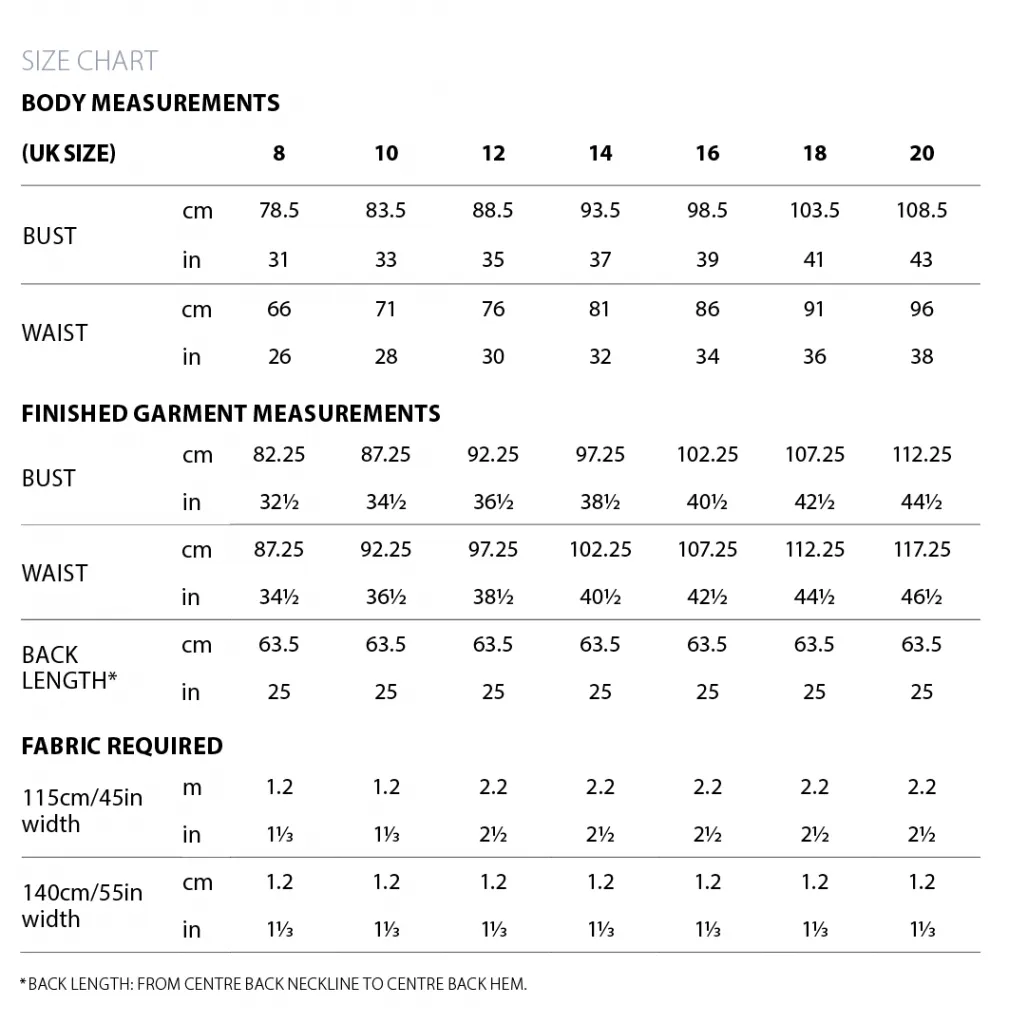
The Silk Cami, issue 43
The pattern envelope for issue 43's The Silk Cami featured an incorrect version of the size chart. The correct size chart is on the instructions pages inside issue 43, and is also shown below.
The Cami Top Hack, issue 46
Whoops! In Simply Sewing magazine issue 46, there was an error in the Cami top hack on page 44.
There is a sentence missing from the instructions advising you to extend the facing. This means that the facings will be slightly too short to reach the front bodice edge.
Once you have followed the instructions for 'Preparing the pattern' use your new left and right bodice pieces to trace facing pieces (use the Sew Over It Cami pattern facings as a guide for the lower edge shape if necessary).
In the Sewing the top section, we mention that the facing will stop short of the centre front (CF) edges. Our facing pieces were cut without the seam allowance at the CF edge allowing the edge to be neatly encased without adding unnecessary bulk.
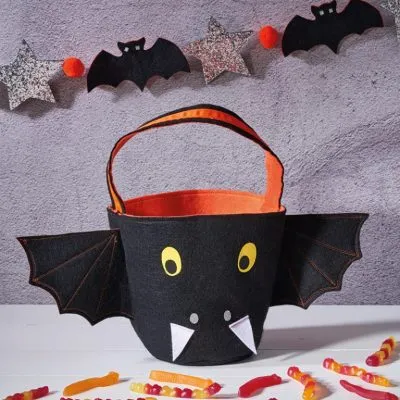
Halloween set bunting, issue 47
Whoops! In Simply Sewing magazine issue 47, there was an error in the Halloween Set bunting instructions on page 76. The centimetre measurements are correct, but there some errors in the imperial conversions. For clarity we have rewritten the You will need and Step 2 of the Bunting: Cutting Out section below.
You will need
For the bunting:
- Black felt: 40x35cm (16x14in)
- Orange felt: 20x25cm (8x10in)
- Glitter fabric: 35x15cm (14x6in)
- Bondaweb: 80x43cm (32x17in)
- Strong thread or fine ribbon: 3.5m (4yds), for hanging
- Yarn, for the pom poms
- Pom pom maker
- Matching thread
- Basic sewing kit
Bunting – Cutting out, Step two:
Cut this black felt piece into two pieces measuring 20×25 (8x10in) for the bats and 35x15cm (14x6in) for the stars. Now carefully peel off the paper backing.
The Bowling Bag, issue 47
Whoops! In Simply Sewing magazine issue 47, there was an error in the bowling bag instructions on pages 52-54.
Cutting out: step one
This should say 'Cut out the templates'. There is no need to print any templates as they are included in the pattern envelope.
Making the top panel: step one
This should read 'Draw a 61x1.5cm (24x5⁄8in) rectangle in the centre of the WS of the top panel lining.' This is an error in the cm/inches conversions.
Making the outer bag: step one
Take one of the bag outer pieces and place an assembled outer pocket piece on top with the lining side of the outer pocket facing the right side (RS) of the bag outer. Then pin a body piping piece all around the edge of the two pieces with RS together. You will be pinning three layers together so work carefully to avoid missing any of the layers. As you pin the piping to the top edge fold the handbag handles down out of the way. At the bottom edge, cross the piping ends over each other with the ends pointing downwards.
Making the outer bag: step two
The first sentence of step two should read: Begin stitching the piping to the outer piece and outer pocket at the cross-over point.
Hooded bath towel, issue 52
Oops, we noticed that the hooded towel in issue 52 had a missing pattern piece. Follow the instructions below to create the hood pattern.
Making the hood template
Step one: Draw a rectangle measuring 22x32cm (9x13in).
Step two: Along the short edge make a mark 13cm (5in) in from the left-hand edge.
Step three: Along the right-hand side long edge measure 19cm (13in) up from the bottom and make a mark.
Step four: Join the marks with a smooth curve to create your pattern piece
Step five: Cut two on the fold from the hand towel
*Measurements can be adjusted based on the size of your child, we recommend drawing out your template and checking this against the size of their head.

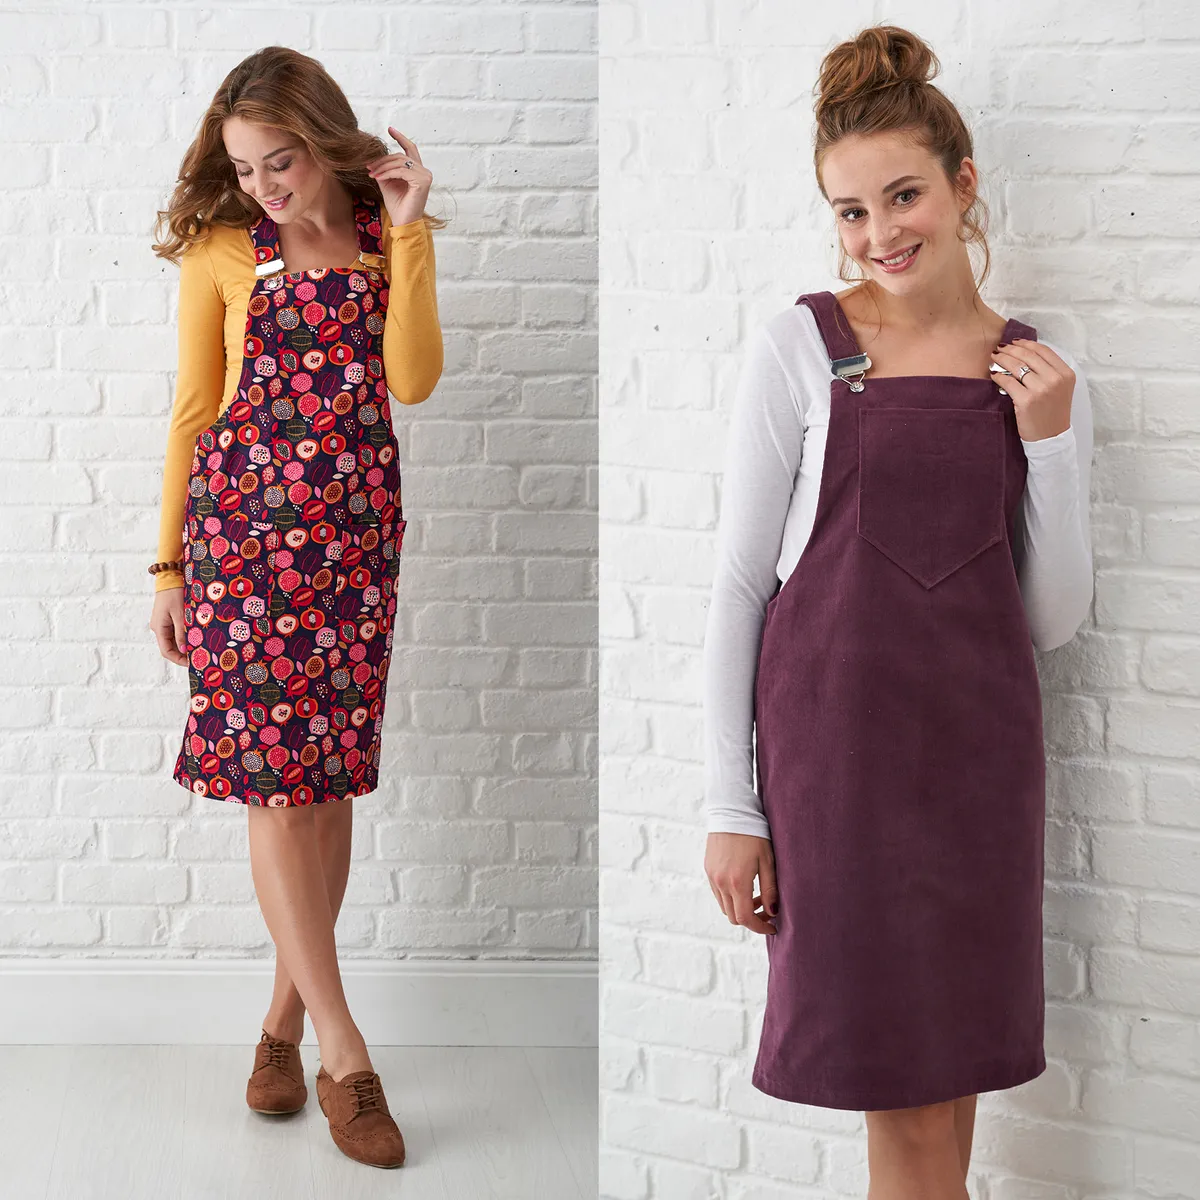
The Pinafore Dress, issue 61
In Simply Sewing magazine issue 61, there was an error in the sizing on the pattern envelope for The Pinafore Dress – the pattern incorrectly stated that it included sizes UK 6-24, but the correct sizing for the pattern is UK 6-20.
We have therefore created a PDF download for The Pinafore Dress in UK sizes 22 and 24, available to download here:
- The Pinafore Dress sizes 22 and 24 pattern sheet 1: pattern pieces A & B
- The Pinafore Dress sizes 22 and 24 pattern sheet 2: pattern pieces C, J & H
- The Pinafore Dress sizes 22 and 24 pattern sheet 3: pattern pieces I, G & F
The Carmen Hoodie, issue 63
5 – Making the pocket bag
- Lay the Pocket Bag wrong side up on top of the wrong side of the Lower front piece matching up the centre front edges

- Pin and then sew the lower un-notched edge.

- Grade the seam allowance once stitched
- Press the seam open.

- Fold the pocket Bag section up onto the lower front so that the right side of both pieces now face up, and the seam is hidden inside.
- Match the finished edges of the pocket mouth with the notches at the side and across the top. Then machine baste the layers together at the side seam and the top edge using the foot width as your guide (aprox 0.7mm)
- Neaten the 2 centre front edges together, From now on this section will be used as one piece, the lower front.

6 - Lower back section
- With right sides together, pin and then sew the un-notched longer edges of the 2 lower back sections together.
- Press the seam open.
- Open out the lower back sections so they face right side up. Place one of the lower front sections over the top, aligning the finished bottom edges of fronts with the back seam-line, and the notches at the side. Pin in place at the side.
- Pin the second lower front onto the opposite side, and then baste the side edges with a .7 mm seam allowance (note: the original pattern states "top and sides" here)
- With the right sides facing, Fold the 2nd lower back piece over the top, sandwiching the 2 lower fronts between the 2 back pieces.
- Pin and then sew the side seams through all the layers with a 1 cm seam allowance. trim and grade the corners to reduce bulk (the original pattern says "top and sides" here)
- Turn through to the right side, and the front sections are now neatly encased inside the side seams
- Press the hem edge. Pin in place and then twin needle stitch from the right side 2 cm from the edge.
- Baste together the 2 layers of the lower back sections together along the un-stitched edge.

The Vivian Dress, issue 68
Oops! We’ve spotted a mistake in issue 68’s The Vivian dress the size chart on the back of the envelope is incorrect and should read:
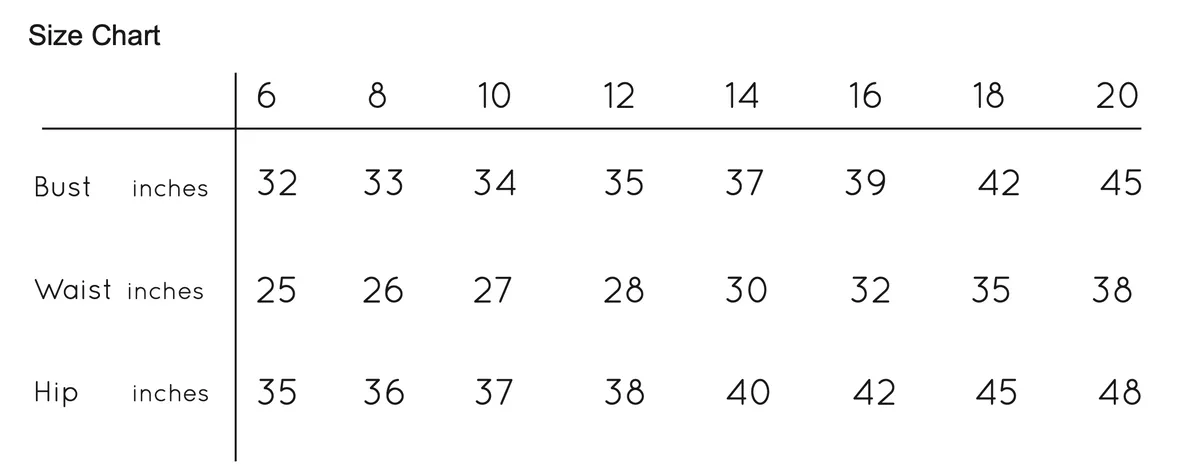
Don’t worry – the Finished Garment Measurements on the instruction sheet are just fine. We apologise for any confusion this has caused!
The Maxi Dress, issue 70
We've noticed that the back and front shoulder seams on the original pattern are marginally different. You'll find the updated pattern sheet on this page. Sorry about that!
Tara Tea Dress, issue 93

Ooops! We’ve spotted an error on our cover pattern in issue 93. Here are the amended fabric requirements for the Tara Tea Dress:
SHORT FRILL LENGTH TARA TEA DRESS
- 2.6x150cm (non-directional print)
- 2.8mx150cm (directional print)
LONG FRILL LENGTH TARA TEA DRESS
- 3mx150cm (non-directional print)
- 3.2mx150cm (directional print)
Patsy Overalls, issue 94

Pattern pieces D, E and H for sizes 4-18 have been printed at the wrong scale. The amended pattern sheets for these pieces can be found here: A4 sheets and A1 sheets. The instructions can be found here.
*Please note: this error was introduced at our printing stage and is not an issue with Readytosew's original pattern.
The Amena Set, issue 96

We've spotted an error in The Amena Set from issue 96. Unfortunately the Front (1/3) and the Back (2/4) have been labelled the wrong way around, therefore label 1 should be 3, 3 should be 1, 2 should be 4, and 4 should be 2. The line that reads 'Cut here for top' should read 'Cut here for dress'. We urge you to make these amends before cutting out your garment. We apologise for any inconvenience caused.
The Kiko Jacket, issue 103
Oops, we've noticed an error in issue 103's Kiko Jacket pattern. The size key is incorrect; it needs to be rotated 180 degrees so the lines align with the correct sizes. Here is the correct size chart. We apologise for any inconvenience caused.

The Marie Dress, issue 104

Unfortunately we have made an error on The Marie Dress pattern. The labelling on pieces F and H (the Waistband and Sleeve Cuff) have been mistakenly switched. The piece that is currently labelled F is actually H, the Waistband, which is why it has the notches which align with the princess seams and side seams – this piece should be 'cut on the fold'. The piece that is currently labelled H is actually F, the Sleeve Cuff, and should be ‘cut one pair’ so that you have one Sleeve Cuff for each Sleeve. We apologise for any inconvenience caused by this error and would be glad to help you finish your dress via email if you need assistance: simplysewing@ourmedia.co.uk
The Penny Dress, issue 105

Oops! It seems that pattern piece D (pockets) weren't included in the pattern sheets! You can download them here. We are sorry for any inconvenienced this caused.
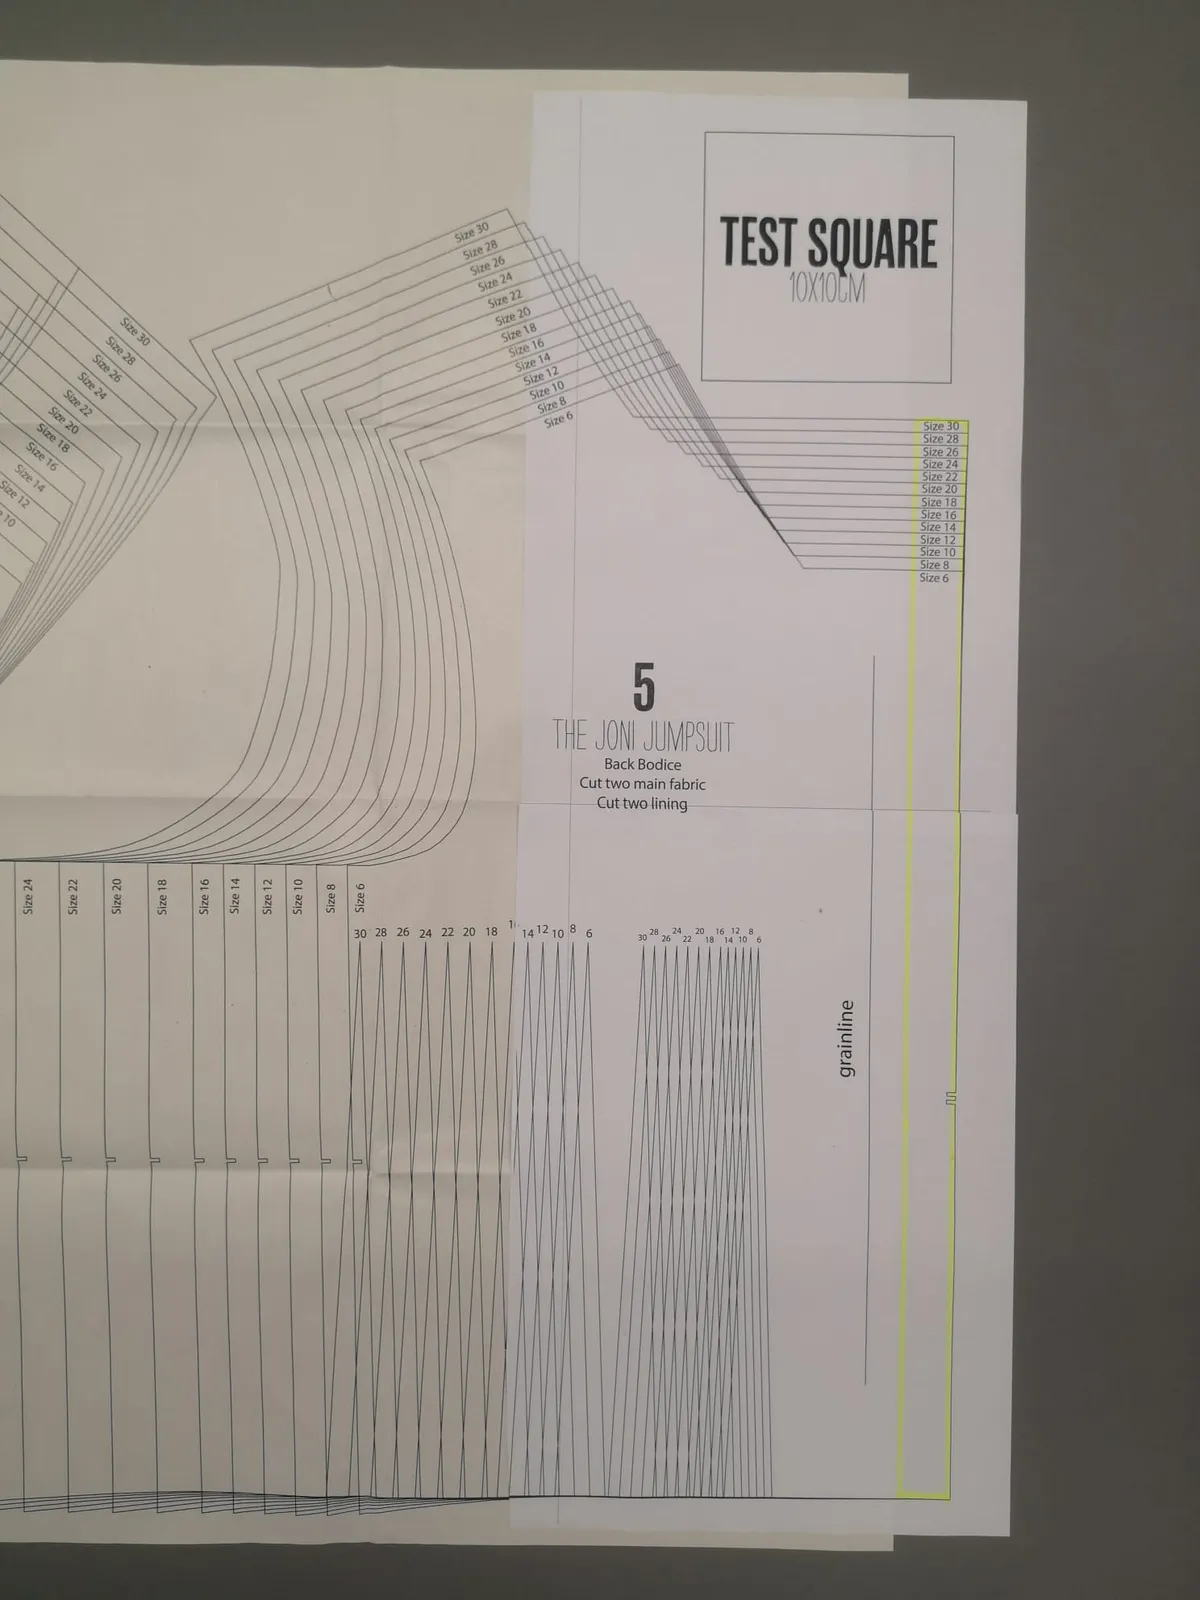
The Joni Jumpsuit from issue 110

Oops, we've spotted a printing error on The Joni Jumpsuit from issue 110. Unfortunately, the Back Bodice (piece 5) has been trimmed off. Download and print these two A4 sheets to complete your Back Bodice.
Alternatively, extend the right-hand edge of your paper by 2cm to cover the section that’s been trimmed off (as shown highlighted on the image below). We apologise for the inconvenience!
Simply Sewing Joni Jumpsuit sewing pattern one
Simply Sewing Joni Jumpsuit sewing pattern two
The Vita Blouse from issue 112
We've noticed that the neckline on the Blouse Front and Back pieces have the sizes transposed. Download and print these three A4 sheets (at 100% scale) and use them in conjunction with the original blouse pattern. We apologise for any inconvenience.
SSM_112_Vita Blouse Front Amend
SSM_112_Vita Blouse Back Amend A
SSM_112_Vita Blouse Back Amend B
The Milan Dress from issue 121

Whoops! Hopefully most sewists will see this (and have a giggle). We mislabelled the Front and Back bodice pieces on the Milan dress. The amended pattern pieces can be downloaded here. Apologies to any early birds who spotted this before us.
SSM_121_ Milan_Dress_Bodice_Amend
The Ultimate Dungarees from issue 125

Ooh buttons! Looks like we missed off the buttonhole placements on our Ultimate Dungaree patternsheet. Many of you may have managed to place yours without them, but if you need guidance, please use the following images to help you.

The Bailey Hoodie from issue 130

We have noticed that there was a small error with the pattern instructions.
The instructions should read:
Lay the Lower Front wrong side down on top of the right side of the Pocket Bag, matching the centre front edges.
This is then turned back up so that the wrong side of the Pocket Bag is against the right side of the Lower Front.