Cricut is a brand of smart cutting machines that are fast becoming a staple for artists, small business owners, and crafters all over the world. They enable anyone to cut intricate details, create vinyl stickers, make cards and personalise items to a professional standard. With different accessories or blades, you can deboss, score, engrave, foil, cut fabric, and even customise t-shirts or tote bags.
In this guide, you'll discover what you can do with your Cricut machine, get inspired by our favourite Cricut project ideas, or dive into one of our step-by-step tutorials!
Jump to a section to get started:
- Which Cricut machine should I buy?
- What can you make with a Cricut machine?
- What are the different types of vinyl for the Cricut Joy™?
- 18 of the best Cricut projects!
- How to personalise a mug, our step-by-step tutorial
- How to label kitchen jars, our step-by-step tutorial
- Where to buy a Cricut machine and accessories

Which Cricut machine should I buy?
If you're thinking about buying a Cricut machine, check out our buyer's guide to find out which is the best Cricut machine for you.
We walk you through the pros and cons of the Cricut Maker 3™, The Cricut Explore 3™, the Cricut Joy™ and the Cricut Joy Xtra™, as well as offering an in-depth guide as to what you can do with each one. We also walk you through the different Cricut accessories that are available for your Cricut machine.
On the subject of Cricut accessories, if you already have, or are thinking about getting a Cricut EasyPress™, why not start with this easy project using Infusible Ink™ pens, how to use a Cricut EasyPress™ to decorate a coaster.
If you have a Cricut machine, don’t forget to share your makes (or machines!) on Facebook or post them on Instagram, we love to see what you've been creating!
What can you make with a Cricut machine?
So, what does a Cricut do? Depending on the machine, you can cut, write and create full-colour stickers using your home inkjet printer. You can even create t-shirt designs, tote bags and drink coasters by using your Cricut machine with Cricut Iron-on Infusible Ink™ and the Cricut EasyPress™ or Cricut EasyPress Mini™.

What is Cricut Design Space™?
Cricut machines work with the free Cricut app, called Cricut Design Space™, which is connected to your machine via Bluetooth, while the Cricut Maker 3™ and Cricut Explore 3™ can also connect via USB. The app tells your machine what to cut or draw, and is designed for PC, Mac and iOS and Android, giving you plenty of options to access it.
The basic software is free, but there is also a paid monthly subscription which you can opt for at £7.49 per month and offers a much more comprehensive library of designs, fonts, and projects, alongside handy features like ‘Make Stickers’, Offset, Warp tool, and many more.
When you sign up for Cricut Design Space™ for the first time, you get one month's subscription for free! You can also purchase images individually if you prefer with prices starting at 79p. There are also more than 1,000 free projects, images, shapes and fonts to choose from.

What are the different types of Cricut vinyl for the Cricut Joy™ machine?
One of the key innovations of the Cricut Joy™ is its compatibility with smart materials, which include an impressive range of Smart Vinyl.
What is Smart Vinyl?
Smart Vinyl is a special type of vinyl that auto-loads into your machine without the need for a cutting mat, virtually eliminating prep time (and is yet another reason why we recommend the Cricut Joy™ as the best Cricut machine for beginners). It's easy to weed and effortless to apply, so you can get on with the really important stuff of creating.
Permanent Vinyl - Smart Vinyl for the Cricut Joy™

Permanent Vinyl is the most popular type of vinyl and is available in a huge selection of colours, including 25 standard colours, 7 shimmer colours, a range of metallics and a gorgeous selection of holographic vinyl, including silver sparkle, pink crystal, gold threads and art deco yellow.
They're all water and UV-resistant, and the permanent adhesive lasts up to three years making this Cricut vinyl ideal for outdoor projects, such as signs, decorating mailboxes or car decals.
Removable Vinyl - Smart Vinyl for the Cricut Joy™

Removable Vinyl, as the name suggests, peels away from surfaces without leaving a residue. It comes in 20 different colours as well as silver and gold.
Cricut removable vinyl is ideal for making stencils, decorating walls, mirrors or even nail art! Or, if you want themed accessories for a special event, removable vinyl is perfect for spicing up existing items, ready to return after the big day.
Writable Vinyl - Smart Label for the Cricut Joy™

Writable Vinyl allows you to create your own peel-and-stick labels, which you can customise using the Cricut Joy™ Pens and Markers. It comes in white, gold, silver, and holographic. It’s perfect for creating your own branded stickers – especially as there are lots of options for different pen colours!
Smart Iron-On for the Cricut Joy™

Smart Iron-on does exactly what the name suggests. Cut your design from Iron-on, then apply heat to transfer your design to a t-shirt, jacket, apron, softie, backpack or tote bag. For an effortless application that will outlast more than 50 washes, apply with the Cricut EasyPress™, or simply use a household iron.
It's available in 20 different colours as standard as well as 14 different glitter colours and 3 different holographic colours! And because it’s one of Cricut’s Smart Materials, there’s no need for a cutting mat.
Transfer Tape - for the Cricut Joy™, Cricut Explore 3™ and Cricut Maker™
Okay - so this one isn't a vinyl, and it doesn't go through your machine. But if you've got intricate designs or lettering (especially where the letters are separate) you are going to want transfer tape. It comes in regular strength for matt and glossy vinyl, and a strong grip for glitter and shimmer vinyl.
Transfer tape keeps your cut-out vinyl designs in place until you transfer them to your project surface. By using transfer tape, your designs will stay in exactly the same position as they appear on the screen. For the Cricut Joy™, it comes in whopping 20ft rolls too. And did you know that you can use transfer tape multiple times? Nice!
Writable paper - Smart Label for the Cricut Joy™

This one isn't a vinyl either, but it's a must-have in your craft stash. Like the writable vinyl, with this smart writable paper, you can create your own peel-and-stick labels, and customise them using Cricut Joy™ Pens and Markers (or by hand!). The paper is a classic kraft brown, rather than a craft vinyl which provides a completely different finish to your projects.
We love this product and it makes organising the home office a piece of cake!
18 Cricut projects to make at home
There are lots of Cricut projects that will get you that instant dopamine craft hit, so we've rounded up some of the best Cricut projects to make with your Cricut Joy™ – or any other Cricut machine you own. Which one is your favourite?
1. Cricut phone case ideas

Craftables shares their super-easy guide to making your own modern and stylish phone cases using Cricut vinyl. You can pick up clear phone cases relatively cheaply, and they make a great project to learn how to use Cricut Design Space™.
2. Make a bespoke wooden tray
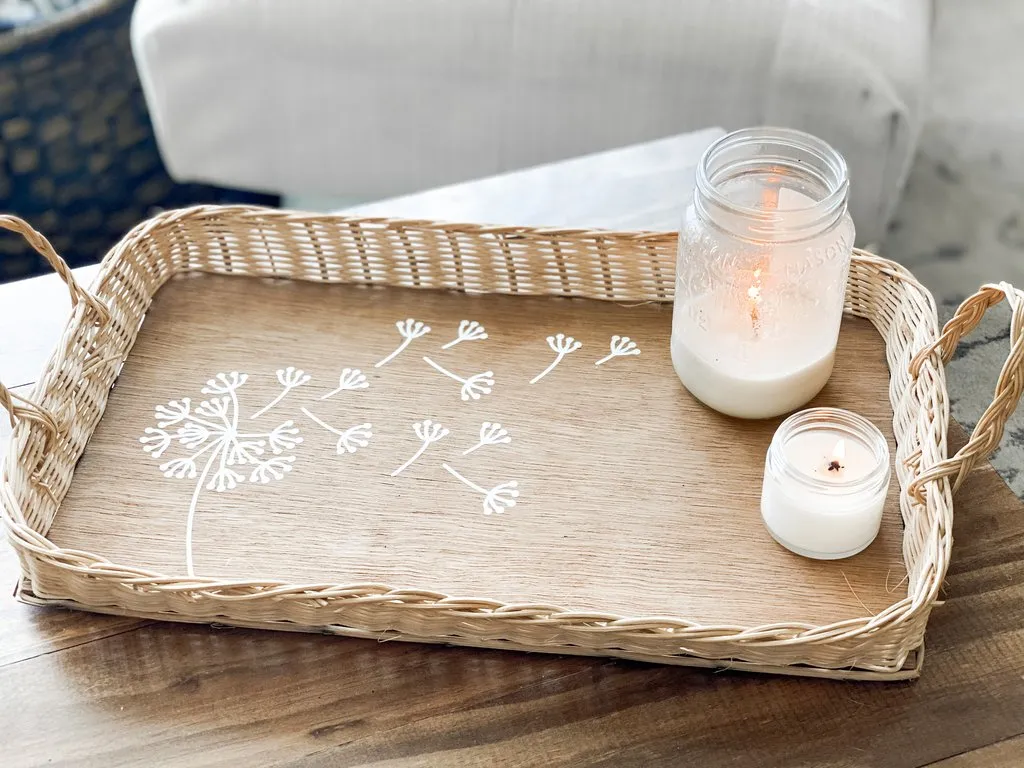
This Cricut project idea has the wow factor. Courteney over at Craft e Corner has upcycled this wicker tray and shows you how to use Cricut vinyl on wood in her fab step-by-step video tutorial. We love this design and the white vinyl on the wood conjures up a real country cottage chic vibe.
3. Create wall art with Cricut
Sarah at Extraordinary Chaos loves finding new uses for her Cricut Joy™. In this project, she shows that the small aperture isn't a barrier to creating big designs, such as a 27" x 17" wall decal. She used removable vinyl for this Cricut project and transferred the individual letters by lining them up along a spirit level held to the wall.
4. Beginner Cricut project – Make a mini canvas
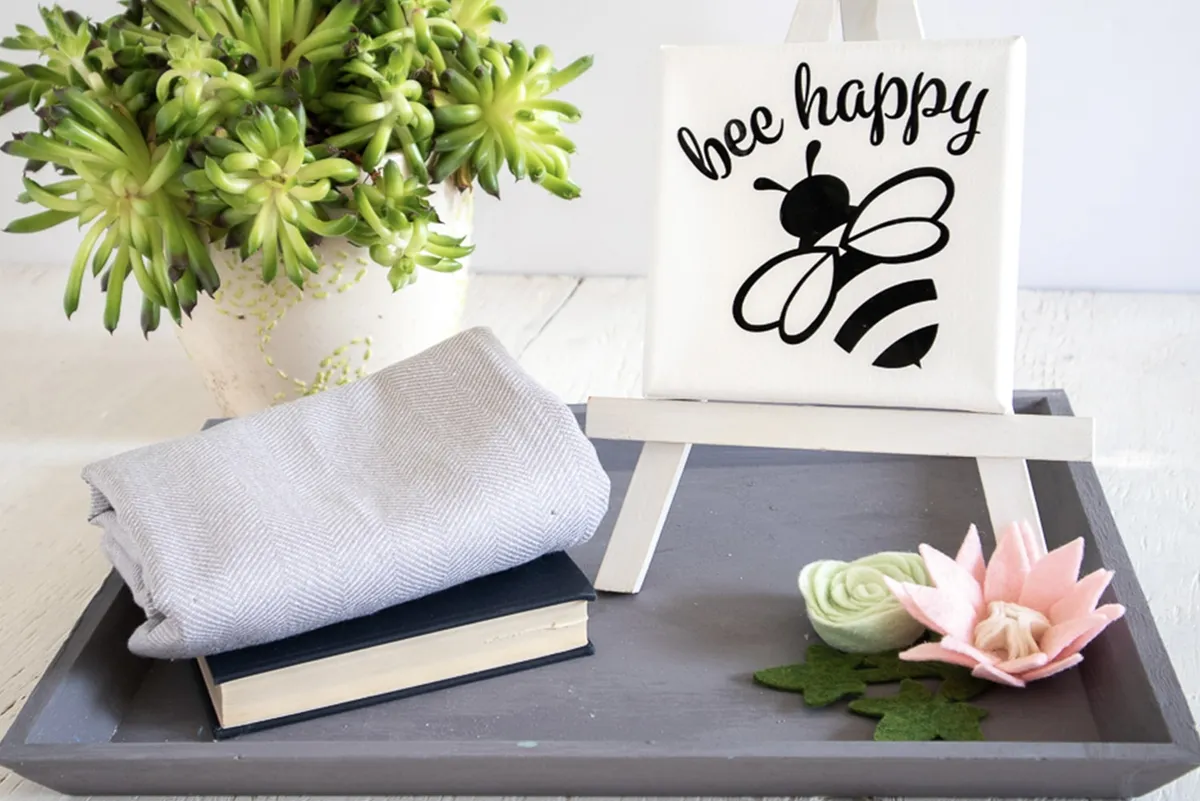
Nancy at Better Life Blog has created a detailed step-by-step guide to making this ultra-cute mini canvas. She walks you through using Cricut Design Space™ for desktop and shares helpful hints and tricks along the way. This is the ideal first project and you can stand up your creation for all to admire and say, "I made that".
5. Cricut gift idea - personalised candles and more!
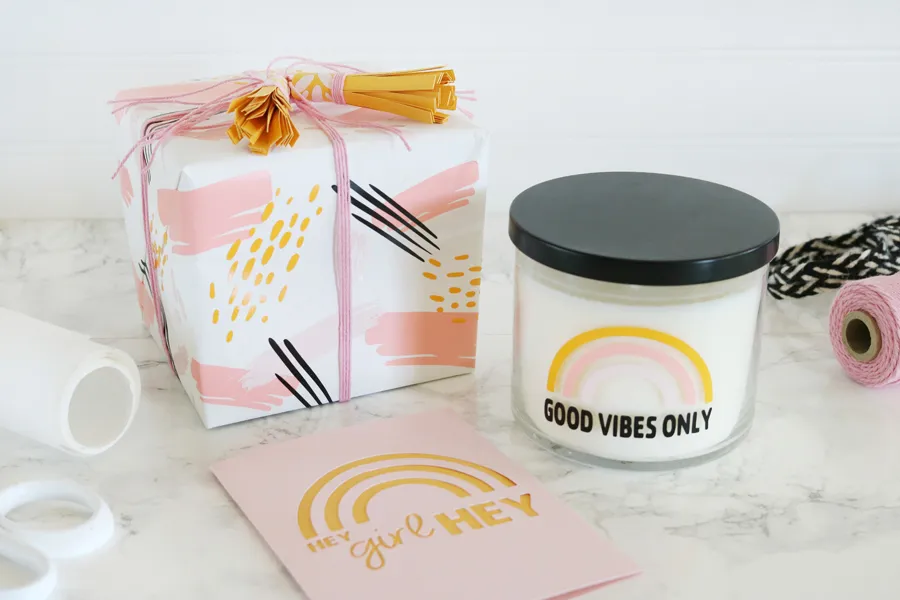
With Christmas just around the corner, you may be thinking about giving out more personalised gifts this year. Rebecca over at The Crafted Sparrow shares her tutorial on how to make this gorgeous multi-coloured personalised candle, among other Cricut projects. Her instructions are clear and she even shows you how to create tassels with your Cricut Joy™!
6. Make personalised party cups with your Cricut machine
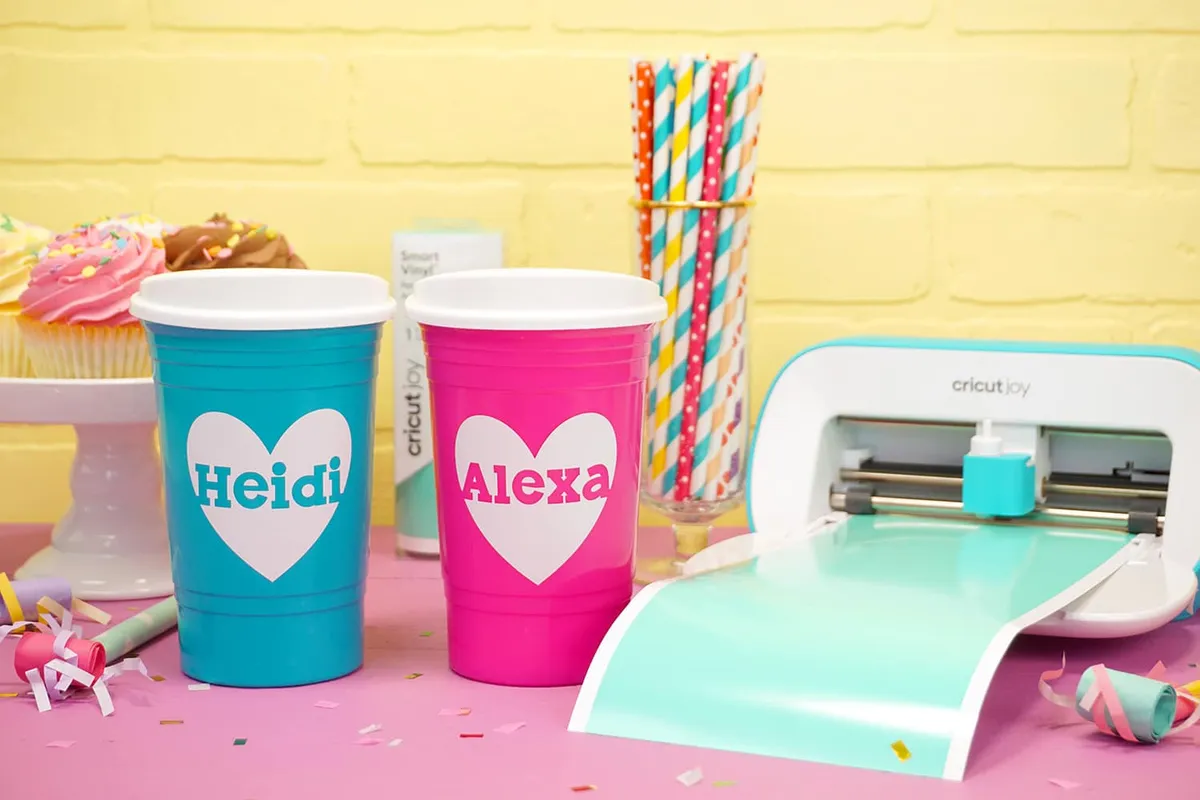
This Cricut project is ideal for kids and adults alike. Why not turn the creative process into part of the party itself? Guests can customise their own reusable cups, which they can take home afterwards. It's a win for wasted party products and a win for the guests! Thank you to Heidi at Happiness is Homemade for these fantastic Cricut projects.
7. Personalise your wardrobe with Cricut t-shirt ideas
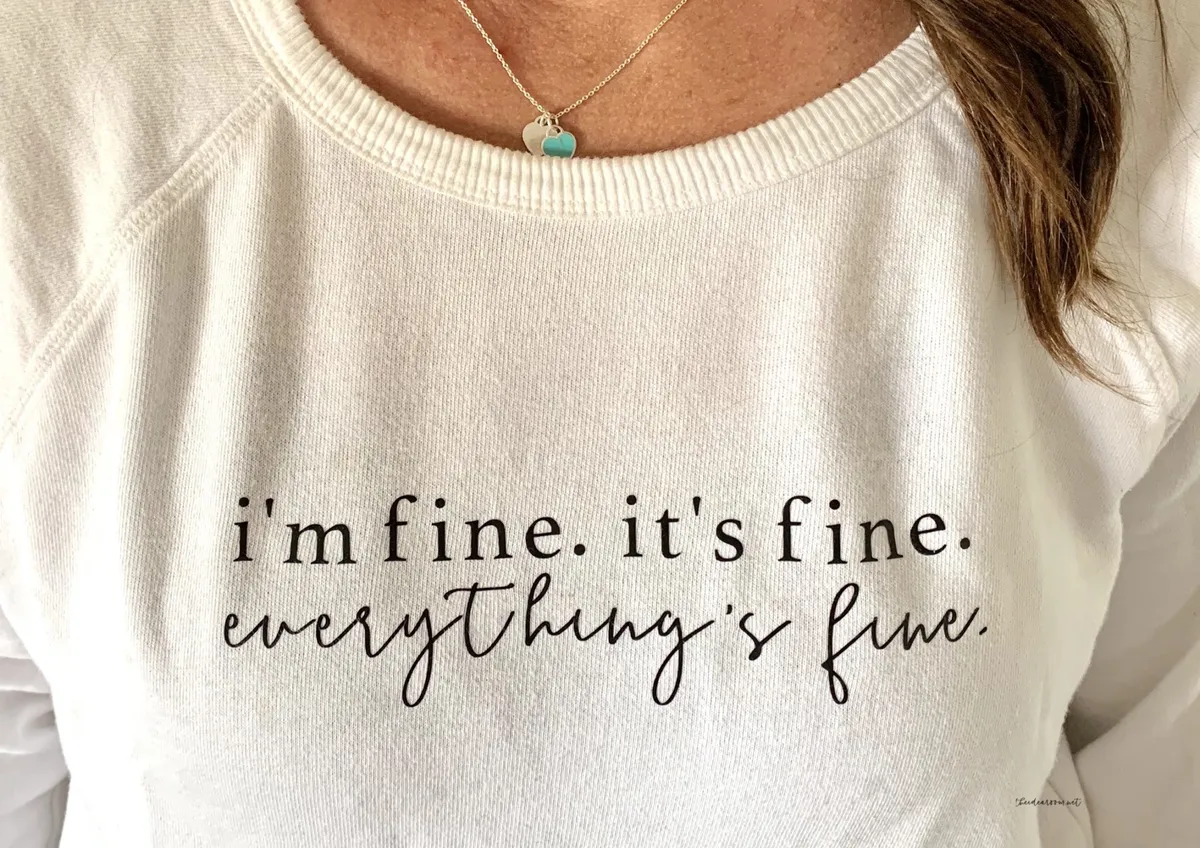
Amy over at The Idea Room has created this fantastic shirt using the Cricut Joy™ with Iron-on vinyl. Even though the design features individual, slim letters, the Cricut Joy™ is still able to pick out all the fine details in the fonts, making sure not to cut through any of the designs.
8. Make back-to-soon fun with a Cricut desk tidy
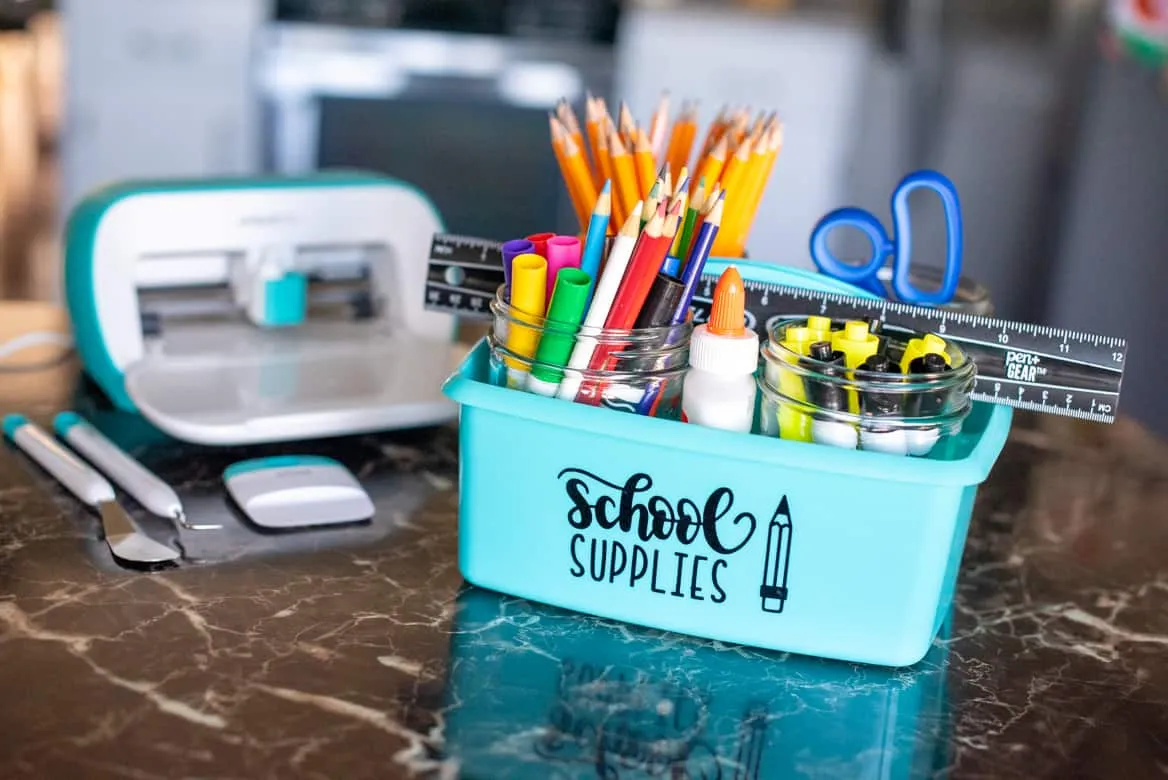
Bre at Bre Pea blog has created an exciting range of back-to-school products using her Cricut Joy™. She shows us just how easy the Cricut Joy™ is for beginners, and we love this stylish way to organise school supplies!
Bre uses Cricut's permanent Smart Vinyl in black for this project which took her around ten minutes to complete from start to finish.
9. Wedding sign Cricut project idea

Weddings can be costly, but with a Cricut machine, you can create affordable yet polished results. A great example is this stylish wedding welcome sign by Diary of a Debutante, which we absolutely love.
10. Create beautiful DIY cards with this Cricut project
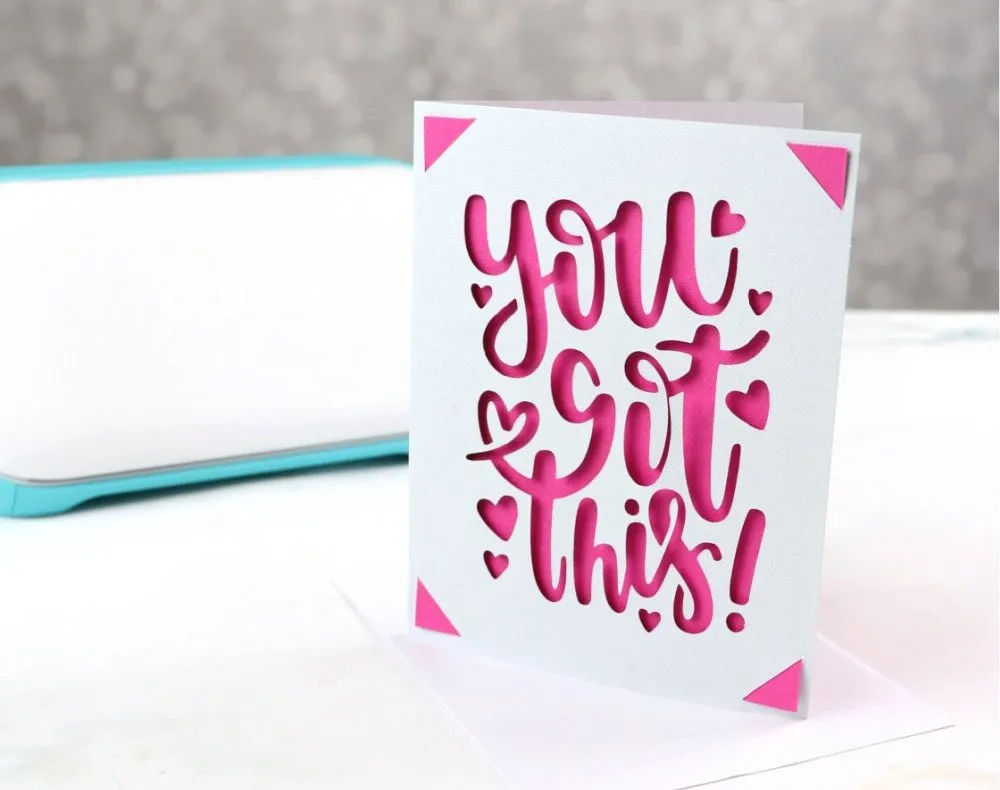
Being able to whip up a card at a moment's notice is incredibly useful, and thanks to the Cricut Joy™ has never been easier. Sarah at Creative Ramblings used the Cricut Joy™ with the card mat, card blank and pink insert card.
The insert cards come in ready-made packs from Cricut and have been perfectly sized to work with the Cricut Joy™ card mat. We love the white and pink colour combo!
11. How to personalise a backpack with Cricut
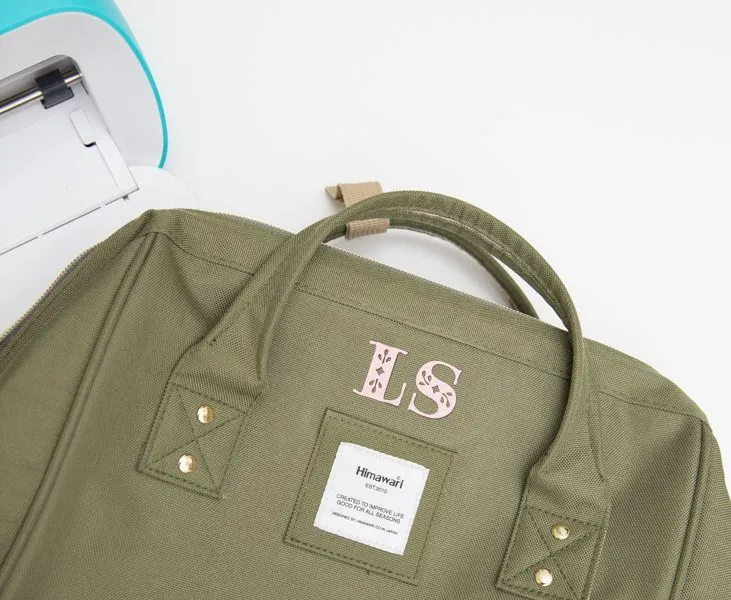
Abby at Sew Much Ado has created this beautiful DIY monogram backpack using Cricut's iron-on vinyl. For this Cricut project, she used the app version of Cricut Design Space™ and has written a step-by-step tutorial (with photographs) so that you too can make your own in less than 15 minutes.
12. Simple Cricut designs: Mailbox
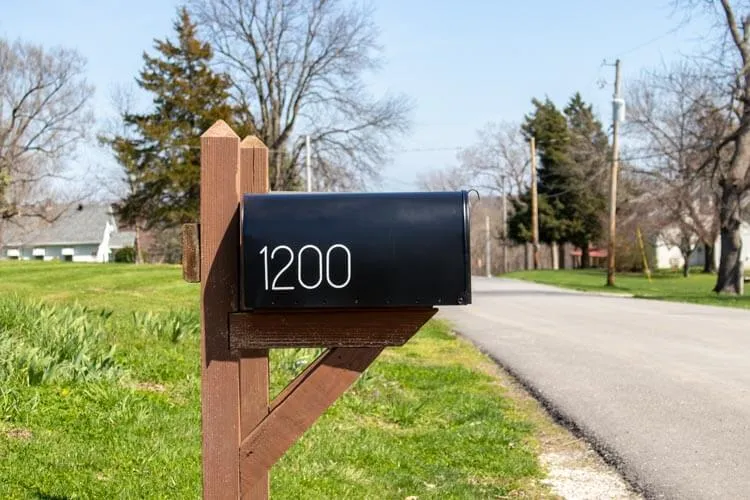
Kala at My Breezy Room proves that the best Cricut projects don't need to be complicated. Her mailbox design is simple, clear and stylish (and easy for the postie to read!). She uses the iOS app and shares her creative process along with screenshots from the app itself.
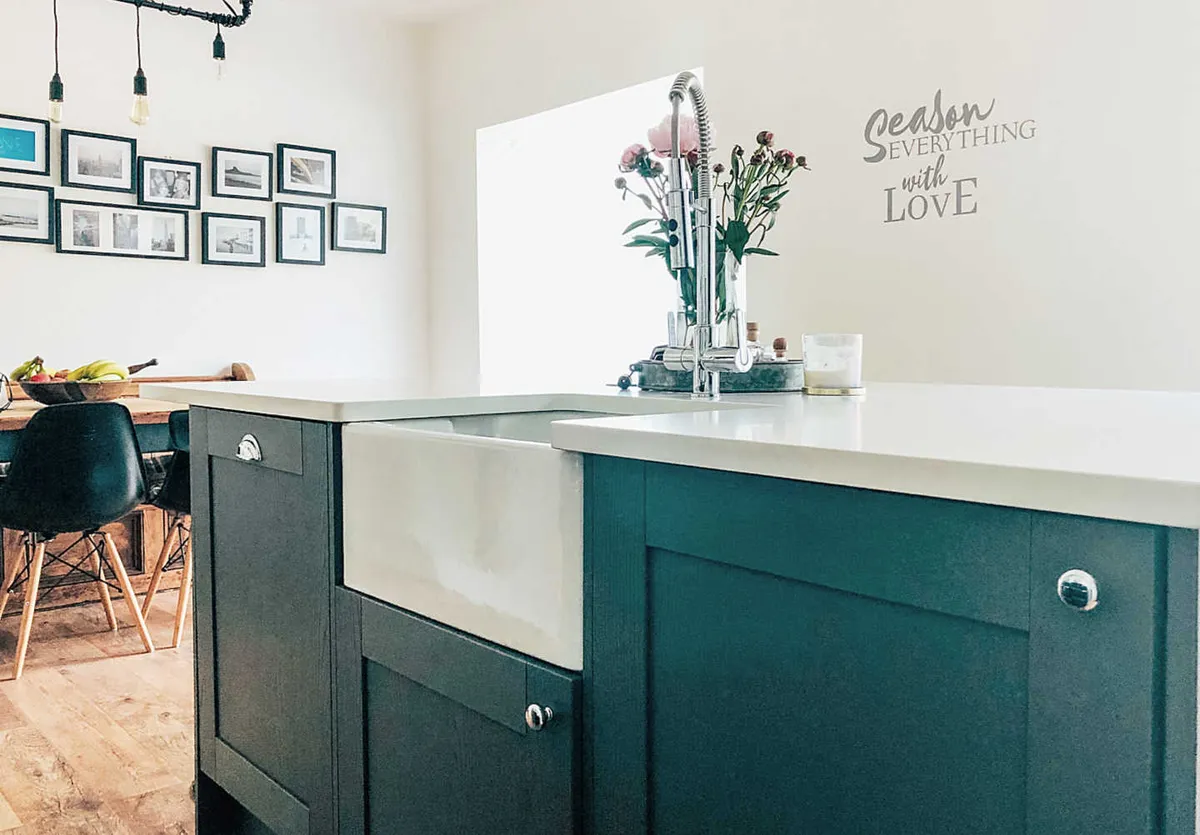
13. Upgrade your space with Cricut stencils
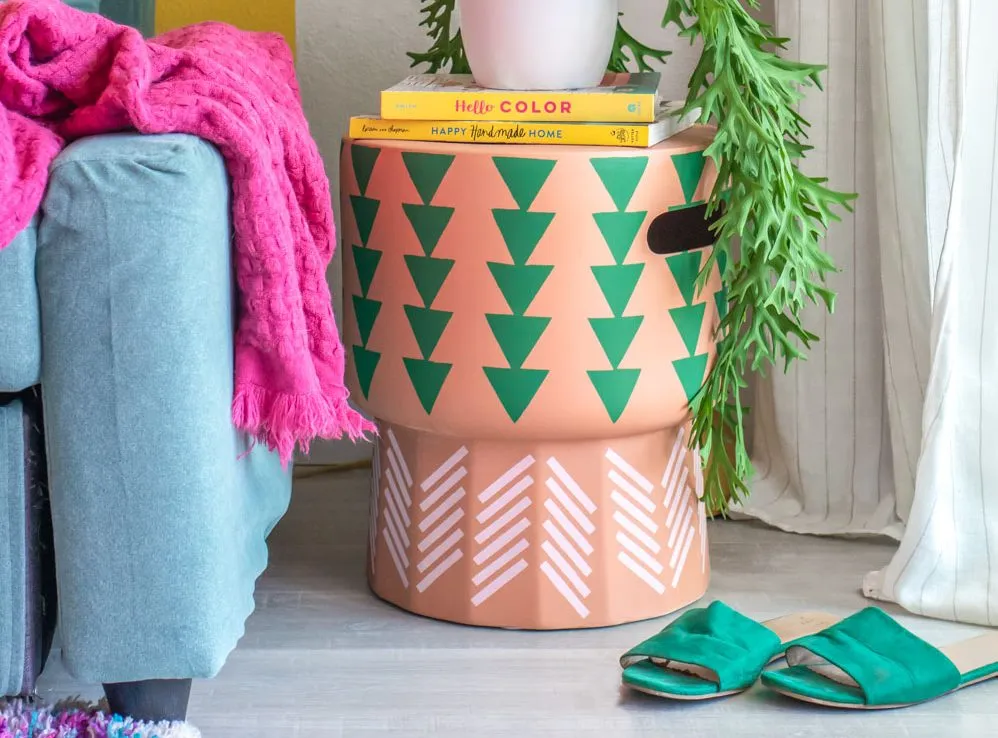
Stuck at home? Like many of us, you might be thinking about making your home living space more comfortable by adding the DIY touch.
Holly at Club Crafted has created this fantastic upcycled terracotta side table using her Cricut Joy™ with removable vinyl. Sponging acrylic paint through the stencils (which you can reuse multiple times), she was able to complete this very impressive Cricut project in under an hour!
14. Personalise a tote bag

Give your tote bags a gorgeous Mediterranean twist with this wonderful tutorial from Hobbycraft. This easy-to-follow guide walks you through the steps in Cricut Design Space™, including how to find and assemble the images into this zesty design!
15. How to make coasters with Cricut
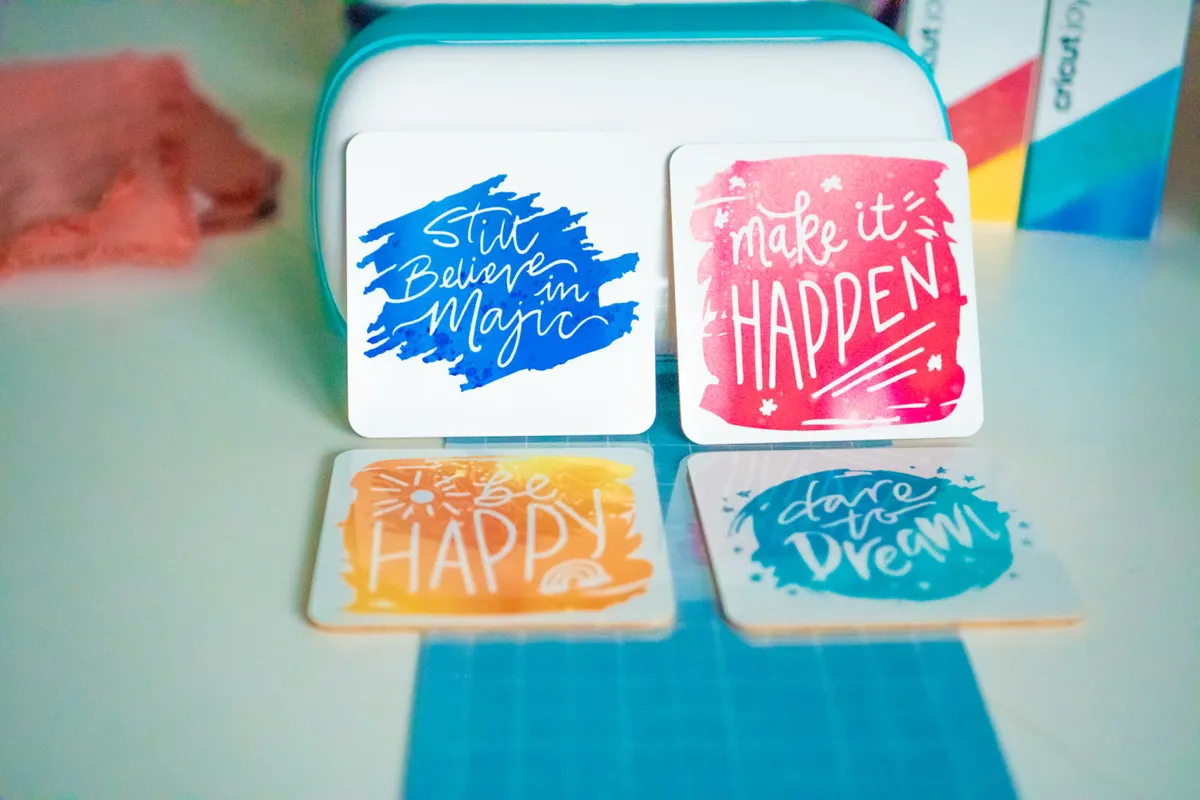
We love these fun coasters! Joyce has a brilliant step-by-step tutorial on her blog, But First Joy, where she guides you through the entire process of using your Cricut Joy™ with Infusible Ink Transfer Sheets.
There's also a comprehensive video tutorial, and we're confident this is a comfortable Cricut project for beginners. It looks impressive, too.
16. Customise a pair of canvas trainers

Shake up your style by customising a plain pair of sneakers using your Cricut machine and Cricut EasyPress™. Abi Kirstin has a brilliant tutorial, complete with a video. We love the use of glittery vinyl in this project!
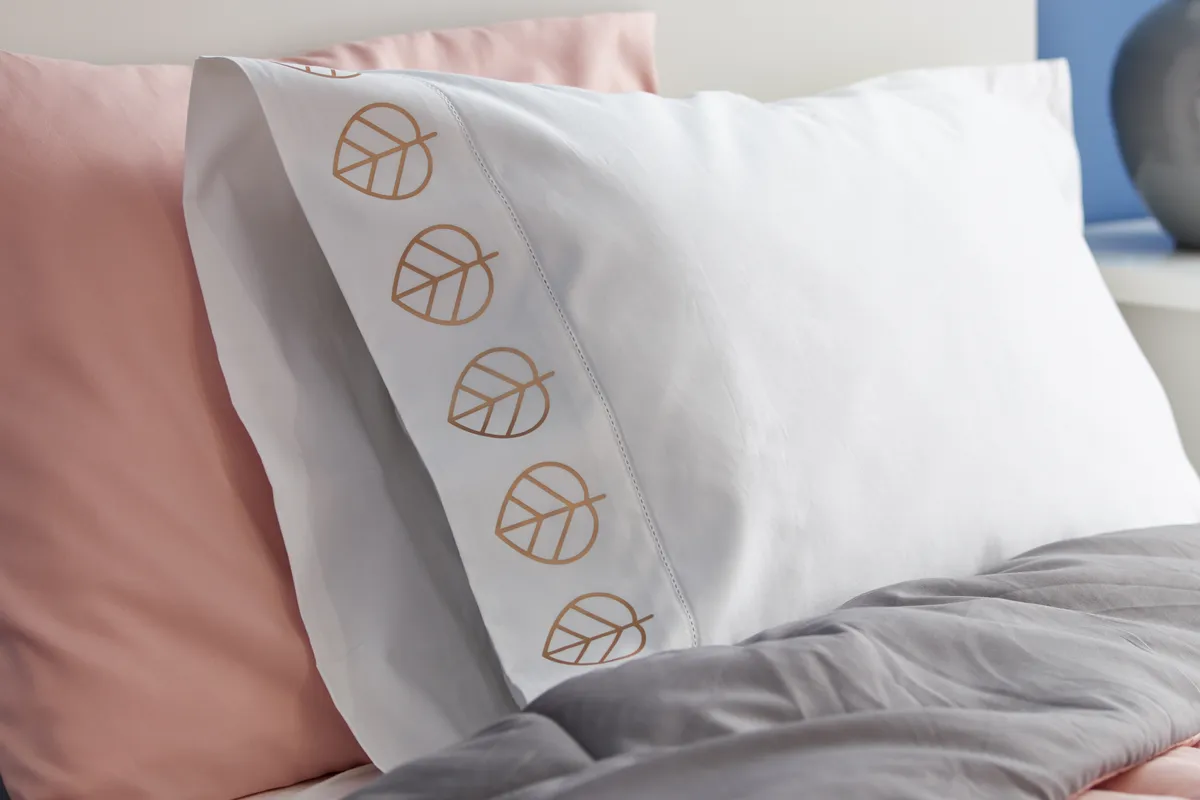
17. Personalise napkins for any event

Do you have a special occasion coming up? Maybe a birthday or baby shower? Monogrammed napkins add a special touch to any celebration, and with Cricut, they don't have to cost a fortune. This simple tutorial by Angie Holden will show you how to do it.
18. Make a personalised Cricut water bottle
If you know someone who doesn't drink enough water, you can remind them with this neat Cricut project, which also makes a great gift. Inside Outlined uses holographic vinyl for a modern, sparkling look in their easy tutorial!
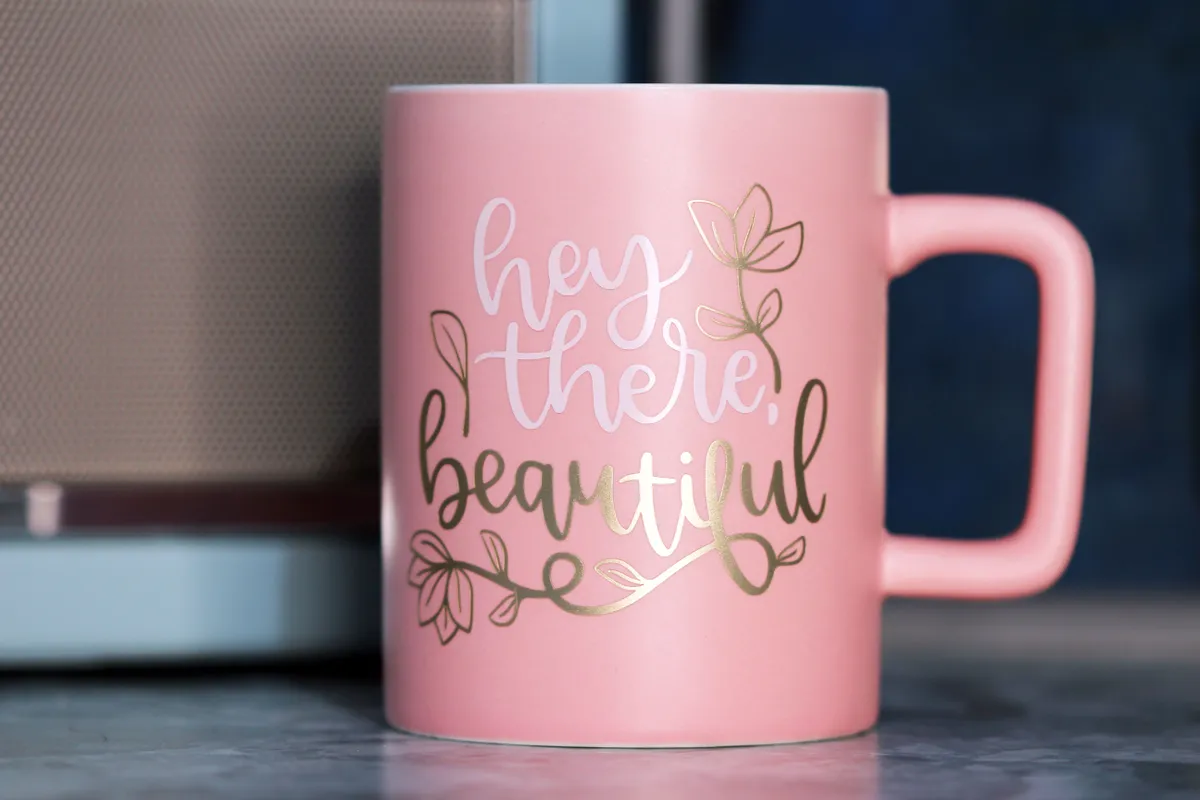
Cricut project ideas: how to personalise a mug with a Cricut machine
Can you use Cricut vinyl on mugs? Yes, you can! Making a personalised mug is a fantastic, inexpensive gift that just about anyone will enjoy. Not into hot drinks? How about a personalised water bottle instead?
We recommend using the Permanent Smart Vinyl for this Cricut project as it will last longer and withstand more wear and tear.
I'm using the Cricut Joy™ (though you can of course use another Cricut machine) for these tutorials, which is a great entry point for new, or up-and-coming artists.
The machine itself is small, taking up just an 8x8.5" footprint in your craft area when open, and 5x8" when closed. This makes it 75% smaller than the Cricut Maker 3™ and the Cricut Explore 3™ and it weighs less than 1.8kg (that's less than 4 pounds!).
It's able to both cut and draw, making it ideal for creatives who like to dabble and perhaps do not have time to dedicate to learning an all-bells-and-whistles machine.

You Will Need
- Cricut Digital Cutting Machine
- Smart Vinyl - Champagne (part of Metallic Elegance sampler)
- Smart Vinyl - Tulip (part of Beachside sampler)
- Cricut Transfer Tape
- Cricut Joy™ - Starter Tool Set
- Ceramic Mug
Step 1
This great beginner project will teach you how to cut on Cricut using craft vinyl in two different colours.
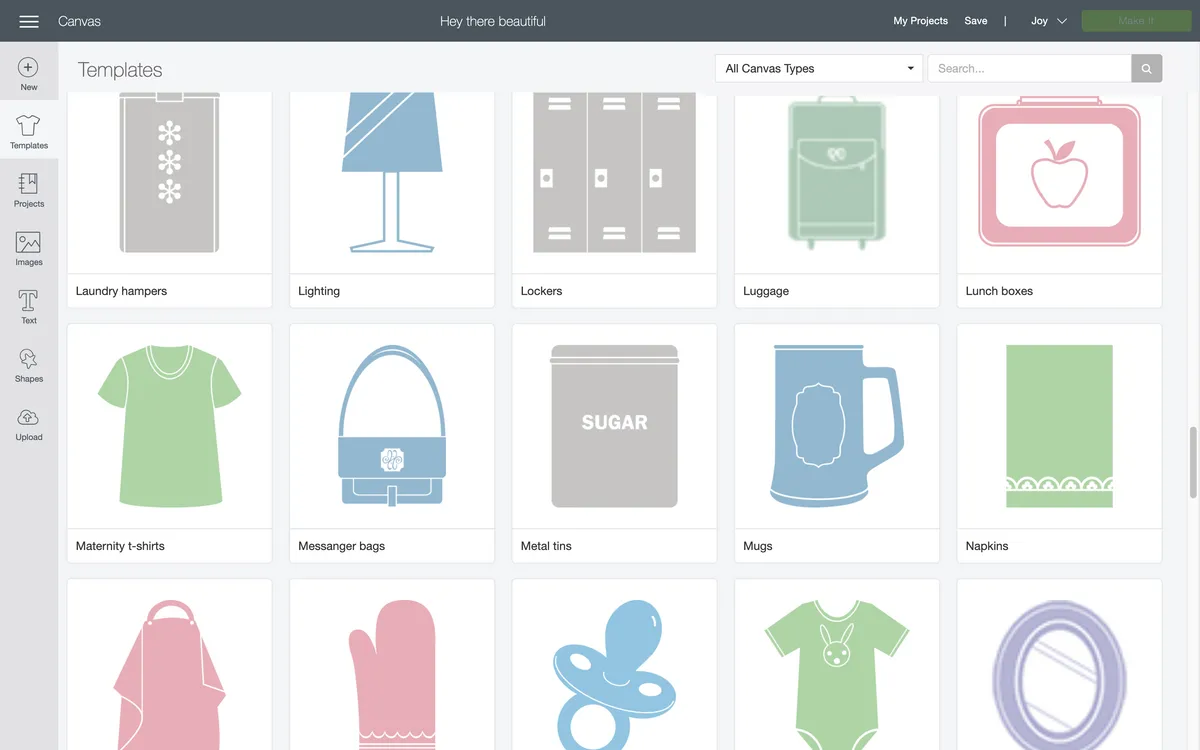
First, open up Cricut Design Space™, and click on templates. We will be adding Cricut vinyl onto a mug, so select the mug template and import. The templates are just a guide and won't be cut so they are a great way to visualise how your finished project will look.
Step 2
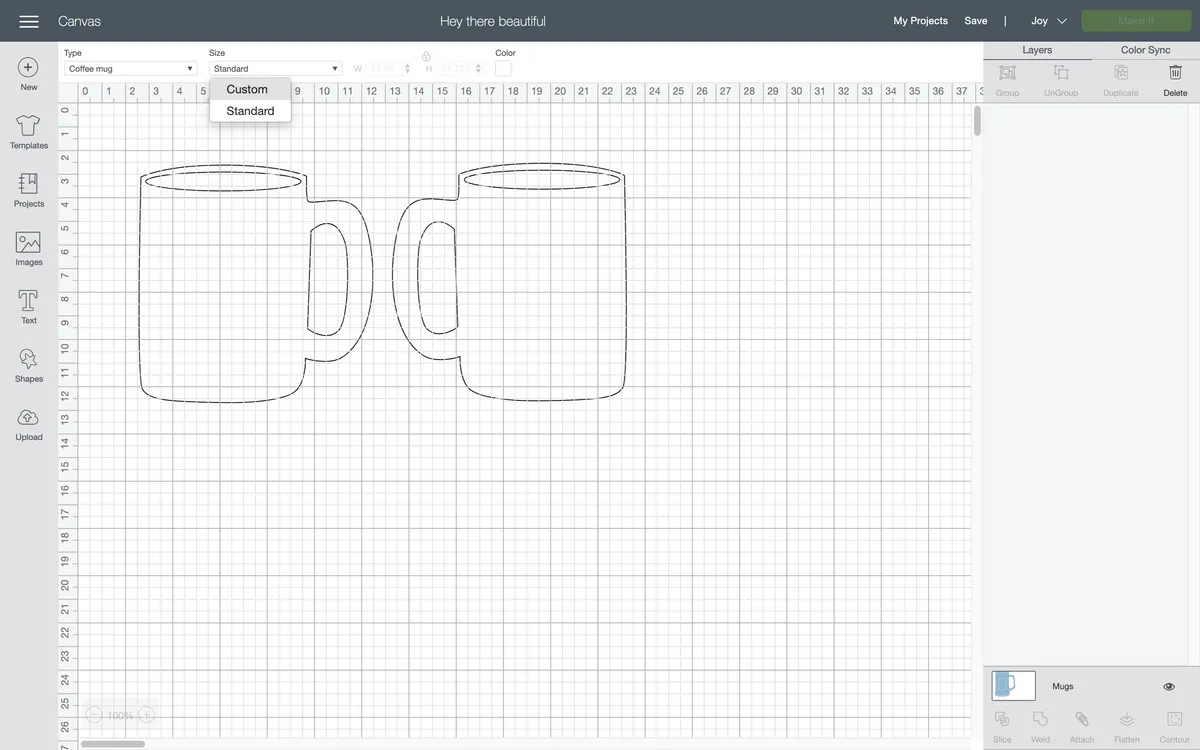
My mug is a different size from the template. If yours is too, at the top under the drop-down menu for size, select 'custom'. Measure the width and height of your mug and enter the measurements. Click on the padlock to unlock the aspect ratio and change the width and height independently from each other.
You can switch between cm and inches by selecting the menu icon (the three lines in the top left-hand corner) > settings > imperial/metric.
Step 3
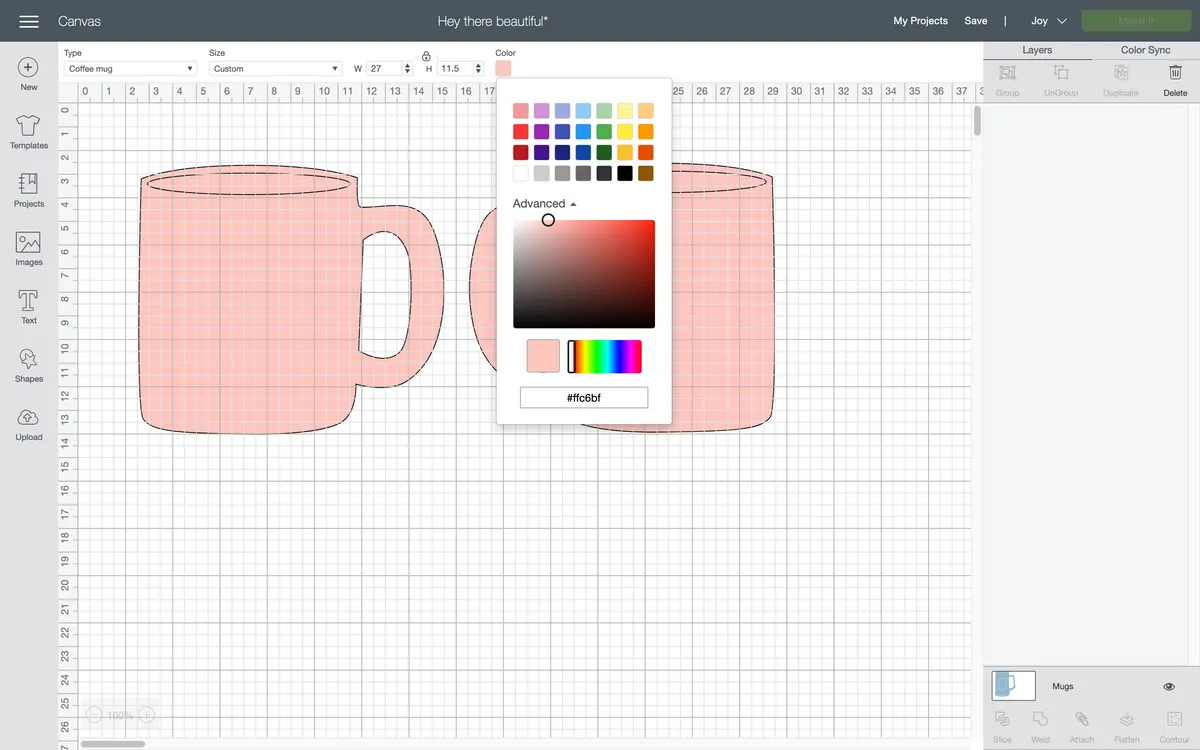
If you like, change the colour of the template in Cricut Design Space™ to match the colour of your mug!
Step 4

Now comes the hardest part. Deciding what design you want on your mug.
Click on the 'images' icon on the left-hand side and find one you like. I'm using #MBF604E6 (hey there, beautiful) for this project.
Click 'insert images' in the bottom right-hand corner to pull that design through to your workspace.
Step 5
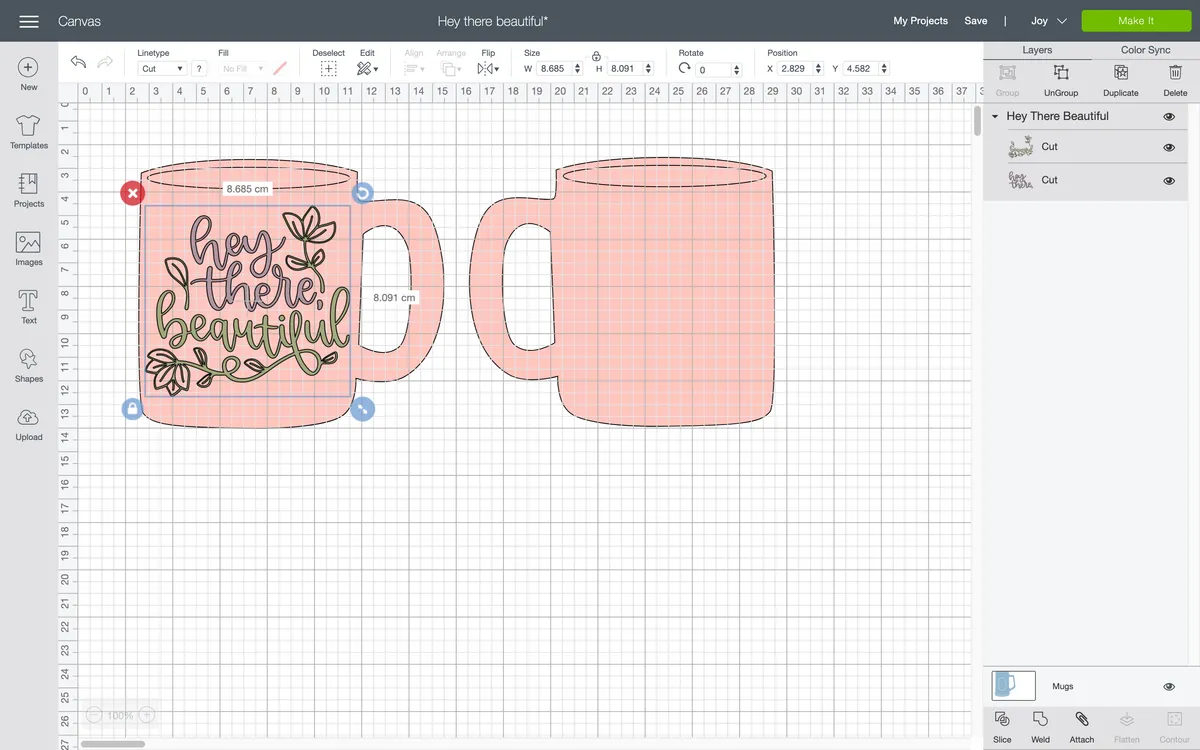
Drag your image into place and resize it until you're happy with how it looks on your mug. I am using two colours, but if you would prefer to make it from one colour instead, click on 'Colour Sync' in the top right and drag one of the sections onto the other. This will tell the software that you are cutting from one piece of material instead of two.
Step 6
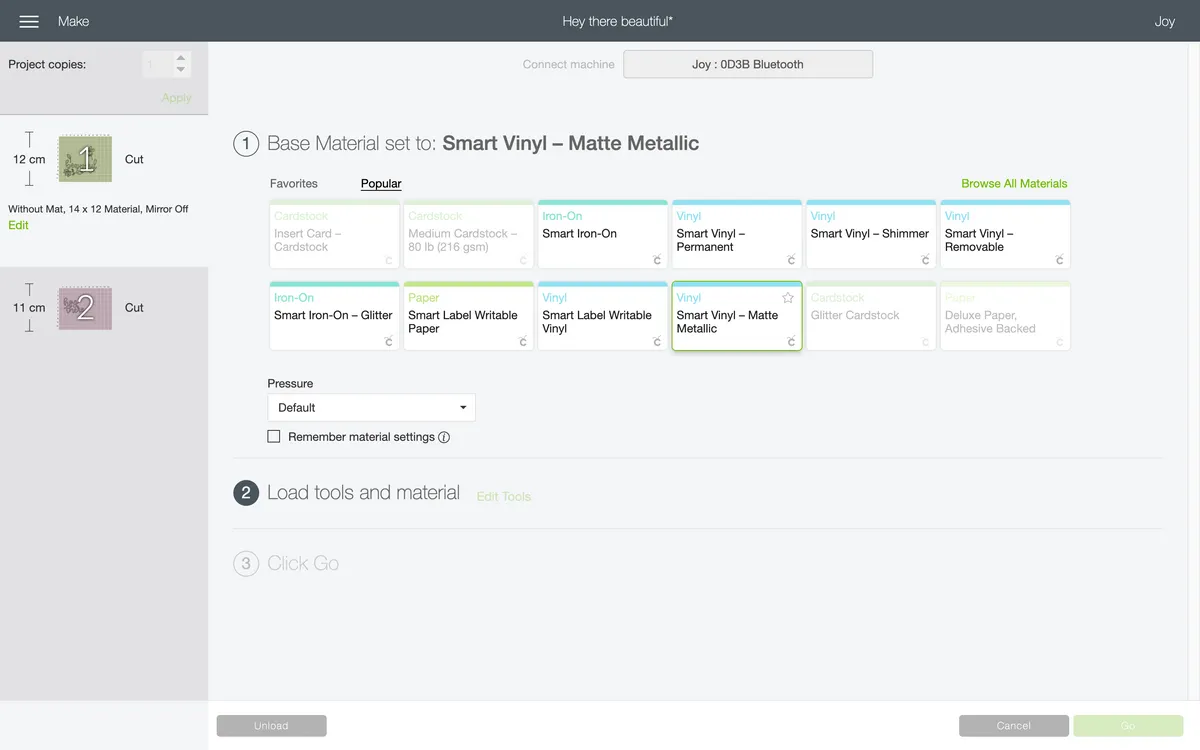
Click 'Make it' in the top right-hand corner. The view will change and Cricut Design Space™ will tell you what to prepare. I am using Smart Vinyl, so I selected 'Without Mat'.
Next, select the type of vinyl you're using. I'm using the Champagne Matte Metallic colour from the Elegance Sampler, so I selected 'Matte Metallic'. Load your material into the machine and click Go.

Once complete, click unload.
Step 7

It will automatically move on to the next part of the design, so repeat the process for the second colour vinyl. Once this second piece is cut, click 'Finish' and it will take you back to the canvas.
Cut off your cut design from the rest of the roll.
Step 8

Now that you have your design in smaller, more manageable bits of vinyl, you need to weed out the parts you don't want in your final design. I am using the Cricut weeder tool to help get at the fine details.

If you don't have a weeder, you could do this using something with a sharp point (like a pokey tool), but the weeder is angled so that it can get under the teeny tiny bits of vinyl and lift them up.
Step 9

Now transfer your design onto your mug!
To keep all the little pieces in place, I am using transfer tape. How to use Cricut Transfer Tape? It's actually very easy and Cricut Transfer Tape is an absolute must-have for projects like this. Because I'm using two colours, I decided to cut out the 'hey, there' sentiment and position on top of the 'beautiful' before adding my Transfer Tape.
Step 10

Lay your Cricut Transfer Tape over your design and press hard using the Cricut scraper tool. The goal is to make each of the cut vinyl pieces stick to the Transfer Tape. Gently lift a corner to make sure the design has stuck.
Step 11

Peel off the Transfer Tape and line up on the mug. Don't press too hard to begin with, as this will allow you to reposition if needed.

Once happy with your positioning, go ahead and press firmly to stick it down.
Step 12

Now, slowly and carefully peel off the Cricut Transfer Tape and admire your handiwork!

Here's a top tip: did you know there is a dishwasher-safe version of Mod Podge? If you're worried about your creation going through the dishwasher, apply 2-3 coats of dishwasher-safe Mod Podge and voila!
Otherwise, handwash your creations for the best results.

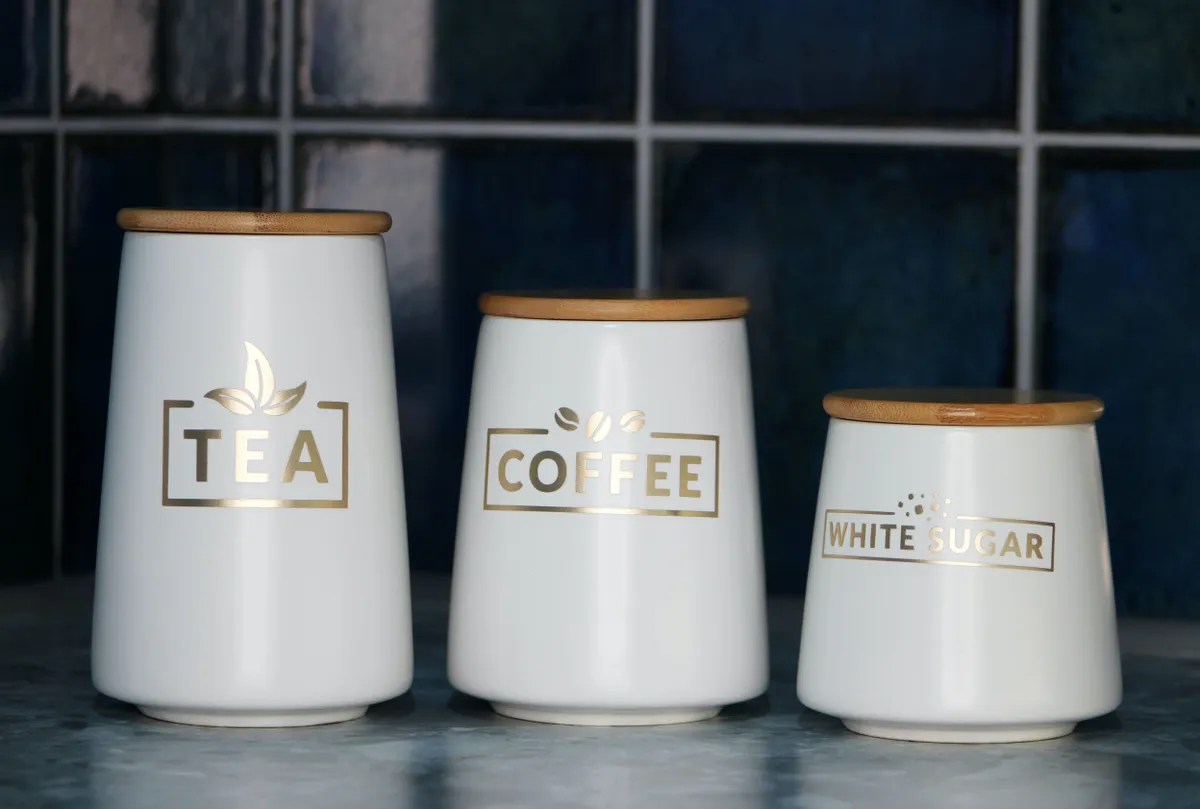
Cricut project inspiration: how to use Cricut vinyl to label kitchen objects
Breathe new life into kitchen canisters by turning them into statement pieces in their own right. We love this white and champagne colour combo!
You Will Need
- Cricut Joy™
- Smart Vinyl - Champagne (part of Metallic Elegance sampler)
- Cricut Transfer Tape
- Cricut Joy™ - Starter Tool Set
- Storage jars
Step 1
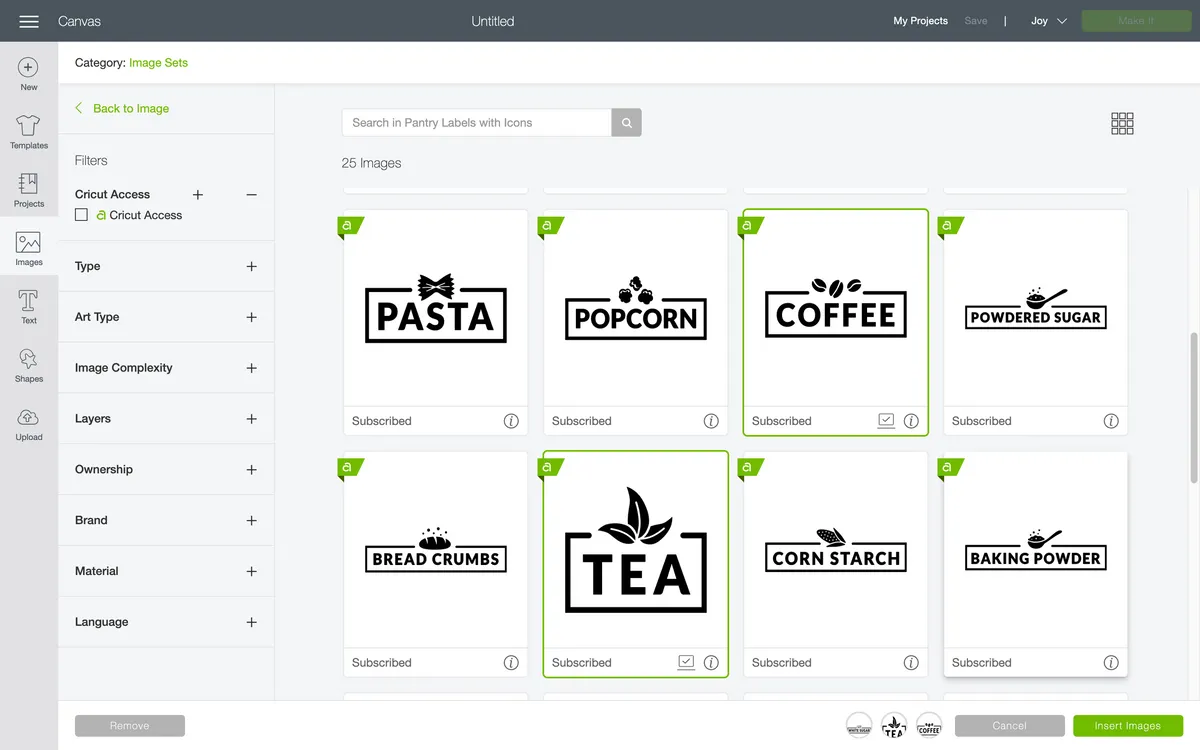
In Cricut Design Space™, click 'New' to bring up a blank canvas. As with the personalised mug project, navigate to 'Images' on the left-hand side.
I am using #M124473E3, #M1244738F and #M124473FB. Select all of the images you want and you'll see a small thumbnail pop up in the bottom right corner.
Click 'import' to import your labels onto the canvas.
Step 2
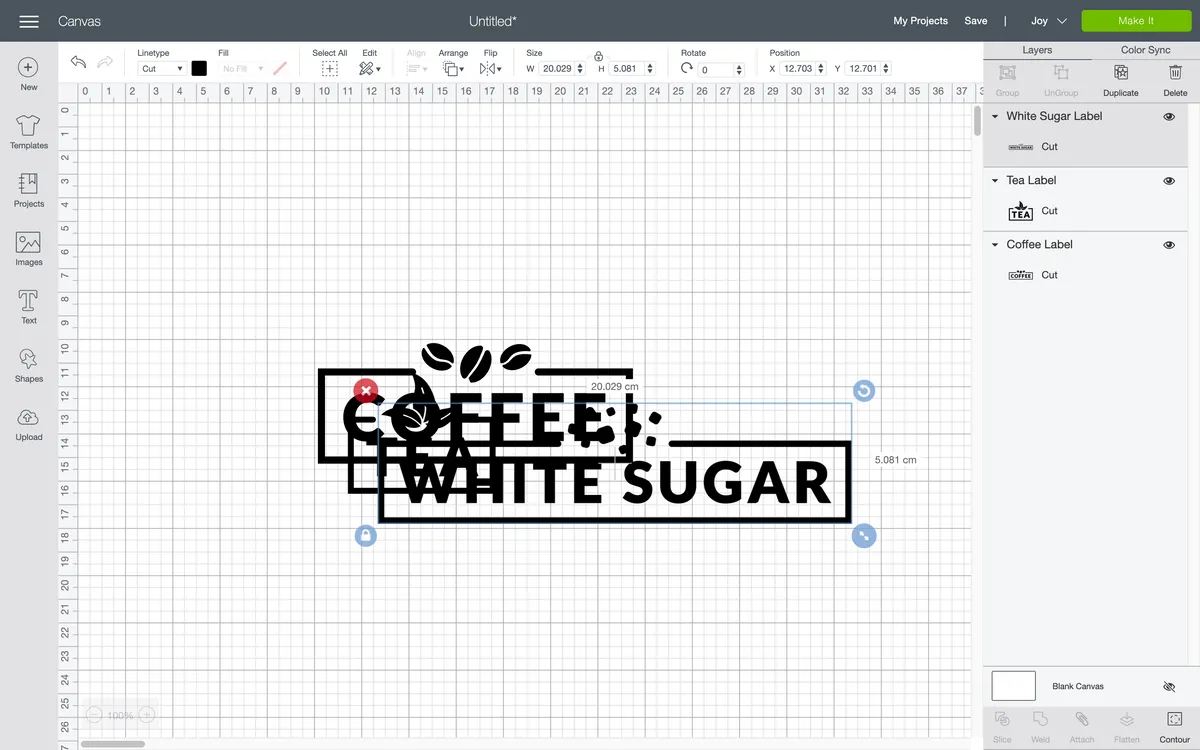
The images will be imported on top of each other, so go ahead and separate them.
Step 3
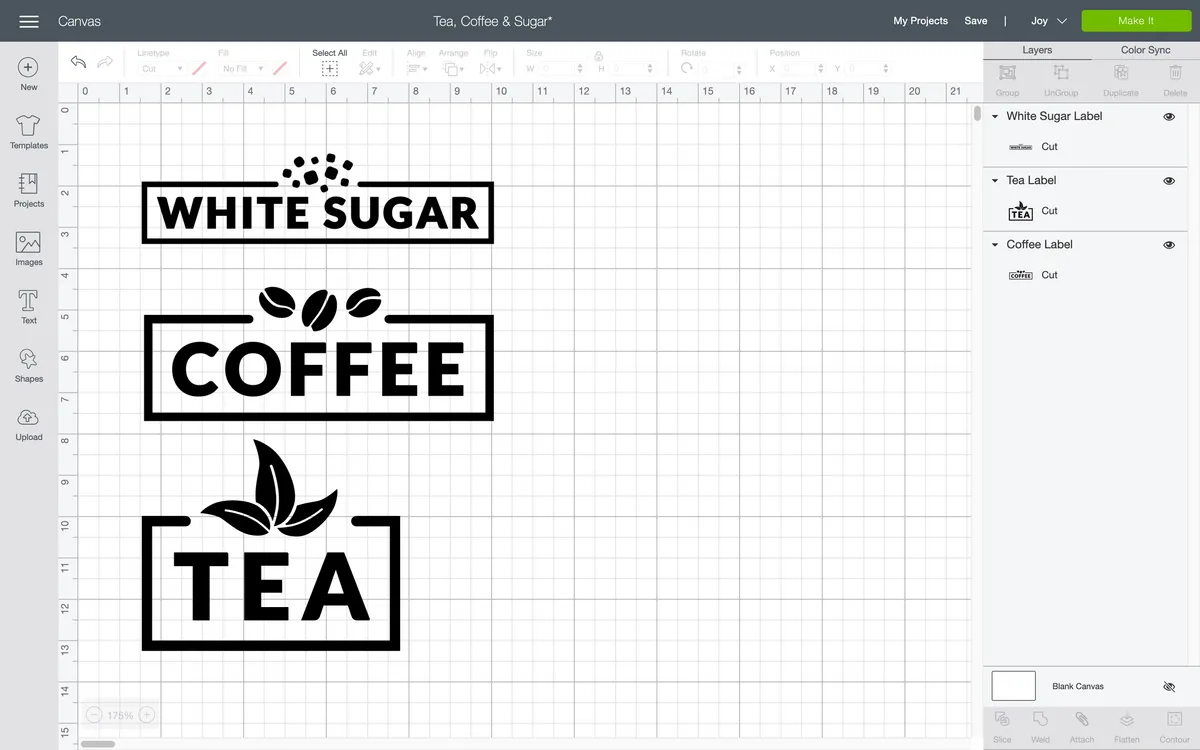
Measure your jars and resize your labels to fit. The Cricut Joy™ can cut very fine details, so zoom in if you need to get a better view by using the toggle in the bottom left corner.
Step 4
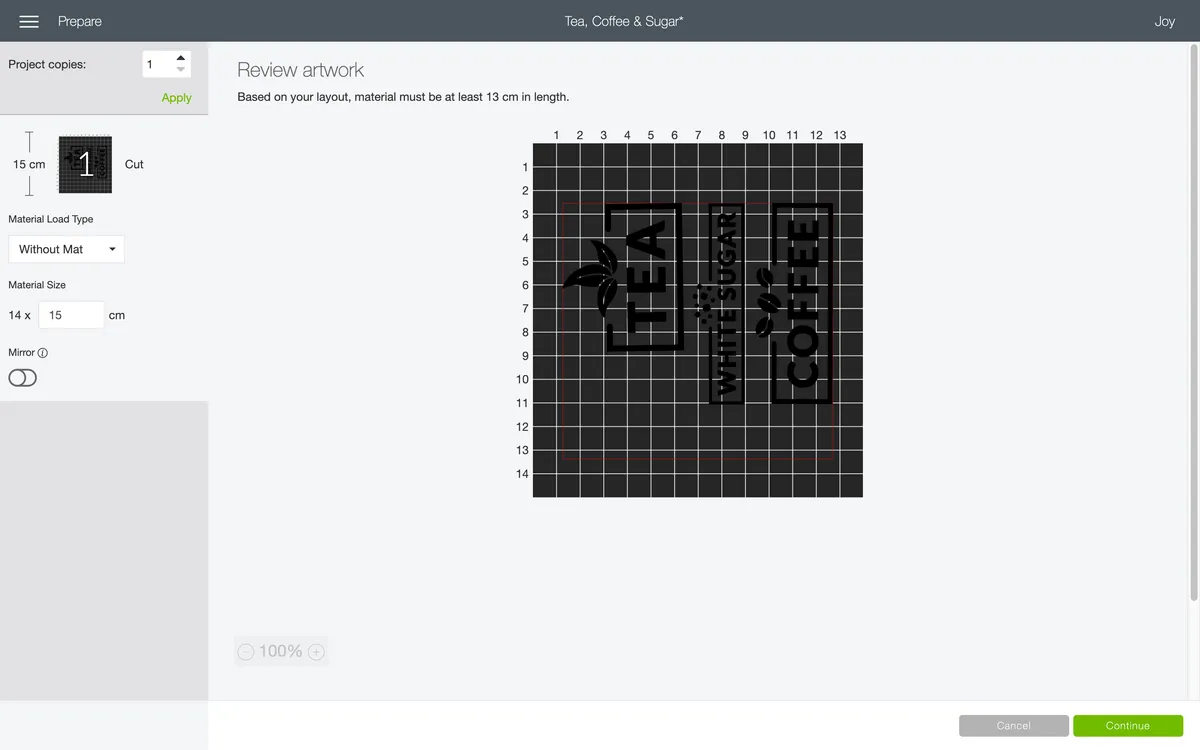
Click 'Make it' in the top right-hand corner. Rearrange your labels if you wish. I increased the magnification so that I could get a better view.
Click 'Continue' and wait for your computer to pair with the Cricut Joy™ via Bluetooth.
Step 5
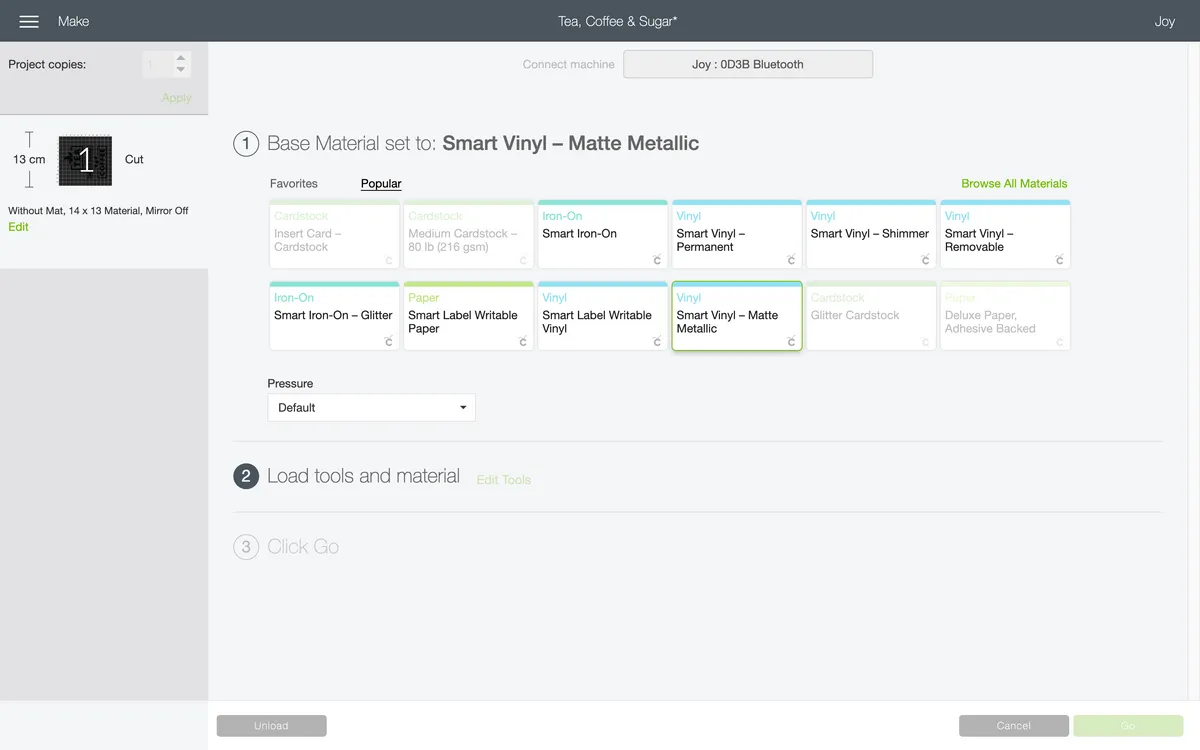
Select your vinyl. I'm using the Cricut Smart Vinyl in Matte Metallic (Champagne). Load your material into the Cricut Joy™ when prompted and click 'Go'.
Step 6

Once complete, click 'Unload' and trim off the excess.
Step 7

Cut your labels apart, making sure not to snip into any of the design elements.
Step 8

For each of the three labels, weed out any of the unwanted vinyl. That's vinyl you don't want to appear on your finished product.
Step 9

If you've completed the mug project, you'll be feeling more confident about how to use Cricut Transfer Tape.
So go ahead and stick some Cricut Transfer Tape over your three labels to hold the individual letters and small details (looking at you, tiny sugar lumps!) in place.
Press the Cricut Transfer tape firmly down.
Step 10

Carefully peel off the Cricut Transfer Tape and the design should stick.
Step 11
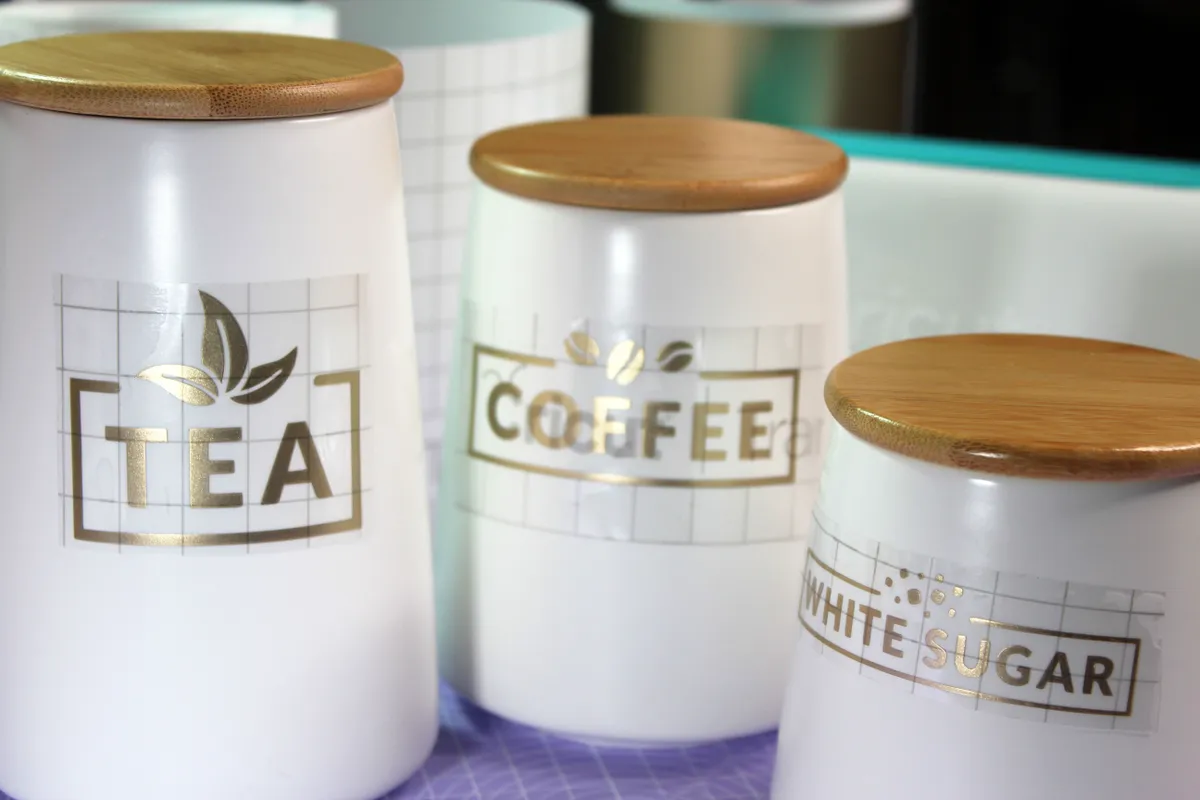
Place your labels gently onto the kitchen jars, and once you're happy with the positioning, press firmly to secure.
Step 12

Peel off the Cricut Transfer Tape and admire your work!


Where can I buy a Cricut Joy™ machine?
UK customers can purchase the Cricut Joy™ (or ask Santa to purchase!) from Cricut.com and lots of retailers including Hobbycraft, Amazon, John Lewis, GMCrafts, Ryman, Argos and Very. For US Customers, you can purchase the Cricut Joy™ from Amazon, Michaels, Joann, Walmart and of course, Cricut.com.
If you’re a Cricut Access member and shopping on Cricut.com, you can save 10% on your Cricut Joy™ purchase (and any other purchase).
- Buy Cricut machines online from Hobbycraft
- Buy Cricut machines online from John Lewis
- Buy Cricut machines online from Ryman
- Buy Cricut machines online from Argos
- Buy Cricut machines online from Very
- Buy Cricut machines online from Littlewoods
Where can I buy craft vinyl for a Cricut Joy™ machine?
You can purchase vinyl for your Cricut Joy™ machine at lots of retailers, or online. Hobbycraft and John Lewis work closely with Cricut, so these stores and websites are great choices for all the latest colours and finishes, as well as your staple buys.
Here's a pro tip: if you're stuck as to which craft vinyl to buy - we recommend purchasing the samplers. These are packs of shorter-length vinyl, but you get a selection of different colours. A white and a black roll are also useful (great for adding drop shadows), and with plenty of retailers in the UK and the US, you can buy on a project-by-project basis, saving pennies and avoiding stockpiling (unless you want to, of course!).