How to draw a spooky pumpkin for Halloween
Spooky season is here! Get in the mood by creating your own Halloween pumpkin drawing with our easy step-by-step tutorial

Published:
Spooky season is upon us, and what better way to embrace the change in seasons than by wrapping yourself in a cosy blanket and learning this simple pumpkin drawing?
Pumpkins can be the central focus of your Halloween artwork, but they also look great as part of a creepy scene. You can position them on the steps of a haunted house, draw them on a window sill or create your own fun Halloween cards!
This pumpkin drawing starts life as an oval, which is then segmented and given character. You can add as much or as little detail as you like to create your own chilling Halloween scene.
Our pumpkin drawing tutorial will show you how to build up the basic form using curves and familiar shapes, then add a spooky face to bring your pumpkin to life. To finish we’ll add some shading and details to make it pop.
For the purposes of this easy pumpkin drawing tutorial, we have used orange to show where you should put the construction lines, then lightened them when adding the detail on top.
If you want to draw a pumpkin to celebrate autumn or Thanksgiving, simply skip a few steps and leave off the pumpkin’s face.
Anyone can learn how to draw a pumpkin with our step-by-step tutorial! Read on to find out how…
Top tips for pumpkin drawing
What’s the secret to creating a hauntingly good pumpkin drawing? Check out these expert tips:
- Draw a real pumpkin: If you can, practise drawing pumpkins from real life. Although we’re all familiar with the stereotypical (round) pumpkin shape, pumpkins can be squat, tall, uneven or pear-shaped.
- Change the pumpkin’s shape: If you’re turning your pumpkin drawing into a Jack O’Lantern, try experimenting with different shapes of pumpkins to give your pumpkin its own unique character.
- Look closer: Examine the texture of the skin of the pumpkin. Is it smooth or bumpy? Adding texture can make your pumpkin drawing more realistic.
- Think about light and shade: If you’re sketching from real life, notice where the light source (Sun or a lamp) hits the pumpkin. Use this to decide where to place your shadows and highlights.
- Be imaginative: If you want to create a pumpkin drawing that has more of a fantasy feel, try extending the vines and making them curl up around your pumpkin.
- Create a natural-looking stalk: Look at the way the stalk grows. Does it grow straight? Is it twisted? How long is it? Is there a leaf still attached? Bring these details into your pumpkin drawing.
- Keep your drawing tidy: If your drawing becomes scuffed or messy, trace and transfer your drawing to a new piece of paper using a lightbox. To keep your drawing neat, make your initial sketches very light and plan out your composition before adding the details.
- Showcase your sketching: If you want to make a feature of your initial construction lines, try sketching them in coloured pencil or alcohol marker, then go over the top of them with a fineliner pen to add the details.
Pumpkin drawing materials
Winsor and Newton sketching set

Latest deals from trusted retailers
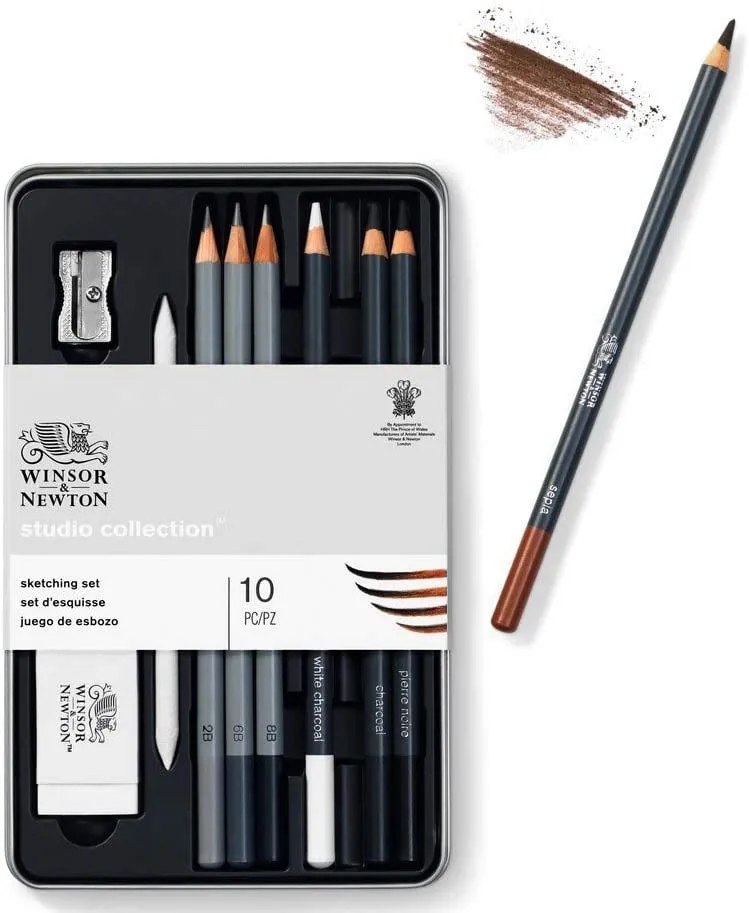
Lightly sketching the rough shape of the pumpkin is a great way to build confidence before you add intricate details. You can use any pencil to get started, but if you want to get the most out of pencil drawing we recommend getting a set with a selection of different hardnesses.
This selection from Winsor and Newton has been specially designed for shading and drawing. It includes a white charcoal pencil, medium charcoal pencil, hard charcoal pencil, sepia colour pencil, plus a 2B, 6B and 8B graphite pencil, a blender, an eraser and a sharpener.
Faber-Castell Grip 2001 mini set
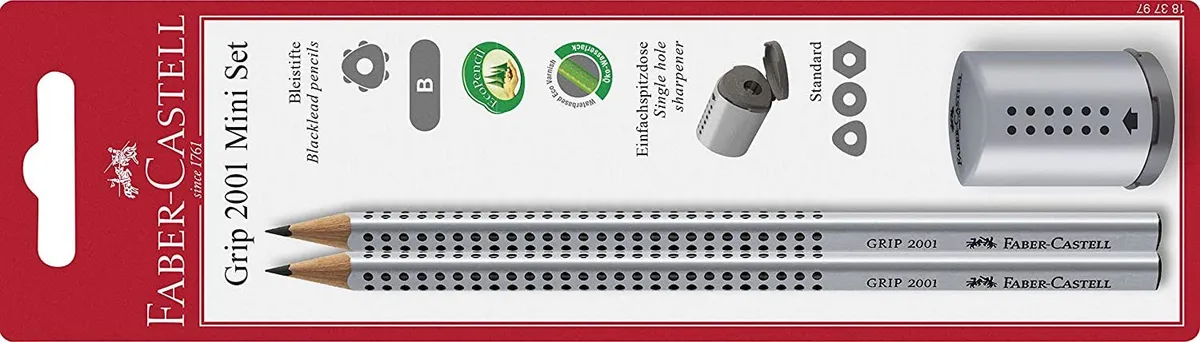
If you only want the bare necessities, then it’s hard to go wrong with this mini pencil set of two B graphite pencils and mini pencil sharpener. The pencils feature Faber-Castell’s patented soft-grip design, which is essentially just raised dots to create the grip. The grip helps with control and prevents fingers from slipping while you’re creating your masterpiece.
The ergonomic triangular shape ensures you can keep sketching (or writing) while minimising fatigue. The lead is fully bonded with the wood surround, which makes these pencils particularly break-resistant. No need to worry about the lead sliding out in chunks like other brands.
Daler Rowney Ebony sketchbook

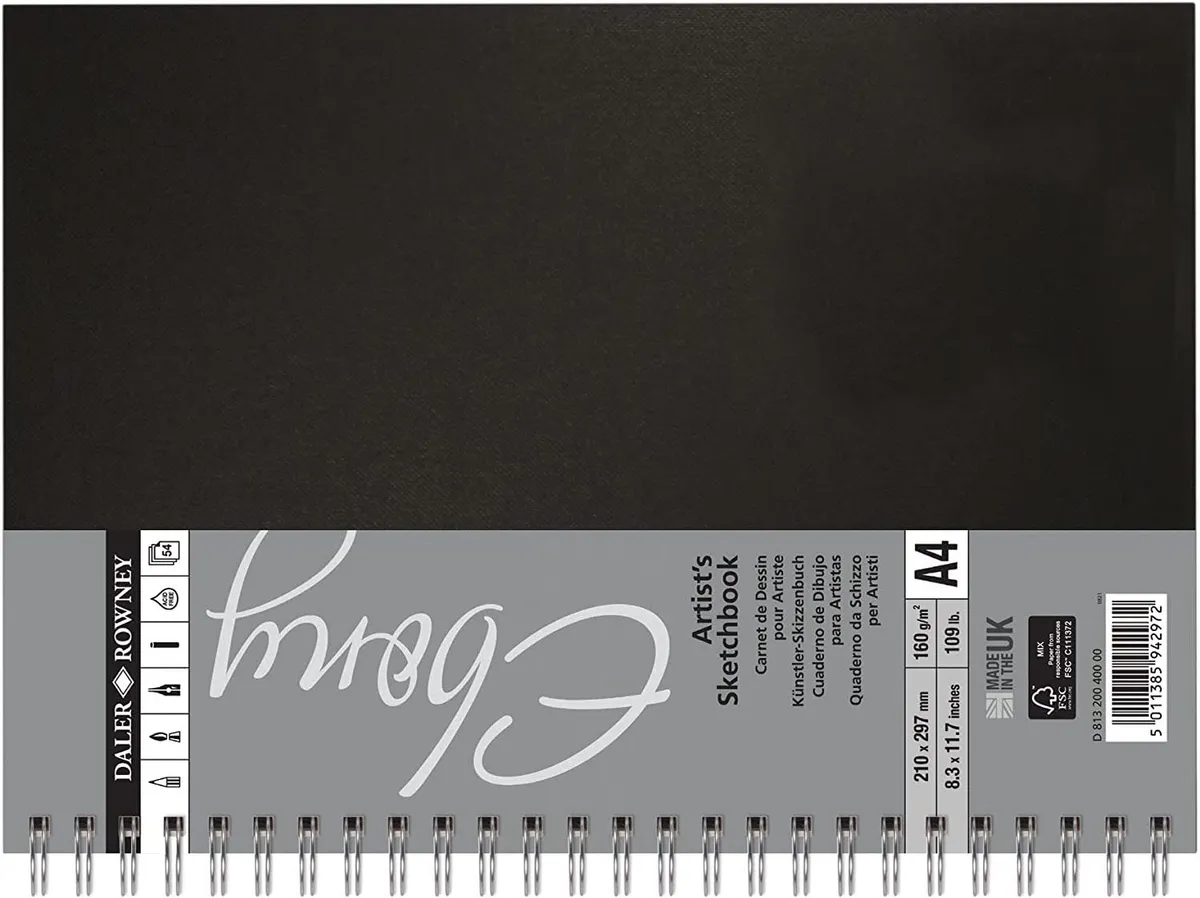
You can use any type of paper for this pumpkin drawing tutorial, but we recommend working with thicker paper and something with a smooth grain. This makes erasing the construction lines easier, as well as tweaking the piece if you need to rework some of the areas.
If you’re sketching outdoors, then working in a hardback sketchbook is ideal, and offers some degree of protection from the mud and muck of the outdoors. If you’ve watched our rose drawing video, this is the sketchbook we used!
iPad Pro

If you want to branch into digital art, or don’t fancy covering your desk in pencil shavings and eraser debris, then the iPad Pro paired with the Apple Pencil is a great option.
Any iPad will offer you a smooth drawing experience, and as (most) of the apps are constantly being updated, you can be confident that it’s up to the task. The model of iPad you want just boils down to how much storage you need and the types of apps you want to run.
As operating systems are taking up more and more space on your tablet, it’s important to keep this in mind if you’re looking to buy a new iPad. As time goes on and you install more updates, the new OS will gradually take up more and more space – and you’ll have less storage for your digital art. So, it’s worth opting for maximum storage from the off, if you can afford it.
Apple Pencil

At the time of writing, the 2nd generation Apple Pencil really is the gold standard when it comes to iPad accessories. Not only does it make digital drawing much more fluid and tactile, but it has also had several upgrades when compared to the 1st generation. By double-tapping, you can switch between the tools you need, which is very useful when alternating between sketching and colouring, or when working on different layers.
The 2nd generation Apple Pencil magnetically attaches to the iPad Pro, and charges wirelessly. If you do happen to put it down on a flat surface, like your craft desk, the flat edges keep it from rolling away.
Ready to learn how to draw a pumpkin? Follow this step-by-step tutorial and learn how to draw a pumpkin this Halloween.
How to make your own creepy pumpkin drawing
You Will Need
- Pencils
- Eraser
- Sketchbook or paper
- iPad, If producing a digital drawing
- Apple Pencil, If using an iPad
Total time:
Sketching the outline of the pumpkin drawing
Step 1
Start with a simple oval outline
First, draw an oval on your page. This will form the main shape of your pumpkin, so make it large enough to fill the majority of the page.
Make sure you leave some space at the top and the bottom for the stalk and the vines.
Draw your outlines very lightly using a pencil. This will make it easier to erase the lines if you make any mistakes, or if you want to get rid of them at a later stage.

Step 2
Mark the stalk position with a cross
Draw a cross near the top of the oval. This will help you position the stalk.

Step 3
Grow a stalk in the middle
Draw another smaller oval where the two lines of the cross meet. This is where the pumpkin’s stalk will sprout from.

Step 4
Give your pumpkin a curvy shape
Draw a curved line, extending from the small oval to the bottom of the main pumpkin shape. Position this line so that it splits the bottom quarter of the cross evenly.

Step 5
Draw lines closer together to create a sense of depth
Start filling out the shape with more curved lines, spacing them slightly closer together towards the back of the pumpkin. This helps to give the impression of depth.

Step 6
Carry on adding curves
Continue adding curved lines around your pumpkin.

Step 7
Make your pumpkin look like a beach ball
Add a final curved line roughly front and centre. At this point, your pumpkin should resemble a beach ball, but don’t worry it won’t look that way for long.

Step 8
Grow the stalk with a triangular base
Draw a triangle for the stalk. Extend the top of the triangle up past the top of the pumpkin.

Step 9
Give the stalk a natural bend
Add a curve to one side of the triangle. This will be where the stalk flops over, so make it as straight or curved as you like.

Step 10
Complete the stalk with a neat finish
Join up the ends of your stalk with a small oval.

Step 11
Make your pumpkin grow even bigger
Next, we’re going to add some shape to the pumpkin. If you look at a pumpkin, you’ll notice that they often bulge outwards. Add a curved line at the edge of each segment to make it look as though the pumpkin is expanding outwards.

Repeat for the next segment.

Carry on until you have worked your way around the entire pumpkin.

Step 12
Draw twisting vines at the pumpkin’s base
Add some curly lines on either side of the pumpkin at the bottom. These will be the vines, so make them as curly as you like.

Give your pumpkin a creepy face
Step 1
Carve some spiky triangular eyes
Skip the next few steps if you don’t want to make your pumpkin drawing into a lantern. If you want to give your pumpkin a face, then plan it out before you start adding more details.
Draw two triangles for the eyes. Angle the bottom of the triangles so that the inner corner points down and the outer corner points up. This will make your pumpkin appear 3D.

Step 2
Add character with a little nose
In the middle of the two triangles, add a smaller triangle for the nose.

Step 3
Raise a smile on your pumpkin’s face
Draw a wide banana-shaped smile at the bottom.

Step 4
Sketch a couple of crooked teeth
Pencil in a couple of teeth. Angle the top one down pointing slightly towards the bottom left. The bottom one up should be tilted slightly towards the top right. This helps maintain the spherical shape of the pumpkin.

Make your pumpkin stand out with bold outlines
Step 1
Highlight your drawing with dark lines
For the next stage, lighten the construction lines to help you see the detail more clearly.
Taking the pumpkin a section at a time, start to go over the construction lines to finalise them. For the front sections, leave them open at the top to make room for the stalk.

Like before, work your way around the pumpkin. Once you get to the segments at the back of the pumpkin, don’t extend the lines into the triangle you drew for the stalk.

Continue until all the sections are done. The pumpkin drawing is starting to take shape!

Step 2
Finish shaping your pumpkin stalk
When it comes to adding detail to the stalk, feel free to get creative. Go over the main outline shape of your stalk, then draw in a backwards C-shape in the small oval at the end, making it slightly scalloped.
Where the stalk joins onto the main body of the pumpkin, make that slightly scalloped as well.

Step 3
Bring more texture to the stalk
Using the scallops as an indicator of where to start, add some lines along the length of the stalk. If you want to make your stalk appear twisted, draw the lines at diagonals – heading off to one side of the stalk.

Step 4
Complete the stalk with fine details
At the end of the stalk, trace the outline to create a skin, then add in a mixture of small circles and teardrop shapes as shown.

Step 5
Give your pumpkin a hand-carved look
For the face, go over the lines you’ve already drawn, but make them slightly wiggly. This helps give the impression that they’ve been cut with a knife. Make the bottom of the eyes slightly curved as you do so.

Step 6
Tidy up your drawing by erasing the lines
At this point, you can erase the lines around the pumpkin’s eyes, nose and mouth to neaten the drawing.
Create some dimension to your pumpkin drawing by adding some internal lines to the eyes, nose and mouth. Again, make them slightly wiggly.

Step 7
Darken the pumpkin’s facial features
Colour in the eyes, nose and mouth for a spooky finish.

Step 8
Complete your curving vines
Go over the vines at the bottom, finalising the curves and thickening them up.

Make your pumpkin pop by adding shading
Step 1
Give your pumpkin more depth
All that’s left is to add some shading and really make your pumpkin drawing come to life!
If you want, you can erase your construction lines now, leave them in altogether, or erase them at the end of the project, as I have done in this tutorial.
Start at the top of the pumpkin, with darker shading nearer the stalk. Fade the shading away as you get closer to the middle of the pumpkin drawing.
Pumpkins often have a streaky texture to their skin, so try and capture this as you add the shading.

Step 2
Gradually build up layers of shading
Apply more shading at the base, then less as you get closer to the centre of the pumpkin. Add a little shading along the edges of each of the sections to help give your pumpkin a nice, bulbous appearance.

Step 3
Shading and colouring the stalk
Next, add shading to the stalk. Put more shading at the base of the stalk where it meets the pumpkin, and apply a little shading along the edges of the lines you drew earlier.

Colour in the end of the stalk. It’s hard to see because it’s so small, but the little circles have been left white.

Step 4
Experiment with the angle of your shading
To help add to the dimension of the piece, it’s a good idea to change the shading direction in the cut-out areas. You can work over the top, or erase the shading as I’ve done here.

Step 5
Take your blending to the next level
The ‘meat’ of a pumpkin is fairly uniform; it’s the insides that are stringy. So, when you’re adding shading to the cut sections, try to blend a little more than when you were shading the outside.
Apply the shading to be darker nearer the inside, and lighter near the outside.

Complete your drawing with some clever finishing touches
Step 1
Draw little lines along the cut edges
Almost there! Using a fine liner, or the pencil you used to finalise the shape of the pumpkin, draw in some lines along the fleshy, cut part of the pumpkin. Angle the lines in towards the middle of the pumpkin, and make them ever-so-slightly uneven.

Step 2
Sketch broken lines along the stalk
Do the same for the stalk. Add in some detail lines, following the lines you drew earlier, but make them broken and uneven.

Step 3
Finish with fine lines along the pumpkin’s exterior
Add in some light detail lines on the outside of your pumpkin. Draw more at the top, and gradually space them out as you go down the pumpkin.

Step 4
Cleaning up your drawing
Finally, erase the construction lines and enjoy your pumpkin drawing!

How to draw a pumpkin the easy way
Drawing a pumpkin is simple once you know how to sketch the basic structure. You begin with an easy oval that’s divided into segments, then gradually add extra details until you have a fabulously eerie pumpkin drawing.
The next step is to give your pumpkin depth by adding shadows and highlights. You can make it pop out of the page by outlining it using a fineliner pen, or by adding colour.
Keep it plain if you’d like it to be a classic autumnal pumpkin or dress it up for Halloween with a creepy carved face. It can be as simple or as detailed as you like!
A pumpkin can complete a spooky scene, but we think it looks fantastic by itself!
Fill your home with sinister Halloween art
Is one pumpkin drawing going to be enough? Of course not! If you want to make your home look extra scary this October, then you’ll need more than just pumpkins on your walls.
If you’re looking for inspiration for your next spooky sketching session, take a look at our frighteningly good Halloween art projects.