
Add depth to your artwork with these 25 watercolor techniques
Watercolor painting is a fantastically creative medium to explore. By learning just a few inventive techniques, you can radically improve your painting style.
From learning how to build up layers of vibrant colours to discovering unusual tools to use, watercolor techniques are an invaluable skill for all artists.
Whether you’re just starting your painting journey or looking to improve your watercolor paintings, this guide to watercolor techniques will make you feel excited for your next art session.
We’ll begin with some simple watercolor painting techniques for beginners and move on to advanced tips for more experienced artists. Keep an eye out for unusual techniques that you might not have tried before!
Hone your skills with our art tutorials and guides:
25 best watercolor painting techniques
1. Watercolor techniques: Creating washes
Washes are the bread and butter of watercolor painting and are often the first thing you’ll put on the paper.
A wash is essentially a thin layer of watered-down paint, which provides a background for your painting. Washes are generally used to cover large areas of a painting in one go.
You can create a flat wash in just one shade, or blend two colours together to give an even gradient.
2. Wet in wet
Wet in wet is a technique where wet paint is applied on top of an initial layer of wet paint. This can create interesting textures and you can use this to add different tones or hints of other colors.
This technique is a little unpredictable, but can produce interesting results. Try not to add too many shades in one go or your painting will end up looking muddy.

Looking for something to paint?
Once you've got to grips with these watercolor techniques, you can explore our watercolor painting ideas for beginners.
3. Wet on dry
Wet on dry painting requires a little more patience. For this watercolor technique, you need to wait for the first layer of paint to dry before you paint over the top.
With wet on dry painting, you can add fresh details to your work and the colors beneath will still shine through due to the translucent nature of the paint.
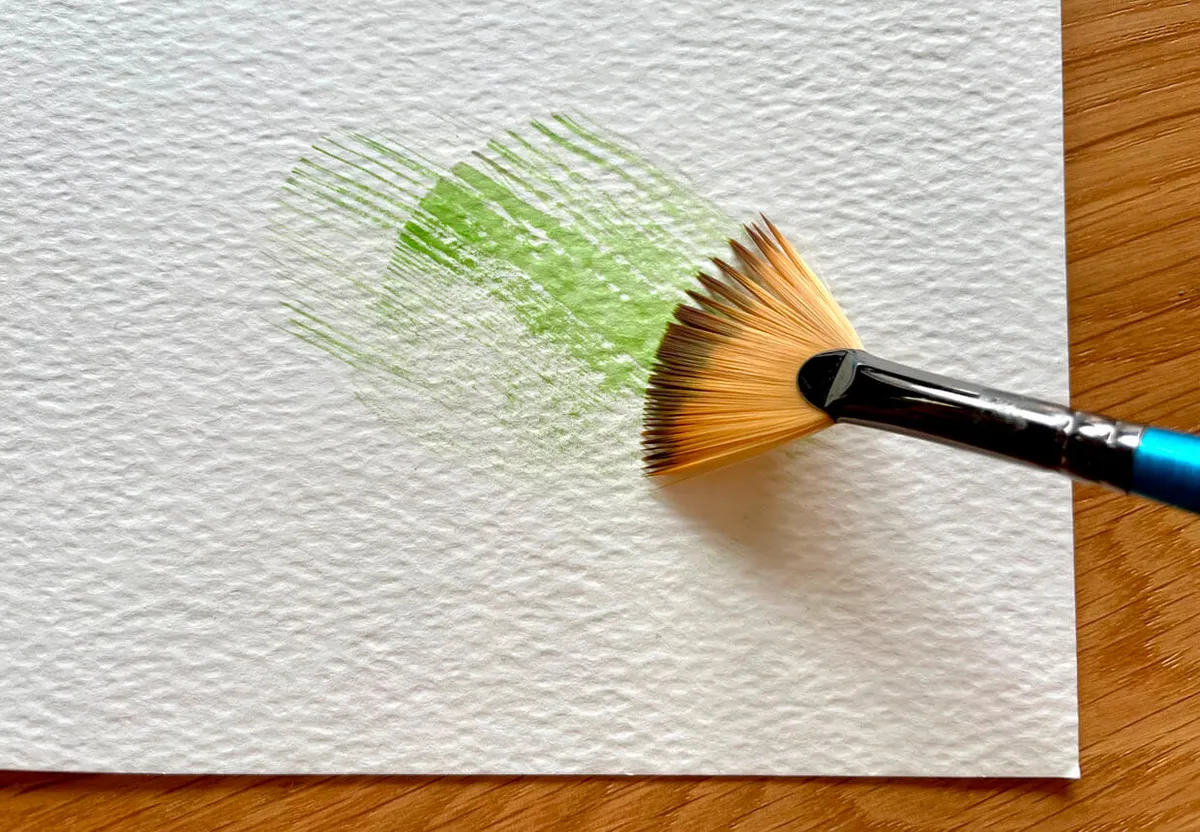
4. Dry brush
Dry brush is a fantastic way to bring more texture into your watercolor paintings. Simply dip a brush into your paint without wetting it first and pull it across the paper.
You can also use the dry brush technique for detailed sections of a painting to improve your accuracy.
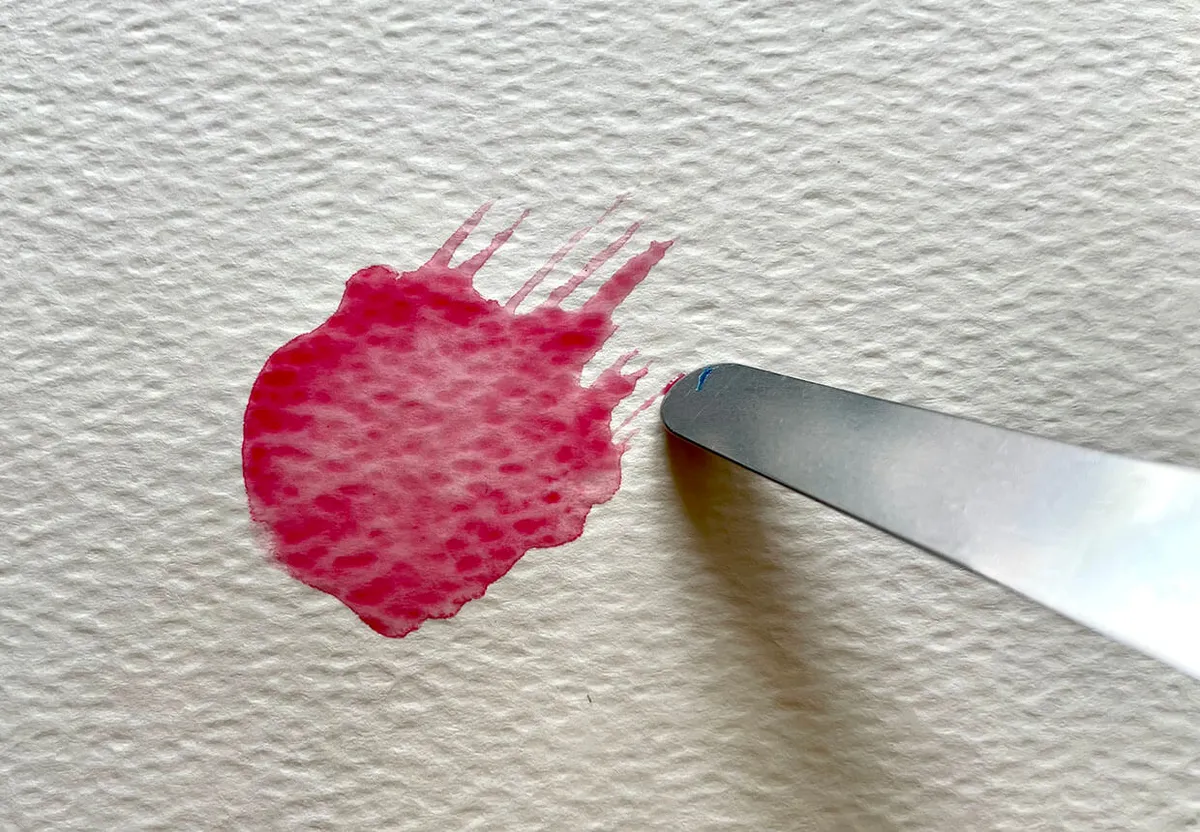
5. Pulling paint
You don’t need to rely on a brush all the time. Try adding a blob of paint onto your paper and use a tool to drag it into different shapes.
The tip of a palette knife is perfect for this technique, but you can use other tools or even a scrap of cardboard instead.
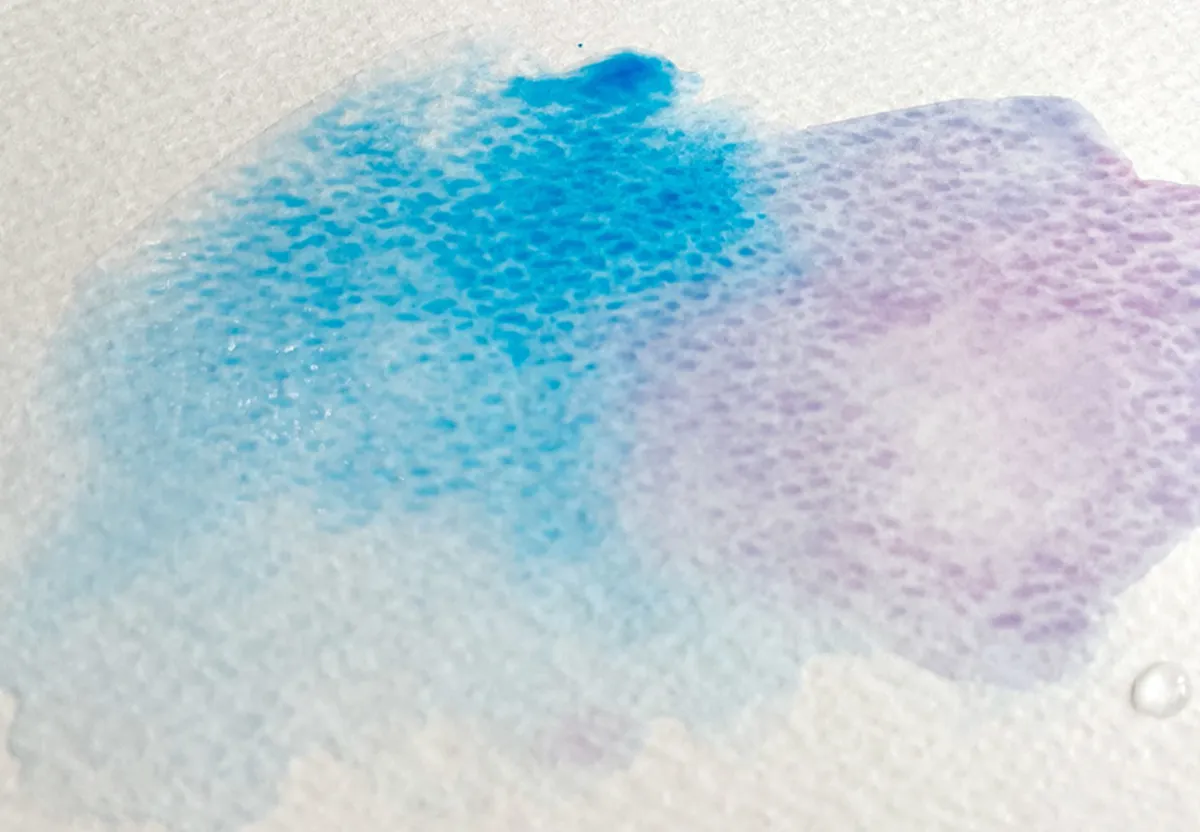
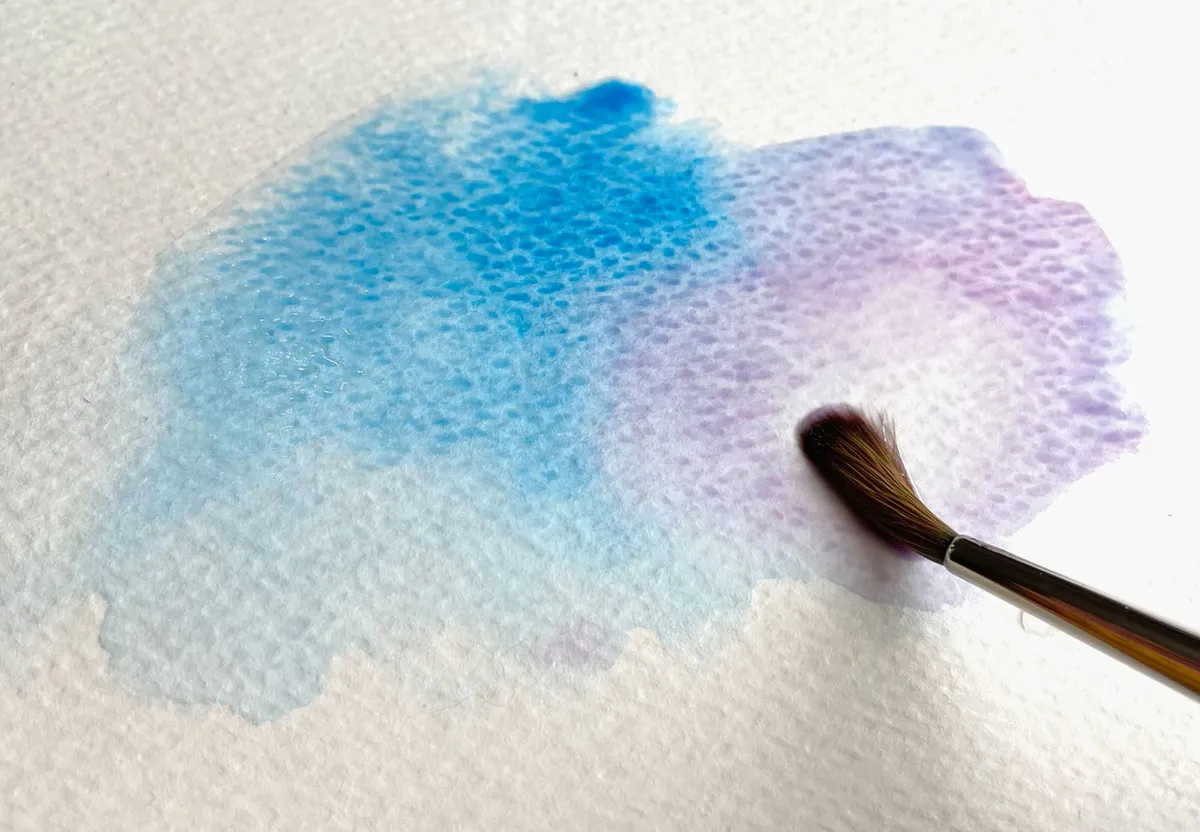
6. Bleeding colors
Allowing colors to run into each other can be extremely effective. Have a go at painting two different colors side by side and see what happens.
You may find that the results change depending on how much paint you use and how wet the paper is. This is all part of the unpredictable nature of this watercolor technique. Experiment to see what works best for you.
7. Get salty
In this guide, we look at some different ways to introduce texture into your paintings and salt is a fun place to begin.
For this watercolor technique, you’ll need a coarse salt with large granules, such as sea salt. Sprinkle some salt onto wet paint and leave it to dry completely. When it’s dry, brush away the salt to reveal unusual textures and patterns underneath.

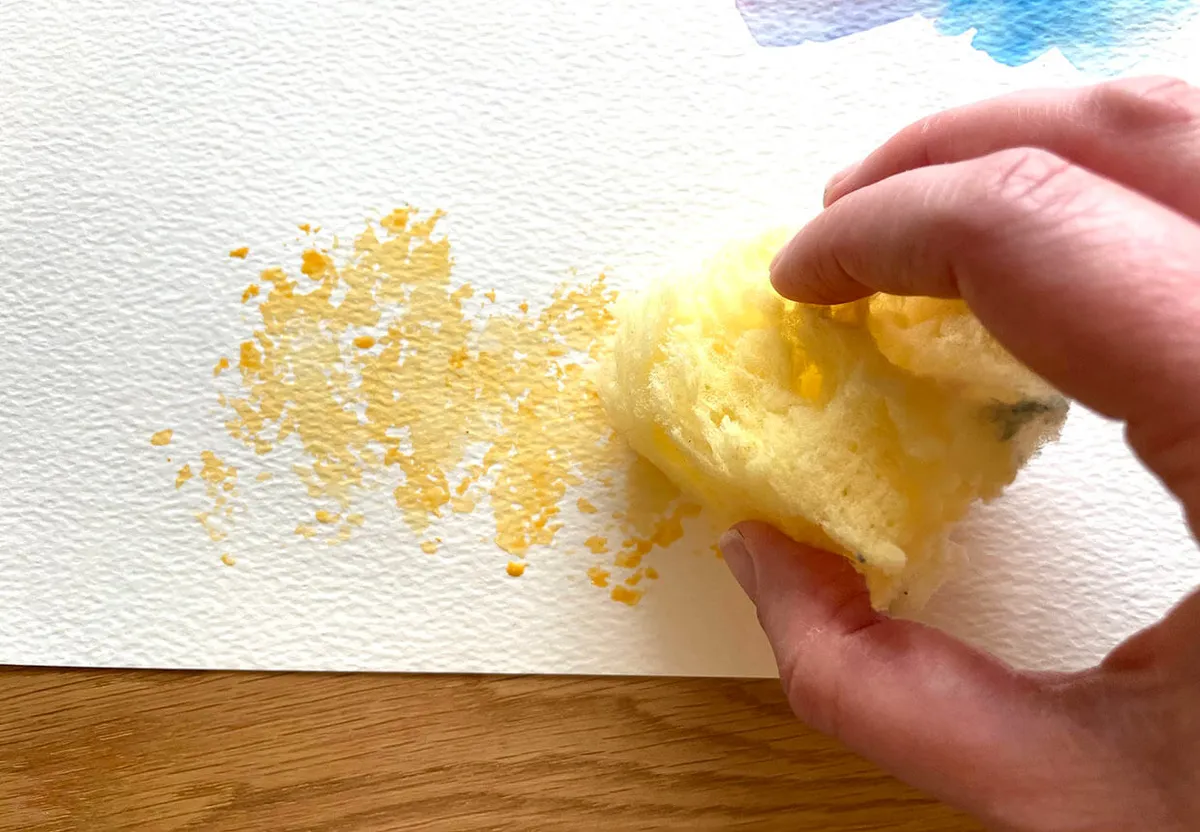
8. Grab a sponge
Apply paint to your paper using a sponge! This is a clever way to produce a textured background for your work and you could use it instead of a wash.
While you can use kitchen sponges for this, you’ll achieve a better finish using a watercolor sponge. These can be found in most art shops.
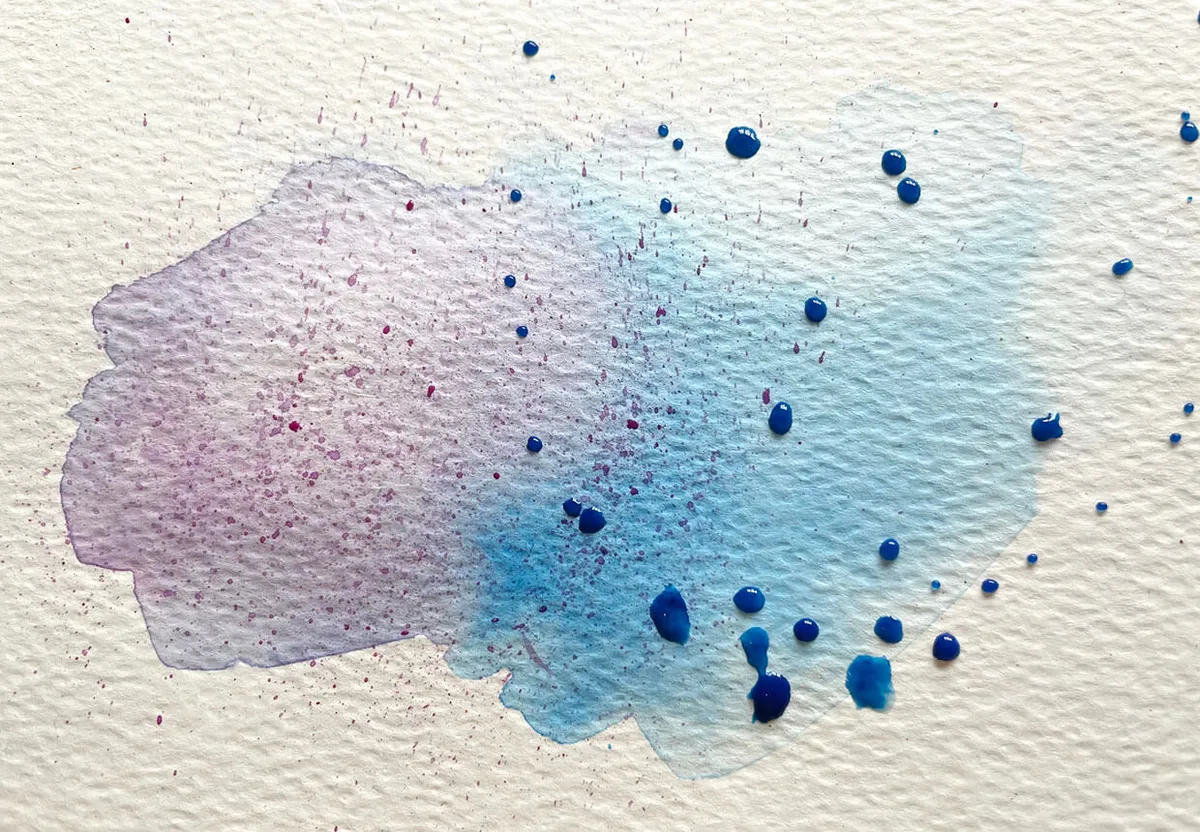
9. Splatter the paint
Perhaps the messiest method in our watercolor techniques round-up is splattering. Splatter paint onto your work to add tiny flecks of color. It can be tricky to control exactly where the paint goes when you flick your paintbrush, but that’s all part of the fun.
If you’re worried about spoiling your painting, practice on a piece of scrap paper first.
To get small flecks, flick the brush against the side of your finger close to the paper. For large splatters, simply load up your brush with paint and flick it towards your painting. We've used both techniques below.
10. Experiment with rubbing alcohol
Drip rubbing alcohol onto your paper, apply it using a brush, or spray it onto your painting. The rubbing alcohol repels the paint, leaving lighter patches. Watch this watercolor techniques video to see the technique in action!
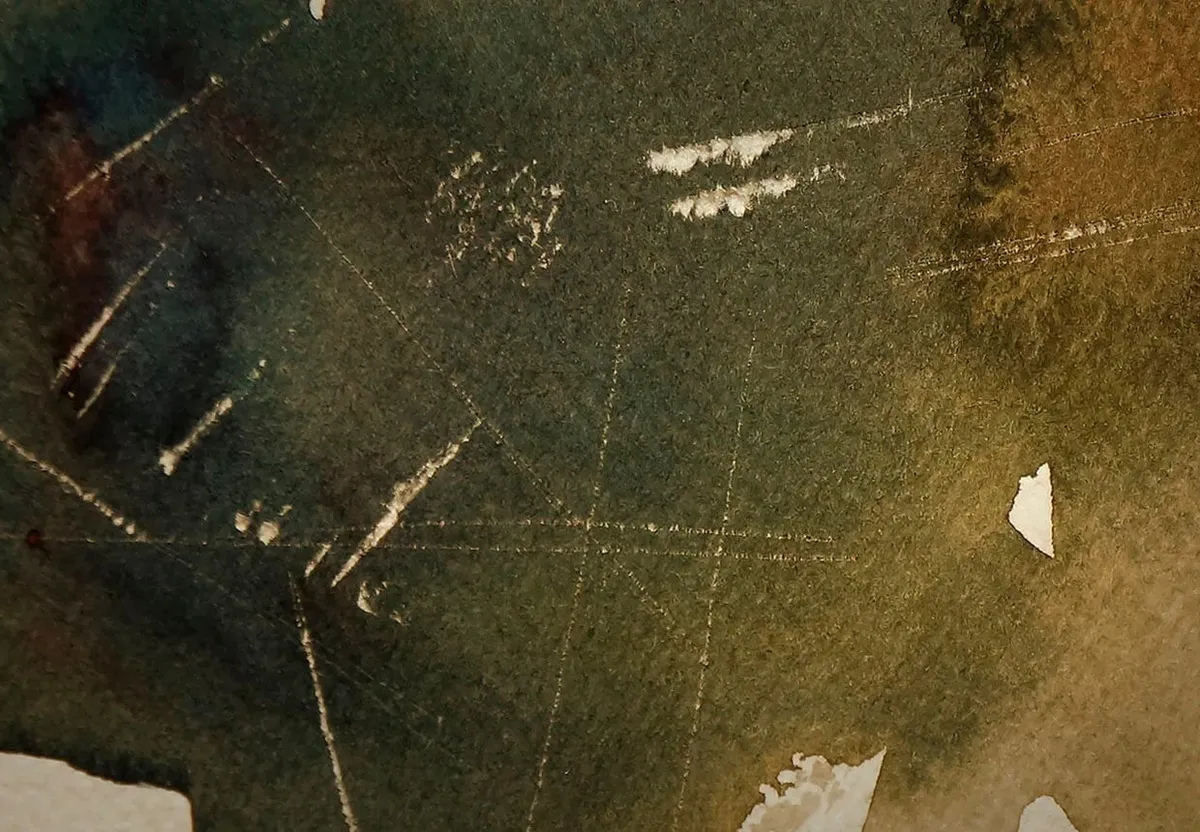
11. Try sgraffito
If you’ve tried other types of painting, then you may have come across the term sgraffito before. Sgraffito comes from an Italian word and means ‘to scratch’.
To use sgraffito in your work, scratch into wet paint to show the color beneath. A tool such as a palette knife is ideal for this.
12. Lighten your painting with lifting
When you’ve just applied a layer of paint to your page, it may seem strange to immediately take it off, but that’s exactly what you need to do when you’re using the lifting technique.
Take some kitchen towel or sponge and dab the paint to lift some of the pigment from the page. You can also lift paint using a dry brush.
You can also lift paint from areas of your artwork that have already dried. Just wet the area with a brush and use kitchen paper or a brush to lift the color.
13. Use clever masking
Masking is a technique that uses a barrier to protect the layer of paint or paper beneath. Use masking fluid to paint a design onto paper, then paint over the top once it has dried.
When the paint has dried, peel away the masking fluid to let your design shine. This is the most satisfying bit!
You can also use paper to mask sections of your artwork and paint over the edges to create a line. Try it with torn paper for a rustic effect.
14. Mix colors with scumbling
Scumbling is a watercolor technique that’s used to build layers of color. To scumble, you need to layer up dabs of color on top of one another. If the layer below is still a little wet, the colors will run into each other – with interesting results!
Try not to add too many colors at once, because your paints will turn muddy and spoil your work.
15. Speed up with alla prima
Alla prima is a term for a painting completed in one session. This technique can help you create art with a looser painting style, especially if you only have a narrow window of time available to you.
16. Experiment with wax resist
Wax is waterproof, so it will resist any watercolor paint you apply over the top. Wax resist techniques can be used to bring texture and color contrasts into your art. Experiment with it and see what you can produce!
Candles work very well for this technique, but you can get similar results with oil pastels.
17. Bring texture into your paintings
Speaking of textures, there are lots of novel tips and tricks that you can introduce to your watercolor paintings. Australian artist John Lovett has lots of brilliant ways to create texture in your watercolor paintings, from scraping the paper with a scalpel to rubbing it with sandpaper.
Check out John’s innovative watercolor techniques to try them for yourself.
18. Cover the paint with plastic
Paint a wash of watercolor, then cover it with crumpled plastic (cling film/saran wrap works well for this). Leave your paint to dry and it’ll result in a fabulous uneven backdrop for your painting.
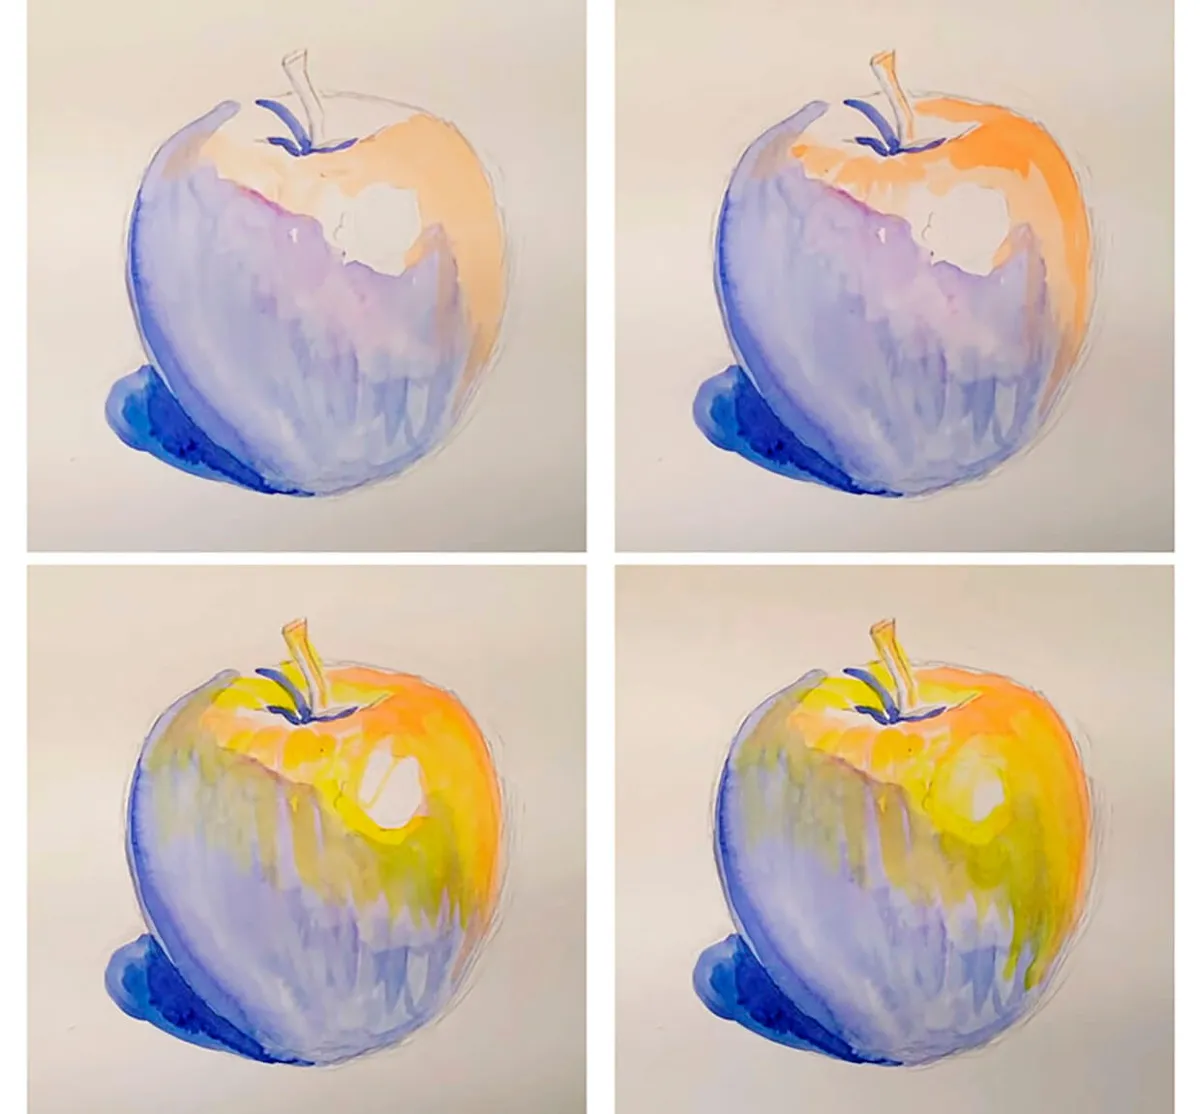
19. Layer your colors
Layering colors is a vital watercolor skill and it’ll make a real difference to your paintings once you get the hang of it.
One of the best things about watercolor is that it’s translucent, allowing the paint below to show through the top layer. Try waiting for a layer of paint to completely dry, then paint over the top.
This can be used to give your painting depth or to add tints of color to your subject matter.
20. Mixed media watercolor techniques
Watercolor can be used by itself or combined with a variety of other mediums. You can team up watercolors with acrylic paint or gouache if you’d like parts of your painting to be opaque.
Watercolors also pair well with inks due to their fluid nature. Many inks are permanent and, once dried, won’t reactivate when you paint over the top. This can be a handy quality!
Take a look at our ink drawing guide for some expert tips. Pastels and charcoal can also be used over watercolor paintings with great effect.

New to the world of watercolor?
If you’re new to watercolor painting and you’re not sure where to begin, take a look at our watercolor for beginners guide. You’ll learn about materials to buy, watercolor dos and don’ts, and much more.
21. Capture a scene with line and wash
If you want to paint a landscape, line and wash can be used to depict a scene quickly. You can draw the subject of your painting using a pen, then bring it to life with loose color washes.
It doesn’t matter which way round you work – you can start with color washes then draw over the top if you prefer! Just make sure the paint is dry first. Try it for yourself with Liz Chaderton’s line and wash guide.
22. Watercolor techniques: collaging
Most artists have an old painting in their sketchbook that they’re not entirely happy with. When a painting doesn’t go to plan, you might want to throw it away in a fit of frustration – but don’t!
Instead, chop up your painting and use it to make an original watercolor collage. If you enjoy making collages, you can also paint watercolor paper to make your own collage paper.
23. Make a dot watercolor artwork
This technique requires some patience, but it’s fun method to try. Take a clean brush and a fresh pot of water. Dip the brush into the water and make a picture using tiny water drops on your paper.
Next, add a little drop of colored paint to each dot of water so that it changes color. This has to be done carefully, or your dots will run into one another.
Once you’ve finished, leave the water to dry to make your own unique dot art.
24. Drip the paint
Watercolor’s fluid nature can be frustratingly unpredictable, but it can also be used to create striking art. Have a go at dripping paint onto your work. To get the best results, you may need to tilt the paper to control where the paint runs.
25. Prepare the paper with an underpainting
For artists who struggle with contrast in their paintings, underpainting can allow you to get it right at an early stage.
Underpaintings are used to create the darkest tones of a watercolor painting before you layer other colors over the top. Try using a color such as blue to paint the darkest shadows of your painting first. This underpainting tutorial from watercolorpainting.com explains the method very clearly.
Use watercolor techniques to find your own unique painting style
Watercolor is one of the most satisfying painting mediums because there’s always something new to learn. Whether you’re a total novice or a seasoned artist, experimenting is the best way to develop your own style and progress as a painter.
Watercolor techniques like layering and masking can take your art in a new direction, while experimenting with a mixed media approach can lift you out of a creative slump.
In this guide, we’ve covered basic watercolor painting techniques as well as some more unusual methods to help you find your own personal painting style.
Get to know your watercolor paper
Creating incredible watercolor paintings begins with choosing the right materials and paper is a good place to start.
Find out how to source the best paper to suit your style with Gathered’s watercolor paper guide.


